-

Win a Free Custom Engraved Brass Coin!!!
As a way to introduce our brass coins to the community, we will raffle off a free coin during the month of August. Follow link ABOVE for instructions for entering.
You are using an out of date browser. It may not display this or other websites correctly.
You should upgrade or use an alternative browser.
You should upgrade or use an alternative browser.
- Joined
- Jun 28, 2020
- Messages
- 527
- Points
- 353

Mr. Herman,
Thank you very much.
We are now at 68.
- Joined
- Jun 28, 2020
- Messages
- 527
- Points
- 353

Good morning. The main mast has a serious rake to it. I’m sure you have it correct as per the movie boat. Just looks weird. Lovely work. I missed your birthday- I hope you had a day. Cheers GrantView attachment 443505
I went to Home Depot and bought the materials.
I immediately made the foremast and mizzenmast.
The picture shows a set of foremast.
View attachment 443506
This image shows a set of mizzen masts.
The foremast, mainmast, and mizzenmast were assembled and temporarily assembled to the hull.
View attachment 443507
View attachment 443508I
I'm not sure about the musts in the film, and I'm making all of them up as I go along.
I think they are mostly good.
I also need to make a split-throat top mast.
I'm thinking of increasing the amount of information on each mast.
- Joined
- Jun 28, 2020
- Messages
- 527
- Points
- 353

Mr. GrantTyler,Good morning. The main mast has a serious rake to it. I’m sure you have it correct as per the movie boat. Just looks weird. Lovely work. I missed your birthday- I hope you had a day. Cheers Grant
This mast is quite serious.
I'm trying to match the concept illustration, but it's falling over too much. (Laughter)
I will fix it a bit later.
It's now about 8pm on the 27th, and I finally got to 68.
Thanks for the birthday wishes.

Have a great birthday my friend! 68 years YOUNG!
- Joined
- Jun 28, 2020
- Messages
- 527
- Points
- 353

Mr. dockattner.Have a great birthday my friend! 68 years YOUNG!
Thank you very much.
68 is also the age my father died.
Now, I am the same age as my father...
I am deeply moved.
- Joined
- Jun 28, 2020
- Messages
- 527
- Points
- 353

Mr. Jimsky,誕生日おめでとう, Mellpala
素晴らしい1年になりますように
Thank you very much for your congratulations in Japanese.
Please look forward to seeing how far the Silent Mary will get.
- Joined
- Jun 28, 2020
- Messages
- 527
- Points
- 353

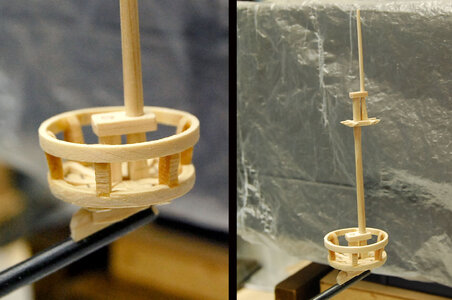
I made a handrail on the platform part of the split-throat topmast. The concept illustration was quite wide, and the drawing was made that way, but the CG of the movie is not so wide. The CG of the movie is not so wide, so I made the handrail to match the CG.
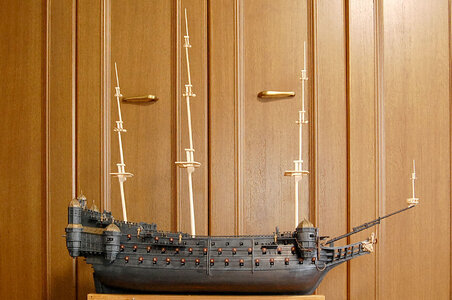
The Silent Mary is shown in its current form in the image above.
The main mast had fallen too far back, so it was reworked and angled to the front.
It was knocked down to match the concept illustration, but it looks too collapsed when actually built.
As expected, the same angle as the mizzen mast is not right, so I fixed it.
Sorry to the person who drew the concept illustration.
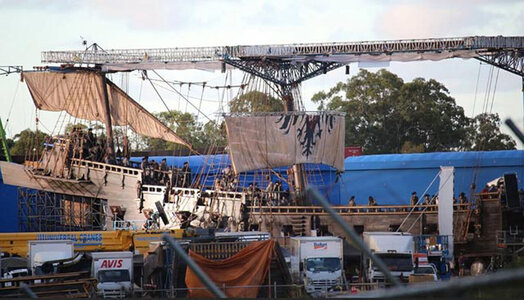
I looked at the set for the photo shoot.
The main mast and mizzen mast appear to be at the same angle, but if you look closely, the main mast looks a little more raised ...... It could just be my optical illusion.
Let's call it good that I fixed it because they look similar.
- Joined
- Jun 28, 2020
- Messages
- 527
- Points
- 353

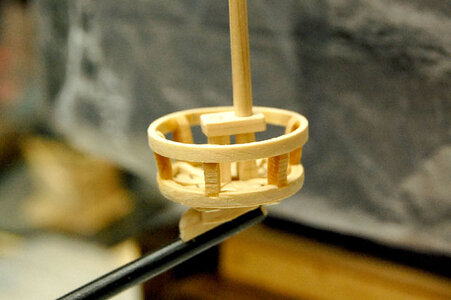
This craft is to paint the platform of the jib boom and install the dead eye.

Paint the platform in German gray.
Wrap 0.5 mm brass wire around a 4 mm diameter dead eye and dye it black.
Wrap that brass wire around a brass nail attached to the end of the jib boom and shape it. It was fiddly because the thing is so small.
Can you see the dead eye and brass wire from the left and right?
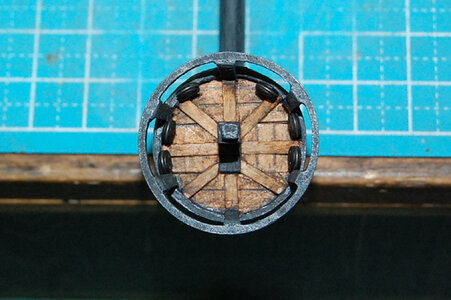
This is the location of the deadeye as seen from above.
You can tell which is the deadeye.
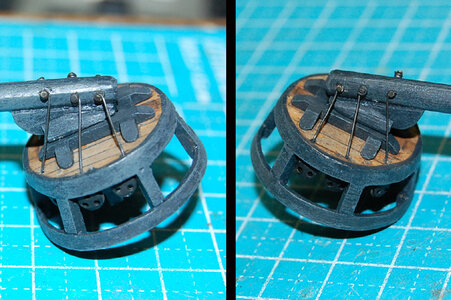
The dead eye brass wire is fixed in this position.
----------------------------------------------------------------------------------------------------------
■ Making a yard ■
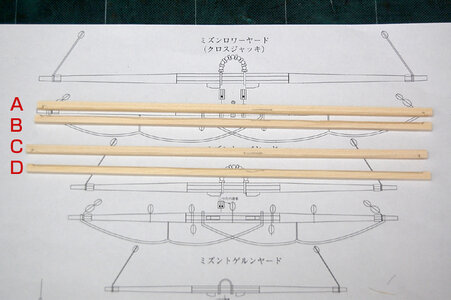
Glue four 4mm square rods together and insert 1mm brass wire inside.
Shave each corner of the four 4mm square bars so that the brass wire can fit inside.
Glue A and B, then C and D.
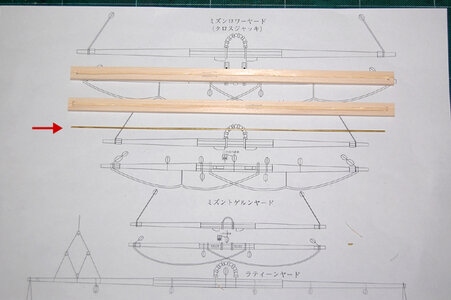
Prepare 1 mm brass wire to be placed inside.

Glued with 1mm brass wire inside.

Four 4mm square bars are glued together with brass wire so that an 8mm square bar can be made.

An 8mm square bar is placed on a special jig and the corners are planed to form an octagonal shape.
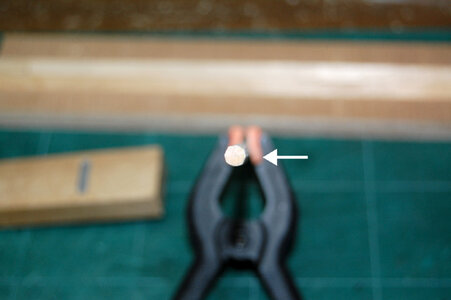
Notice the arrows.
They are roughly octagonal.
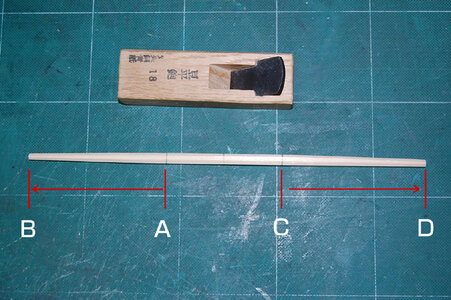
From A to B, and from C to D, the octagonal shape is left as it is, and it is thinned by planing.

A is a sling cleat.
The center portion of the yard has an octagonal cross section and a round cross section up to the cleat portion of the yard.
The cleat portion of the yard remains octagonal and the cross section from the cleat portion to the outer yard arm is round.
The shape of the yard is made at my own discretion and prejudice, so it has no material value.
You don't have to imitate it, but if you do, do so at your own risk.
Last edited:
- Joined
- Aug 8, 2019
- Messages
- 5,486
- Points
- 738

Nice work again, I enjoy this build.
You read this article from me? https://shipsofscale.com/sosforums/...ts-and-spars-of-historic-sailing-ships.13503/
You read this article from me? https://shipsofscale.com/sosforums/...ts-and-spars-of-historic-sailing-ships.13503/
- Joined
- Jun 28, 2020
- Messages
- 527
- Points
- 353

Hello, Steef66.Nice work again, I enjoy this build.
You read this article from me? https://shipsofscale.com/sosforums/...ts-and-spars-of-historic-sailing-ships.13503/
I saw your article.
I see, I can make this accurately.
Thank you for introducing me to this very informative article.
- Joined
- Jun 28, 2020
- Messages
- 527
- Points
- 353

Each mast yard could be processed.
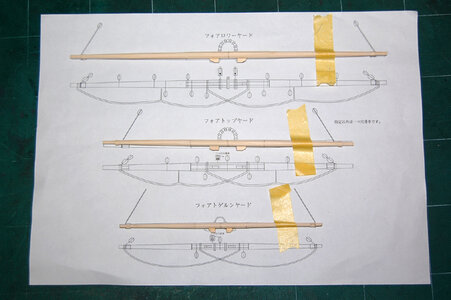
These are the foremast yards.
From top to bottom, Fore Lower Yard, Fore Top Yard, and Fore Togern Yard.
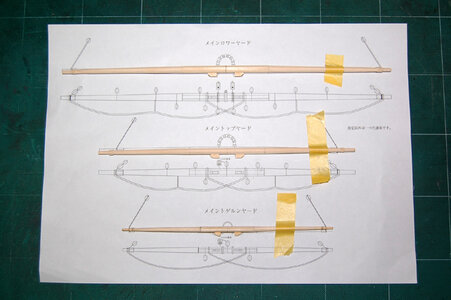
These are the main mast yards.
From top to bottom: main lower yard, main top yard, and main togern yard.
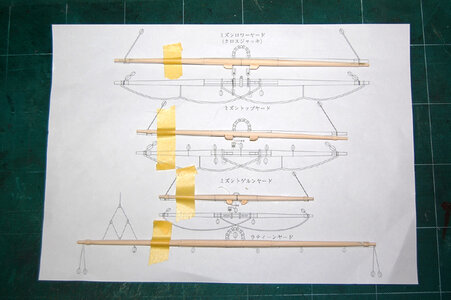
These are the mizzen mast yards.
From top to bottom: cross jack yards, mizzen top yards, mizzen togern yards, and latine yards.
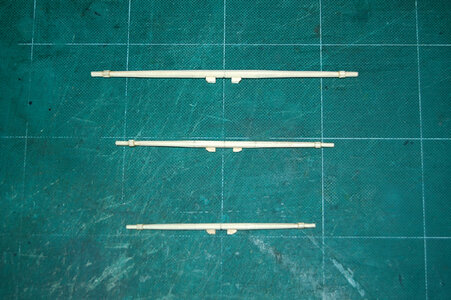
It is a yard that attaches to the bowsprit and split-throat topmast.
---------------------------------------------------------------------------------------------------------------------------
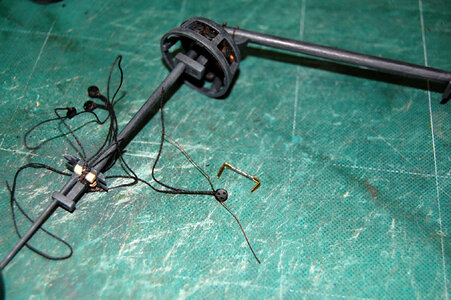
The bowsprit is still temporarily assembled to the hull, so it is removed and the standin rigging of the split-thrust topmast shrouds is done.
This is the process of attaching the deadeye.
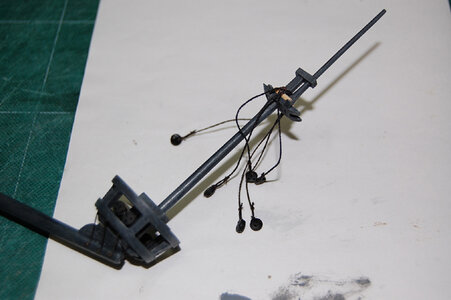
The shroud now has a deadeye.
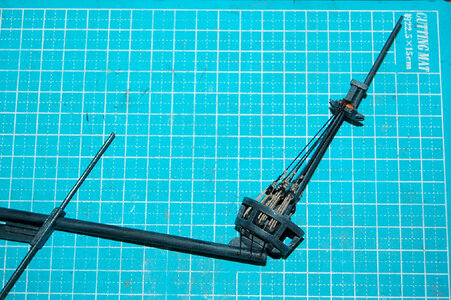
A lanyard connects the platform side to the deadeye.
This is the starboard side.
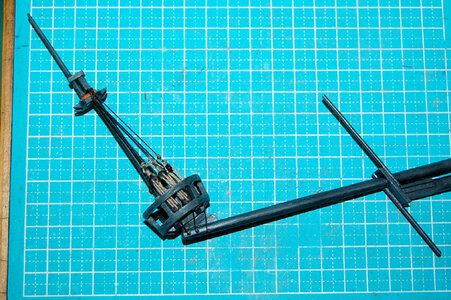
This is the port side.
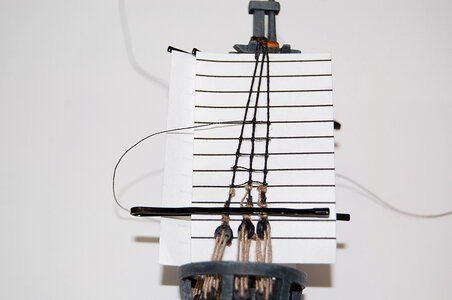
Once the shroud is finished, set a piece of paper with a guideline drawn on the back and tie the ratlines together with a club hitch.
It's been so long since I've had a ratline that I forgot how to tie a club hitch. I looked it up in a rigging book.
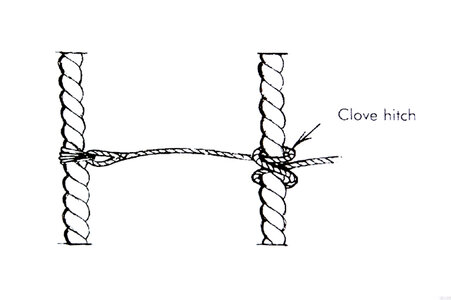
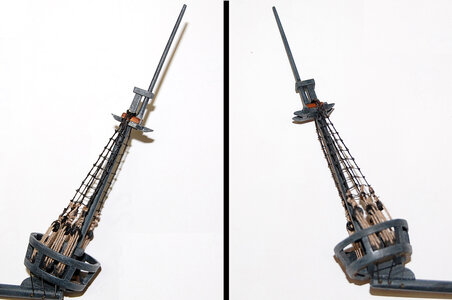
Left and right ratlines.

These are the foremast yards.
From top to bottom, Fore Lower Yard, Fore Top Yard, and Fore Togern Yard.

These are the main mast yards.
From top to bottom: main lower yard, main top yard, and main togern yard.

These are the mizzen mast yards.
From top to bottom: cross jack yards, mizzen top yards, mizzen togern yards, and latine yards.

It is a yard that attaches to the bowsprit and split-throat topmast.
---------------------------------------------------------------------------------------------------------------------------

The bowsprit is still temporarily assembled to the hull, so it is removed and the standin rigging of the split-thrust topmast shrouds is done.
This is the process of attaching the deadeye.

The shroud now has a deadeye.

A lanyard connects the platform side to the deadeye.
This is the starboard side.

This is the port side.

Once the shroud is finished, set a piece of paper with a guideline drawn on the back and tie the ratlines together with a club hitch.
It's been so long since I've had a ratline that I forgot how to tie a club hitch. I looked it up in a rigging book.


Left and right ratlines.
Love your work, Mellpapa. There is always something ingenious/innovative to learn...
- Joined
- Jun 28, 2020
- Messages
- 527
- Points
- 353

Hello dockattner.Love your work, Mellpapa. There is always something ingenious/innovative to learn...
Thank you for taking a look at my poor craft.

I am referring to the article about the construction of the Vasa completed by dockattner. That article is the driving force for my crafting.

I appreciate dockattner's very informative article.
- Joined
- Jun 28, 2020
- Messages
- 527
- Points
- 353

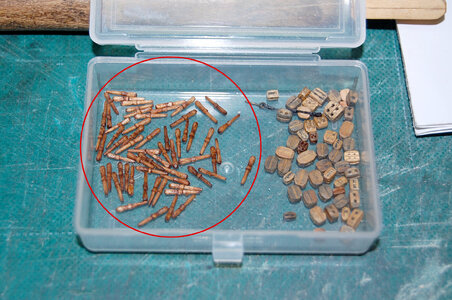
I had not made the pins and rails for the bullwork section, so I started by making about 60 belay pins.
I also made various kinds of pulleys, but they are still quite insufficient.
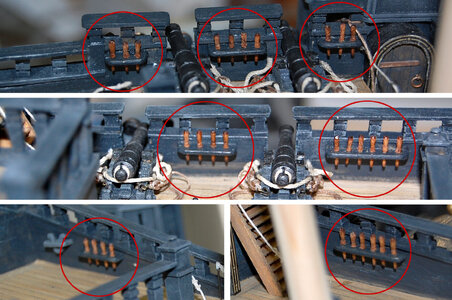
I made a pin rail on the port side and stuck a belay pin in it. This is what it looks like.
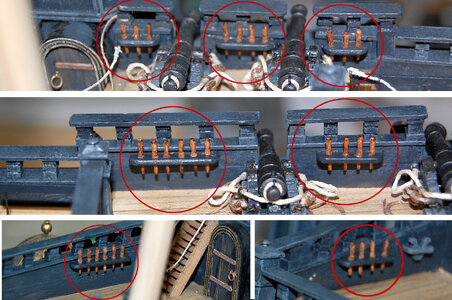
Made a pin rail on the starboard side and stuck a belay pin in it.
- Joined
- Jun 28, 2020
- Messages
- 527
- Points
- 353

Hello, Steef66.Your pins look very good.
This is a belaying pin made from a toothpick shaved from a toothpick.
They are uneven and overscale.
But I'm going to produce them as they are.

- Joined
- Jun 28, 2020
- Messages
- 527
- Points
- 353

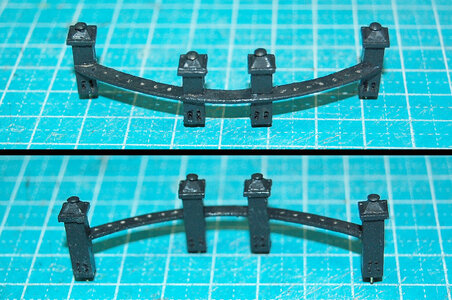
I didn't make a fife rail for the bow, so I did.
The top image is from the front. The bottom is the image from the back.
Where does it go on the bow?
See the image below.
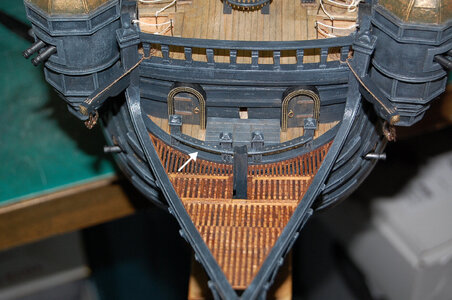
Note the white arrow part!
Can you see it?
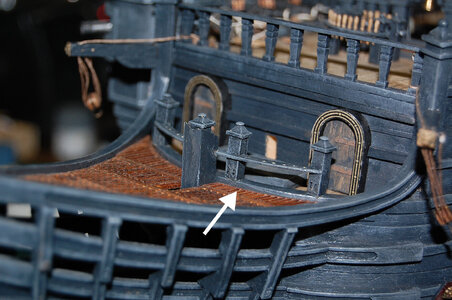
Image showing the bow of the vessel from the left oblique angle.
Note the white arrow!
If it's attached here, won't it hit the bowsprit?
No, it's fine.
You will not hit the bowsprit.
See the image below.
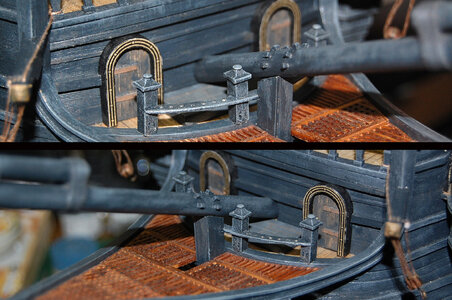
The image above is viewed from the right diagonally.
You are avoiding the bowsprit.
The bottom image is seen from diagonally above on the left, you are avoiding the bowsprit properly.

I have to make belaying pins again.
But this time it's about 14 of them, so one day is enough to do it.
