School for model ship building

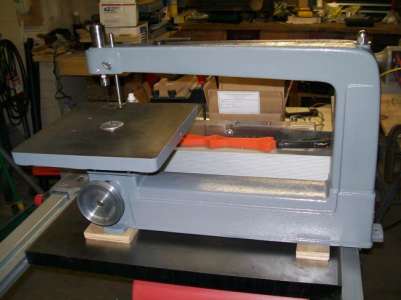
i actually have one of these i bought it at a farm sale for $20.00 i will tell you it is one heavy machine
1743342381030.png

interesting you mentioned the kerf i find it an important factor in choosing a saw. It comes down to table saw vs bandsaw

the circular blade has a thin kerf of .083 to .093

if you are ripping down planking that is 1/8 x 1/16, you're losing more wood than you are saving. If you bought Pearwood at $25.00 a board foot to rip into hull planking, you are using less than 1/2 the wood the rest is saw dust.
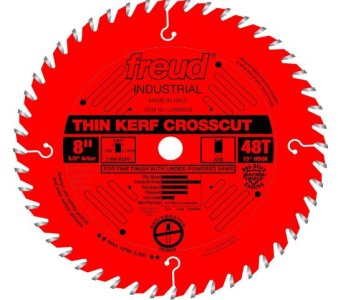
thin kerf.JPG


A bandsaw blade has a much thinner kerf of .020 to .025 so you will get more planks out of that piece of expensive Pearwood.
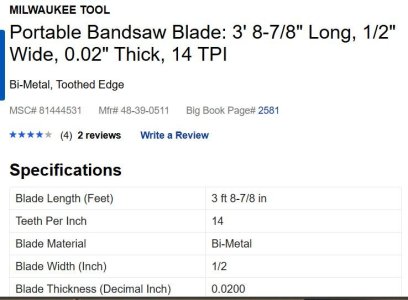
thin kerf bandsaw.JPG

a PDF file testing thin kerf blades on a table saw
 

Attachments

Last edited:
For a time I had the same jigsaw and drill press, along with a jointer and bandsaw that my Dad had acquired from the widow of an acquaintance who had passed away. Heavy, indeed! And much better quality than anything you will find these days at a similar price point. Alas, I had to pass them on to a neighbor when we left RI, being too heavy and bulky to ship to Japan.
 
A bandsaw blade has a much thinner kerf of .020 to .025 so you will get more planks out of that piece of expensive Pearwood.
That is certainly true! However, cutting a perfectly straight line on a bandsaw is often easier said than done and, while possible, "the right tool for the job" is clearly a table saw. While it's certainly a matter of "different ships, different long splices," for my money if we're only talking about scale modeling work and minimal shop space, and total cost are considerations, one would be best served with the Byrnes Model Machines "trifecta:" the basic table saw with its sliding crosscut table, the thickness sander, and the standard disk sander, plus a adequately-powered quality scroll saw.
Any curved cut within the scale of modeling can be done on a scroll saw using the proper blade. Remember also that the scroll saw will permit inside cuts by running the blade through a small hole drilled in the workpiece, but this is not possible with a bandsaw, which must always begin a cut from the outside edge of the piece. In terms of cost and "bang for your buck," in my opinion and from all I've read from the "experts," there isn't a lot of point to buying a bandsaw smaller than the ubiquitous 14 inch "two wheelers" that will handle full-size stock for resawing and can be had used in decent condition for $300 and up. (E.g., https://www.grizzly.com/products/grizzly-14-1-hp-bandsaw/g0555) However, if one absolutely must have a small, less expensive bandsaw, they might take a look at the cute little Shop Fox 9" "two-wheeler" portable benchtop bandsaw for around $350. This bandsaw won't hog through thick stock and is very much a specialty small-scale machine, but with its 12" square tabletop and eight and seven eighths cutting width to the left of the blade, it looks like it would make a nice companion to the Byrnes table saw of roughly the same table size. (See: https://www.grizzly.com/products/shop-fox-9-benchtop-bandsaw/w1878)

While I am sure they still have their fans, I am in agreement with the wide general consensus that "three-wheeled" bandsaws are not worth buying. Serious woodworkers don't want anything to do with them. As anybody who uses a bandsaw knows or will quickly learn, blade tracking is critical on a bandsaw and proper blade tracking requires that the wheels are adjusted perfectly parallel to each other. That often takes some fiddling to get two wheels in perfect alignment and there's really no advantage in having to try to keep three wheels in alignment simultaneously unless you absolutely must have a machine of less overall height. Moreover, the three smaller diameter wheels are tough on blades.

Anyways, that's my take on setting up a fairly serious battery of essential modeling stationary power tools. Lathes, of course, are another subject of their own and not essential in any event. We could go on forever about the options for lathes and mills for scale modeling, but costs considered,, if nothing else, they're best left as a story for another night.

And don't forget, none of these power tools are essential for scale ship modeling. they just make it faster and easier to one degree or another.
 
Last edited:
Yeah, I have a 14” bandsaw made by Sprunger but sold by Montgomery Ward; Remember them? Sprunger tools were built like tanks and since bought in the late 1970’s I have replaced the tires, added a “Cobra” blade tension spring, and a higher HP motor.

I call it Galloping Gertie for a reason. It saws, but it has the shakes. Bandsaws are two vertical wheels rotating at high speed and in addition to lying in the same plane as Bob points out, they must be balanced. While it certainly can cut; I’ve roughed out gunstock blanks with it from 2-1/2” black walnut, re-sawing model ship planking is another matter. For that I would use my 10” table saw with a thin kerf blade. I also have a Rockler Thin Rip Guide that allows planking to be cut without pinching the cut between the blade and fence.

Roger
 
one of the issues a beginner faces are the different styles and methods used by different builders. In the end there isn't a right answer or a definitive answer to what power tools if any are needed
it is true setting up a bandsaw is tricky but once you understand the tool and have it set up it will be very accurate. Over the years i have cut thousands of linear feet of model scale ship planking. Making a straight cut with a bandsaw no problem resawing a strip 36 inches long within .006 thousandths from end to end.
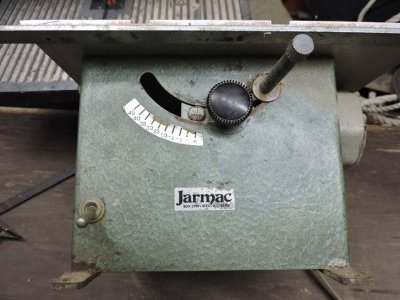
Many years ago, i did have a Jarmac table saw which collected dust i hardly used it for anything nor do i use a table saw for any model building, these days, but that is just me. The finer, finish woodworking and joinery work on a model i do with hand tools because i personally like it that way. working with my hands they are the best tool i have.

to dive deeper into fine model work or as some refer it as model engineering or as Harold Hahn called it "art" you need hands on experience.

there are different areas to model ship building

A prep work researching and planning and working with drawings
B the mill work needed to cut down and dress rough lumber into workable modeling sizes
C using hand tools and fabrication of parts
D construction which is not that easy

With this in mind i am prepping up a build project for the Sir Edward Hawk. This project is going from D to C to B and to A yup backwards.
Try to actually build a scale model of a ship first and then challenge yourself to harder and harder projects or doing more of the prep work yourself

you can start with just the plans and do all the millwork yourself
you can get milled framing stock and build frame blanks and cut out all the frames
you can set a set of laser cut frame parts and start building, the laser cut frames are far from a finished frame they are more like a blank that you will have to finish into the frame shape.

a prototype build will start in about 2 weeks and it will be step by step how to build a semi-scratch scale model of a ship.

One of Harold Hahns fist models a tribute to a great builder. The laser cut parts and milling will be limited edition because i am not a production shop it's just me.

what tools you need will depend on where you starting A,B, C or D and D is all about hand tools.

the Sir Edward Hawk is based on Harold Hahns original work which i modified or upgraded. He did say "try it and see if you can do better" ok than i accept the challenge.
 
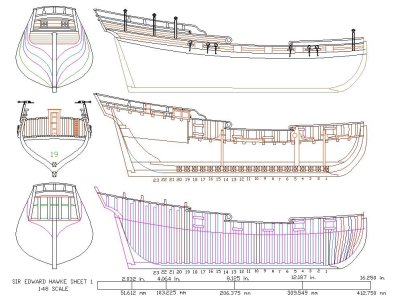
imaginary build group A starting with sheet 1 we have three views the top is the outside profile showing the location of the wales. deadeyes and planking
next is the inside profile this shows the frame floors, deck and deck fittings and the inside of the bulwarks. a section drawing at frame 19 shows the wales, swivel guns, and the cabin front

last view shows the framing

sheet1.JPG

a PDF is attached so you can take a close look. There is a scale on the drawing you can use to scale the drawing.
 

Attachments

for build group A you will need a bandsaw or a table saw and a thickness sander or planer because you will need to cut framing stock

sheet2.JPG


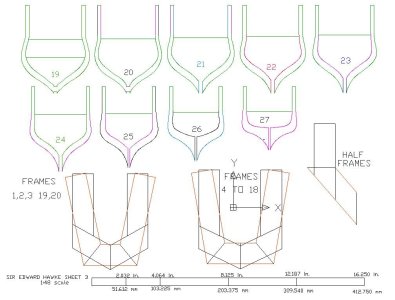
Frame blanks are built from the patterns on the drawing so the first thing you need to do is figure out how much framing stock you will need. I did the math and you will need 125 linear feet of 1 1/4 wide X .150 thick stock.

next question is how much wood do i need to buy?

let's do the math and figure the amount of board feet of lumber, one board foot is 1 inch thick x 6 inches wide and 24 inches long. How many strips will you get per board foot? you need the framing material to be 1 1/4 wide so rip the board into 1 1/4 strips you will get 5 pieces out of the board with a little left over. Next you need to cut the thickness of .150 it depends on the lumber if you using 4/4 lumber it is 1 inch thick so you will get 3 strips out of each 1 1/4 piece. 3 x 5 = 15 strips of framing stock out of 1 board foot of 4/4 lumber or 30 linear feet, you need to get 5 board feet of lumber which will give you a little extra.
The type of wood you use it totally up to you one of the benefits of scratch building you get to choose your own material. I suggest Maple, Beech, Cherry, Poplar but there is a huge selection to choose from.

sheet3.JPG

sheets 2 and 3 are attached
 

Attachments

you can frame up the Sir Edward Hawke for under $50.00 depending on how resourceful you are in finding a good price on the lumber. Keep in mind the 5 board foot estimate for the framing stock is based on 4/4 lumber a full 1 inch thick. If you buy the wood at one of the home improvement stores the wood will be surfaced down to either 7/8 or 3/4 thick which means you will only get 2 strips rather than 3 so per board foot you will get 10 piece and not 15 per strip. It also depends on how you are cutting the wood a table saw will take a wider kerf than a bandsaw and the amount you leave for sanding the strips. doing you own math you need a finished strip .150 a table saw will take a kerf of .093 and you need a little extra to finish the strips maybe another .050. it takes .140 of lumber to finish at .150 yup you lose 1/2 the wood in milling.

going with build group A you need a saw and some way to finish the thickness OR know someone you can ask to cut the lumber down. Or just order 125 linear feet of finished framing stock and you skip all the cutting and sanding and dust and you can start building frames.
But keep in mind your building frame blanks so you still need a bandsaw or scroll saw to cut the frames out.
 
Last edited:
one of the issues a beginner faces are the different styles and methods used by different builders. In the end there isn't a right answer or a definitive answer to what power tools if any are needed
it is true setting up a bandsaw is tricky but once you understand the tool and have it set up it will be very accurate. Over the years i have cut thousands of linear feet of model scale ship planking. Making a straight cut with a bandsaw no problem resawing a strip 36 inches long within .006 thousandths from end to end.
Many years ago, i did have a Jarmac table saw which collected dust i hardly used it for anything nor do i use a table saw for any model building, these days, but that is just me. The finer, finish woodworking and joinery work on a model i do with hand tools because i personally like it that way. working with my hands they are the best tool i have.

to dive deeper into fine model work or as some refer it as model engineering or as Harold Hahn called it "art" you need hands on experience.

there are different areas to model ship building

A prep work researching and planning and working with drawings
B the mill work needed to cut down and dress rough lumber into workable modeling sizes
C using hand tools and fabrication of parts
D construction which is not that easy

With this in mind i am prepping up a build project for the Sir Edward Hawk. This project is going from D to C to B and to A yup backwards.
Try to actually build a scale model of a ship first and then challenge yourself to harder and harder projects or doing more of the prep work yourself

you can start with just the plans and do all the millwork yourself
you can get milled framing stock and build frame blanks and cut out all the frames
you can set a set of laser cut frame parts and start building, the laser cut frames are far from a finished frame they are more like a blank that you will have to finish into the frame shape.

a prototype build will start in about 2 weeks and it will be step by step how to build a semi-scratch scale model of a ship.

One of Harold Hahns fist models a tribute to a great builder. The laser cut parts and milling will be limited edition because i am not a production shop it's just me.

what tools you need will depend on where you starting A,B, C or D and D is all about hand tools.

the Sir Edward Hawk is based on Harold Hahns original work which i modified or upgraded. He did say "try it and see if you can do better" ok than i accept the challenge.
 
before i get into the build if you want to keep up with the posts click on the pirate icon and click FOLLOW this will let you know when new posts are added.

ok then let's build a frame

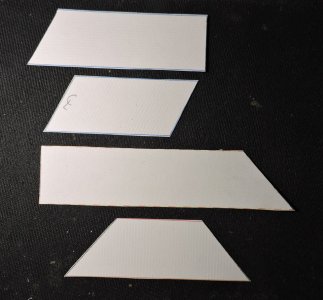
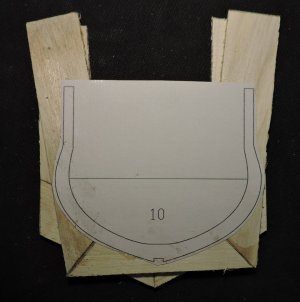
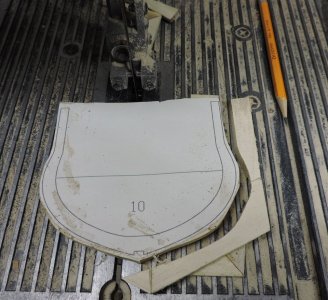
Once you have the framing stock milled out or you purchased the framing stock from the Lumberyard you need to make the blank patterns which are drawn on the plans. I will print out the patterns the glue them to cardboard like that found in food packaging boxed like cereal etc.
I do this because you have to mark out a lot of pieces.

FRAME2.jpg


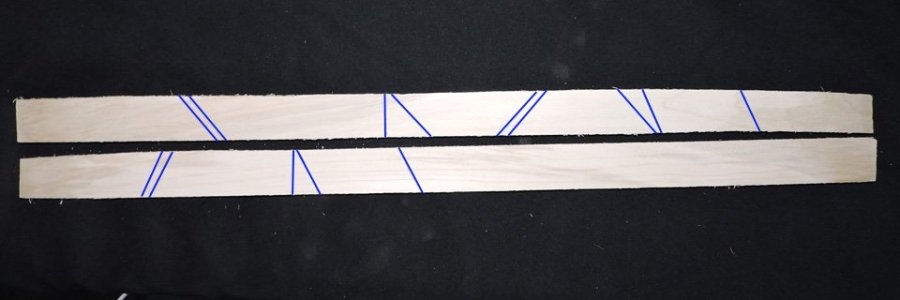
the framing material is marked out like this

FRAME1.jpg
 
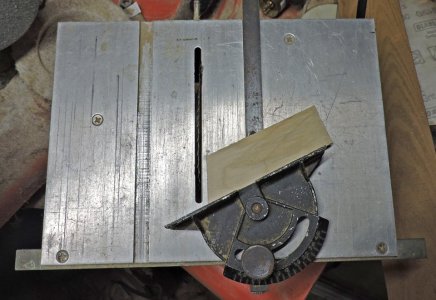
depending on what tools you have cut out each blank. I have this 4 inch table saw for around 30 years. Set the angle and start cutting the pieces apart.


FRAME3.jpg

The old Jarmac has been rround my shop for many, many years and works just fine for model work. I do think they are still available for a reasonable price.

FRAME4.jpg

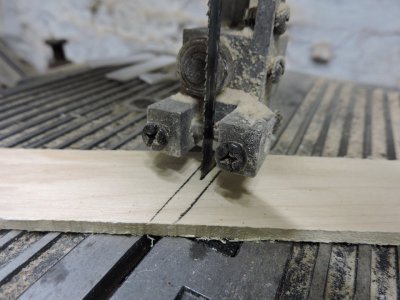
here i am using my 10 inch table top bandsaw to cut the pieces apart. if you careful the can actually make a straight enough cut.

FRAME5.jpg


i just rough cut the pieces apart and sanded the edge to the line

FRAME6.jpg
 
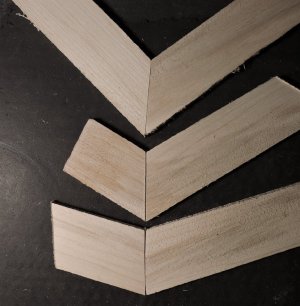
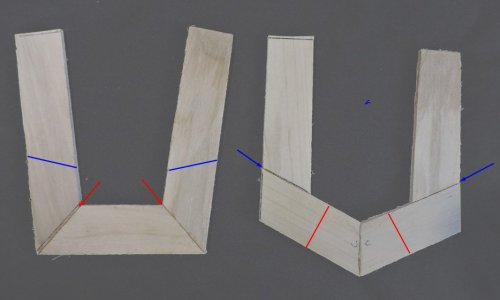
building a wood scale model is as much about your skill as a woodworker as it is in building the model. Joinery may break or make a fine scale model. Let's take a close look at the joinery. The top example is cut on the bandsaw and finished sanded, the second sample is hand cut on the bandsaw and the bottom example is cut on the table saw.

FRAME7.jpg

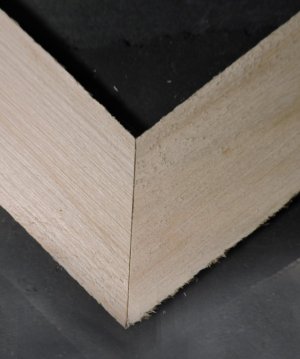
taking each cut the rough cut and sanded makes the tightest fit

FRAME9.jpg


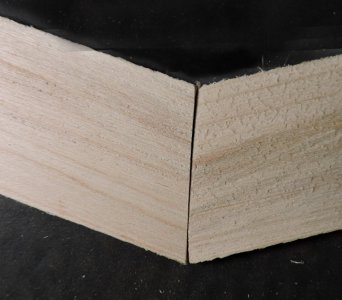
the next one is cut freehand on the bandsaw. you can use a miter guild to make a steady clean cut. i just did it freehand to see what happens.
The type blade matters when resawing or cutting straight cuts like ripping down planking. The wider the blade the better the cut.
While choosing a blade for your band saw, remember that the wider blades are stiffer and work well for making straight cuts. They also track better on band wheels than on narrow blades. If thicker material must be cut, a wider blade is less able to deviate because when the back end is in the cut, it steers the front part of the blade.

Blade Width Minimum Radius
1/8″ 3/16″
3/16″ 5/16"
1/4″ 5/8"
3/8" 1-1/2"
1/2" 2-1/2"
5/8" 4"
3/4" 5-1/2"
1" 7"

Tips to select the right TPI
The higher the TPI, the slower the cut but the smoother the finish
Low TPI is inversely proportional to a fast cut with a slightly rough finish
There must be a minimum of three teeth in the piece worked on.

with a 3/8 wide blade you can cut a straight edge freehand and a perfect cut using a miter guide

FRAME9.jpg

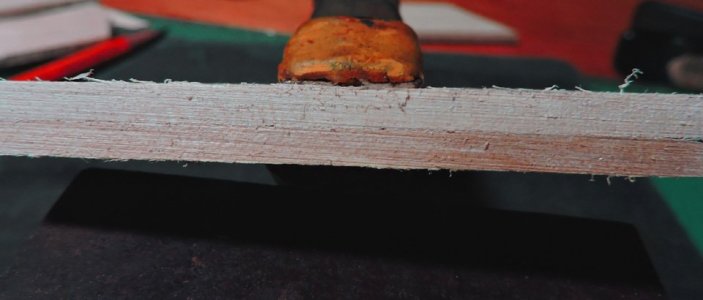
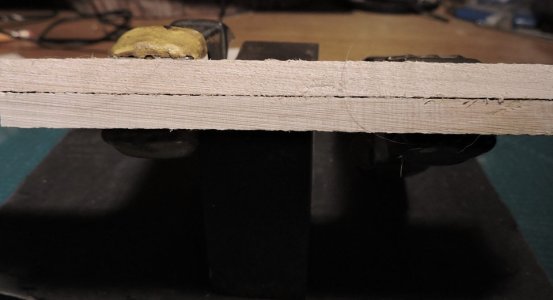
last is looking at the cut from the table saw, go back up to the first picture, notice the gap at the start and finish of the cut. This is the result of the blade flexing as it touches the wood and at the end the blade once again slightly moves. One way to avoid this is to use a thicker blade or use washers on either side of the blade to prevent it from moving.

FRAME8.jpg
 
paying attention to details and because you are scratch building the ship you have a number of options. For example, when building frame blanks from sanded stock the joint between the two halves of the frame disappears. The only way you see it is the difference colors in the wood. If your using a wood with no figure and an even color the frame looks like one solid piece.

FRAME12.jpg

framing material rough cut on a bandsaw, looking close at the saw marks.


FRAME13.jpg
FRAME14.jpg

when you clamp together the two halves of a frame it leaves a line between the pieces. Up close it is visible but at arm's length it is a very fine line. Some builders like the looks of being able to see the joinery between parts and some do not. Some builders will give the framing material a slight sanding so the joinery between the frame pieces leave a very fine line.
Scratch building or semi-scratch building leaves you in charge of everything right from the start


FRAME11.jpg
 
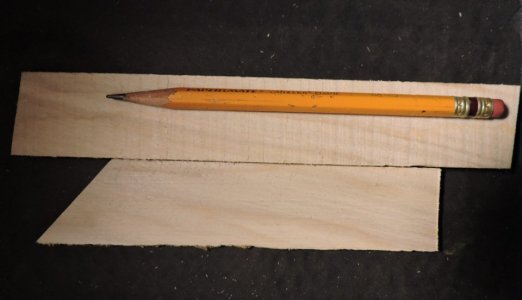
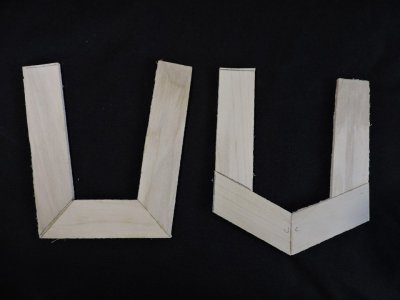
Making frame blanks i glued the pieces end to end and made up the two halves. To do this i used a super glue that sets in 10 seconds.

FRAME24.jpg


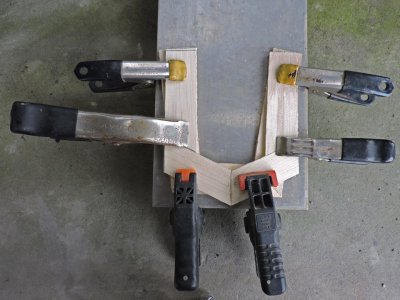
once the two halves are glued up i overlay them and glue them together. You want to use a flat surface when you do this either a pieces of glass or a piece of flat wood or i use this piece of sheet aluminum i had laying around. If you do not clamp them flat you run the risk of the blank warping. for glue i use a wood glue, you can also use a 5 minute epoxy. This is a slow operation unless you have a lot of clamps to do multiple frames at once. That makes the quick set Epoxy a good idea you can do a number of frames in one build session rather than waiting for the wood glue to set.

FRAME15.jpg
 
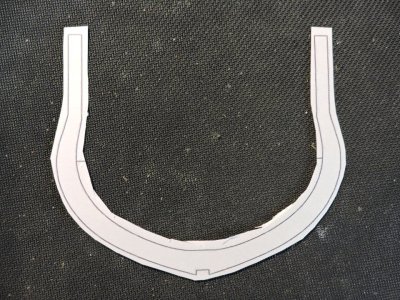
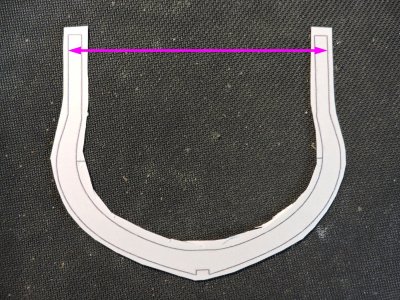
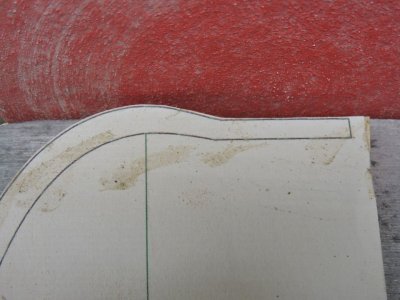
When i print out the frame patterns i use a heavy paper like card stock. You want a stable pattern that will not distort when you glue it to the blank. You do not want to cut out the pattern like this that is a mistake.

FRAME16.jpg


The tops of the patterns fit into the notches in the jig so any slight movement or distortion will give you problems when it comes time to build the hull. So keeping the top is critical.

FRAME16A.jpg

This is how you want to glue the pattern to the blank. By keeping the inside of the pattern.

FRAME17.jpg

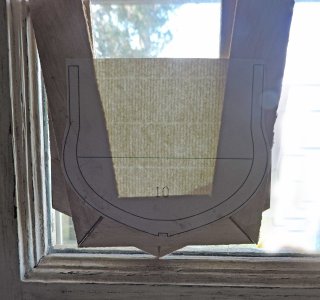
As the frames reach the ends of the hull the frames get narrow and you will have to see the inside edge of the blank to be sure you pattern is not running off the blank. A simple way to check the position of the frame pattern is to hold the blank on a window so you can see through the paper. Buy the way this does not work at night. so it you building at night use a lamp.

FRAME18.jpg
 
cutting out the frames and this is where a table saw will not help you because you can not cut curves.

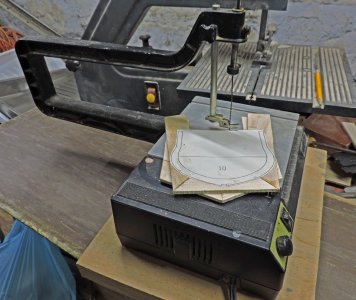
what you are looking at here is a cut made by a small hobby scroll saw. It will cut the thickness of the frame but very slow and your pushing the saw to its limit. It will take you a long , long time to cut out all the frames and most likely you will keep breaking blades.
This saw is a "hobby toy" and not meant to do this kind of work.

FRAME19.jpg


FRAME20.jpgFRAME21.jpg

Cutting out the frames on the table top bandsaw i cut i cut the entire side of the frame in the same time it took the small scroll saw to cut 1 inch.

FRAME22.jpg

i rough cut the frame and sanded it to the line. but you can take your time and cut right on the line and skip the sanding. The frame shapes will have to be given a final shaping and sanding once the hull is built so it is not all that critical to be exact. The only critical dimension is at the top where the frame fits the jig. Critical within reason the frames will flex slightly when fitting them to the jig so a pencil line + or - is within the building tolerance.

FRAME23.jpg
 
building a wood scale model is as much about your skill as a woodworker as it is in building the model. Joinery may break or make a fine scale model. Let's take a close look at the joinery. The top example is cut on the bandsaw and finished sanded, the second sample is hand cut on the bandsaw and the bottom example is cut on the table saw.

View attachment 513131

taking each cut the rough cut and sanded makes the tightest fit

View attachment 513133


the next one is cut freehand on the bandsaw. you can use a miter guild to make a steady clean cut. i just did it freehand to see what happens.
The type blade matters when resawing or cutting straight cuts like ripping down planking. The wider the blade the better the cut.
While choosing a blade for your band saw, remember that the wider blades are stiffer and work well for making straight cuts. They also track better on band wheels than on narrow blades. If thicker material must be cut, a wider blade is less able to deviate because when the back end is in the cut, it steers the front part of the blade.

Blade Width Minimum Radius
1/8″ 3/16″
3/16″ 5/16"
1/4″ 5/8"
3/8" 1-1/2"
1/2" 2-1/2"
5/8" 4"
3/4" 5-1/2"
1" 7"

Tips to select the right TPI
The higher the TPI, the slower the cut but the smoother the finish
Low TPI is inversely proportional to a fast cut with a slightly rough finish
There must be a minimum of three teeth in the piece worked on.

with a 3/8 wide blade you can cut a straight edge freehand and a perfect cut using a miter guide

View attachment 513133

last is looking at the cut from the table saw, go back up to the first picture, notice the gap at the start and finish of the cut. This is the result of the blade flexing as it touches the wood and at the end the blade once again slightly moves. One way to avoid this is to use a thicker blade or use washers on either side of the blade to prevent it from moving.

View attachment 513132
Glue up of end grain can be problematic. In thin stock too. In woodworking, biscuits are typically used in the joinery, but in model woodworking you might have to only rely on the glue joint. Suggestions?
 
i am going to finish up this one frame and stop there. There are 31 frames to build from 217 pieces for the frame blanks. Once you have all the 217 blank pieces cut it is a simple process of gluing up the blanks that you can do while watching TV with the wife, all you need is a tray to build on. something that does not confine you to the work room.

i have finished the laser cutting files for the frames, jig and keel assembly and it is at the laser cutter. when i get the parts i will build a frame from the laser parts then we can move on the building the hull.
 
Glue up of end grain can be problematic. In thin stock too. In woodworking, biscuits are typically used in the joinery, but in model woodworking you might have to only rely on the glue joint. Suggestions?

when you look at the construction of a frame blank those ends joining the pieces overlap when the two frame halves are glued together. The gluing of the blank pieces is only to hold the shape of the blank so they do not have to be strong. The strength of the frame is in the overlapping of the frame pieces.

Actually wood moves regardless of being kiln dry or not, sometimes when the two frame halves are clamped together if there is the slightest distortion in the wood the pressure of the clamps will snap apart the end joints which is ok

like bricks in a wall

FRAME25.jpg
 
Last edited:
Glue up of end grain can be problematic. In thin stock too. In woodworking, biscuits are typically used in the joinery, but in model woodworking you might have to only rely on the glue joint. Suggestions?

if the frames were built as a single thickness and not sistered together with overlapping joints then yes butting them would be a very weal joint. i the case of butting the joints a lap scarf is used with a treenail holding the pieces together, Or in a small scale model gluing the pieces should be enough

FRAME26.jpg
 
Back
Top