School for model ship building

After thinking about tool for the beginner i get Harold Hahn reasoning why he would never allow his work to be turned into a kit. His idea was to teach those who wanted to build model ships by using his plans and research and learning how to use woodworking tools. I also see why kits are designed the way they are and can be built with the minimum number of tools. A kit that required twice the cost for tools to enable you the build the model is not a good idea. There are levels to this hobby and the beginner should start with a beginner's kit to see if the hobby is something you want to continue with.

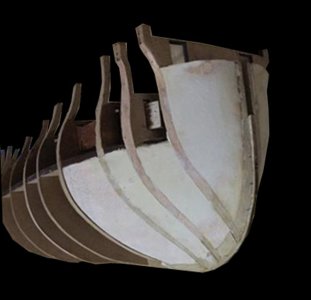
To assemble the bulkhead structure all you need is a square or something around the house that is square
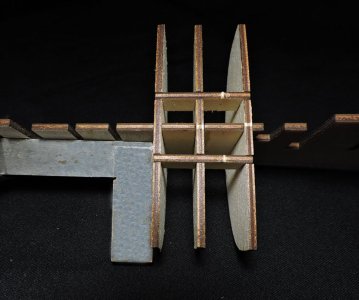
hull3.jpg

Many of the kits supply one width of planking when actually you need wide planks for a garboard and bottom planks and narrower planking for the upper works. Hull planking is shaped to fit the hull and with only one width of planking creative use of stealers are used. What you will need is a knife and push pins oh yes and a woodworking glue.
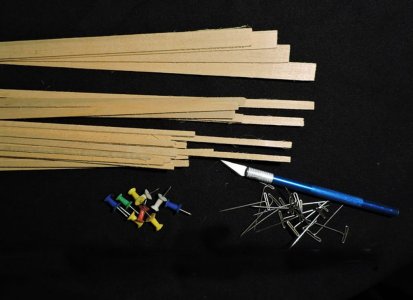
planking1.jpg


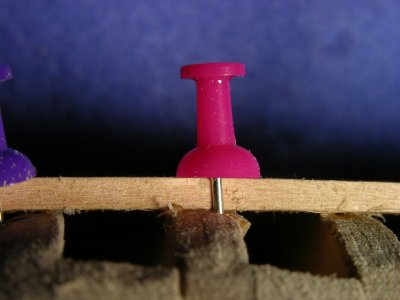
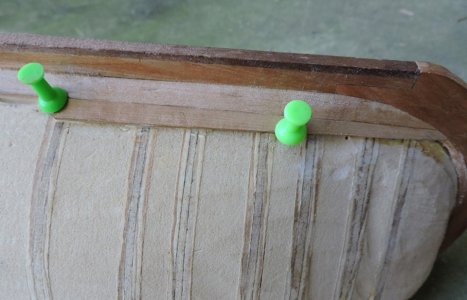
Push pins are ideal for holding planks in place while the glue sets.
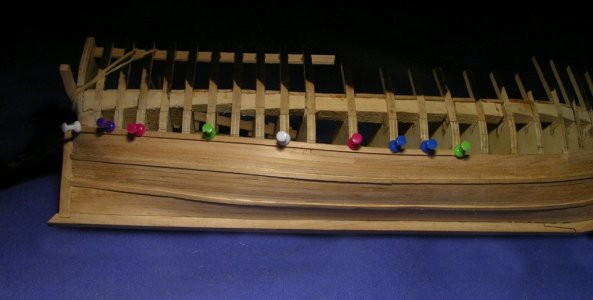
pinned wale1.jpg

by pushing the pin in tight to the edge of the plank holds it against the last plank and holds it down
pinned wale2.jpg
bottom 7.jpg

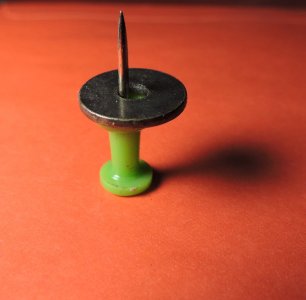
if you want the pin to reach a little more into the width of a plank a small washer works just fine.
pin.jpg
 
Last edited:
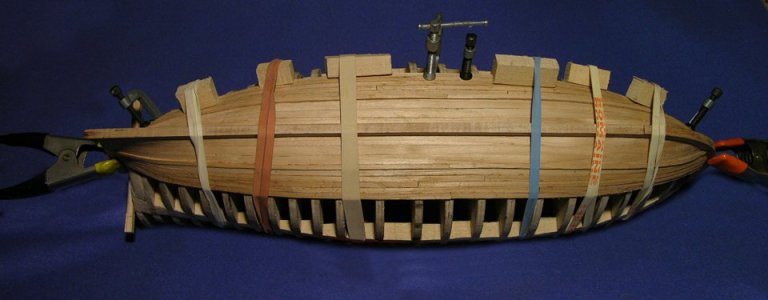
another low-tech method for holding planks to the hull are heavy duty rubber bands and wood blocks

blocks 1.jpg

by tweaking the position of the block and the pressure point of the rubber band you can hold a plank firm to the edge of the last plank and down on the hull


blocks 2.jpg

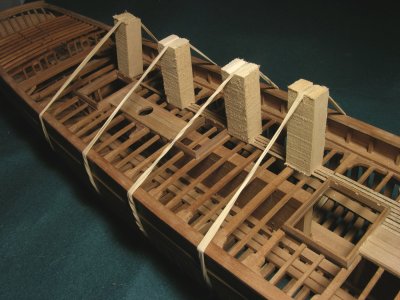
blocks and rubber bands work for holding down deck planks

blockinga.jpg
 
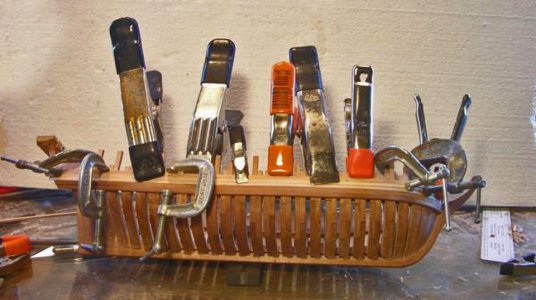
Clamps are something you might want to invest in they will come in handy

plank clamping.jpg

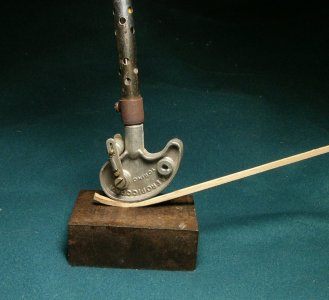
bending planks might be required when planking a hull. There are plank bending tools you can buy. My experience with these tools is they do not get hot enough. To get a good bend you need to apply steam and these tools will not do that.


steam bending 1.jpg
 
Last edited:
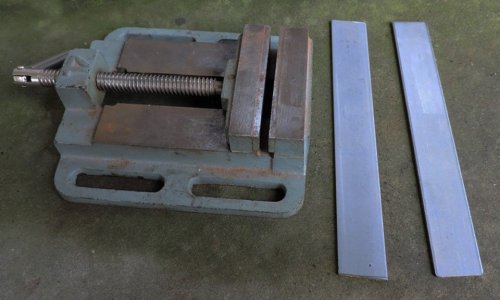
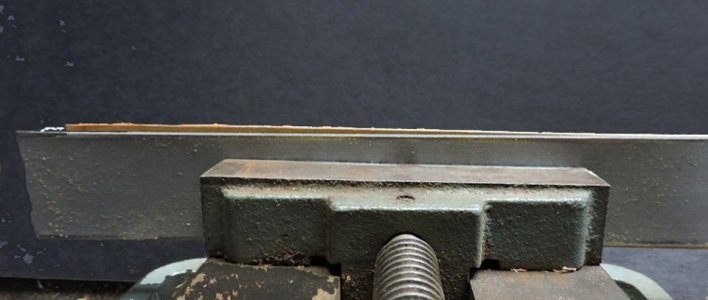
When planking a hull, you will need to taper planks. Getting a straight edge to a taper can be an issue. What i do is to clamp a plank between two straight edges. I picked up this vice in a rummage sale for like $3.00 .If you do not want to buy a vice spring clamps work just as well.

tp1.jpgtp3.jpg

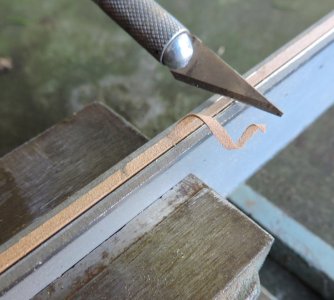
trim the plank to the edge


tp5.jpg

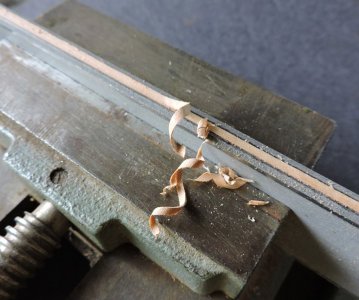
i have found scalpers are extremely sharp and work well for cutting, you can shave off strips of wood

tp7.jpg
 
Last edited:
kit makers do not design their kits with double planking, so you have a practice run before you start the final planking. This is done because the first planking is to span the open space between bulkheads. When bulkheads are spaced to far apart the thin planking tends to lay flat between the bulkheads. So it might be a good idea to have some wood filler handy to fill in low spots on the hull. some builder will coat the entire hull and give the hull a nice even surface.

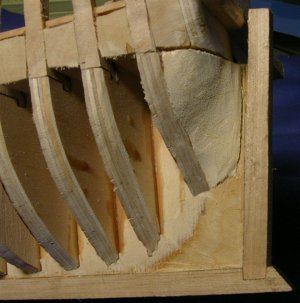
It is not a tool, but you will need some extra wood to make bow and stern blocks. Some builder fill all the spaces between the bulkheads but that is really not necessary if your double planking the hull. The first layer of planking serves that purpose.

filler blocks2.jpgshaped stern block_edited-1.jpg

if you do not use filler blocks this will happen, the planks will bot conform to the hull they will lay flat.


stern01.jpg
 
Last edited:
OY! Tell me about it! :rolleyes:

Pete: (Flying Cloud by Mamoli kit bash)

ok then!

We have out of the box kit building which does not require power tools it is about basic construction and little if any fabrication of parts. From out of the box building, we get into kit bashing which can be a minor or a major reconstruction. some of the bashing is replacing things like rigging blocks to a better-quality version or tossing out cast metal deck fittings and making them from scratch. One of the bigger changes is replacing the hull and deck planking. as mentioned above many kits do not provide the correct width of hull planking making a proper planking job almost impossible. Let's say you want to replace the hull planking because you do not like the color, or the type of wood supplied. First take an inventory of what is in the kit size and amount of planking material. At this point you have two options cut it yourself or buy milled planking. To do it yourself requires two power tools one to rip down larger material into plank size strips and a means to thickness sand it to size.
Just about all the mini table saws are accurate enough to rip down planking material so it is all you need for milling planking. The thickness sander is a handy tool but not necessary. I have tried this myself and talked to other builders about hull planking. Some will say you got to have that thickness sander to make sure all your planking is the correct thickness" other builders will say "no you don't need to thickness sand the planking" Huh? the next step after planking a hull is to sand it. so why pre-sand the planking when you going to sand the hull?
A table saw will give you a "good enough" finish so you can apply the planking to the hull, it does not have to be perfect, it is on the inside!
You can get away with just a table saw. Allow a little more thickness for the final hull sanding.
First and foremost, consider buying the power tool vs buying milled material. If this is you first attempt at bashing a kit you may want to buy milled material rather than invest in power tools. There is no advantage in spending a couple hundred dollars in tools when you can buy what you need for a fraction of the cost.
Another consideration is how many kits are you going to build? they take time so you're not going to be building a fleet of ships in your spare time. Plus, the fact even if you are a speed builder do you have a place to display them? If you are building to sell the models and you have a gallery or list of clients waiting on your models, then it is best to invest in the tools to make thing faster.

if the goal is to build a good-looking ship model, then the milling your own material is not necessary just buy what you need. However, if working with wood, selecting the wood, cutting, milling and finishing wood is something you want to get into then there are things to consider.
First you are not going to be doing this in the living room while watching TV. You need space to set up a shop. Woodworking is a dusty job so you will need something as simple as a shop vac duct taped to the machine or an actual dust collection system.
 
Last edited:
May I recommend following @ MavRick's build of "the Frederick from the Lumberyard" as a fine example of what can be done with one of the Lumberyard's excellent offerings, and an exemplary example of a hobbyists' high quality and skill level of craftsmanship. He has few people signed on and is well deserving of considerably more, especially as a real time example of the application of the material presented in this exemplary thread (IMHO).
Pete G.
 
Table Saws: If I were outfitting my shop with the intent to mill my own lumber I would first buy a full sized saw ( one capable of using 8” or 10” blades). If you find that ship modeling is “your thing,” a miniature saw can be added later.

The other two dimensions to consider are the arbor size and table width. Here in the USA, standard arbor size is 5/8”. This means that with a 5/8” diameter arbor, your saw will accept a wide variety of blades. For ship modeling, table width is much less important. I am on my third saw. The first had a table about 12” wide. With it I built a Hahn method POF model from the three classic woods; Pear, Boxwood, and Holly. The Pear and holly were salvaged from trees being cut down or trimmed. I didn’t own a miniature saw until much later. For those without large workshops, a full sized table saw with a smaller table is easier to move outside.

Look for used saws. My Delta Contractors Saw was bought from a local canoe builder who was getting rid of it to buy a Saw Stop saw. It cost me $150 including a canoe trailer to haul it home.

Any serious sawing is done with my full sized table saw. For my current project, my Byrnes saw mostly cuts metal.

Roger
 
Now, I don't want anybody to get their feelings hurt by what I'm writing here, but, rather, I'll offer my thoughts about tools for consideration in the hope they might be of use to someone just starting out. There's no shame in being a learner. We all should be. The impossibility of knowing everything about the subject is one of the things about ship modeling that makes it so fascinating.

The first question a lot of novice ship modelers ask first is, "What tools should I buy?" Now, if that's their first question, you know for sure that they don't have the knowledge necessary to start building because if they did, they'd know what tools they needed to get the job done. There isn't a lot of point to going shopping for tools until you know how to use them. Mind you, that fact never stopped the snake oil salesmen who'll be more than happy to sell you whatever they can regardless of whether you need it or not.

It's not the tools that are required, but rather the knowledge. When you have the knowledge of how tools can be used, it's surprising how few of them you really need. (Alas, and just as surprising to discover how many of them you will want! :D ) Now, very few people will know all the little tricks of the modeling trade, but you should learn basic woodworking and, in some instances, metalworking, processes before starting to invest in tools willy-nilly. You will need to know how to cut and shape wood, and how to assemble it, and how to finish it with paint and/or clear finishes. You will need to know how to tie most of the basic knots. (So much the better if you know how to make "instrument ties" as surgeons do.) You will also need to know how to read plans and how to scale measurements and how to perform basic board drafting operations. (Or on a much higher level of expertise, if you are so inclined, how to load and work with a CAD program.)

There was a time when every boy had to take woodworking shop in high school, but apparently that's not the case today. (My 14-year-old grandson can't even write in cursive longhand and his printing looks like a second grader's. His schoolteacher mom tells me "None of them can. They missed that during the Covid lockdown." :rolleyes: ) Fortunately, today, a lot of community colleges offer woodworking shop classes that will be invaluable if you are really starting at ground zero. There are also a lot of basic woodworking books which can be quite informative. Perhaps the best set of woodworking shop manuals around is the three-volume set, Tage Frid Teaches Woodworking. (https://www.amazon.com/Tage-Teaches-Woodworking-Step-Step/dp/1561588261) This is rather pricey if purchased new in hardcover, but it's been out in paperback for ages now and there are always lots of used paperback copies available online for considerably less. These books are great reference works to keep on your bookshelf. Tage Frid was widely considered the dean of American art studio furniture. His books explain how to do all the basic woodworking processes with hand tools. His teaching approach was to train the student to know all the ways anything to be built of wood could be built using hand tools. We often marvel at the level of craftsmanship demonstrated by contemporary ship modelers who had only hand tools with which to create their masterpieces. Frid takes the mystery out of that.

When it comes to the metal bits on a ship model, one should turn their mind to the jeweler's art. There are lots of jewelry textbooks out there and also plenty of YouTube videos. Here again, once you learn the processes, you'll know what tools you need (and which you want) to get the job done. You can also peruse the used surgical instruments on eBay and the like. There are some surgical instruments tools that can be found used that serve the modeler far better than anything similar made for general use.

Now, I'm not saying you can't build a credible model without being a master woodworker. Not that at all. What I'm saying is that when you know how the applicable tools are used you will be in a position to determine which you'll eventually want in your toolbox. Besides, when you know what tool you need, it's much more efficient to post on a forum like this a more specific inquiry than just "What tools do I need?" It's much more efficient to ask, "What's the best kind of saw for this job?", "What's the best source of scissors for rigging work?", or "Is an XYZ brand airbrush any good?"

Some general truths about buying tools which I had to learn the hard way is to never buy a tool until you need it to do a specific task you must do and, when buying tools, unless it's something you plan to use once or twice and never again, it's better to always buy the best tool of the type that you can afford. Quality costs more, but the most expensive tool is the one you have to buy more than once. A really good tool will last your children's lifetimes and probably your grandchildren's lifetimes and then some.
 
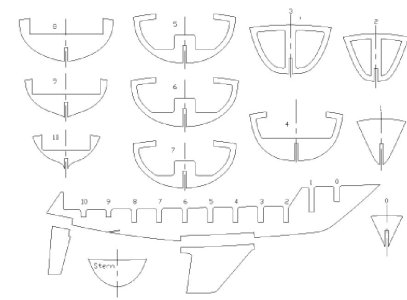
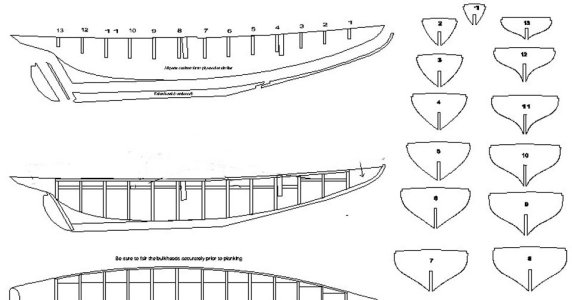
you found a hull that you would like to build so you post what tools do i need? an answer was get yourself a good mini table saw. So you spend a couple hundred dollars on a saw. Then i dawns on you no way are you going to cut bulkheads out with a 4-inch mini table saw or any table saw for that matter.

Either you buy a second saw like a scroll saw or bandsaw or you buy one saw that can be used for multi-tasking.

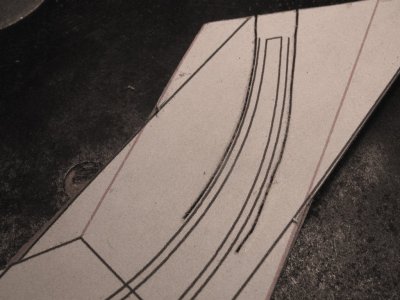
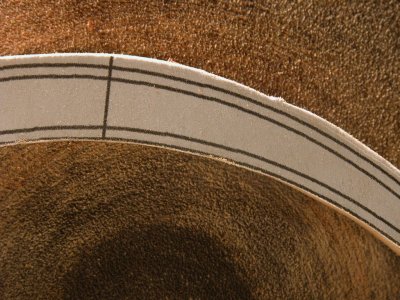
bhp.jpgBluenose bulkheads.jpg
 
setting up your shop first consider the space then cost of tools and which ones you can live without. Starting with a tool you really do not need is a lathe, there are few things you will need to turn besides cannons. With 3D printing and a number of sources for cannons investing in a lathe is not top priority, the model your building may not even have cannons. If your into rigging and mast and spars are round it is easy to chuck square stock in a hand drill and using sandpaper to round out the stock. Buying a mill maybe or maybe not. Yes, a mill will give you very close accurate tolerances but so will cutting joinery by hand. Here is the controversy having a machine do the work or learn woodworking skills and do it by hand. You will need a saw and you can use a jewelry saw and cut everything by hand but that is not very practical. Thinking about a saw one that has multiple uses would be better than buying saw foe each process. you are not going to do cutting like this with a table saw, you need either a tabletop bandsaw or a scroll saw.

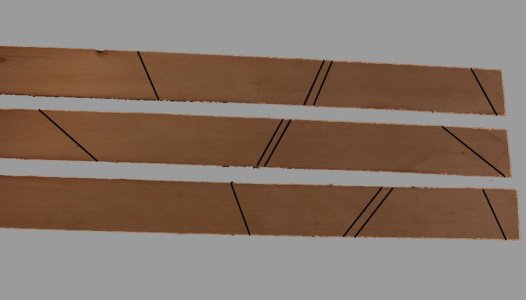
pf1.jpgpf2.jpgps1.jpg

a 10 or 12 inch table saw would be good for ripping down framing stock if you building frame blanks. A mini hobby saw might have problems cutting 200 linear feet of 1 inch thick, rough lumber. On the other hand, cutting planking 1/8 x 1/16 on a powerful 10 inch table saw to me is a bit scarry.

p4.jpg
 
There are 3 grades of tools first is the professional or industrial tools which are heavy built and have a higher degree of precision and will hold tight tolerances they will also stand up to heavy use. Then we have the home grade wood working tools which have a tolerance + or - of .010 thousandths. The home grade are just fine unless you are pushing them to their limit. finally, the hobby grade these are light duty, some built for precision work and you will pay big bucks for these machines, other cheaper machines will get the job done.
What is needed is a saw that will cut out curved shapes like frames and bulkheads as well as rip down material for planking. There are 3 types the scroll saw, a tabletop 10-inch band saw and the larger bandsaws 14 to 20 inch 2 HP machines.
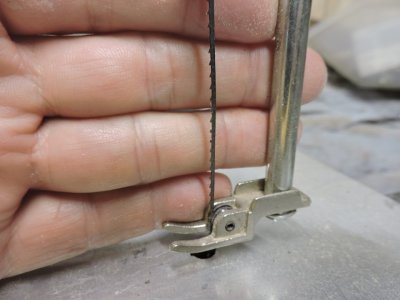
The scroll saw will cut out a frame 1/4 inch thick but it is slow going and your pushing the saw to its limit. Plus, the fact scroll saw blades are small which is good for tight curves and small work and thin material.

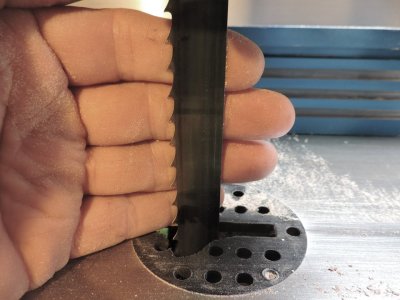
scroll blade.jpg


A size up are the tabletop bandsaws these have no problem cutting out parts for model ship building and will cut up to 1 inch material slow but it will cut. An advantage is you can use different width blades and from 4 teeth per inch to very fine 14 and up teeth per inch giving you a smooth cut.

bandsaw.jpg

Last, we have the big bandsaws 14 to 20 inch with 2 to 3 horsepower motors. These machines are heavy, big and take up a lot or room. There is no need for such machines unless you dive deep into model building and intend on resawing 8 inch logs into planks or resawing sheet stock from rough lumber. these machines will take blades from 1/4 wide all the way up to resaw blades 3/4 wide with a claw tooth that pulls the work into the blade.

wide blade.jpg

What i suggest and mind you it is just a suggestion, if you find yourself getting deeper into model building and wood working i would look into the tabletop bandsaws. They will do everything a table saw and scroll saw will do, It is like 3 saws in one. you can change blades depending on what you want to cut. Less teeth and wider blades cut faster and thicker material, the finer the teeth the smoother the cut but slower and thinner material. very fine narrow blades will cut accurate and will cut thin material.
 
a disk sander is not a must have tool but a good idea. Once you cut out frames or bulkheads a little over size sanding them to a finish is the next step. There is no problem sanding a frame on the outside but how to sand the inside on a flat disk? One way is to use a sanding drum on a Dremel tool or use the edge of a disk sander. I cut the sandpaper larger than the disk or buy one size bigger sandpaper disks. Here you see the sandpaper disk is larger than the metal disk.

pf4.jpg


i fold over the edge of the sandpaper on to the edge of the disk. The sandpaper is not glued to the edge the pressure of sanding pushes the sandpaper disk against the edge.

pf3.jpg
 
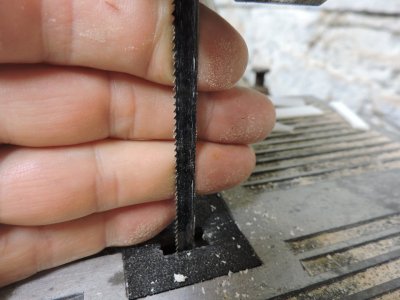
Why, when you mentioned a jigsaw, didn't you mention blades with reverse teeth?

i did not get into types of blades because it is a big topic and there are a lot of different blades

thanks for adding the blades with reverse teeth

any more suggestions or blades you would like to add?
 
When we talk about buying tools, and especially power tools, I have found that a lot of really good tools and machinery can be found at garage sales and local internet sales sites. Because of their weight, you have to look local because nobody's going to dream of shipping anything big and heavy. You do have to do some homework and learn what's worth having and what's not, but there are amazing bargains to be found out there and, in many instances, the old machinery is of far better quality than what can be bought new today. Check out http://www.vintagemachinery.org/home.aspx and https://lathes.co.uk/#gsc.tab=0. These websites are the Bibles of old tools and invaluable research resources for any old machinery you'll ever find.

There's been some "linguistic drift" with saws over the years and hence some confusion when we old geezers talk about them. Dave's right about the usefulness of an 8" table saw. Harold Hahn used a Craftsman model, I believe. That said, Dave also referred to a "good mini table saw" for "two hundred bucks." I don't think such an animal exists. In fact, I don't think it ever did. I see junk coming out of China, some trying to imitate the Byrnes Model Machines' product, but they aren't even in the same zip code. "Second best" Proxxons, etc., are only about a hundred bucks less than the Byrnes table saw which is light years ahead of the competition. That said, not everybody is ready to pull the pin for a $500 micro table saw and, in my book, a used high quality 8" bench saw is the best runner-up currently available if you feel you need a table saw. A used 8" "old 'arn" table saw will require careful setups to get accurate results, but it will provide them. It will effortlessly cut through 1.5" of hardwood and then some, while only the Byrnes saw has the power to really do that in the 4" blade class of machines. About the only drawback to an 8: saw for modeling work is that you will have to search for the thinnest 8" blades you can find and be ready to lose as much in kerf sawdust as you get in planking strips, if not more. (If you are working with exotic wood species, that can get expensive.) If it's any consolation, the 4" mini saws really are limited in the size material they can handle and the 8" much less so.

The Craftsman 8" table saw was a very popular model. Sears called them "bench saws." If you're the kind of guy who detaches and disables all the safety devices on a tool as soon as you take it out of the box, this one's for you. I think they originally came with a riving knife and a blade guard, but you'll not likely find a used one that hasn't had these go missing this late in the game. They were made of solid, "old 'arn." and cast-iron table extension "wings" were available for it also (see second picture below.) There are a lot of 8" table saws on the market now, but these seem mostly to be made out of plastic and stamped metal. As an old machinist once told me, "Mass equals accuracy in a machine tool."

1743289880471.png

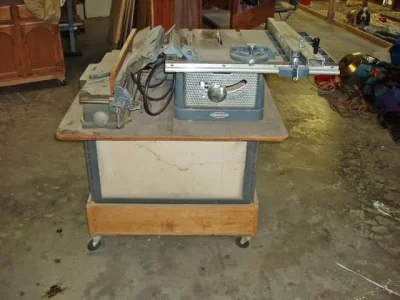
A lot of guys would put the table saw on a table with a Craftsman 4" benchtop jointer alongside and mount the motor on a metal bar running behind the two machines so that it could slide behind either tool for use, thereby only requiring the purchase of one motor for the two machines. Holes were cut in the tabletop and a canvas bag for catching the sawdust and shavings hung below the table. The table saw also accommodated a molding head with interchangeable knives that, when used in combination, produced many different molding styles.


1743290389414.webp

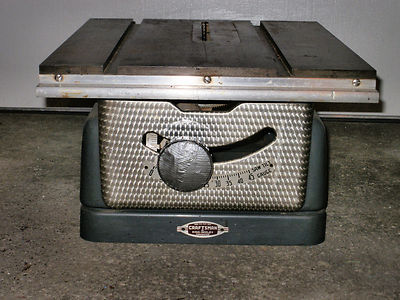
Sears also once sold a cast-iron 7" tilting-table table saw. (The 8" ones were tilting arbor saws.) They are "cute" little machines but widely considered "widow-makers" when used on work of any size. Anybody who has any experience with table saws can let their own imagination run wild. A tilting table on circular saw... what could possibly go wrong? However, they might serve well enough for relatively small work that doesn't require a lot of blade exposure, but I sure wouldn't try ripping eight-foot 2x4's with one! Sears sold these under their Craftsman label and, I believe, this or another 7" table saw under their "second quality" Dunlap label. (See below.) Montgomery-Wards sold similar models during the same time frame.

1743292225861.png

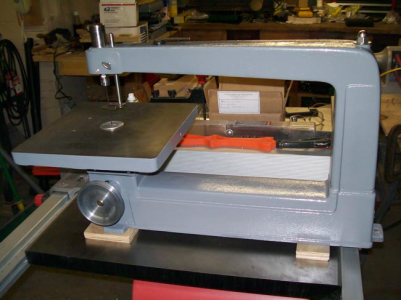
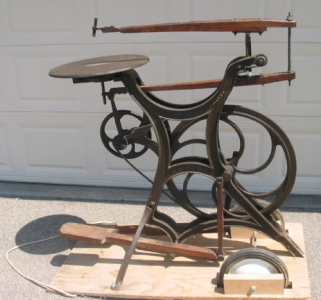
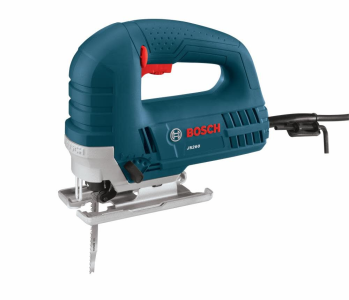
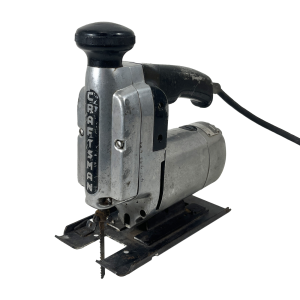
Funny thing with "up and down cutting saws." I don't know what to really call them sometimes. There used to be jig saws and scroll saws. The jig saw was a stationary tool much like a scroll saw, but for heavier work, somewhat in the range of a hand coping saw. The scroll saw was for finer work than the jig saw, somewhat in the range of a hand jeweler's piercing saw. The earlier scroll saws were frequently treadle or spring-pedal powered. Then there was the saber saw, which came in two configurations, stationary and hand-held. The saber saw cut in an up and down motion, but the blade was only attached at one end and was wider and stiffer than the other up and down cutting machine blades. Some jigsaws provided the option to remove the upper arm of the saw and mount a saber saw blade in the lower end blade jaw of the jigsaw. Then, somewhere along the way, hand-held saber saws started being called "jig saws," jigsaws started being called scroll saws, and saber saws seem to have disappeared entirely.

(Below) Craftsman 1950's cast-iron jig saw, which, by loosening the bolt on the top of the saw elbow, removing the "forearm" of the saw, and mounting a saber saw blade in the lower blade holder, could be converted to a stationary saber saw. Blade direction vertical with air dampened upper blade attachment point. Belt driven with graduated pulley speed adjustment.

1743293785995.png

(Below) Modern Hegner scroll saw with parallel arm true vertical saw blade movement, graduated pulley speed adjustment.

1743295659460.png

(Below) Antique treadle-powered scroll saw.

1743297808261.png

(Below) Modern jig saw.

1743297957880.png

(Below) 1950's saber saw.

1743298312591.png

I'd be interested to know whether our cousins across the pond have gone through the same linguistic evolution. Over here, at least, it's not your grandfather's scroll saw anymore and it's not your father's saber saw anymore, either! :D

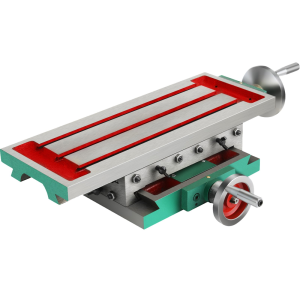
As for milling machines, even those miniature ones that go hand and glove with the Sieg "seven-by" Chinese mini-lathes are too expensive for my pocketbook and that's just for the machine. Don't forget that you will easily spend the cost of a mill or lathe again just for the tooling to get anything done with it. There is, however, another option. Generally, a drill press cannot be used for milling because the drill chuck is held in the quill with a taper fit which, when side force is applied, will lose its grip, causing the chuck to fall out while running. That, of course, can be a very dangerous thing, not to mention that the work will likely be ruined as well. However, the 1950's era Craftsman drill presses had an optional collect holder made to screw onto the quill and stay put. The collet holder accepted 1/4" shaft tooling, which is common on many milling machines. By adding the optional Craftsman X-Y table to the drill press table, you had a reasonably accurate milling machine! I was lucky enough to inherit my father's drill press with the collet holder and I expect they might be rather hard to come by these days, but I don't think it would not be that hard to have one machined for you. The important thing is that the quill is made to hold a screwed-on fitting as well as a Morse taper shanked drill chuck. I don't have the Craftsman X-Y table, but the Vevor X-Y table is widely available at a reasonable price. Being the high-tolerance tools they are, X-Y tables can be very expensive, but, although the Vervor table will likely involve some fettling to get it where you want it, there are loads of YouTube videos on how to do it. (Even if you don't have a way to fit a milling bit in your drill press, you can probably carefully mill wood on your drill press with cutters in the drill chuck if you don't put a lot of sideways pressure on the cutter.) So, if you are in the market for a good drill press and can find an old Craftsman, grab it. They don't make them like they used to. My dad paid $50 at Sears for the one below in 1950. Now, I see where guys are "restoring" them and asking two grand on eBay! Mindboggling. Fear not, though, there are still ones with some dust and even rust on them that are going regularly for two or three hundred on Craigslist.

(Below) 1950 cast iron Craftsman bench top drill press made by King-Seeley tools.

1743301986566.webp

(Below) Vevor drill press X-Y table. (See: https://www.vevor.com/rotary-table-...slide-bench-drill-vise-fixture-p_010230619047 )

1743302490282.png
 
Last edited:
Bob,

Great old tool discussion. My father had one of those 8in tilting table Craftsman table saws. It was one of only three major power tools that he used to build a 23ft L Francis Herreshoff designed sailboat. The other tools were a borrowed bandsaw and a Craftsman drill press. Major purchases during construction were a hand held belt sander and 1/4” power drill.

Roger
 
Back
Top