Nice job Grant, those two large counters (odd name to me) appear complicated in their shape and even more complicated to place correctly.
-

Win a Free Custom Engraved Brass Coin!!!
As a way to introduce our brass coins to the community, we will raffle off a free coin during the month of August. Follow link ABOVE for instructions for entering.
-

PRE-ORDER SHIPS IN SCALE TODAY!
The beloved Ships in Scale Magazine is back and charting a new course for 2026!
Discover new skills, new techniques, and new inspirations in every issue.
NOTE THAT OUR FIRST ISSUE WILL BE JAN/FEB 2026
You are using an out of date browser. It may not display this or other websites correctly.
You should upgrade or use an alternative browser.
You should upgrade or use an alternative browser.
HMS Enterprise 1774 POF 1:48.
- Thread starter GrantTyler
- Start date
- Watchers 85
-
- Tags
- caf model enterprise
wonderful work !!!
Great skill, loads of angles to consider. Neat as you like! Fantastic!
……. Still looks good tho.
Cheers Grant
Certainly does Grant, terrific job.
Nice step on this complicated aft part, Grant.Good afternoon all. Just a small update on the stern timbers. I fixed the broken counters and fitted the side counters Tom sent me. Took a long time to get these ready, plenty of sanding and cleaning up required.
View attachment 520618
Close up of the fitting. The joins came together pretty good although I did miss the measurement of the deck clamp by 0.5mm. Still looks good tho.
View attachment 520620
From the rear and outside:
View attachment 520619
And the side timbers added:
View attachment 520621
Cheers Grant
Regards, Peter
Thank you Paul. Took a while but came out reasonably ok. I can work with this going foTricky part of the build, Grant. Well done!
Thank you kindly KeithSplendid workmanship my friend. Very well done
Cheers Grant
Good morning Daniel. They are pretty complex( Kudo to those guys who scratch make them) and meet 3 different parts all at differing angles. I got them pretty close…..hopefully this remains true when I take her out the jig.Nice job Grant, those two large counters (odd name to me) appear complicated in their shape and even more complicated to place correctly.
Goodwin refers to these as side counter timbers , Sutherland as stern timbers and I have seen them called fashion pieces. To me they are those twisty thingings at the back on the side….
 .
.wonderful work !!!
Great skill, loads of angles to consider. Neat as you like! Fantastic!
Certainly does Grant, terrific job.
Nice step on this complicated aft part, Grant.
Regards, Peter
wonderful work, Grant
Good morning Gentlemen. Thank you very much indeed. Your support and encouragement always makes a big difference…..especially when I feel a little out of my depth so to speak. Cheers GrantHey Grant,
that looks excellent once again Grant. That's great craftsmanship. I'll be happy to see any progress you make. I think I can learn a lot from you here.
Cheers Günther
Beautiful work GrantGood afternoon all. Just a small update on the stern timbers. I fixed the broken counters and fitted the side counters Tom sent me. Took a long time to get these ready, plenty of sanding and cleaning up required.
View attachment 520618
Close up of the fitting. The joins came together pretty good although I did miss the measurement of the deck clamp by 0.5mm. Still looks good tho.
View attachment 520620
From the rear and outside:
View attachment 520619
And the side timbers added:
View attachment 520621
Cheers Grant
Thats the best description yet!To me they are those twisty thingings at the back on the side…..

Thank you kindly Gilbert.Beautiful work Grant
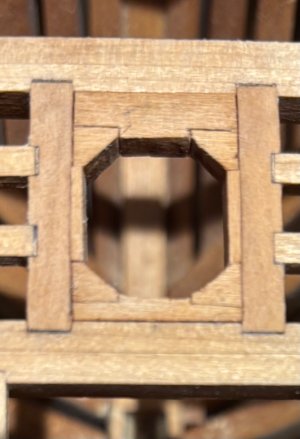
Good afternoon.It was a cold, wet and blustery day today so I bunked going to the office. My desire to make more carlings, beams, ledges and knees was null and void. Ricochet Rabbit decided to come out and play.
The kit partners and chocks for the masts are sad so I scratch made a resemblance of these. I did not notch the fore/aft partners to accept the chocks as these where already fitted. (I had a feeling I would cock this up).
Here is my attempt cut from some left over cherry.
Foremast:
Cheers Grant
PS. Not yet sanded. I’m trying to be more accurate in my cutting and be less dependent on sanding…..hmmmmm .
.
The kit partners and chocks for the masts are sad so I scratch made a resemblance of these. I did not notch the fore/aft partners to accept the chocks as these where already fitted. (I had a feeling I would cock this up).
Here is my attempt cut from some left over cherry.
Foremast:

Cheers Grant
PS. Not yet sanded. I’m trying to be more accurate in my cutting and be less dependent on sanding…..hmmmmm
 .
.- Joined
- May 25, 2020
- Messages
- 1,131
- Points
- 443

Very pretty, Grant! Except for that last part.Good morning Gentlemen
While I wait for the new parts I am going to deviate to deck beams and carlings etc.
Firstly I need to poly the internal frames below the clamp line. I was very happy, indeed, how the Cherry came out. It looks way better in real life and try as I may I couldn’t share this with you guys:
Some pics:
View attachment 516330View attachment 516332View attachment 516331View attachment 516333
Very chuffed and then ……
View attachment 516334
I knew this was going to happen just not while it is still in the cradle

Cheers Grant

- Joined
- May 25, 2020
- Messages
- 1,131
- Points
- 443

Grant, you could also put the camera even closer so we can really see any flaw in your craftsmanshipGood afternoon.It was a cold, wet and blustery day today so I bunked going to the office. My desire to make more carlings, beams, ledges and knees was null and void. Ricochet Rabbit decided to come out and play.
The kit partners and chocks for the masts are sad so I scratch made a resemblance of these. I did not notch the fore/aft partners to accept the chocks as these where already fitted. (I had a feeling I would cock this up).
Here is my attempt cut from some left over cherry.
Foremast:
View attachment 520855
Cheers Grant
PS. Not yet sanded. I’m trying to be more accurate in my cutting and be less dependent on sanding…..hmmmmm.
 My bet is that all of the angles look perfect when your eye isn't pressed against the deck. Lovely.
Blessings.
Chuck
or you can put the camera so close that everything is blurry and we can't see any of your flaws.... 
You are doing a great job !

You are doing a great job !
Grant, you could also put the camera even closer so we can really see any flaw in your craftsmanshipMy bet is that all of the angles look perfect when your eye isn't pressed against the deck. Lovely.
Blessings.
Chuck
Good morning Gentlemen. If you do close ups you only see a few flaws vs a whole multitude……or you can put the camera so close that everything is blurry and we can't see any of your flaws....
You are doing a great job !
 Thanks for checking in on my ship guys- I do appreciate it. Cheers Grant
- Joined
- Mar 1, 2022
- Messages
- 693
- Points
- 308

... True story! It's a wooden kit, not a bacterial colony. To me, those mast partners are nicely executed. Good job, Grant!or you can put the camera so close that everything is blurry and we can't see any of your flaws....
You are doing a great job !
Thank you Albert.... True story! It's a wooden kit, not a bacterial colony. To me, those mast partners are nicely executed. Good job, Grant!
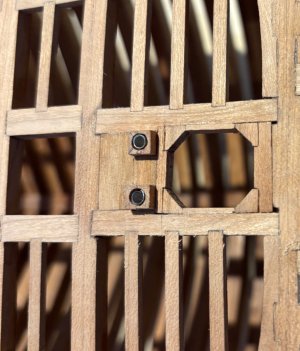
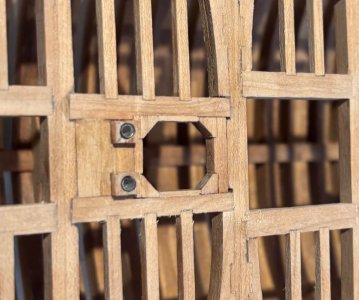
Good evening. WIP : Some more scratch building. The partner and chocks for main mast and the inner ducks for a chain pump. The kit does not include all these yet from my research a frigate has this. I included some lead lining for the ducts……all WIP.
and then a deep uncontrollable urge of unimaginable force ……the jig had to go..,
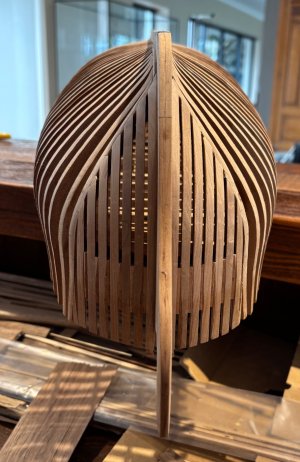
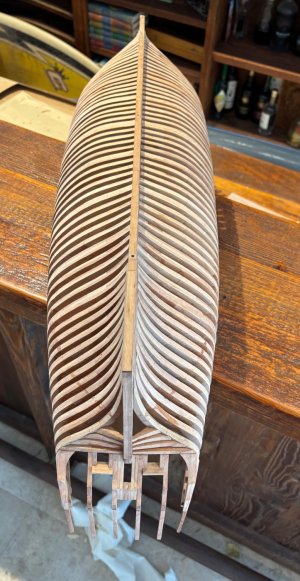
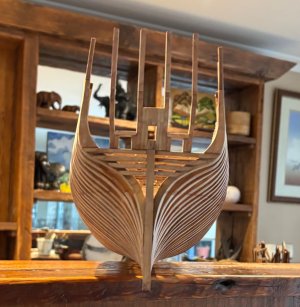
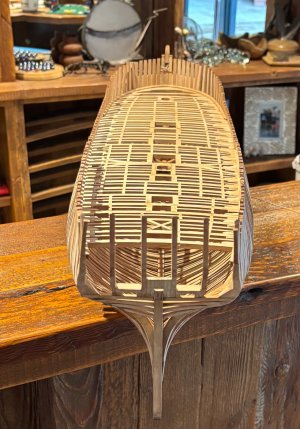
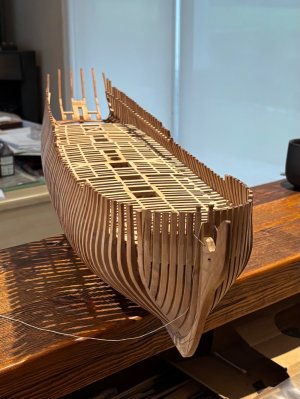
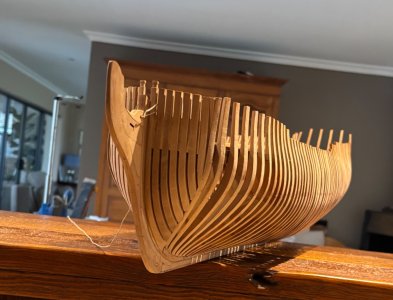
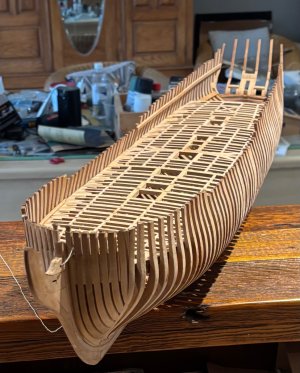
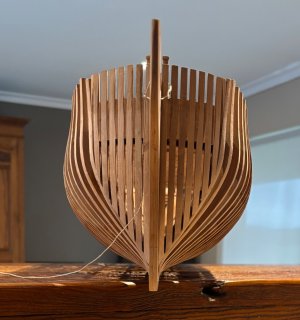
Cheers Grant


and then a deep uncontrollable urge of unimaginable force ……the jig had to go..,


Cheers Grant


