That is what I use 90% of the time. 
-

Win a Free Custom Engraved Brass Coin!!!
As a way to introduce our brass coins to the community, we will raffle off a free coin during the month of August. Follow link ABOVE for instructions for entering.
-

PRE-ORDER SHIPS IN SCALE TODAY!
The beloved Ships in Scale Magazine is back and charting a new course for 2026!
Discover new skills, new techniques, and new inspirations in every issue.
NOTE THAT OUR FIRST ISSUE WILL BE JAN/FEB 2026
- Home
- Forums
- Ships of Scale Group Builds and Projects
- Modelship Dockyard PoF HMS Enterprize 1774 - 1/48
You are using an out of date browser. It may not display this or other websites correctly.
You should upgrade or use an alternative browser.
You should upgrade or use an alternative browser.
- Joined
- Jan 10, 2022
- Messages
- 860
- Points
- 403

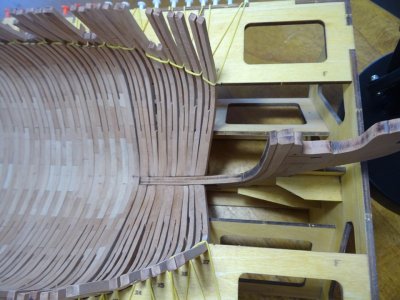
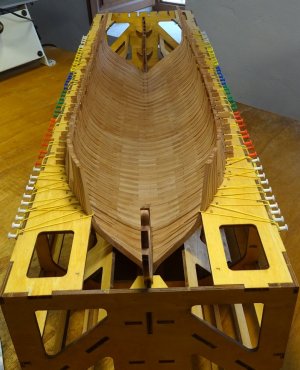
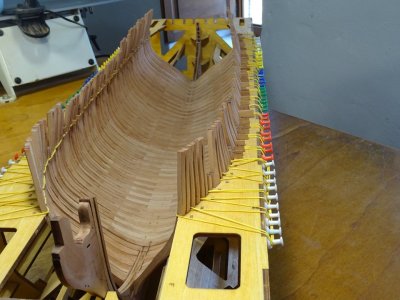
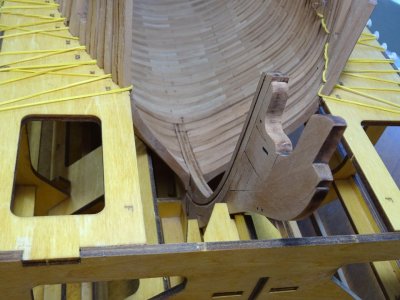
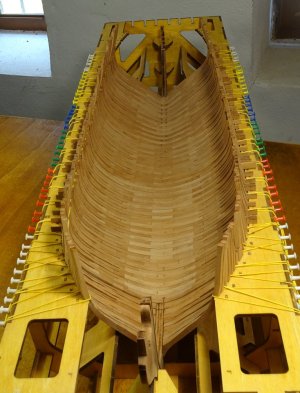
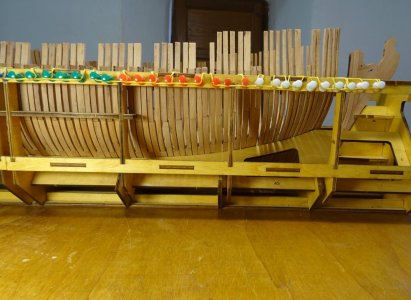
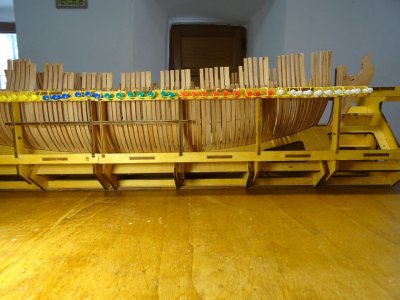
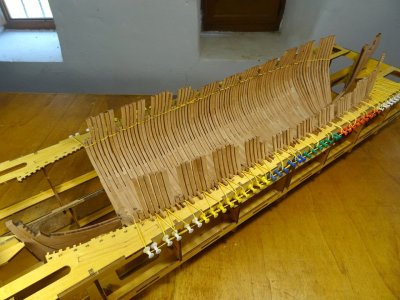
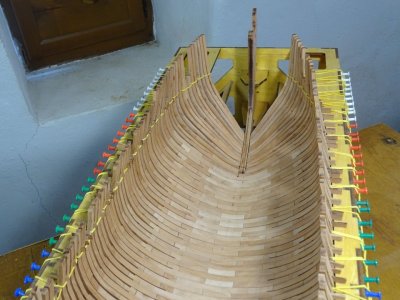
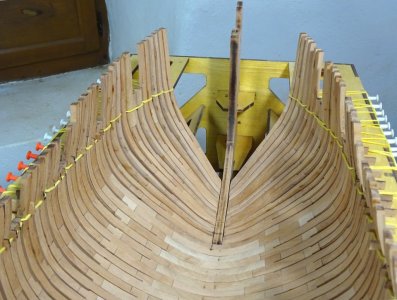
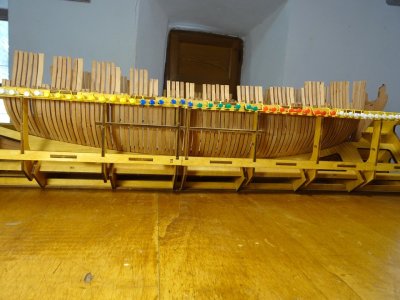
Have now completed the fore cant frames (x1 to x7). There is actually an x8 but I am leaving that for the time being as x8A is used to make up the hawse pieces and is not fitted into the hull until that part is complete. Everything is still only dry fit and some work is required on the cant frame bases where they join the hull as some of the angles are not quite right. Not too bad but could be better. So, I think next I shall permanently fix the frames 1 to 37 to the hull, the concentrate on the stern cants


Looking very nice! Bravo!
She is getting her shape more and more, Keith. A very nice shape of the frames!Have now completed the fore cant frames (x1 to x7). There is actually an x8 but I am leaving that for the time being as x8A is used to make up the hawse pieces and is not fitted into the hull until that part is complete. Everything is still only dry fit and some work is required on the cant frame bases where they join the hull as some of the angles are not quite right. Not too bad but could be better. So, I think next I shall permanently fix the frames 1 to 37 to the hull, the concentrate on the stern cants
View attachment 530371
View attachment 530372
View attachment 530373
View attachment 530374
View attachment 530375
View attachment 530376
View attachment 530377
View attachment 530378
View attachment 530379
View attachment 530380
View attachment 530381
Regards, Peter
- Joined
- Jan 10, 2022
- Messages
- 860
- Points
- 403

Thank you Paul. You were right. It was no jokeLooking very nice! Bravo!
- Joined
- Jan 10, 2022
- Messages
- 860
- Points
- 403

Thank you Peter. Yes, it's taken a while but finally taking shapeShe is getting her shape more and more, Keith. A very nice shape of the frames!
Regards, Peter
- Joined
- Apr 20, 2020
- Messages
- 6,242
- Points
- 738

Dear KeefHave now completed the fore cant frames (x1 to x7). There is actually an x8 but I am leaving that for the time being as x8A is used to make up the hawse pieces and is not fitted into the hull until that part is complete. Everything is still only dry fit and some work is required on the cant frame bases where they join the hull as some of the angles are not quite right. Not too bad but could be better. So, I think next I shall permanently fix the frames 1 to 37 to the hull, the concentrate on the stern cants
View attachment 530371
View attachment 530372
View attachment 530373
View attachment 530374
View attachment 530375
View attachment 530376
View attachment 530377
View attachment 530378
View attachment 530379
View attachment 530380
View attachment 530381
the frames creating a smooth and very nice hull, great job
- Joined
- Jul 24, 2016
- Messages
- 540
- Points
- 188

That is MOST impressiveHave now completed the fore cant frames (x1 to x7). There is actually an x8 but I am leaving that for the time being as x8A is used to make up the hawse pieces and is not fitted into the hull until that part is complete. Everything is still only dry fit and some work is required on the cant frame bases where they join the hull as some of the angles are not quite right. Not too bad but could be better. So, I think next I shall permanently fix the frames 1 to 37 to the hull, the concentrate on the stern cants
View attachment 530371
View attachment 530372
View attachment 530373
View attachment 530374
View attachment 530375
View attachment 530376
View attachment 530377
View attachment 530378
View attachment 530379
View attachment 530380
View attachment 530381
I note that they Poijt towards the Bow have taken photos to try and get something like this increible wrok
It's actually X8b that is used for the hawse pieces.Have now completed the fore cant frames (x1 to x7). There is actually an x8 but I am leaving that for the time being as x8A is used to make up the hawse pieces and is not fitted into the hull until that part is complete. Everything is still only dry fit and some work is required on the cant frame bases where they join the hull as some of the angles are not quite right. Not too bad but could be better. So, I think next I shall permanently fix the frames 1 to 37 to the hull, the concentrate on the stern cants
View attachment 530371
View attachment 530372
View attachment 530373
View attachment 530374
View attachment 530375
View attachment 530376
View attachment 530377
View attachment 530378
View attachment 530379
View attachment 530380
View attachment 530381
A beautiful job on her !!! I hope mine looks that good !
- Joined
- Jan 10, 2022
- Messages
- 860
- Points
- 403

x8B is on the stern side of the frame. Thanks for your comments JeffIt's actually X8b that is used for the hawse pieces.
A beautiful job on her !!! I hope mine looks that good !

- Joined
- Jul 24, 2016
- Messages
- 540
- Points
- 188

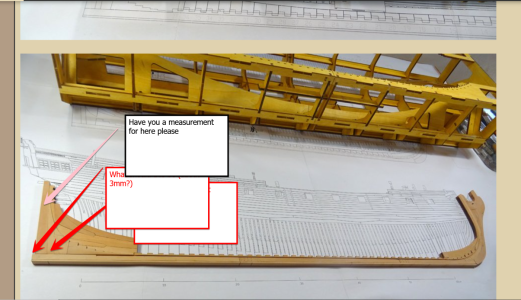
Just wondering if you can give me these measurementsThe stern deadwood is now finished and attached to the keel. It all fits the drawing perfectly, which I am taking as a good sign and fits into the jig as well. When the glue is dry, I shall remove the keel from the jig to add the photo etch bracket ties front and back and do a little cleaning up of the top of stern deadwood and where the fore apron is attached. That will be the keel complete and on to the next stage . . . the construction of the ribs
View attachment 514274
View attachment 514275
View attachment 514276
View attachment 514277
View attachment 514278
View attachment 514279
View attachment 514280
LOL I've been thinking about it the wrong way. Maybe I'm building my ship backwards.....x8B is on the stern side of the frame. Thanks for your comments Jeff

Jeff & all
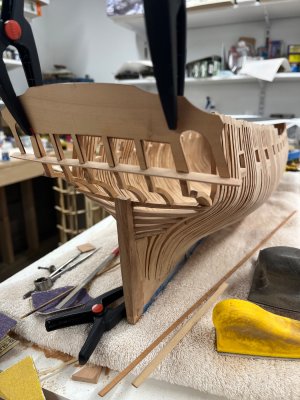
My shaping/sanding is coming along. Started back at it since I returned from Montana.
All the sanding is pretty tedious so I tackled some fitting to the transom to see if the transition from the hull flowed reasonably well.
All the counter timbers were glued up/pinned with bamboo pins and spaced out according to the dry fit transom piece with windows and everything seems to fit reasonably well and seems symmetrical so I'll finish framing and doorway next then back to finish sanding.....probably go down to 600 grit.
That's about it for now and thanks to Jeff for allowing me to jump on here together with his fine work.
Tim

It's nice to see what mine should look like in the future. 
This is Keef's build report...That's about it for now and thanks to Jeff for allowing me to jump on here together with his fine work.
Tim has been posting his progress in both mine and Keef's reports.This is Keef's build report...

Got my wires crossed, posting on both, Keef….my bad, sorry. DUH!This is Keef's build report...
Tim
Under transom, the piece I PM’d you about, scratch built and still oversized other than counter timber fitting…….pretty straight forward.It's nice to see what mine should look like in the future.
- Joined
- Jul 24, 2016
- Messages
- 540
- Points
- 188

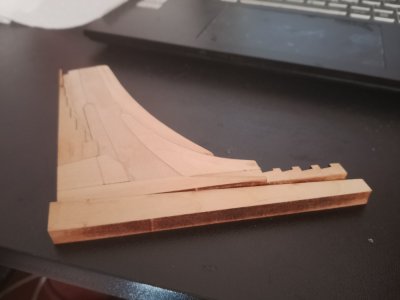
ive tappered the bottom of the deadwood to 3mm added the G parts and tapered to 4mm and its too narrow for the SterStern deadwood glued and keel pieces dry fitted to see how it all fits together. A little sanding of the bow gripe piece curve will have it fitting perfectly inside the jig. When the glue has dried on the stern deadwood l will begin the first sanding to taper it down to 3 mm at the bottom. Everything seems to fit the drawing nicely
View attachment 513165
View attachment 513166
View attachment 513167
View attachment 513168
View attachment 513171
n post
Tearing my hair outThe stern deadwood is now finished and attached to the keel. It all fits the drawing perfectly, which I am taking as a good sign and fits into the jig as well. When the glue is dry, I shall remove the keel from the jig to add the photo etch bracket ties front and back and do a little cleaning up of the top of stern deadwood and where the fore apron is attached. That will be the keel complete and on to the next stage . . . the construction of the ribs
View attachment 514274
View attachment 514275
View attachment 514276
View attachment 514277
TeaView attachment 514278
View attachment 514279
View attachment 514280
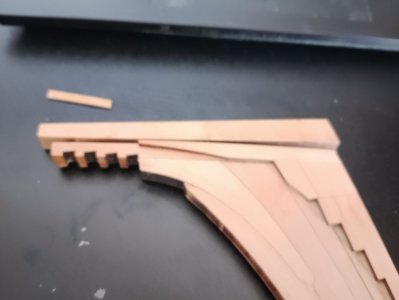
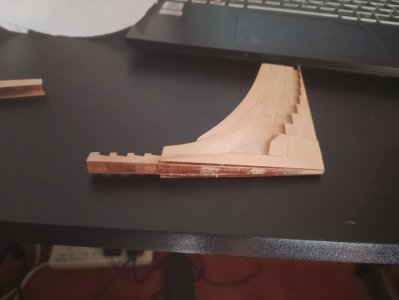
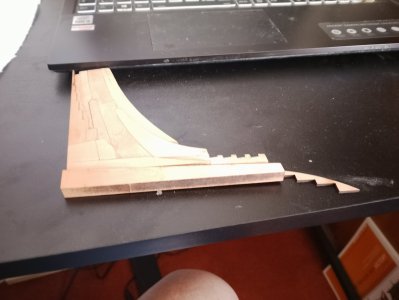
Cut the inner deadwood to 3 mm then added G parts and cut down to 4mm
WHY
if we are not quite correctly trimming the stern post Have i cut too much off (AGAIN)
Stern post is not attached but as you can see with the 3mm (and 4mm) it m/looks to much
But not enough higher up
I made sure the bottom was 3mm
- Joined
- Jul 24, 2016
- Messages
- 540
- Points
- 188


![IMG_20250708_172558[1].jpg IMG_20250708_172558[1].jpg](https://shipsofscale.com/sosforums/data/attachments/514/514513-422a469b726bd10b2ac60121a086458d.jpg?hash=p58IqpZG7T)