Happy birthday!
-

Win a Free Custom Engraved Brass Coin!!!
As a way to introduce our brass coins to the community, we will raffle off a free coin during the month of August. Follow link ABOVE for instructions for entering.
You are using an out of date browser. It may not display this or other websites correctly.
You should upgrade or use an alternative browser.
You should upgrade or use an alternative browser.
VOC ship The Prins Willem (scale 1:75) Year 1651
- Thread starter Steef66
- Start date
- Watchers 74
-
- Tags
- 1:75 prins willem
A very Happy Birthday Steef.
Hi Stephan,
Happy birthday and up to the next 25.
Happy birthday and up to the next 25.
- Joined
- Aug 8, 2019
- Messages
- 5,433
- Points
- 738

Good morning Stephan.
I wish you all the bests and a very Happy Birthday.
Enjoy this day to the fullest.
Gefeliciteerd met je verjaardag, Stephan

Also from my side a Happy Birthday, Stephan. Enjoy this day!
Regards, Peter
My best wishes for a very happy birthday Stephan.
Van harte, Stephan!
Wonderful! I hope you have a great day celebrating, my friend!
A very happy birthday Stephan!!!. Cheers Grant
Happy birthday!
A very Happy Birthday Steef.
I want to thank you all for the warm birthday celebrations. They certainly make the day. 59 years is still young they say.my dear friend Stephan
Happy Birthday
I wish you all the bests and a very Happy day with your family
Thanks Maarten, normally they say this at 25, 50 or 75.Hi Stephan,
Happy birthday and up to the next 25.
Thanks Jim, no idea what all you are saying. But given the cake, I do appreciate it. Ps; I am Dutch.Hvad? Endnu et år allerede? Wow!
I det tempo kan jeg slet ikke forestille mig, hvor klog du bliver i næste uge – for slet ikke at tale om næste år!
Tillykke med fødselsdagen, min ven!
Må din dag være fyldt med glæde, latter og lige den rette mængde kage-inspireret eftertænksomhed.

- Joined
- Aug 8, 2019
- Messages
- 5,433
- Points
- 738

Thanks WojtasSHappy Birthday Stephan
All The Best
Oh no... being multilingual is not easy....Thanks Jim, no idea what all you are saying. But given the cake, I do appreciate it. Ps; I am Dutch.
Wat? Alweer een jaar erbij? Wow!
Als je in dit tempo doorgaat, durf ik niet eens te bedenken hoe wijs je volgende week al zult zijn – laat staan volgend jaar!
Gefeliciteerd met je verjaardag, mijn vriend!

Moge je dag gevuld zijn met vreugde, gelach, en precies de juiste hoeveelheid door taart geïnspireerde reflectie.
- Joined
- Aug 8, 2019
- Messages
- 5,433
- Points
- 738

Bedankt voor de vertaling.precies de juiste hoeveelheid door taart geïnspireerde reflectie.
Wat betreft dat laatste stukje tekst, taart staat voor morgen in de planning, gisteren was de inspiratie door bier.

Thought you still were 25.I want to thank you all for the warm birthday celebrations. They certainly make the day. 59 years is still young they say.
Thanks Maarten, normally they say this at 25, 50 or 75.But on to the 84 is also fine.
Thanks Jim, no idea what all you are saying. But given the cake, I do appreciate it. Ps; I am Dutch.
- Joined
- Aug 8, 2019
- Messages
- 5,433
- Points
- 738

Indeed, I seem young, young at heart and taut skin due to the padding.Thought you still were 25.
- Joined
- Aug 8, 2019
- Messages
- 5,433
- Points
- 738

After building a lot of rope walks and refurbishing a Creality Ender 3V2 printer I'm still working on my sails. My first goal is to complete both mizzen sails. Attach them to the yard and make all the rope, blocks and stuff that is needed to hang them on the ship.
After completing the paper cloth and shape I started with the bolt rope and cringes. The easy part are the edges of the sail.
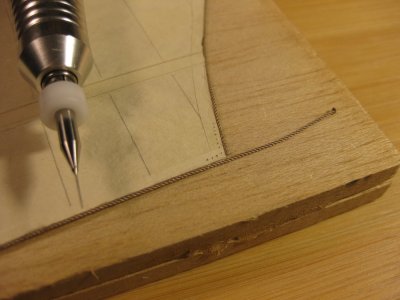
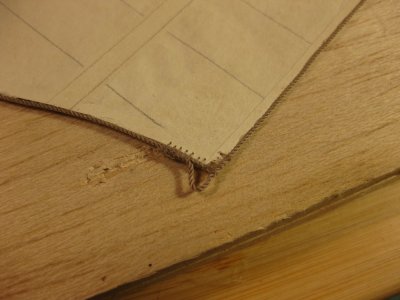
The glue you see next to the bolt rope will in a later moment be removed and it is almost gone by now. Not all, not possible. But invisible for the eye. Only the macro pictures show it.
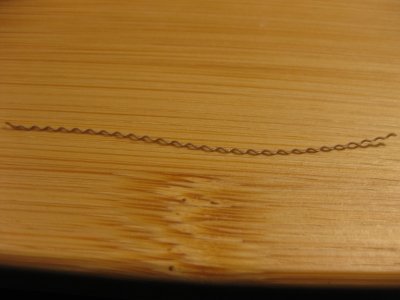
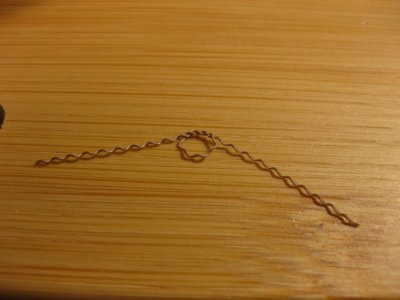
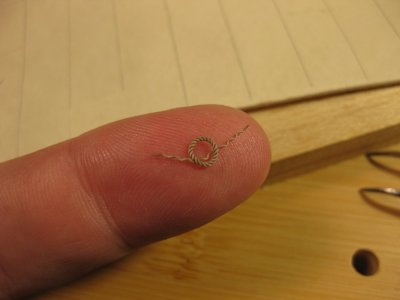
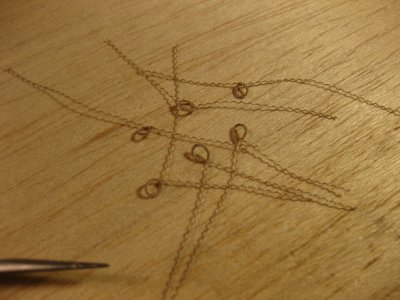
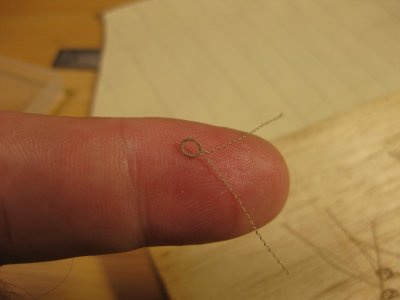
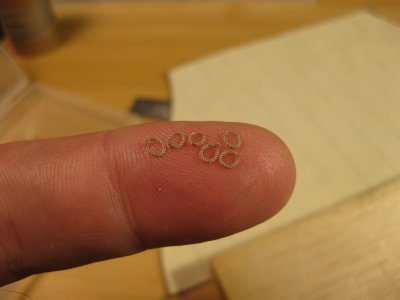
The cringes or is it cringles? are a bigger problem. Making them how it should be done is difficult and I can't get them on the bolt rope on a decent way. So I searched something that looks good, but not entirely correct. I made tiny grommets. They just take me 1,5 minute to make. So easy for me. There a tutorials on YouTube about how to do it.
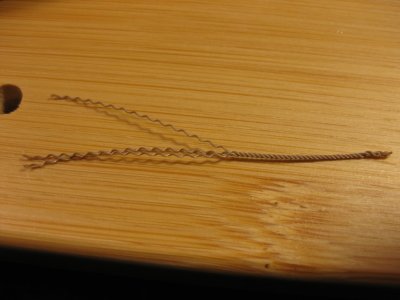
Then I attach them to the sails
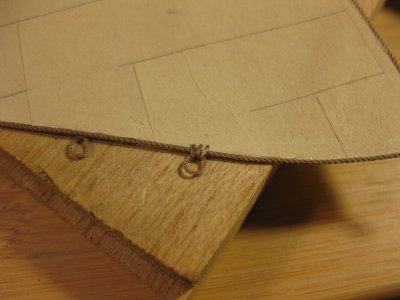
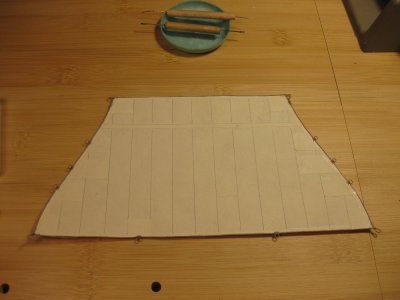
I'm happy with this tiny sail, the cringles look good this way. Maybe I change the way to do it on the next one. But For now I go on to the next part.
Reef points.
They always look bad on modelships. The rope is always pointing in the wrong direction. John Harland also wrote it in his book. But I'm working with poly rope and you can program the shape with heat!!!!! I have a tiny soldering iron for repairing 3D prints or do wood burning. I set the temperature to 180 degrees Celsius (lowest). And carefully I shaped the rope with success. The first one is ready.
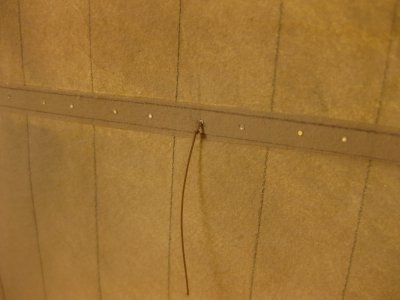
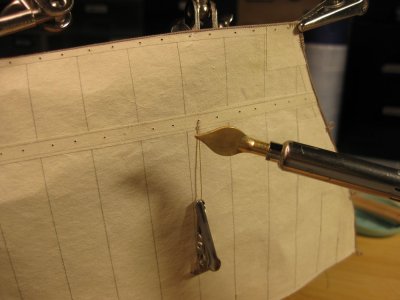
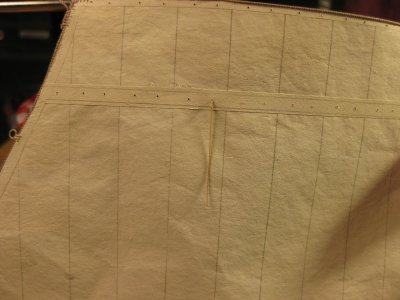
The holes in the paper sails are drilled with a tiny drill for electrical boards, These are no drills like normal but more like end mills. See the first pair of pictures.
Thanks for watching.
After completing the paper cloth and shape I started with the bolt rope and cringes. The easy part are the edges of the sail.


The glue you see next to the bolt rope will in a later moment be removed and it is almost gone by now. Not all, not possible. But invisible for the eye. Only the macro pictures show it.
The cringes or is it cringles? are a bigger problem. Making them how it should be done is difficult and I can't get them on the bolt rope on a decent way. So I searched something that looks good, but not entirely correct. I made tiny grommets. They just take me 1,5 minute to make. So easy for me. There a tutorials on YouTube about how to do it.


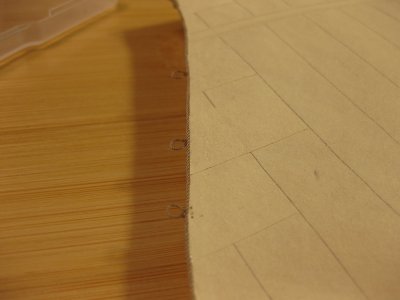
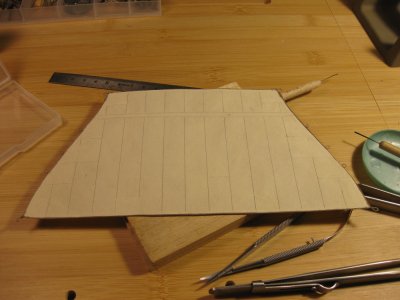
Then I attach them to the sails


I'm happy with this tiny sail, the cringles look good this way. Maybe I change the way to do it on the next one. But For now I go on to the next part.
Reef points.
They always look bad on modelships. The rope is always pointing in the wrong direction. John Harland also wrote it in his book. But I'm working with poly rope and you can program the shape with heat!!!!! I have a tiny soldering iron for repairing 3D prints or do wood burning. I set the temperature to 180 degrees Celsius (lowest). And carefully I shaped the rope with success. The first one is ready.


The holes in the paper sails are drilled with a tiny drill for electrical boards, These are no drills like normal but more like end mills. See the first pair of pictures.
Thanks for watching.
Beautiful detailing, Stephan!
By every step they look better and better, Stephan. Nicely detailed.After building a lot of rope walks and refurbishing a Creality Ender 3V2 printer I'm still working on my sails. My first goal is to complete both mizzen sails. Attach them to the yard and make all the rope, blocks and stuff that is needed to hang them on the ship.
After completing the paper cloth and shape I started with the bolt rope and cringes. The easy part are the edges of the sail.
View attachment 533698View attachment 533699
The glue you see next to the bolt rope will in a later moment be removed and it is almost gone by now. Not all, not possible. But invisible for the eye. Only the macro pictures show it.
The cringes or is it cringles? are a bigger problem. Making them how it should be done is difficult and I can't get them on the bolt rope on a decent way. So I searched something that looks good, but not entirely correct. I made tiny grommets. They just take me 1,5 minute to make. So easy for me. There a tutorials on YouTube about how to do it.
View attachment 533700View attachment 533701View attachment 533702View attachment 533703View attachment 533704View attachment 533705View attachment 533706
Then I attach them to the sails
View attachment 533707View attachment 533708View attachment 533709View attachment 533710
I'm happy with this tiny sail, the cringles look good this way. Maybe I change the way to do it on the next one. But For now I go on to the next part.
Reef points.
They always look bad on modelships. The rope is always pointing in the wrong direction. John Harland also wrote it in his book. But I'm working with poly rope and you can program the shape with heat!!!!! I have a tiny soldering iron for repairing 3D prints or do wood burning. I set the temperature to 180 degrees Celsius (lowest). And carefully I shaped the rope with success. The first one is ready.
View attachment 533711View attachment 533712View attachment 533713
The holes in the paper sails are drilled with a tiny drill for electrical boards, These are no drills like normal but more like end mills. See the first pair of pictures.
Thanks for watching.
Regards, Peter
- Joined
- Nov 10, 2019
- Messages
- 467
- Points
- 373

Hello Stephan,
I really like what you're showing about making rope crommets.
Until now, I had no idea how to make these crommets in miniature. As you impressively demonstrate, it's definitely possible to make them in a tiny version.
You need a lot of these rope crommets on a model sailing ship. For example, on the yardarms, as supports for the other rigging elements. So far, I've cheated a little and simply made a ring out of a rope and glued it at the cut points.
In the future, I'll try Stephan's method.
- Joined
- Aug 8, 2019
- Messages
- 5,433
- Points
- 738

Thanks Paul, In Dutch we say: Ik doe mijn best.Beautiful detailing, Stephan!
- Joined
- Aug 8, 2019
- Messages
- 5,433
- Points
- 738

Thanks Peter, this method of making sails is so satisfying.By every step they look better and better, Stephan. Nicely detailed.
Regards, Peter
- Joined
- Aug 8, 2019
- Messages
- 5,433
- Points
- 738

Thanks Johann, great to teach the masterHello Stephan,
I really like what you're showing about making rope crommets.
Until now, I had no idea how to make these crommets in miniature. As you impressively demonstrate, it's definitely possible to make them in a tiny version.
You need a lot of these rope crommets on a model sailing ship. For example, on the yardarms, as supports for the other rigging elements. So far, I've cheated a little and simply made a ring out of a rope and glued it at the cut points.
In the future, I'll try Stephan's method.
They are one of the easiest things to make. Just turn them into each other. There is one way to turn that the rope comes together. Turning the wrong way and nothing is happening. I made a lot of them.
But you need polyester rope that had a heat treatment. I think silk is not possible to use for. And when you cheat in a correct way, nobody will see.
- Joined
- Aug 8, 2019
- Messages
- 5,433
- Points
- 738

Splendid work Steef. Amazing at that scale.
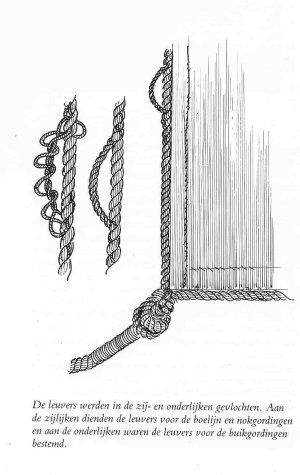
Where did you find that cringles were circular? Herman Ketting shows a different shape in his book Prins Willem:
View attachment 533772
Thanks Ab, you are absolutely right about this point. I mentioned in my post before
I didn't get them in a nice way onto the boltrope. It keeps looking messy. That's why I choose the grommets, they looked the best of all. Yeah I'm ashamed about it, but to small for correct details.The cringes or is it cringles? are a bigger problem. Making them how it should be done is difficult and I can't get them on the bolt rope on a decent way. So I searched something that looks good, but not entirely correct. I made tiny grommets. They just take me 1,5 minute to make. So easy for me. There a tutorials on YouTube about how to do it.
The bigger sails will give me a better try, because of the bigger rope on the sail. Circular cringles are used on modern sails these days. They are placed in the sail.
The next small sail I make, I will try to don't let them look round but oval by sewing them on 2 points first and then the middle point. And the main and fore sail are big enough to give more detail.


