My worry is that she might gift me the vacuum cleaner.Hey, ConsNZ!
What a wonderful wife you have, giving you a sewing machine as a gift!
-

Win a Free Custom Engraved Brass Coin!!!
As a way to introduce our brass coins to the community, we will raffle off a free coin during the month of August. Follow link ABOVE for instructions for entering.
-

PRE-ORDER SHIPS IN SCALE TODAY!
The beloved Ships in Scale Magazine is back and charting a new course for 2026!
Discover new skills, new techniques, and new inspirations in every issue.
NOTE THAT OUR FIRST ISSUE WILL BE JAN/FEB 2026
You are using an out of date browser. It may not display this or other websites correctly.
You should upgrade or use an alternative browser.
You should upgrade or use an alternative browser.
- Joined
- Jun 28, 2020
- Messages
- 550
- Points
- 353

Hey, ConsNZ!My worry is that she might gift me the vacuum cleaner.
Next, you'll get a washing machine as a gift!

- Joined
- Jun 28, 2020
- Messages
- 550
- Points
- 353

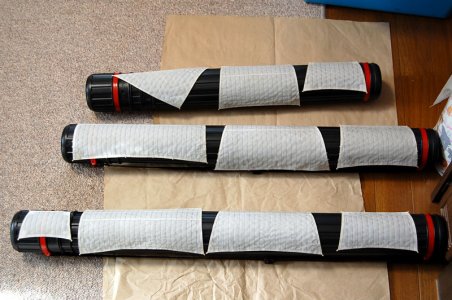
The sails for the foremast, split-sloop topmast, and mizzenmast were constructed, sprayed with clear coat, and weathered.
They are drying on the case holding the blueprints.
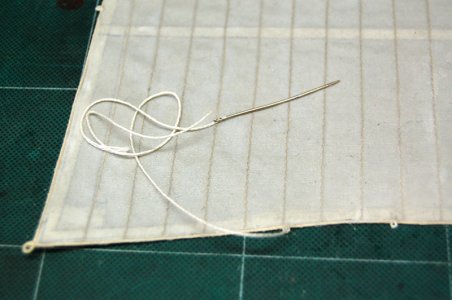
Attach a cleat to each sail.
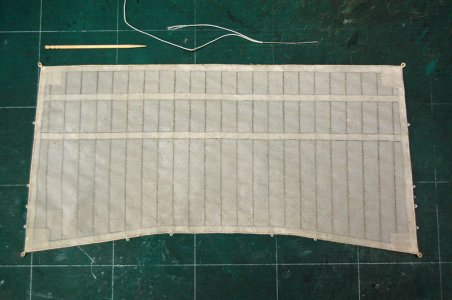
The top one is an earring, the four below are crinkles, and the very bottom is a clump... or so I intended.
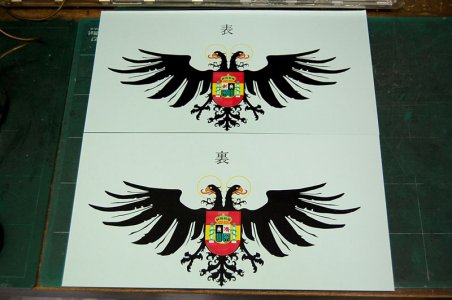
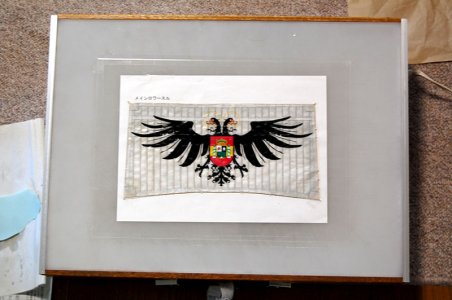
I printed the double-headed eagle decals.
The top is the front side decal, the bottom is the back side decal.
The difference is...
The patch on the belly is reversed left and right between the front and back.
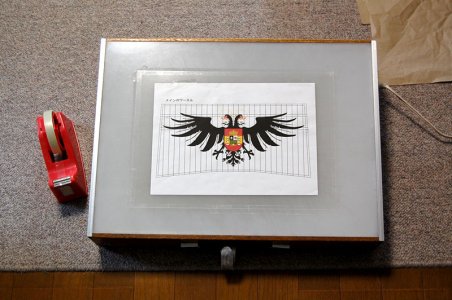
To transfer the decal onto the front side of the sail, place the illustration on the light table, lay the transparent film over it, and secure it with tape.
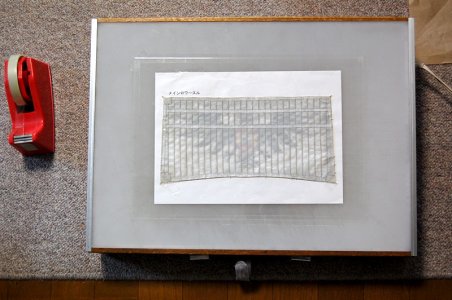
Place the main lower sail with its weathered paint finish on top.
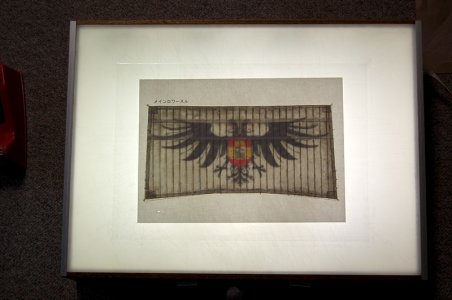
When held up to the light, an illustration of a double-headed eagle appears.
This shows where to apply the decal.
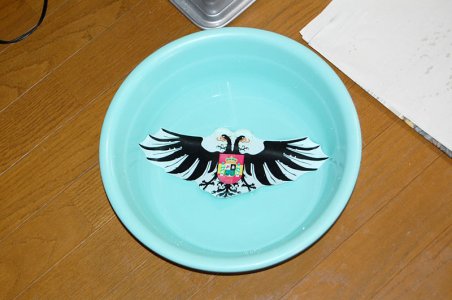
Soak the decal in water and wait for it to separate from the backing paper.
If the decal starts to peel off the backing sheet, quickly transfer it to the sail.
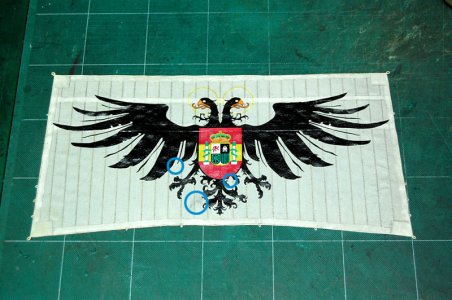
While cutting and peeling off the transparent varnish part of the decal with a design knife... the decal in the blue circle area shattered.
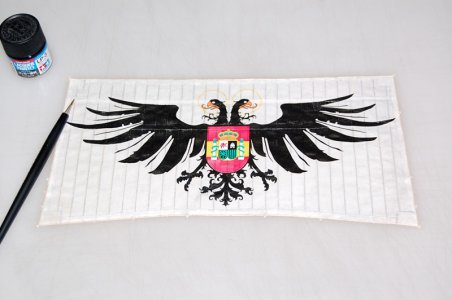
I corrected it using Tamiya lacquer paint (matte black).
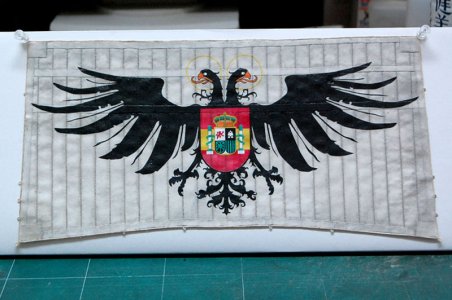
The decals and retouched areas are completely dry, so I sprayed them with matte clear lacquer to eliminate the decals' gloss.
The front side of the main lower sail is now complete.
I haven't attached the reef points yet.
I'll apply decals to the back side too, but that's a job for tomorrow.
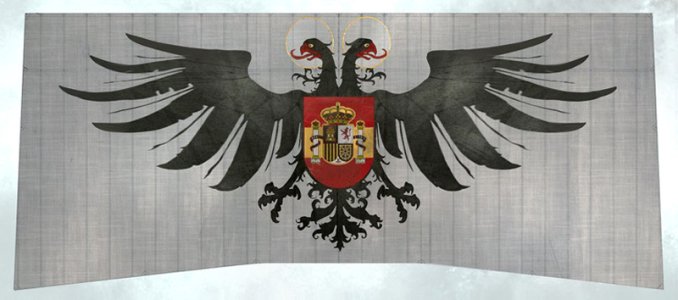
This is a concept illustration of the sail published online.
I believe this is the back side of the sail.
Please look at the illustration below.
The patch section on the belly is the same.
If you flip the patch section left to right, it becomes the illustration of the sail's front side.
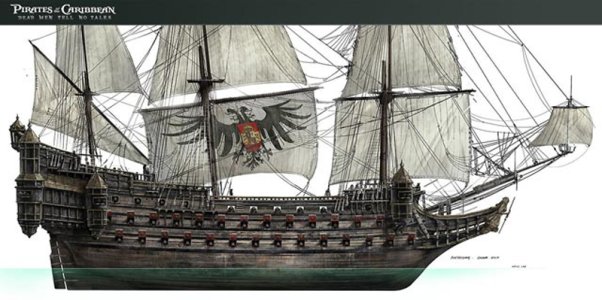
This concept art has a shallow waterline.
I'll post again after I finish the next step.
I'm impressed!
- Joined
- Jun 28, 2020
- Messages
- 550
- Points
- 353

Hello, dockattner,I'm impressed!
Thank you.
I figured out how to make it happen by thinking through the production steps and giving it a try.
There were some failures, but it was a good experience.
I managed to smooth out the sail's wrinkles with an iron once, but they come back over time.
Since they're not too bad, I'll leave it as is.
I'm satisfied that I managed to apply the decals, which I was most worried about getting right.
Indeed. I have been following your journey and was not hopeful that a decal would work on fabric. Now I know I was wrong to worry.Hello, dockattner,
Thank you.
I figured out how to make it happen by thinking through the production steps and giving it a try.
There were some failures, but it was a good experience.
I managed to smooth out the sail's wrinkles with an iron once, but they come back over time.
Since they're not too bad, I'll leave it as is.
I'm satisfied that I managed to apply the decals, which I was most worried about getting right.
- Joined
- Jun 28, 2020
- Messages
- 550
- Points
- 353

To apply decals to canvas, I thought the fabric surface needed some kind of treatment, so I sprayed it with clear lacquer.Indeed. I have been following your journey and was not hopeful that a decal would work on fabric. Now I know I was wrong to worry.
This must have worked because the decal adhered.
After applying the decal to the sail, I immediately pressed it down with a steamed towel.
The decal settled nicely onto the canvas.
After the decal dried, I applied Tamiya Decal Adhesive (with softener) to the decal's surface, pressed it again with a steamed towel, and let it dry.
Then I retouched any areas where the decal had cracked and sprayed it with matte clear lacquer.
Somehow, I managed to successfully apply the decal.
Here's how it looks.

- Joined
- Jun 28, 2020
- Messages
- 550
- Points
- 353

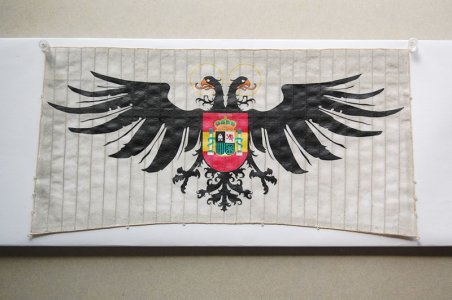
Apply the decal to the back side as well.
After applying the decal to the front side, spraying flat clear coat, and letting it dry, I also applied the decal to the back side of the sail.
I was relieved it applied without any issues.
I managed to position it exactly the same as the front.
I've included an image of the front below, so please compare them.
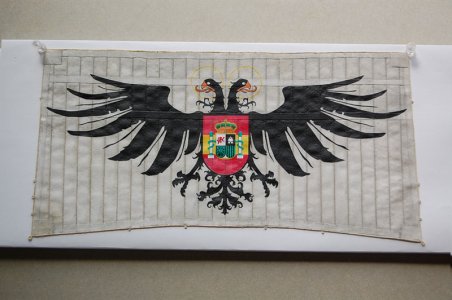
This is the front side.
I've included it so you can compare it to the back side.
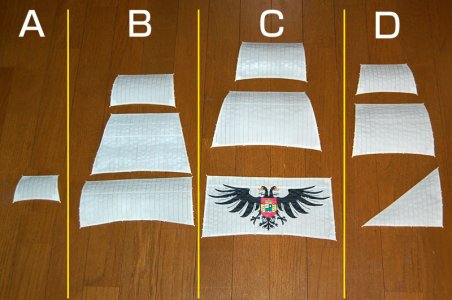
I worked on finishing the sail in August, and somehow managed to get it done.
I confirmed the sail names by checking the book ‘Sailing Ship Models - Construction Techniques’.
A: Split topsail
B: From top: Fore Top Gallant Sail
Fore Top Sail
Fore Sail
C: From top: Main Top Gallant Sail
Main Top Sail
Main Sail
D: From top: Mizzen Top Gallant Sail
Mizzen Top Sail
Lateen Sail
Sorry if any names are incorrect.
I'll add the reef points next.
- Joined
- Jun 28, 2020
- Messages
- 550
- Points
- 353

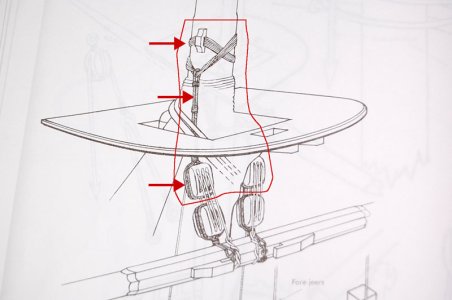
I'll try making the part outlined in red on Jeers' drawing.
It probably won't turn out exactly like this illustration, but I'll craft something similar.
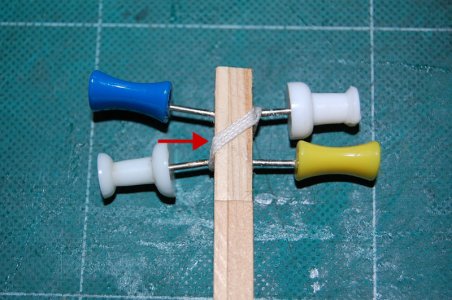
Prepare a rod of the same thickness as the mast's jeers section.
Insert four pins, wrap the rope like this, apply wood glue (white glue), and let it harden.
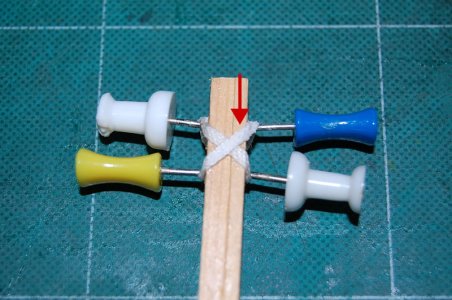
Once the wood glue on the previously wrapped rope has dried, wrap the rope like this and secure it with wood glue.
Make sure it doesn't stick to the rope below.
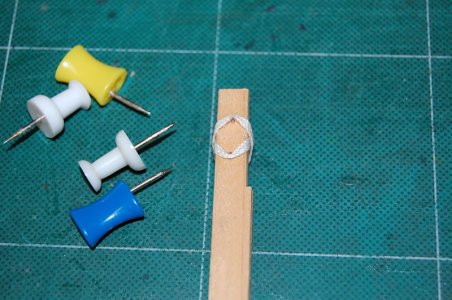
Once the coiled rope has hardened, remove the four pins.
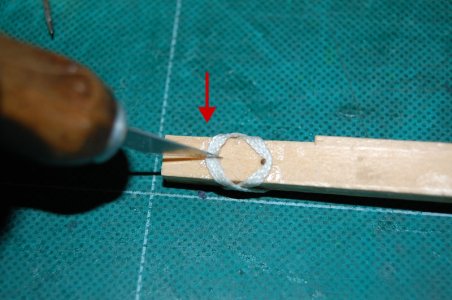
Cut along the red arrow.
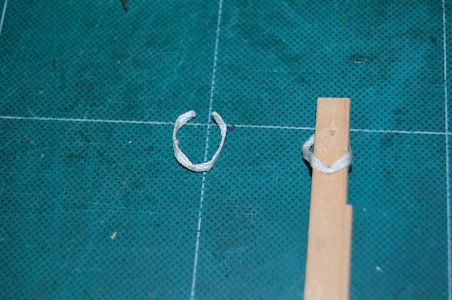
Carefully peel off the tightly wound rope.
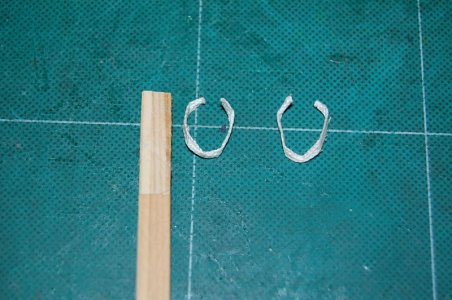
Cut and peel off the other side as well.
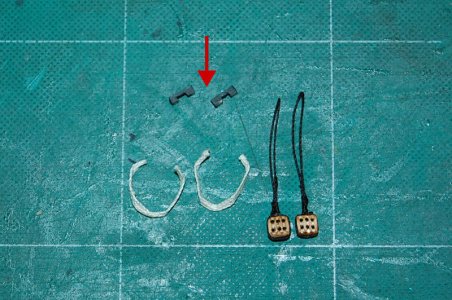
The part marked with the red arrow was machined from a 2×2mm square rod and painted German Gray.
All parts are now ready.
These will be attached to the mast.
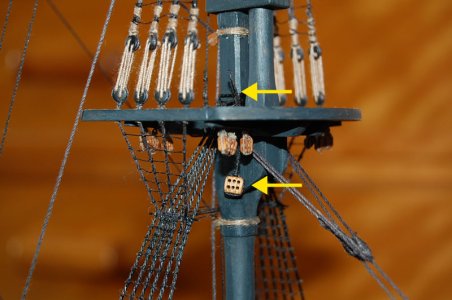
Set the rope section of the triple block and tackle to the foremast...
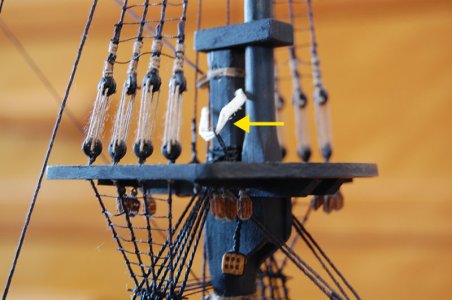
Set the tightened rope as shown by the yellow arrow.
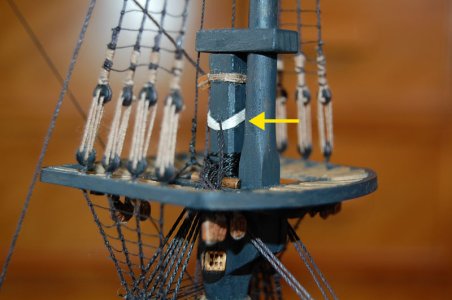
Neatly attach the rope stiffened with wood glue.
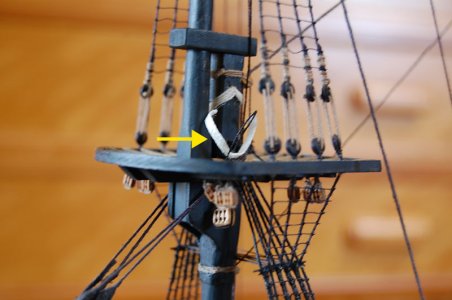
Attach the other side to the mast as shown by the yellow arrow.
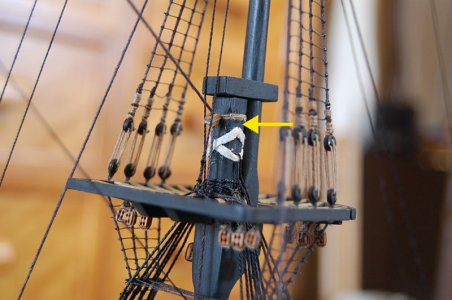
Apply wood glue evenly to the top of the hardened rope on the opposite side and attach it to the mast.
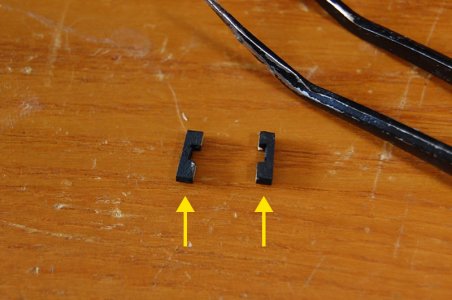
This is where this part comes into play.
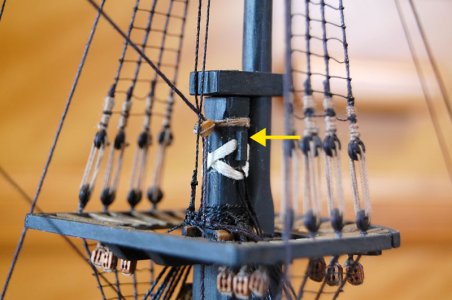
Apply adhesive to the arrowed areas and attach the parts.
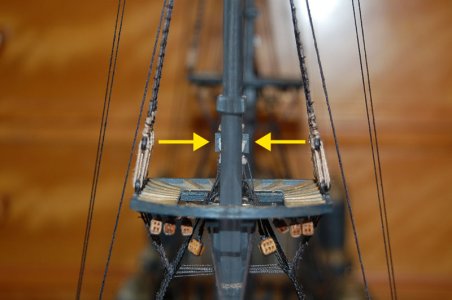
Check that the parts are attached in the correct positions.
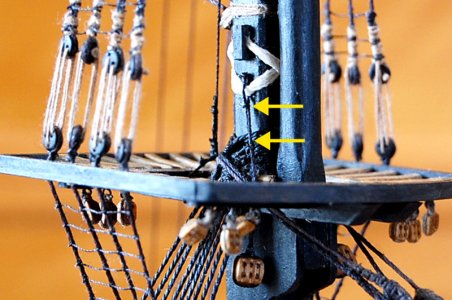
Finally, tie the rope sections of the triple pulley at the two yellow arrows with thin thread.
The foremast jeers are complete.
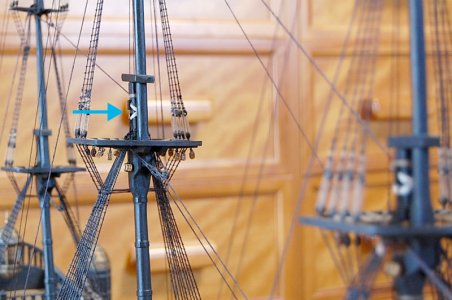
I worked on the jib section of the mainmast in the same way. (blue arrow section)
That's all for today.
That’s very neatly done, Mellpapa!
- Joined
- Jun 28, 2020
- Messages
- 550
- Points
- 353

Namabiiru, hello,That’s very neatly done, Mellpapa!
Jeers are tough to make look just like the real thing.
Since models let you separate parts and glue them together, I managed to make it look somewhat similar.

- Joined
- Dec 5, 2022
- Messages
- 1,119
- Points
- 443

Hey Mellpapa,
really very nice work. The Silent Mary looks beautiful, even if she is so dark. Actually, she should glow the way you built her. Beautiful. The tip about the Jeers really isn't bad. I'll have to remember that.
I have one more question. How does the crest feel? Does it really hold that well? As it is nothing more than foil, it may crack afterwards. May I ask why you didn't use an iron-on sticker? That would be more suitable, wouldn't it?
These are just questions, not criticisms. I wish I was as good as you. Simply great class ...
Best regards
Günther

- Joined
- Jun 28, 2020
- Messages
- 550
- Points
- 353

GIG1810, hello.Hey Mellpapa,
really very nice work. The Silent Mary looks beautiful, even if she is so dark. Actually, she should glow the way you built her. Beautiful. The tip about the Jeers really isn't bad. I'll have to remember that.
I have one more question. How does the crest feel? Does it really hold that well? As it is nothing more than foil, it may crack afterwards. May I ask why you didn't use an iron-on sticker? That would be more suitable, wouldn't it?
These are just questions, not criticisms. I wish I was as good as you. Simply great class ...
Best regards
Günther
I've been thinking about how to make the Jeers... but how should I go about it?
When considering how to assemble it as a plastic model, the only thing I could think of was separating the parts... and gluing them together... that's about all I could come up with.
Since I want to put the double-headed eagle illustration on both sides of the sail, I didn't use iron-on decals.
In that case, I decided decals would be easier to handle.
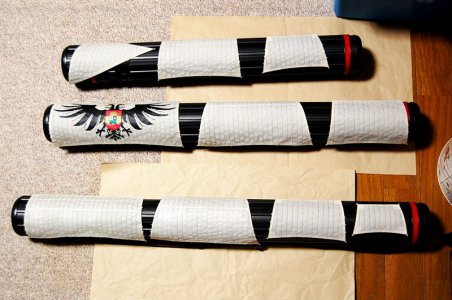
To protect the decals, I sprayed a matte clear coat onto the sail surface and wrapped it around a tube to dry (see photo).
I plan to observe it in this state for about a month.
No cracking has occurred on the decals at this point.
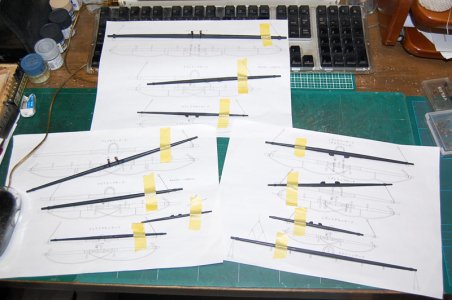
Each yard is currently painted in German Grey, and work is temporarily paused at that stage (see photo).
This month (September), I plan to proceed with installing footropes and blocks on the yards. I aim to complete all yard-related work by the end of September.
- Joined
- Jun 28, 2020
- Messages
- 550
- Points
- 353

Hey, GIG1810.Hey Melpapa,
thanks for your answer. It looks like very nice.
Best Regards
Günther
I know you were wondering if the decals were adhering well to the sails,
so I'm attaching close-up photos of the decals applied to the sails.
I think the decals are adhering quite well.
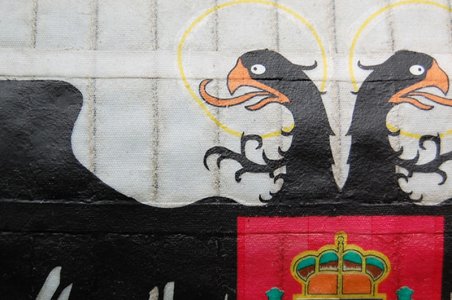
Image of the sail's front side
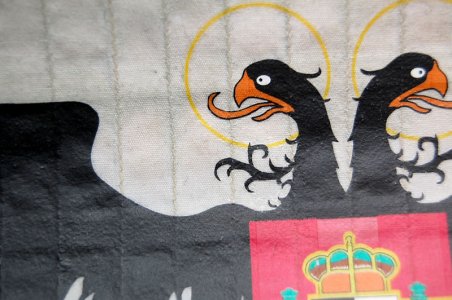
Image of the sail's back side
- Joined
- Dec 5, 2022
- Messages
- 1,119
- Points
- 443

Hey, GIG1810.
I know you were wondering if the decals were adhering well to the sails,
so I'm attaching close-up photos of the decals applied to the sails.
I think the decals are adhering quite well.
View attachment 542090
Image of the sail's front side
View attachment 542091
Image of the sail's back side
Hey Mellpapa,
That looks really nice.

Thanks to the plasticiser, the sticker has moulded itself well into the sail. Really very nice and top work. I had to smile when I chose your coat of arms as mine is almost identical. Here is a picture of the city of Cologne in Germany ...
Cheers
Günther


- Joined
- Jun 28, 2020
- Messages
- 550
- Points
- 353

Hello, GIG1810Hey Mellpapa,
That looks really nice.
Thanks to the plasticiser, the sticker has moulded itself well into the sail. Really very nice and top work. I had to smile when I chose your coat of arms as mine is almost identical. Here is a picture of the city of Cologne in Germany ...
Cheers
Günther
View attachment 542099
I was surprised to see such similar crests!!
Is this some kind of fate?
I look forward to working with you in the future.
The double-headed Eagle was a symbol of the Byzantine Empire and the Holy Roman Empire. Later, it was adopted by the Hapsburg Empire. So perhaps not a surprising coincidence, but no less a good reason to work together on your own wonderful projects.Hello, GIG1810
I was surprised to see such similar crests!!
Is this some kind of fate?
I look forward to working with you in the future.

