• Win a Free Custom Engraved Brass Coin!!!
    As a way to introduce our brass coins to the community, we will raffle off a free coin during the month of August. Follow link ABOVE for instructions for entering.

School for Shipmodel Building School for model ship building

Charlie, A comment relative to your question but I’ll leave exactly modeling techniques to others.

The great weakness of wooden ships was their longitudinal strength. In the days before modern waterproof adhesives ships were a collection of pegged together wooden parts each one trying to move vs its neighbors as the vessel flexed in a seaway. As these ships aged the sliding of individual hull planks relative to each other squeezed out the caulking. Old ships often required continuous pumping to stay afloat.

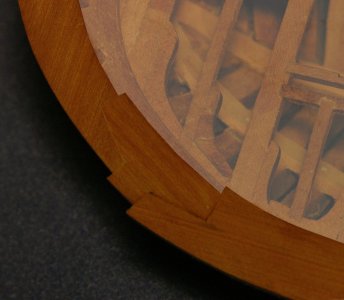
The heavy Wales, were, therefore, principal longitudinal strength members and special scarphs were often used to lock them together to resist longitudinal bending loads. There were Anchor Stock scarphs, Hook and Butt, and probably more. All of these require precision woodworking to model properly. I know nothing about your model and t what degree of historical accuracy you wish to achieve. If your model is “representative” it’s ok to skip this detail. If you’re trying to replicate exact shipbuilding technology, you should research this.

Roger
 
Bob,
Thanks for your reply. I would never have thought of a hard spot. My best option might be to spring for the extra cash and order wood of a custom length.
Roger,
The ship is the Sovereign of the Seas (1637) based on my own plans that I have posted in a thread here on SOS. I haven't been able to find a clear answer to the type of scarf joint yet, though Google's AI helpfully tells me that it is not possible to confirm there were any Welsh on the HMS London.

Ah, well, now you know why scratch builders end up investing in the tools necessary for getting out their own timbers. If you don't have a friend with a table saw, or a local adult education program at a junior college that has an accessible wood shop, I expect you'll still save money by even going to a local cabinet shop hand having them rip you out some suitably sized stock. You can always finish it to size with a plane, if need be. All it takes is a table saw with a fine-toothed blade. If you were doing a lot of cutting with expensive wood, a thin kerfed blade on a Byrnes saw would pay for itself in short order, but for occasional needs, you can make do. As you probably know, or are about to find out, the killer on any sort of milled modeling stock over two feet long is the shipping cost. It's bad enough below two feet, but, if memory serves, there's a big jump for anything longer than two feet.

Do you have a copy of The Construction of English Men of War - 1650 to 1850, by Peter Goodwin? This is the standard reference work for things like the various types of scarfs used by the Admiralty during the period(s) covered by the book. (There are many scarfs illustrated in the section on scarfs for various purposes.) The book is part of a three-volume set, the other two being one on arming English Men of War and the other on rigging English Men of War. If you don't have a copy already, and you plan to do any more scratch building of period warships, you'd do well to add these three books to your library. They are extensive and highly detailed with a tremendous number of diagrams, drawings and photographs. Be forewarned, though. They are thick "coffee table size" books and they aren't cheap. The good news is that the construction volume you need is free online in the Internet Archive. You'll have to open a free account, but that's no biggie. They won't bother you with a lot of spam. See: https://archive.org/details/constructionfitt0000good/mode/2up
 
Yup, I have Goodwin's book. Perhaps more importantly, I also have the Byrnes saw. Looks like I might be going to a cabinet shop, though.
 
Sorry to backtrack, but I have a question about wales. I'm beginning a model on which I'd like to make them from several pieces, and connect the pieces using scarf joints. Not only is this historically accurate, but my model will be rather large, so it might be difficult to find a piece long enough to make the wales from a single piece. So, what's the best way to go about this? Cut the scarfs, glue the pieces together, and then bend the wales? Try and cut a scarf into wood that's already been bent? Something else?
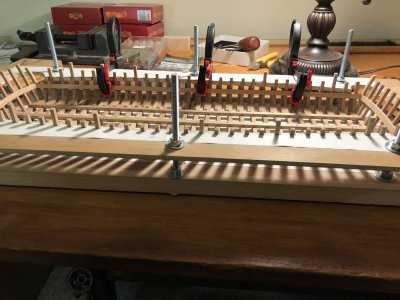
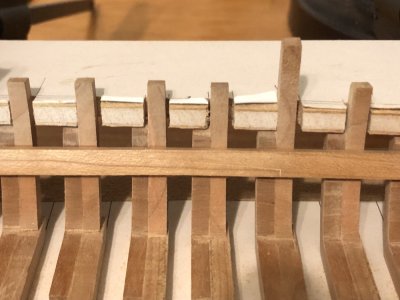
This is not a wale, but the process would be similar. The piece you see being clamped is made from 2 pieces of wood. Prior to putting in place the two pieces were joined via a scarf joint. The location the scarf joint needed to be was determined and then the ends were finished to fit.
1759030809360.jpeg

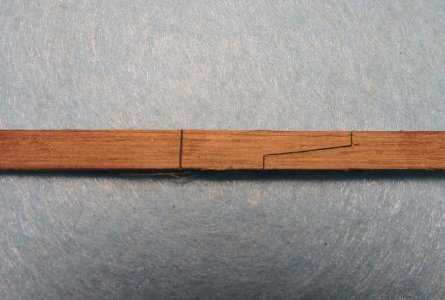
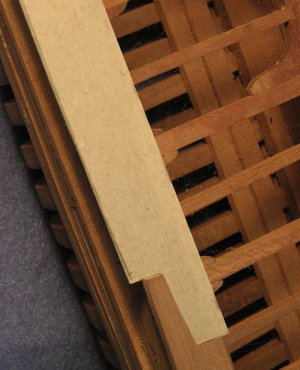
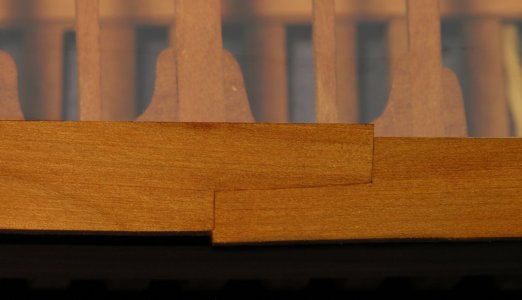
Here is the scarf joint

1759030850964.jpeg
 
thank you Greg, Bob and Roger for jumping in. Lets dive into the wales a little deeper. For this project the Sir Edward Hawke the idea is a semi-kit a transition from building a bulkhead hull to a framed hull. The focus is more on accomplishing a framed up hull rather than the finer details. With that said i made the wales as one continues piece which in the real world of ship building would not have been done. The Hawke was 57 feet long so the wales could have been done in 3 piece maybe 2. Historically accurate is iffy in most all cases with the Hawke we do not have the bones to examine so there are blanks that have to be filled in. As the Hawke project stands it is based on the original Admiralty drawings, it used archaeological evidence of ships of the size and period. filled in by general practices of the time. Question is would the model get the Howard Chapelle stamp of approval if the wales were one piece? or kicked to the curb and not a true representation of the real thing? Well that is a whole different subject.

You can simulate the joinery by simply carving in the joint once the full-length wales are installed. a finer detail that might go unnoticed or noticed " look at that darker band of wood it is made from individual pieces all joined together WOW! that is nice. Really it is one piece made to look like individual pieces, but the point is made.


DSCN0665.jpg
 
Last edited:
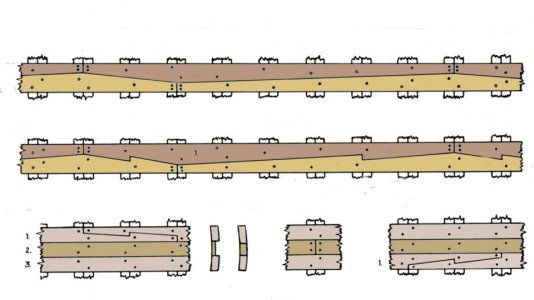
There are a number of ways wales were built i suspect it depended on the shipyard, the master shipwright and country or origin where the ship was built.
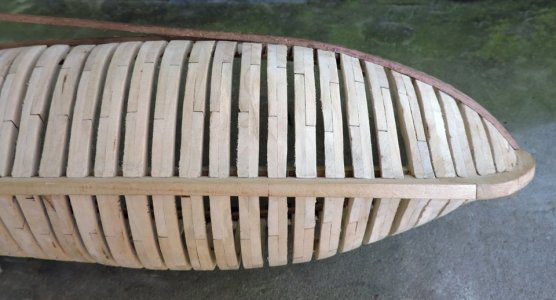
The timbers making up wales could be a simple butt like all the rest of the hull planks on the hull or the following shown below.

doing joinery on a model such as this is the next level up in model building so i will work up a "how to" on making scarf joinery in wale timbers. So check in later

img480.jpgimg481.jpg
 
Last edited:
Howard Chapelle would have given your model his stamp of approval. Although I never met him, from his writings his principal complaint was reconstructing hull lines. This was consistent with his training as a Naval Architect as it focuses on development of the vessel’s hull shape and how to calculate it’s expected performance.

He died in 1975, before the current trend to mimic exact Royal Navy shipbuilding practices existed.

Roger
 
Howard Chapelle would have given your model his stamp of approval. Although I never met him, from his writings his principal complaint was reconstructing hull lines. This was consistent with his training as a Naval Architect as it focuses on development of the vessel’s hull shape and how to calculate it’s expected performance.

true he did focus on the hull lines and Naval Architecture, but he did kick off the "better models through research" which was expanded from his original points of view on the subject of model ship building. Keep in mind model ship building was never static and has and still is undergoing an evolution. More information is available, better hi tech tools, more knowledgeable builders. This is a subject all in itself. There are critic's out there that will call me out on one long wale timber and i cannot argue they are right.
 
I am not a critic of Chapelle. A regret is that a friend and I were in the bookstall at the Smithsonian Museum of American History; I believe in 1968. It was then located next to the museum’s front door. I had just spent the then huge sum of $35.00 for a copy of his Baltimore Clipper Book. As we left the museum, a distinguished, white haired gentleman was also leaving. It was Howard Chapelle. No I didn’t stop him and ask him to sign my book.

I also regret that during my several years in Washington, I didn’t join the local ship modeling club. I don’t know why. Probably because it ever occurred to me. My view of ship modeling was that it was a solitary activity. I didn’t learn about the Nautical Research Guild until I had left the navy, moved to Marietta, Ohio, and read in the local Newsaper that they were coming to town.
Roger
 
My guess is that old Howard wouldn't mind a bit if you built a solid hull model, as long as the lines were accurate, and he wouldn't mind a bit if a scarf were drawn on a model if it accurately portrayed the actual construction of the vessel, but God help the man who might have drawn on details in the wrong place, like some of the "nail heads" on planks we see these days. I don't think Howard considered it a sin to omit a detail, but it was a real crime to include a detail that wasn't ever there.
 
There are a number of ways wales were built i suspect it depended on the shipyard, the master shipwright and country or origin where the ship was built.
The timbers making up wales could be a simple butt like all the rest of the hull planks on the hull or the following shown below.

doing joinery on a model such as this is the next level up in model building so i will work up a "how to" on making scarf joinery in wale timbers. So check in later

View attachment 547198View attachment 547199
Looking forward to that, Dave.
 
Ah, well, now you know why scratch builders end up investing in the tools necessary for getting out their own timbers. If you don't have a friend with a table saw, or a local adult education program at a junior college that has an accessible wood shop, I expect you'll still save money by even going to a local cabinet shop hand having them rip you out some suitably sized stock. You can always finish it to size with a plane, if need be. All it takes is a table saw with a fine-toothed blade. If you were doing a lot of cutting with expensive wood, a thin kerfed blade on a Byrnes saw would pay for itself in short order, but for occasional needs, you can make do. As you probably know, or are about to find out, the killer on any sort of milled modeling stock over two feet long is the shipping cost. It's bad enough below two feet, but, if memory serves, there's a big jump for anything longer than two feet.

Do you have a copy of The Construction of English Men of War - 1650 to 1850, by Peter Goodwin? This is the standard reference work for things like the various types of scarfs used by the Admiralty during the period(s) covered by the book. (There are many scarfs illustrated in the section on scarfs for various purposes.) The book is part of a three-volume set, the other two being one on arming English Men of War and the other on rigging English Men of War. If you don't have a copy already, and you plan to do any more scratch building of period warships, you'd do well to add these three books to your library. They are extensive and highly detailed with a tremendous number of diagrams, drawings and photographs. Be forewarned, though. They are thick "coffee table size" books and they aren't cheap. The good news is that the construction volume you need is free online in the Internet Archive. You'll have to open a free account, but that's no biggie. They won't bother you with a lot of spam. See: https://archive.org/details/constructionfitt0000good/mode/2up
Hi Bob,
I believe these are the books that one needs to progress in model ship making, and I will need to obtain them.
..........................................................................................................................................................................................................................................................................................................................................
I went online to visit the page you suggested and opened an account on the Archive.org site and had a look at his book.
As I am searching for details on the ship's steering wheel of the period, I spent a bit of time looking for and finding the page on the "Steering wheel". He certainly had a fair bit of information on it and including the drum also. So I will also use this book.
Do the other books exist on archive.org as well?
I would really like to purchase them all, though, but not from the other side of the planet, as they would cost a mint. Living Down-Under has its disadvantages, but heaps of advantages also. Sometimes I have to bite the bullet as the snake bites me.
Sorry Dave, to interrupt your class, just so much info I am gathering from every direction and even this old sponge still can sort of absorb.
 
Last edited:
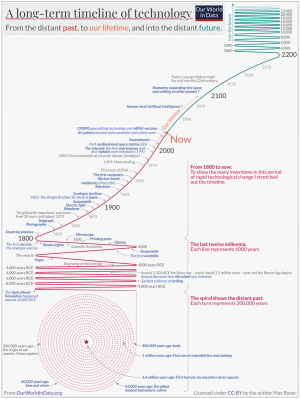
Keep in mind model ship building was never static and has and still is undergoing an evolution.
Best comment posted in a while. Like technology in general, our generation has seen more changes/advances in our lifetime than in all previous years since, well, cave men ruled. The steepest part of the curve is in our (those of us born circa 1950) generation.
Allan

1759145421799.png
 
Actually i encourage drifting of subject material in the classroom. Ideas pop up and who know where they may lead. Now drifting to what is growing in your garden , well! that is far adrift. but if it has anything to do with model building then sure go for it. At the end of this build i will save it as a PDF and clean it up so comments live here in class is OK by me.
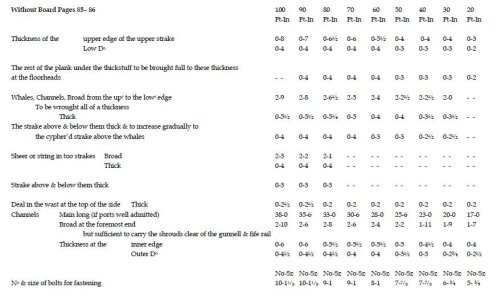
So i will drift back to wales and lets see what Humphrey's had to say

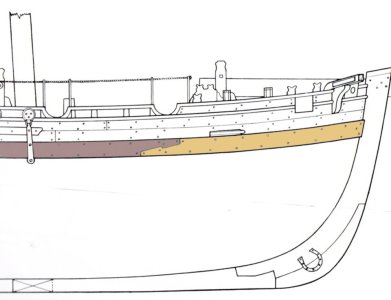
I am thinking the wales did not stand out like a belt. looking at the hull, the wales blended into the planking with thick stuff at the top and bottom. So you would not see the edges of the wales. This might be different on smaller ships

wale1.JPGwale2.JPG
 
Sorry to backtrack, but I have a question about wales. I'm beginning a model on which I'd like to make them from several pieces, and connect the pieces using scarf joints. Not only is this historically accurate, but my model will be rather large, so it might be difficult to find a piece long enough to make the wales from a single piece. So, what's the best way to go about this? Cut the scarfs, glue the pieces together, and then bend the wales? Try and cut a scarf into wood that's already been bent? Something else?

We are getting into the finer details of model building. When i join planks end to end like on a cap rail i use material wider than the finished width. I do this because it leaves me room to shave the joinery without getting to narrow on the final width. Once i get a tight fit in the joinery then i shape the entire piece.
fitting scarf use2.jpgfitting joint2.jpgjoint fit1.jpg

but for wales it is a different story because your starting with the final width so you have to be careful with cutting the joinery. I would not try and place a hook scarf where the wales are bending like at the bow or where the wale takes a compound bend and twist. so start back where the wales begin to flatten out. As Bob mentioned if you scraf the pieces together then try to bend the wale the glue at the scarf most likely will not bend creating a "hard spot".


wale26.jpg

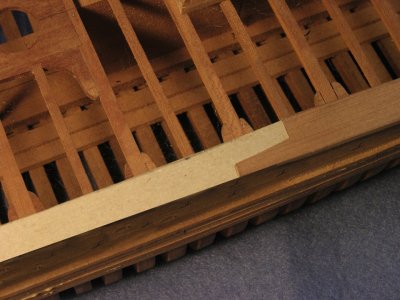
Creating the scarf as you build the wales starting with the first piece cut the scarf in the end then secure the first piece to the hull with clamps or push pins. Next cut a strip of cardboard the (type used for food packaging) the width of the strake. slip the end under the scarf of the first piece then position the strip on the hull and pin it in place. Use a knife and cut the scarf into the cardboard. now you have a template.

fitting scarf use.jpg

First priority is the placement of the wale on the hull and adjusting the scarf to fit tight. The slightest movement of the second piece makes a big difference in the fitting of the scarf.
 
Last edited:
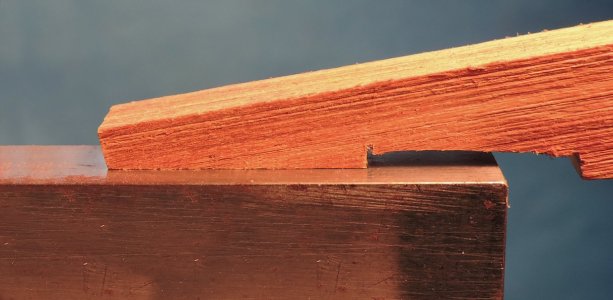
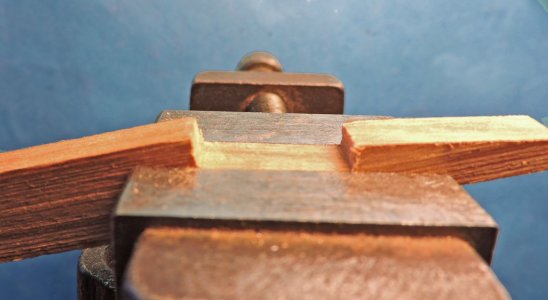
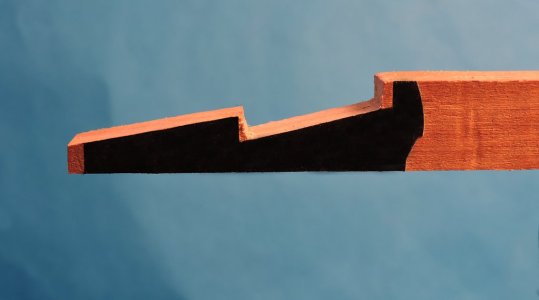
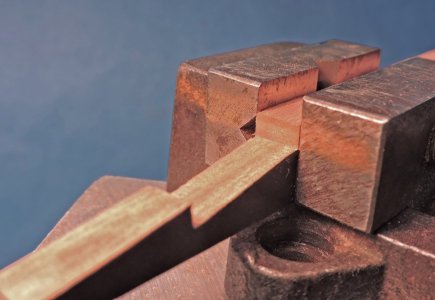
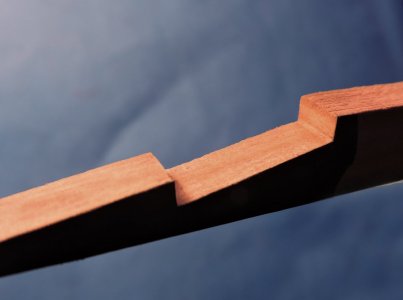
Cutting a hook scarf

An investment in a box of 100 scalpels or Exacto blades and a small vice is all you need. Once you mastered the sill of a knife and the method used here the results are equal to the best machined joinery.

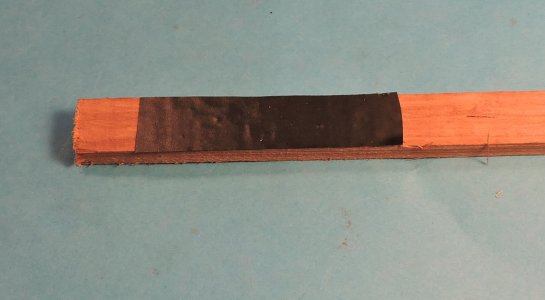
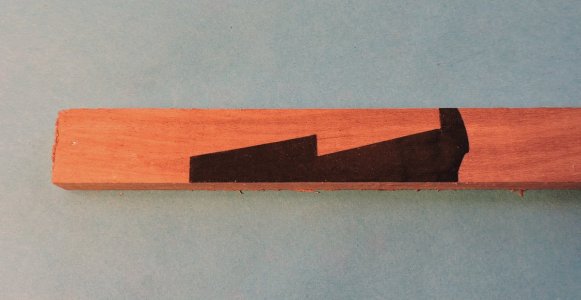
To begin, a piece of electrical tape is used where the scarf will be cut. I use the electrical tape because it gives me a clear and sharp edge.


pic1.jpg
pic3.jpg


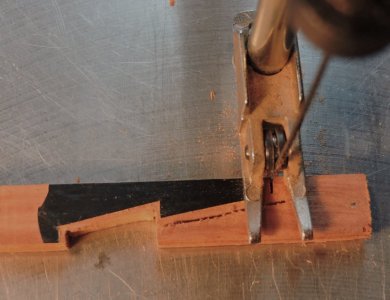
Once the shape of the scarf is cut out of the electrical tape i will rough cut the scarf with a scroll saw. If you do not have a scroll saw get a jewelers saw or rough it out with a Dremel tool.

pic4.jpg

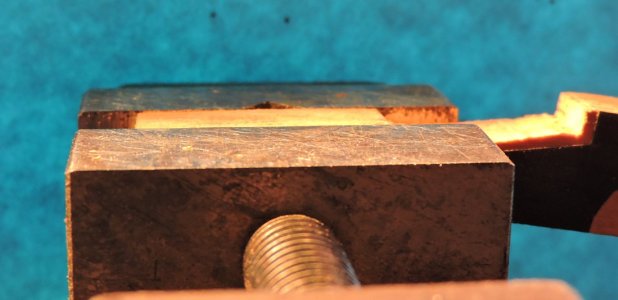
Using a knife i shave down the surface until it is level with the top of the vice.

flat1.jpg

Before removing the piece from the vice i check the surface to make sure it is flat and even.

flat2.jpgflat3.jpg

one surface done.
 
Last edited:
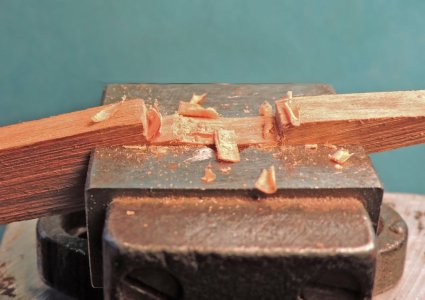
for the second surface the same is done and the piece is clamped in the vice even with the tape edge and i begin to shave down the surface. I will take big cuts and hog out the extra wood.

cutting2.jpg

As i get close to the finished surface i take small shavings until the blade glides along the top of the vice. This way i know the surface of the wood if flat and even from side to side.

cutting3.jpgcutting1.jpgcutting4.jpg

finishing of the horizontal surfaces


cutting5.jpg
 
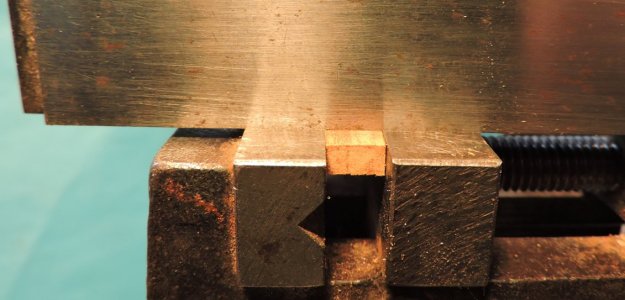
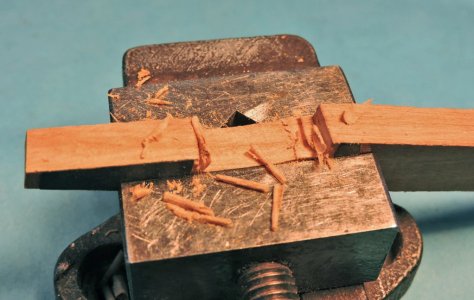
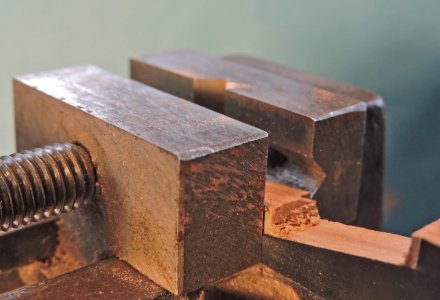
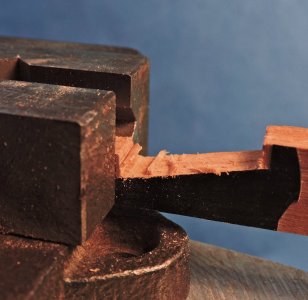
For the hook part of the scarf the same is done and the piece is clamped in the side of the vice. Be sure the piece is sitting on the bottom of the vice to insure once the two parts of the scarf are together the timber will sit flat.
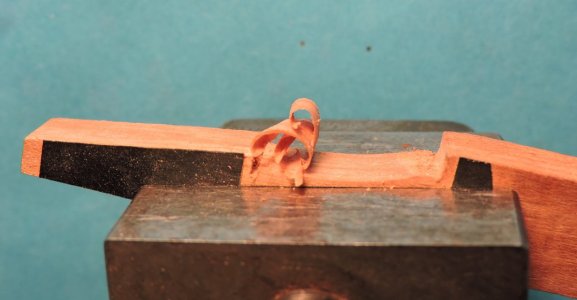
Cutting the end grain is a lot harder than shaving along the grain. This is the reason i use scalpels because they are extremely sharp. Exact-O blade also will do the job but always use a new sharp blade for each surface you cut. The blades are not wasted because you can use them for less critical cutting. Cutting the end grain i take shallow cuts producing very thin shavings. It will take a few cuts but slowly creep up to the surface of the vice.
This is not a rush job, make each cut deliberate and inspect your work after every other cut. The cutting is not straight down, the cuts are more of a slicing from side to side. The final surface will be perfectly square and flat.

hook1.jpghook2.jpghook3.jpg

Finally all the surfaces are cut. The goal in cutting the first half of the hook scarf is to make sure all the surfaces are flat. The horizontal ends are at a 90 degree to the bottom edge, this is important because when the second half is being cut and fit you will want it to slide straight down along the end surfaces. If these ends were slightly at an angle you will get a gap at the top or bottom when the two halves are put together


finish.jpg
.
 
Back
Top