-

Win a Free Custom Engraved Brass Coin!!!
As a way to introduce our brass coins to the community, we will raffle off a free coin during the month of August. Follow link ABOVE for instructions for entering.
-

PRE-ORDER SHIPS IN SCALE TODAY!
The beloved Ships in Scale Magazine is back and charting a new course for 2026!
Discover new skills, new techniques, and new inspirations in every issue.
NOTE THAT OUR FIRST ISSUE WILL BE JAN/FEB 2026
You are using an out of date browser. It may not display this or other websites correctly.
You should upgrade or use an alternative browser.
You should upgrade or use an alternative browser.
BALDER, Vlaardingen Herring Lugger from 1912, scratch build scale 1:50 Plate-On-Frame
- Thread starter Peter Voogt
- Start date
- Watchers 66
true storySuch wonderful modeling, Peter!
Such wonderful modeling, Peter!
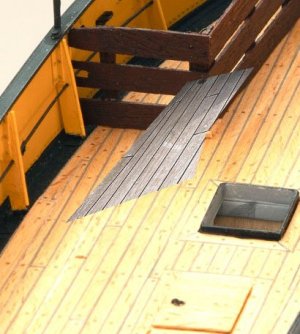
View attachment 548758
The floor is so good made by you. Only the colour is different (wet, light from sun) But the nails are in the same size, even the cracks are the same size.
It is all in the details, magnificent Peter.
It's with details like these that a model really comes alive, very nicely crafted (like always).
Thanks, Paul, Stephan, Johan, Grant and the others with the ‘likes’. Your posts, input, nice words, compliments, likes etc. still stimulates me to go on.true story
Regards, Peter
Last edited:
To determine the position of the other crib, I actually had to first make the hatch for the net hold. But that hatch consists of two interlocking parts. Here's a nice drawing from the Amsterdam archives:
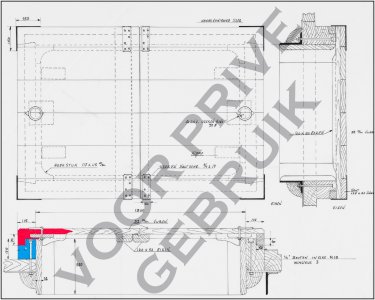
Bottom left: the frame in blue and the hatch fits around in red.
Like every new part, it's a challenge to recreate this to scale. It's also a matter of 'simplification'.
So first, just a regular hatch. The example just behind the breeds crib:
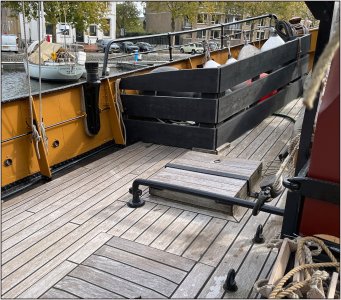
With this as the result:
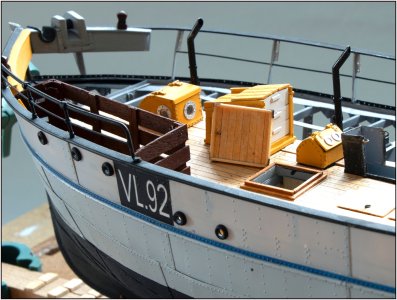
The hardwood frame around the deck opening. And at the bottom of the hatch, the frame that fits around the opening.
It fits again:
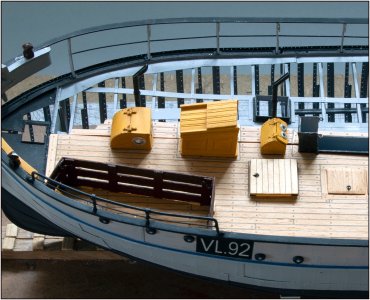
But... the hatch has become proportionally much too large. Back to the drawing board...
Second attempt, the frame around the opening was removed and the hatch reduced in size:
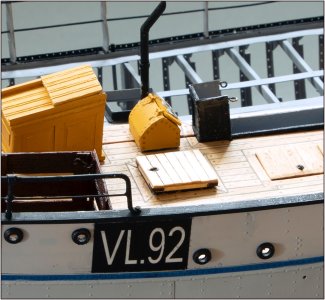
That's better. You can now also see the mitered deck planks around the opening.
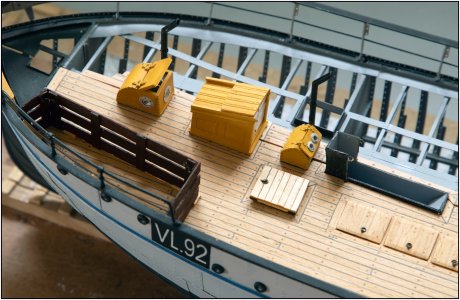
It also looks better from above.
It's a good thing I didn't make all three lists at once.
Regards, Peter

Bottom left: the frame in blue and the hatch fits around in red.
Like every new part, it's a challenge to recreate this to scale. It's also a matter of 'simplification'.
So first, just a regular hatch. The example just behind the breeds crib:

With this as the result:

The hardwood frame around the deck opening. And at the bottom of the hatch, the frame that fits around the opening.
It fits again:

But... the hatch has become proportionally much too large. Back to the drawing board...
Second attempt, the frame around the opening was removed and the hatch reduced in size:

That's better. You can now also see the mitered deck planks around the opening.

It also looks better from above.
It's a good thing I didn't make all three lists at once.
Regards, Peter
Last edited:
Continued with the remaining hatches:

A: the test hatch from the previous post.
B: the sealing of the cove of the 'kossing';
C: the double hatch on the net hold;
D: the hatch above the aft storage area.
The double net hatch is used on the Balder to close off the stairs to the large space in the former barrel holds.
First, hatch 'D' was made to further develop the skills:
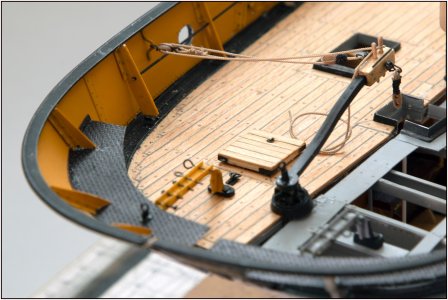
The cover wood for the hatches is lighter in color than the wood on the deck. The specifications and drawings clearly state 'pine wood'.
Then 'B' and 'C':
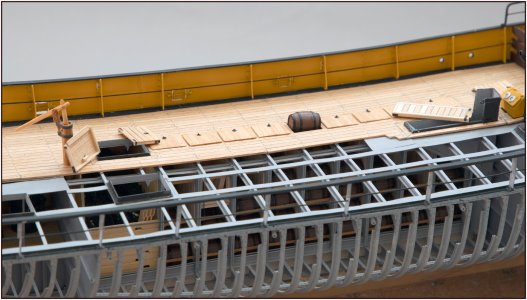
The net hatch consists of two parts. A small ridge on the inside near the closing strip prevents a half hatch from sliding open. The kossing hatch also has such a ridge. It is also more or less a half hatch because it has no closing strip on the mast side.
It doesn't matter which of the two halves is removed or replaced first:
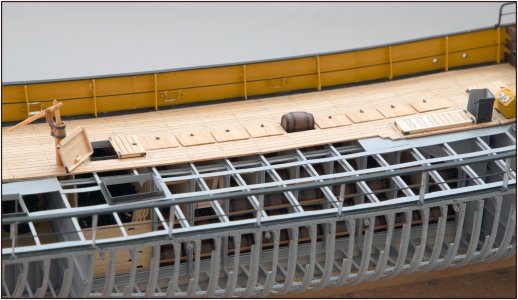
The hatch by the water pump has a lip that fits under the other part. The kossing hatch is made slightly differently. It has two longitudinal strips on top, with cross planks between them.
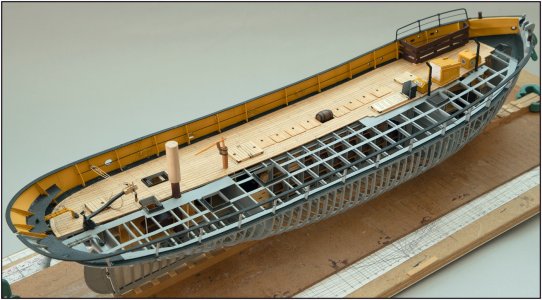
Here's an overview till now:
Two more openings to close: the entrance to the rear cabin and the skylight above.
Regards, Peter

A: the test hatch from the previous post.
B: the sealing of the cove of the 'kossing';
C: the double hatch on the net hold;
D: the hatch above the aft storage area.
The double net hatch is used on the Balder to close off the stairs to the large space in the former barrel holds.
First, hatch 'D' was made to further develop the skills:

The cover wood for the hatches is lighter in color than the wood on the deck. The specifications and drawings clearly state 'pine wood'.
Then 'B' and 'C':

The net hatch consists of two parts. A small ridge on the inside near the closing strip prevents a half hatch from sliding open. The kossing hatch also has such a ridge. It is also more or less a half hatch because it has no closing strip on the mast side.
It doesn't matter which of the two halves is removed or replaced first:

The hatch by the water pump has a lip that fits under the other part. The kossing hatch is made slightly differently. It has two longitudinal strips on top, with cross planks between them.
Here's an overview till now:

Two more openings to close: the entrance to the rear cabin and the skylight above.
Regards, Peter
You have a keen eye for the details and then the skills to bring them to the model. My respect, Peter!
I’m in full agreement with Paul — your skill truly sets this model apart as a one-of-a-kind creation. Bravo!
Looks like we are used to, just fantastic.
Good morning Peter. You have outdone yourself on this model.....and that is saying something. Brilliant details on a master piece. Cheers GrantContinued with the remaining hatches:
View attachment 549700
A: the test hatch from the previous post.
B: the sealing of the cove of the 'kossing';
C: the double hatch on the net hold;
D: the hatch above the aft storage area.
The double net hatch is used on the Balder to close off the stairs to the large space in the former barrel holds.
First, hatch 'D' was made to further develop the skills:
View attachment 549701
The cover wood for the hatches is lighter in color than the wood on the deck. The specifications and drawings clearly state 'pine wood'.
Then 'B' and 'C':
View attachment 549702
The net hatch consists of two parts. A small ridge on the inside near the closing strip prevents a half hatch from sliding open. The kossing hatch also has such a ridge. It is also more or less a half hatch because it has no closing strip on the mast side.
It doesn't matter which of the two halves is removed or replaced first:
View attachment 549703
The hatch by the water pump has a lip that fits under the other part. The kossing hatch is made slightly differently. It has two longitudinal strips on top, with cross planks between them.
Here's an overview till now:
View attachment 549704
Two more openings to close: the entrance to the rear cabin and the skylight above.
Regards, Peter
You have a keen eye for the details and then the skills to bring them to the model. My respect, Peter!
I’m in full agreement with Paul — your skill truly sets this model apart as a one-of-a-kind creation. Bravo!
I agree with above 2, and small fingers too.
Looks like we are used to, just fantastic.
Thanks for all this compliments and nice words (again), Paul, Jim, Stephan, Maarten and Grant.Good morning Peter. You have outdone yourself on this model.....and that is saying something. Brilliant details on a master piece. Cheers Grant
But also thanks for the bunch of likes!
Regards, Peter
Thanks, Johan. Much appreciated.Next level modelling...
Regards, Peter
Based on the model for the forecastle, a second one was made:
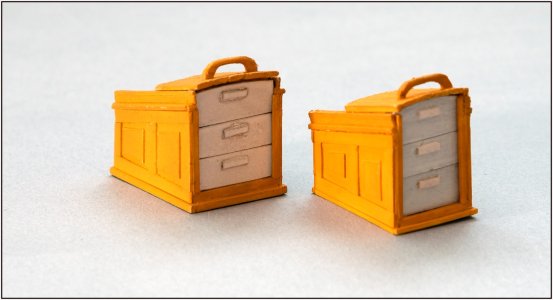
It's slightly smaller. Only the captain and helmsman need to enter. Now both with a handle.
The last thing to be closed is opening for the skylight.
This is how it is on the Balder:
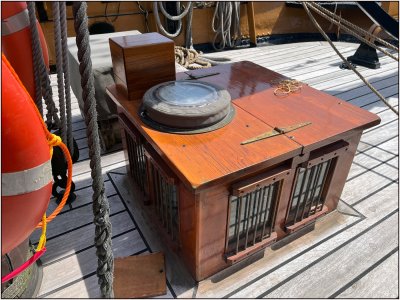
With the compass at the front and two beautiful copper hinges.
The bars protecting the windows are set in fairly large bars.
However, it was redesigned to be multifunctional:
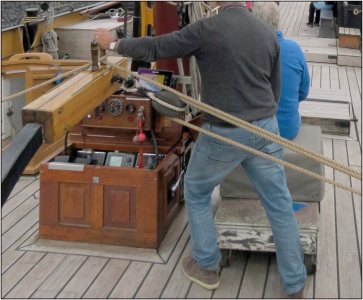
The rear section of the hood can be folded up. All the necessary equipment is installed underneath. The throttle for the engine is on the side.
There was a drawing in the Amsterdam archives:
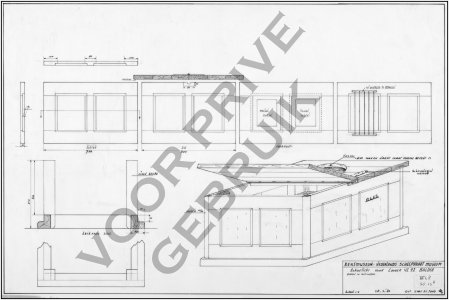
That's always helpful for dimensional control.
All the parts were cut to size:
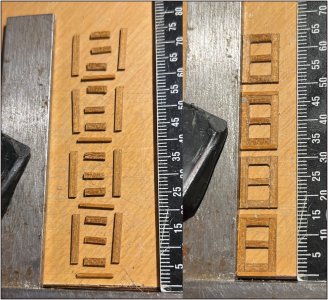
And glued together panel by panel, including the corner posts in two of them.
For the bars, I drilled 0.5 mm holes every 2 mm in 1x1 mm strips. 0.5 mm brass rod fit into these.
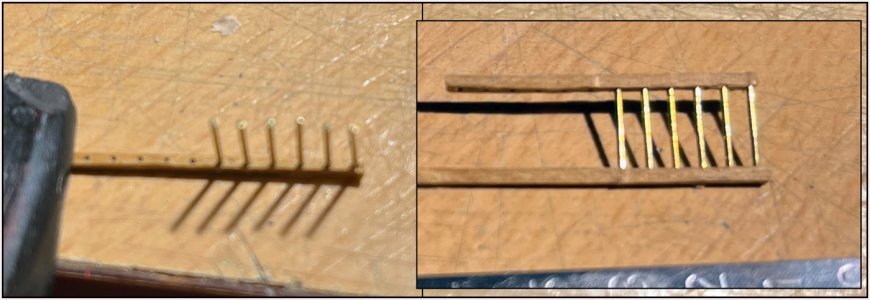
And I managed to fit the 6 bars into the top holes four times per frame. Next time I will make them sharp .........
Then I put everything in the Ballistol to burnish:
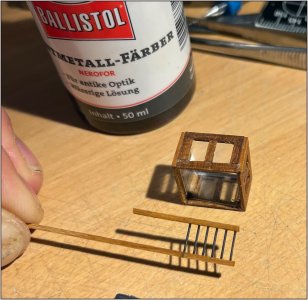
Wood and all. No problems.
This is what the aft deck looks like:
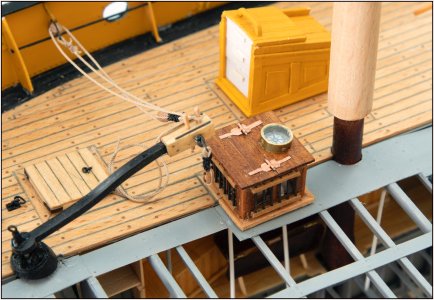
With working hinges made of brass foil and a 6 mm compass in a brass frame and cover glass. (No: the compass is not functional ........... )
)
With the hatch open, without any equipment. Just to air it out.
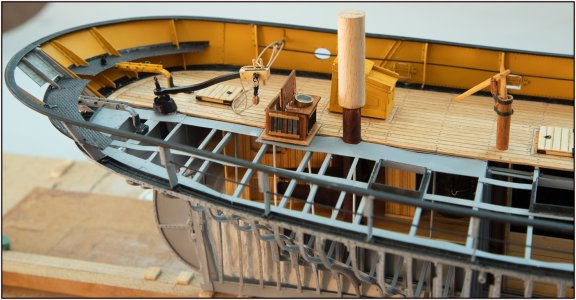
Thanks to the light, both halves are now held together at the rear, with a continuous railing.
Now all the openings have their closures:
Now I'll start on the metalwork.
Regards, Peter

It's slightly smaller. Only the captain and helmsman need to enter. Now both with a handle.
The last thing to be closed is opening for the skylight.
This is how it is on the Balder:

With the compass at the front and two beautiful copper hinges.
The bars protecting the windows are set in fairly large bars.
However, it was redesigned to be multifunctional:

The rear section of the hood can be folded up. All the necessary equipment is installed underneath. The throttle for the engine is on the side.
There was a drawing in the Amsterdam archives:

That's always helpful for dimensional control.
All the parts were cut to size:

And glued together panel by panel, including the corner posts in two of them.
For the bars, I drilled 0.5 mm holes every 2 mm in 1x1 mm strips. 0.5 mm brass rod fit into these.

And I managed to fit the 6 bars into the top holes four times per frame. Next time I will make them sharp .........
Then I put everything in the Ballistol to burnish:

Wood and all. No problems.
This is what the aft deck looks like:

With working hinges made of brass foil and a 6 mm compass in a brass frame and cover glass. (No: the compass is not functional ...........
With the hatch open, without any equipment. Just to air it out.

Thanks to the light, both halves are now held together at the rear, with a continuous railing.
Now all the openings have their closures:

Now I'll start on the metalwork.
Regards, Peter
Last edited:
- Joined
- Jul 18, 2024
- Messages
- 475
- Points
- 323

So ... if this is the standard ... really nice! In awe.
- Joined
- Sep 3, 2021
- Messages
- 5,181
- Points
- 738

I wouldn't necessarily say this is the standard; it is a standard, but not for us, common mortals...So ... if this is the standard ... really nice! In awe.
So ... if this is the standard ... really nice! In awe.
Thanks, Marco and Johan. That’s the nice think with ‘a standard’: every body has it’s own and it remains ‘the standerd’.I wouldn't necessarily say this is the standard; it is a standard, but not for us, common mortals...
Regards, Peter
Thanks, Stephan. I have no idea what kind of wood it is. I found 3 types of dark wood in my stock. And treated with linseed-oil this was the one I liked te most. And luckily it was enough to make the sky-light.so special, also because you don't use boxwood or castello to make these tiny parts. Looks like walnut?
Regards, Peter

