• Ships of Scale has incorportated an extra level of security when you log In. Please follow on-screen prompts to acknowledge that you are not a robot via a "Check Box" or a "Pictorial Check Box Puzzle". This is needed due to higher level of AI Activity Security.
  • SUBSCRIBE TO SHIPS IN SCALE TODAY!

    The beloved Ships in Scale Magazine is back and charting a new course for 2026!
    Discover new skills, new techniques, and new inspirations in every issue.

    NOTE THAT OUR NEXT ISSUE WILL BE July/August 2026
  • Win a Free Custom Engraved Brass Coin!!!
    As a way to introduce our brass coins to the community, we will raffle off a free coin during the month of August. Follow link ABOVE for instructions for entering.

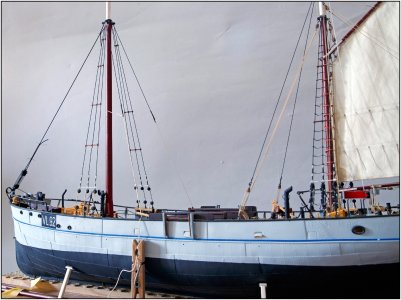
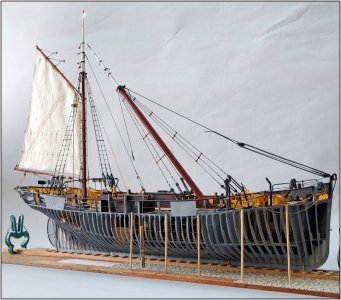
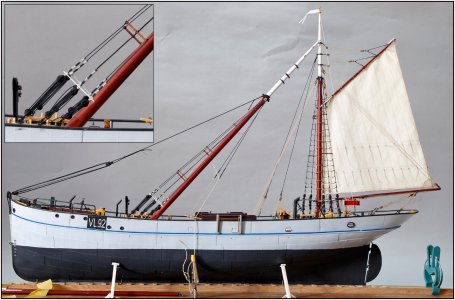
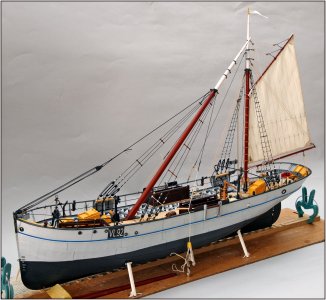
BALDER, Vlaardingen Herring Lugger from 1912, scratch build scale 1:50 Plate-On-Frame

The best life Peter......and the best models.
Thanks, Grant.
First photo with just the Mizzen up looks like fun in that choppy sea. Cheers Grant
As I walked across the deck with that swell, I got a déjà vu feeling at the fairground attraction CakeWalk. When she plunged into a valley, you took some very light steps.:)
And a big plus: no one got seasick.:rolleyes:
Regards, Peter
 
Started working on making the shrouds and served them.
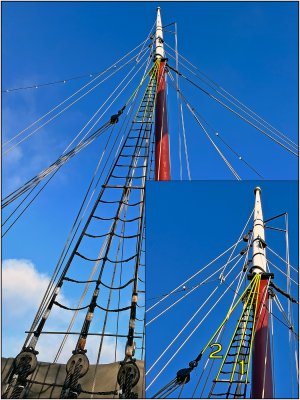
In addition to the forestay, the mainmast is fitted with 3 shrouds and a 'bak'stay on each side.
1174 Shrouds.jpg
From the restoration and old specifications:
-The forward two main ropes are made of a single cable wrapped around the mast with a braided loop. This is called the 'spanwant' (tensioning rigging).
-The third sidestay and the 'bak'stay are made of a second cable. This is called the 'hangerspan' (hanger span).
-All shrouds are covered with tarred rigging twine.
-A spacious thimble has been spliced into the aft leg. The double-sheave upper block with sister hooks and dog's eye of a long four-runner is hooked into this. The four-runner must be long enough to be able to direct the masthead against the mizzenmast when the mast is lowered.
-The double-sheave lower block is hooked into an eye on the bulwark.

On the insert:
1: the tensioning rigging.
2: the hanger span.

In a previous post, I already described that the tackles between the deadeyes of the main mast is released when lowering the main mast. This is because the mast's pivot point is located well over a meter below the deck in the 'kossing'. Therefore, the mast does not pivot around the eyes of the chainplates.
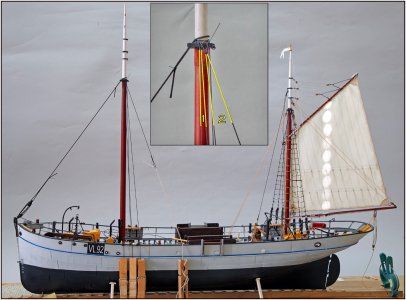
I installed the shrouds and backstay with the mast standing:
1175 Shrouds.jpg
I passed the 3 shrouds and a temporary line from the eye splice of the 'bak'stay through the eyes placed on the bulwark. This is because the shrouds, with their hooked deadeyes, pivot around them.
I kept the 4 ends under tension with clothespins, which I secured at the height of the blue line.
Also on the insert are the tension rigging and the hanger span.

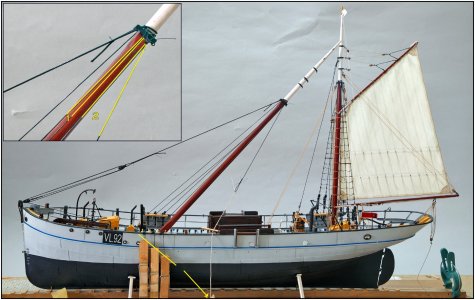
To determine the length of the tackles for the shrouds and the ‘bak’stay, I then lowered the mast:
1176 Shrouds.jpg
The three clothespins show that the middle shroud has risen slightly. The front one is much higher, so that tackle needs to be loosened. The 3rd one has dropped and needs to be tightened.
It will probably be adjusted slightly once I have attached the upper deadeye blocks to the shrouds and secured the spreader bar. That way, the spread of the 3 shrouds remains intact.
The line with the clothepin on the ‘bak’stay is lowered even more. Therefor the tackle was looking long in standing position.

All in all, a nice little case of geometry.
Regards, Peter
 
Last edited:
I did not foresee the amount of adjustment to the shrouds to lower the mast - but seeing it in your demonstration one can't argue against facts. It must have been quite a dance in rolling seas to perform this maneuver. Brilliant as always, Peter.
That’s for sure, Paul. That’s why I wrote last Friday:
We all here aboard have great respect for the fisherman who sailed this for weeks on open see.
When they moved from fishing ground to fishing ground, mast up, mast down, mast up …..
Regards, Peter
 
I cut the shrouds to size and secured each with 3 lashings around the deadeyes:
1177 Shrouds.jpg
And attached the wooden spreader bars to each shroud:
1178 Shrouds.jpg
On the starboard side, the 'double' spreader bar still needs to be installed, but the supply of small magnets ran out. There, too, I have to cut the shroud to be able to separate the two halves.

After threading the lanyards between the deadeyes, the moment I have been working towards lately arrived: lowering the mast with shrouds to see how the lanyards behave.
1179 Shrouds.jpg
The lanyards have been set 'loose' and the shrouds remain nicely in shape:
1180 Shrouds.jpg
I think the forestay will also be tightened a bit later when the gaff and the stowed mainsail are hoisted to the mast.

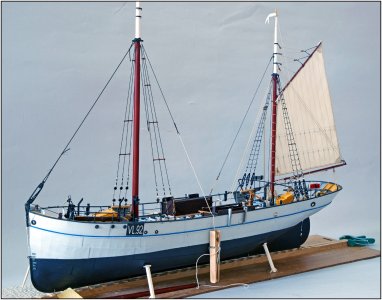
With another overview picture:
1181 Shrouds.jpg
It is actually a bit of a relief that the model can be rigged in this way.
The mast can be raised again to attach the weave ratlines.
Regards, Peter
 
Last edited:
What a stunning model! Your attention to and accuracy for all the small parts and your great ability to replicate to the smallest detail is a wonder in itself. Your build is quite astonishing. You have skills that many of us can only dream about.
 
I have to admit, I didn't even realize she didn't have an engine! It certainly wasn't because I wasn't paying attention to your build. Quite the opposite, I was so captivated by the model itself and by watching your construction process unfold that I never stopped to think about the propulsion.

What really held my attention was the incredible level of detail and the way you've captured the character and appearance of the original vessel. Every update revealed another beautifully executed feature, making it feel less like looking at a model and more like seeing the real ship in miniature. That's a real credit to your craftsmanship, Peter. Thanks for teaching us something new about these wonderful old herring luggers, and congratulations on one of the unique builds you share.
 
What a stunning model! Your attention to and accuracy for all the small parts and your great ability to replicate to the smallest detail is a wonder in itself. Your build is quite astonishing. You have skills that many of us can only dream about.
Thanks for this nice words and compliments, Roger. That are the pros nd cons of scratch building and having the example near by in scale 1:1.;) And this build has certainly pushed my boundaries.
Regards, Peter
 
Stunning workmanschip Peter. Not only the fine details on this scale, but then even make it possible to lower the mast. Hats off.
You also thanks for this nice words and compliments, Herman.:)
One of the major headaches from almost the very beginning was: will the main mast shaft hold up?:rolleyes: It is secured on the port side in the side plate of the ‘kossing’. On the starboard side, the end rests in a hole, but that is only the case with the composite sections.
A kind of support plate still needs to be added to the end of the shaft, but that can only be done once the mast is permanently set. Here too, I have had plenty of time to think about this, but whether it will work out..;). It will most certainly be captured in a photo later.


Regards, Peter
 
Last edited:
Back
Top