






Imitation bolts.
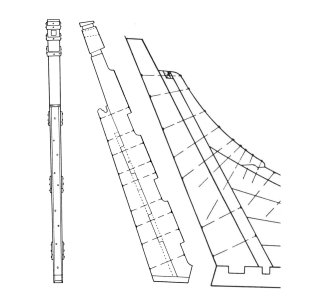
I've already discussed the issue of bolts, and it's quite a controversial topic, especially given the scale involved.
So what is a bolt? Firstly, it's not a thread and nut, but a rod of forged steel or copper, riveted on one end in a forge to form a saucer-shaped head, not a mushroom-shaped one. Then there are two options.
First, if the length is very long (a stem or sternpost assembly), the bolt was driven into several elements (not all the way through), and because it was driven at different angles, the bolts fused the elements together.
And the second option is that the rod was driven from the outside, without heating, into a hole smaller than the bolt (so that the bolt would work across its entire length, not just at its ends). Then, the head was pressed against a kind of anvil on the outside, and a washer was inserted into the inside, and the rod was cold-riveted so that the metal would flow onto the washer, thus preventing it from falling off.
Both ends were treated against corrosion. Sometimes the bolt was recessed and covered with a wooden plug, but more often, a small indentation was simply made on the outside so the head was flush with the surface and did not interfere with the movement of the bolt through the water.
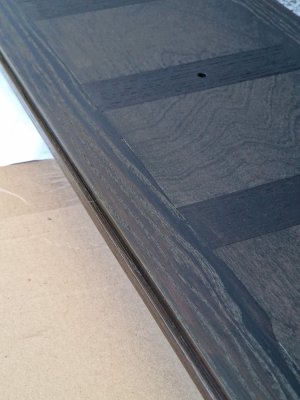
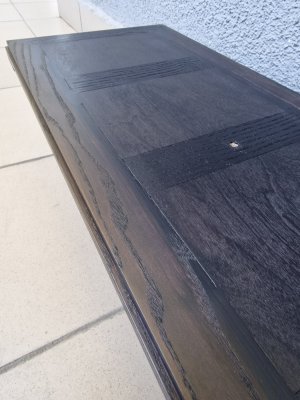
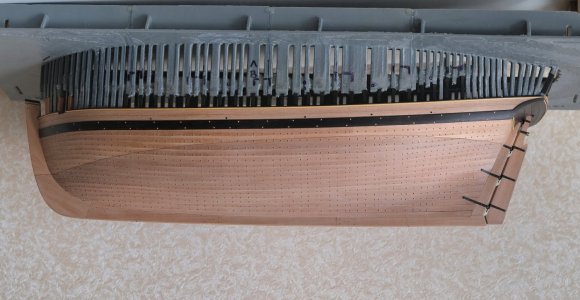
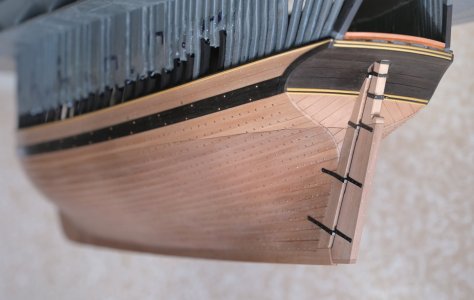
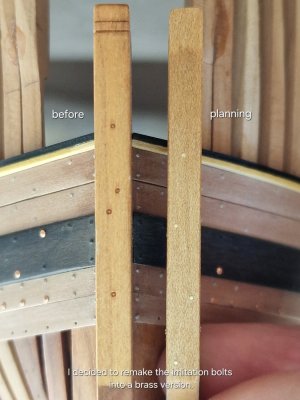
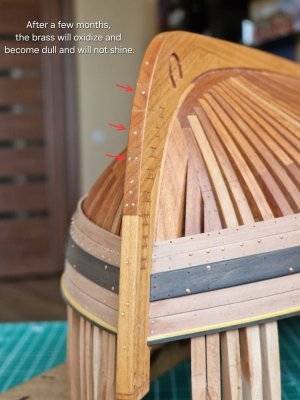
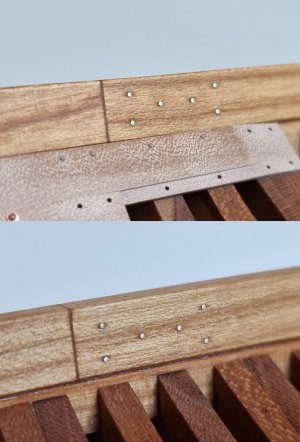
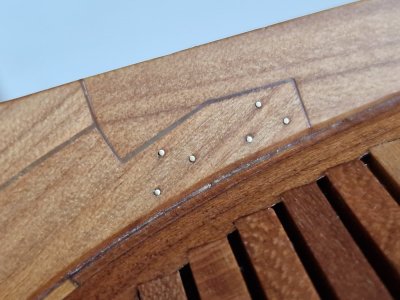
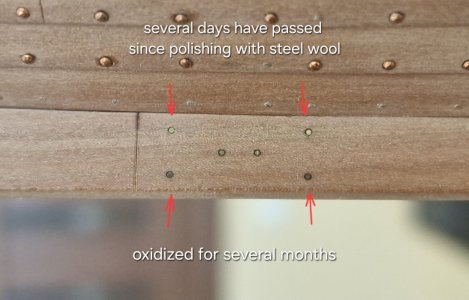
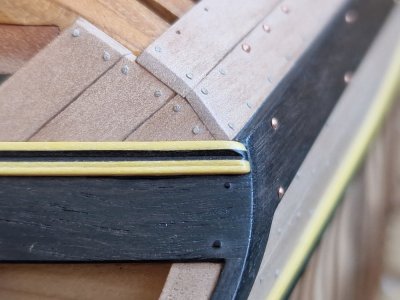
The dimensions were naturally standard for each rank and size of ship. On a small cutter, the bolts were naturally an order of magnitude smaller than on, say, a frigate. If we recalculate to scale, we have specific dimensions, but we also have to consider the model's visibility. Sometimes we have to reduce or increase certain parameters to avoid overloading an element or, conversely, to make it more visible. Therefore, I made the bolts almost flush with the wood, almost flat, and slightly smaller, 0.5 mm, like the nails (dowels). I chose brass because my copper bolts are copper, and I wanted to make the forged ones a different color. I didn't like the plain blackened ones, so I left the pure brass. After many months, it oxidizes and becomes very dark, somewhat mimicking the appearance of corroded metal. But that's my choice; I'm simply explaining my reasons.
Also, the bolts were usually not positioned precisely in the center of the part. They were typically placed alternately on either side for increased rigidity and to prevent the wood from splitting along the drill line.
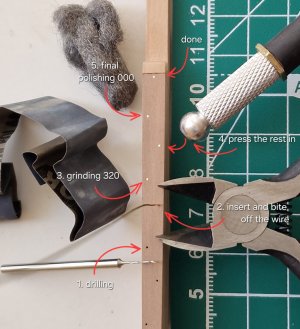
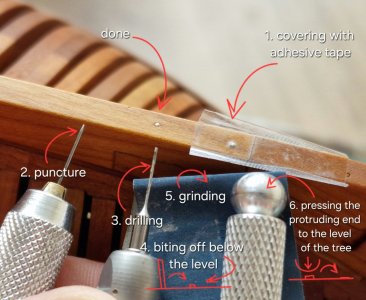
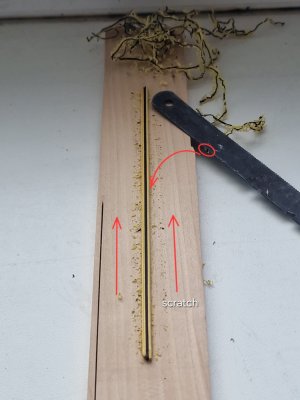
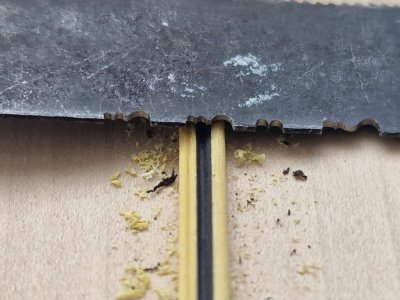
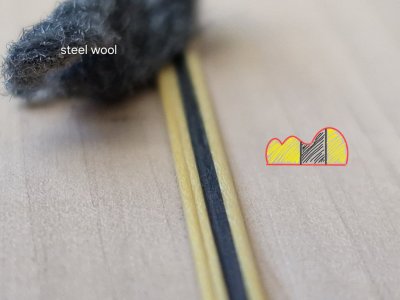
To give the wire a slight roundness, I cut the wire off not right at the end, but at a small tip, then sand it lightly and press the remaining part with something hard. If I don't want to scratch the wood during this process, I lay down some masking tape and sand over it to avoid damaging the wood. After pressing the wire, I remove the tape.
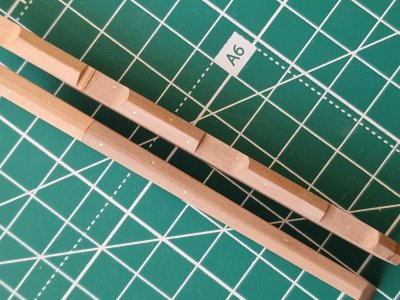
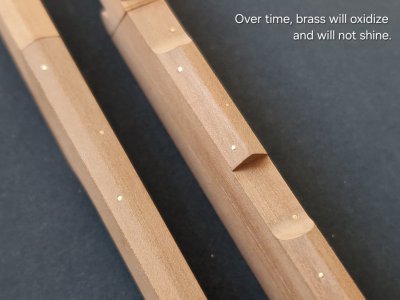
Over time, brass will tarnish significantly, and I really like this color, as opposed to black spots (like after blackening). But that's a matter of taste.
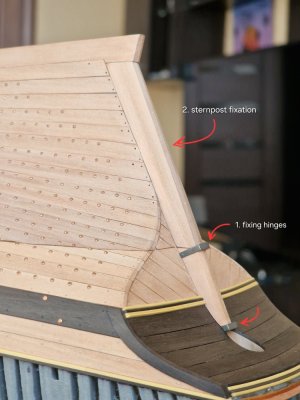
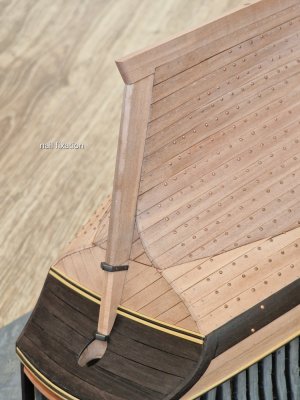
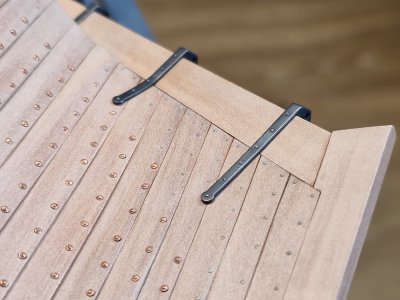
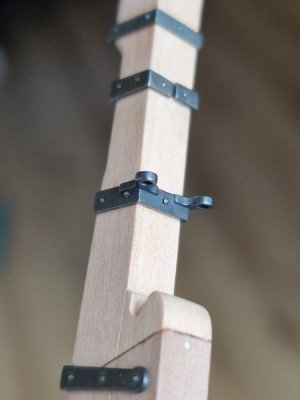
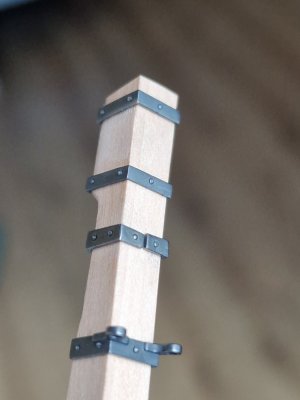
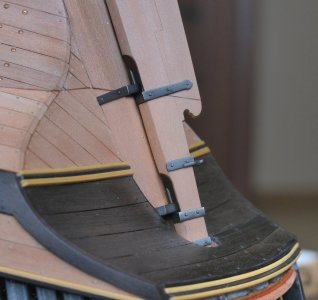
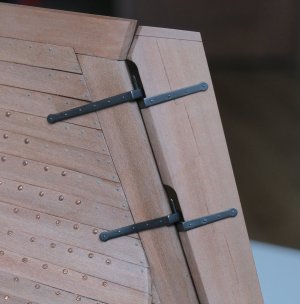
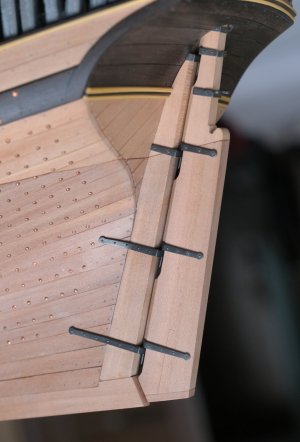
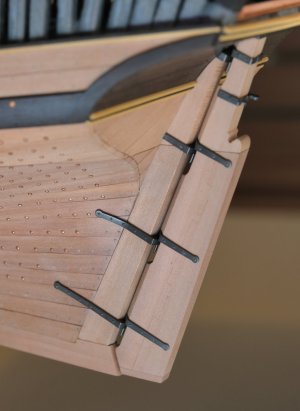
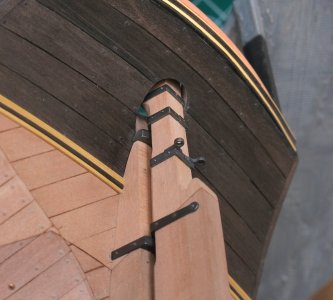
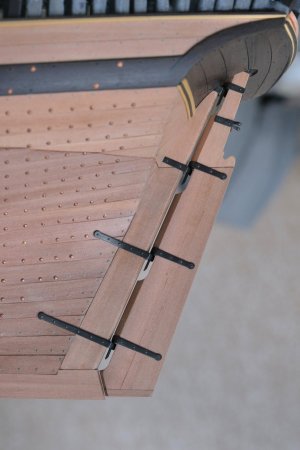
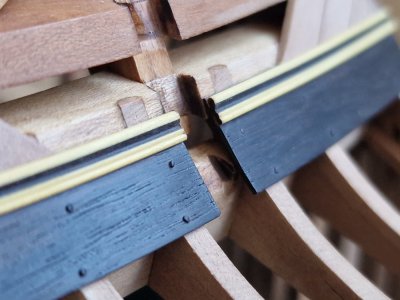
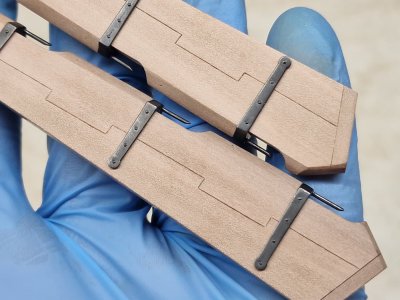
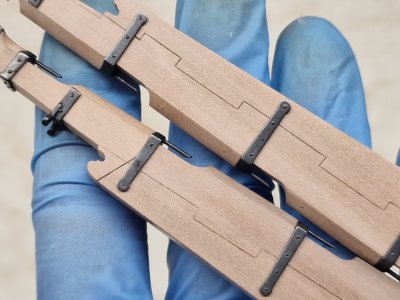
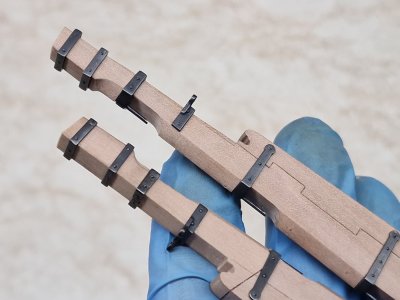
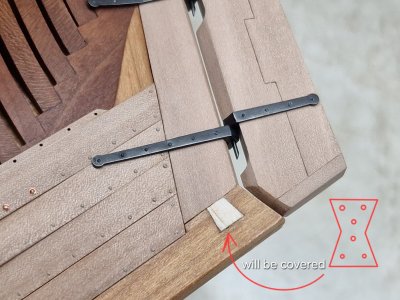
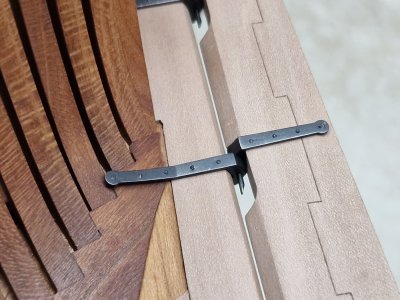
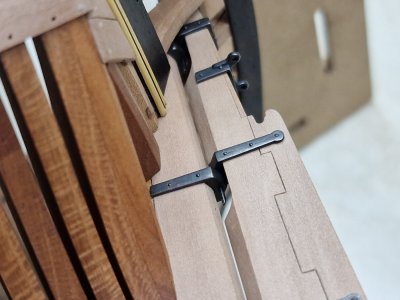
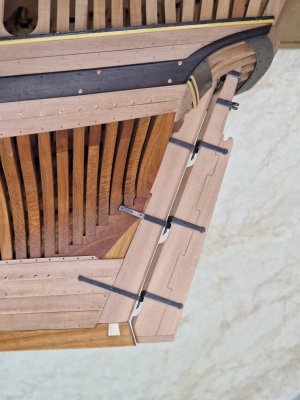
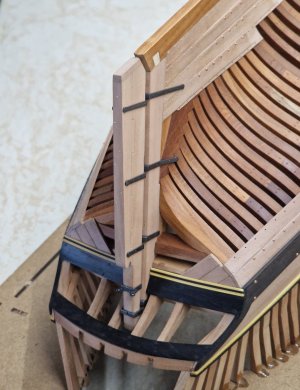
On the other hand, I make the hinge bolts black, which is natural, since the hinges themselves are black. The head here also can't be hidden, so I create it by rolling it with a knife, just like I did with the copper bolts in the clinker paneling.
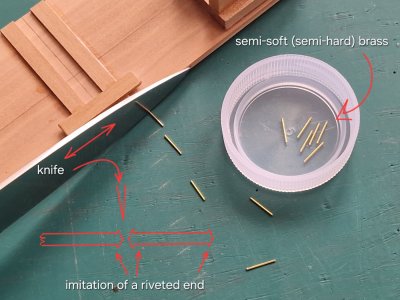
Then I cut them to the required length after blackening and install them in the holes that I drilled through the loop in the wood.
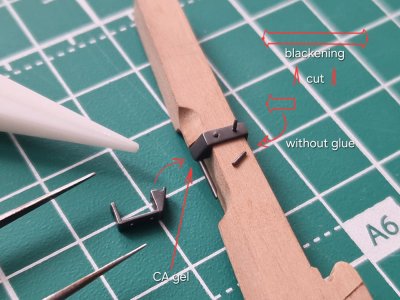
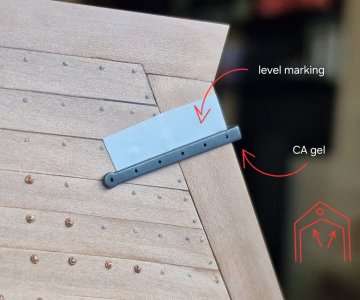
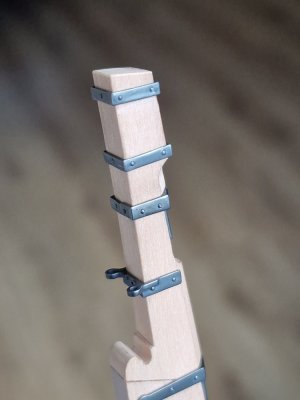
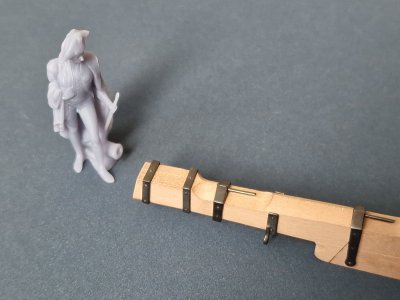
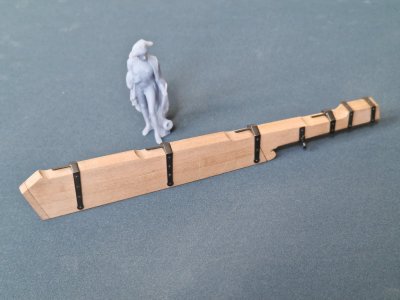
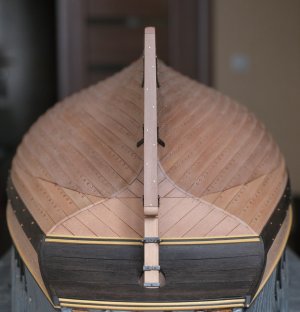
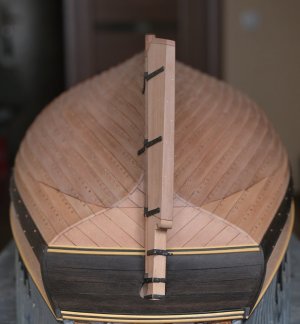
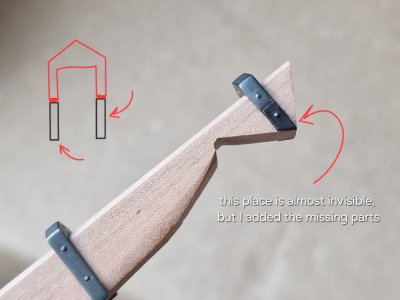
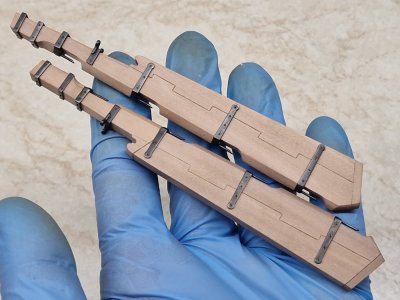
My top hinge is made in two pieces because it wraps around the back of the steering wheel. I first glue the hinge to the wooden part, then drill one hole in each piece and insert one bolt, then drill the second, and so on, to avoid any distortions or misalignments.
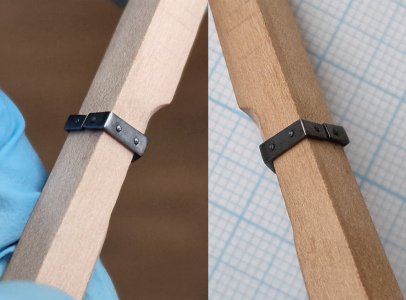
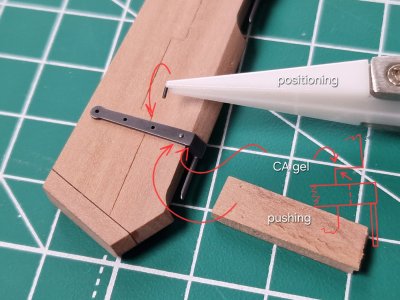
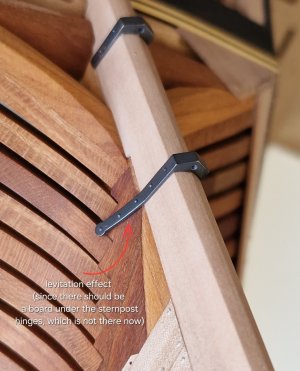
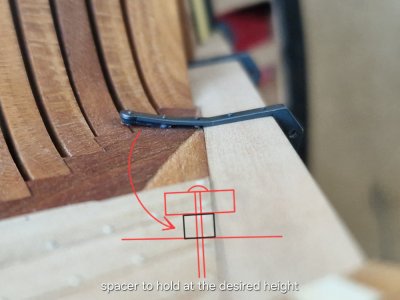
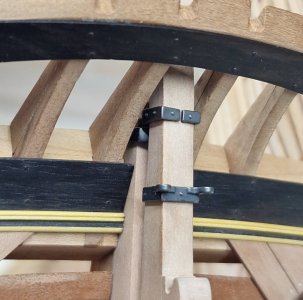
First, I fix all the loops on the steering wheel, since they have strict places for this...
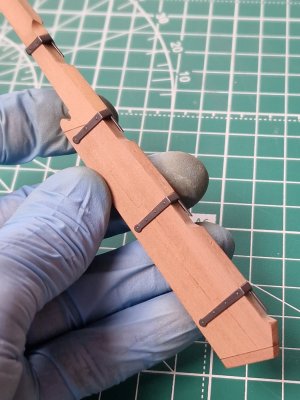
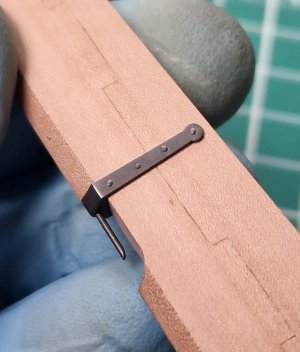
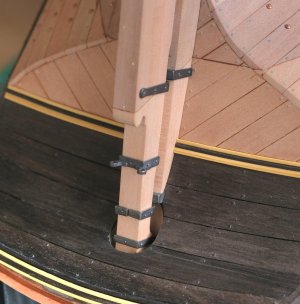
...and then, from this position, I secure the hinges to the sternpost. But I'll show you that next time.
By the way, the color here is exactly like in real life: not black, but a very dark gray, and the bolts are clearly visible, not blending into one black spot.
I've already discussed the issue of bolts, and it's quite a controversial topic, especially given the scale involved.
So what is a bolt? Firstly, it's not a thread and nut, but a rod of forged steel or copper, riveted on one end in a forge to form a saucer-shaped head, not a mushroom-shaped one. Then there are two options.
First, if the length is very long (a stem or sternpost assembly), the bolt was driven into several elements (not all the way through), and because it was driven at different angles, the bolts fused the elements together.
And the second option is that the rod was driven from the outside, without heating, into a hole smaller than the bolt (so that the bolt would work across its entire length, not just at its ends). Then, the head was pressed against a kind of anvil on the outside, and a washer was inserted into the inside, and the rod was cold-riveted so that the metal would flow onto the washer, thus preventing it from falling off.
Both ends were treated against corrosion. Sometimes the bolt was recessed and covered with a wooden plug, but more often, a small indentation was simply made on the outside so the head was flush with the surface and did not interfere with the movement of the bolt through the water.
The dimensions were naturally standard for each rank and size of ship. On a small cutter, the bolts were naturally an order of magnitude smaller than on, say, a frigate. If we recalculate to scale, we have specific dimensions, but we also have to consider the model's visibility. Sometimes we have to reduce or increase certain parameters to avoid overloading an element or, conversely, to make it more visible. Therefore, I made the bolts almost flush with the wood, almost flat, and slightly smaller, 0.5 mm, like the nails (dowels). I chose brass because my copper bolts are copper, and I wanted to make the forged ones a different color. I didn't like the plain blackened ones, so I left the pure brass. After many months, it oxidizes and becomes very dark, somewhat mimicking the appearance of corroded metal. But that's my choice; I'm simply explaining my reasons.
Also, the bolts were usually not positioned precisely in the center of the part. They were typically placed alternately on either side for increased rigidity and to prevent the wood from splitting along the drill line.
To give the wire a slight roundness, I cut the wire off not right at the end, but at a small tip, then sand it lightly and press the remaining part with something hard. If I don't want to scratch the wood during this process, I lay down some masking tape and sand over it to avoid damaging the wood. After pressing the wire, I remove the tape.
Over time, brass will tarnish significantly, and I really like this color, as opposed to black spots (like after blackening). But that's a matter of taste.
On the other hand, I make the hinge bolts black, which is natural, since the hinges themselves are black. The head here also can't be hidden, so I create it by rolling it with a knife, just like I did with the copper bolts in the clinker paneling.
Then I cut them to the required length after blackening and install them in the holes that I drilled through the loop in the wood.
My top hinge is made in two pieces because it wraps around the back of the steering wheel. I first glue the hinge to the wooden part, then drill one hole in each piece and insert one bolt, then drill the second, and so on, to avoid any distortions or misalignments.
First, I fix all the loops on the steering wheel, since they have strict places for this...
...and then, from this position, I secure the hinges to the sternpost. But I'll show you that next time.
By the way, the color here is exactly like in real life: not black, but a very dark gray, and the bolts are clearly visible, not blending into one black spot.


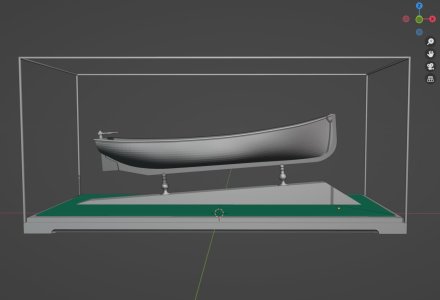
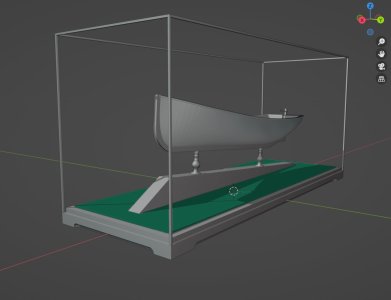













 . I hope you and your family are staying safe my friend. Cheers Grant.