• Ships of Scale has incorportated an extra level of security when you log In. Please follow on-screen prompts to acknowledge that you are not a robot via a "Check Box" or a "Pictorial Check Box Puzzle". This is needed due to higher level of AI Activity Security.
  • SUBSCRIBE TO SHIPS IN SCALE TODAY!

    The beloved Ships in Scale Magazine is back and charting a new course for 2026!
    Discover new skills, new techniques, and new inspirations in every issue.

    NOTE THAT OUR NEXT ISSUE WILL BE July/August 2026
  • Win a Free Custom Engraved Brass Coin!!!
    As a way to introduce our brass coins to the community, we will raffle off a free coin during the month of August. Follow link ABOVE for instructions for entering.

Bluenose Model Shipways 1:64 Beautiful ship

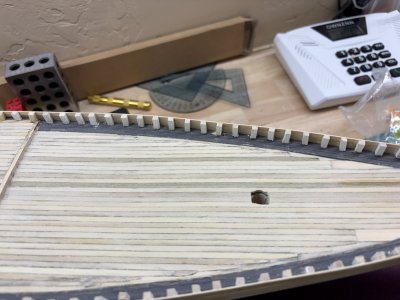
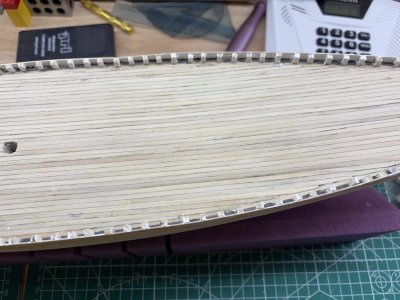
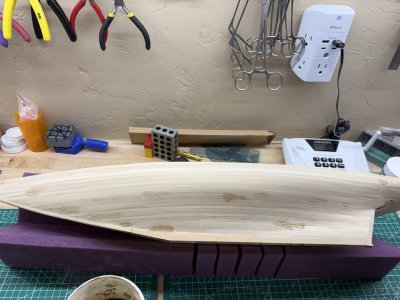
Back in Arizona! It is nice to continue on the Bluenose. The shape of the hull is a joy to behold, especially compared to the hull of a ship like the Black Swan that I am also working on. I did a little more filling in some small divots with some wood filler.
IMG_0378.jpeg

I agree with ERSRich that the hull should be smooth, but not so smooth that it resembles a plastic hull. I want people to appreciate that there is planking under the paint.

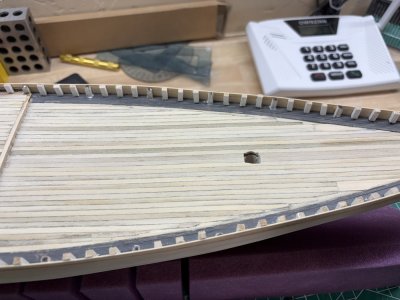
While waiting for the wood filler to dry I continued with placing the stanchions. The stanchions of the foredeck is finished.
IMG_0382.jpeg

You can note the difference of the Stanchions that are part of the original bulkheads. I will probably be cutting those out and replacing them as most everyone one else has done in their build logs.

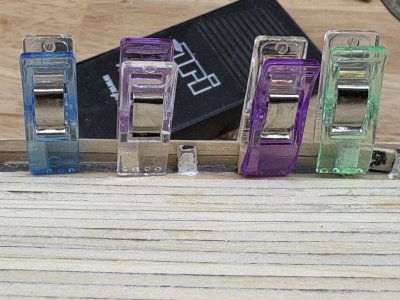
I am using some small clothing pins used to hold material together that is to be sewn. They work well for small parts but are fragile and break easily.
IMG_0381.jpeg
 
Last edited:
Back in Arizona! It is nice to continue on the Bluenose. The shape of the hull is a joy to behold, especially compared to the hull ship of a ship like the Black Swan that I am also working on. I did a little more filling in some small divots with some wood filler.

View attachment 632622

I agree with ERSRich that the hull should be smooth, but not so smooth that it resembles a plastic hull. I want people to appreciate that there is planking under the paint.

While waiting for the wood filler to dry I continued with placing the stanchions. The stanchions of the foredeck is finished.

View attachment 632623

You can note the difference of the Stanchions that are part of the original bulkheads. I will probably be cutting those out and replacing them as most everyone one else has done in their build logs.

I am using some small clothing pins used to hold material together that is to be sewn. They work well for small parts but are fragile and break easily.

View attachment 632624
Good to see you back, working on the Bluenose, Rob.:) Now you have the different sizes in view, it’s a good idea to replace the original bulkhead ones.

Regards, Peter.
 
Back in Arizona! It is nice to continue on the Bluenose. The shape of the hull is a joy to behold, especially compared to the hull ship of a ship like the Black Swan that I am also working on. I did a little more filling in some small divots with some wood filler.

View attachment 632622

I agree with ERSRich that the hull should be smooth, but not so smooth that it resembles a plastic hull. I want people to appreciate that there is planking under the paint.

While waiting for the wood filler to dry I continued with placing the stanchions. The stanchions of the foredeck is finished.

View attachment 632623

You can note the difference of the Stanchions that are part of the original bulkheads. I will probably be cutting those out and replacing them as most everyone one else has done in their build logs.

I am using some small clothing pins used to hold material together that is to be sewn. They work well for small parts but are fragile and break easily.

View attachment 632624
Ah I remember the rib stanchions, painting up and down in and out over and over. She's looking good Rob.
 
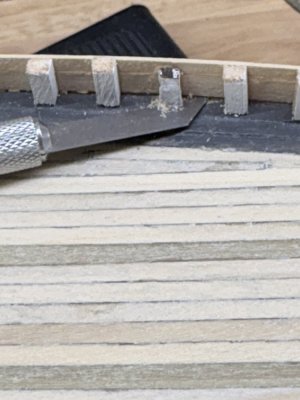
I am replacing the original bulkhead stanchions with the ones I manufactured. I am using a small "saw" blade to cut the base of the stanchion I want to remove.

IMG_0387.jpeg

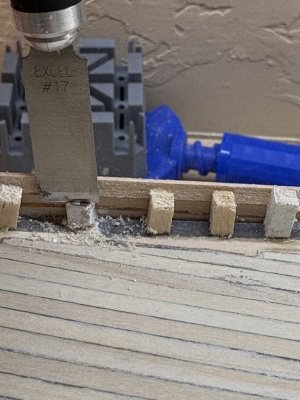
I then used a chisel blade to pare the wood back in thin sections at a time, not attempting to remove the whole thing at once.

IMG_0388.jpeg

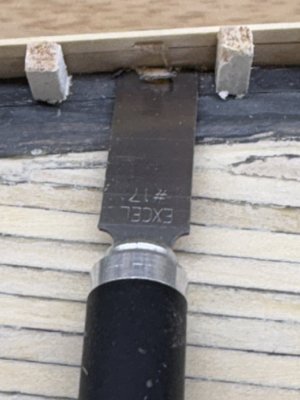
I then "planned" the base and wall smooth.

IMG_0384.jpeg

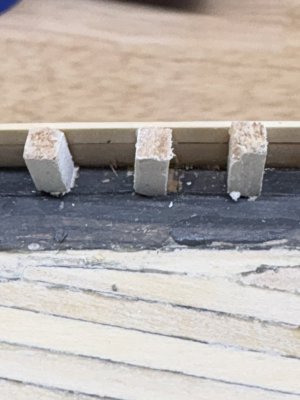
And replaced th Stanchion

IMG_0386.jpeg
 
I am replacing the original bulkhead stanchions with the ones I manufactured. I am using a small "saw" blade to cut the base of the stanchion I want to remove.

View attachment 633862

I then used a chisel blade to pare the wood back in thin sections at a time, not attempting to remove the whole thing at once.

View attachment 633866

I then "planned" the base and wall smooth.

View attachment 633874

And replaced th Stanchion

View attachment 633884
Very nice Rob, the chisel blade is such a handy tool that works well when a situation calls for it.
 
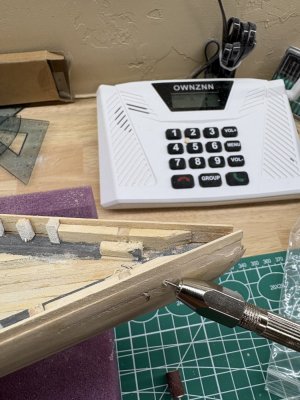
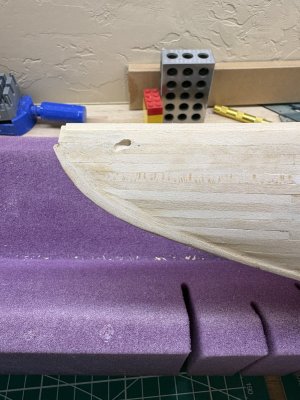
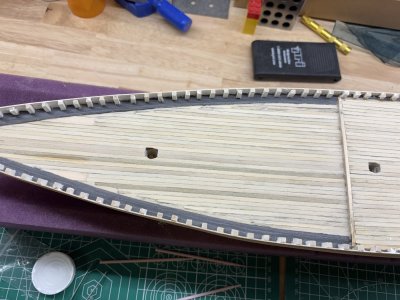
Taking a small break from the wonderfully interesting stanchions, I decided to make the holes for the hawse pipes in the front of the ship. Measuring off the plans I put a mark on the out side of the hull and eyeballed the angle needed to get to the chaffing blocks. I used a small drill bit to find the right space (ignore the other small hole :rolleyes: ).

IMG_0393.jpeg


Using progressively larger drill bits I enlarged the hole until it we 1/8"

IMG_0394.jpeg

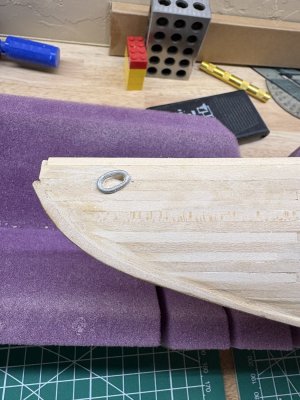
I dry fitted the metal fitting that is supplied,

IMG_0395.jpeg
 
Finally the smaller bulkhead stanchions were replaced.

IMG_0397.jpeg

IMG_0398.jpeg

I would recommend 2 things for people who are building this kit after me.

1) make the stanchions a bit higher than the bulwarks. It is easier to sand them down to make them even with the bulwarks.

2) Pre-paint the stanchions. It is easier to paint the stock strips you use to cut the stanchions beforehand and then place them. Ideally paint 3 sides so gluing the 4th side will give a better attachment.
 
Finally the smaller bulkhead stanchions were replaced.

View attachment 634695

View attachment 634696

I would recommend 2 things for people who are building this kit after me.

1) make the stanchions a bit higher than the bulwarks. It is easier to sand them down to make them even with the bulwarks.

2) Pre-paint the stanchions. It is easier to paint the stock strips you use to cut the stanchions beforehand and then place them. Ideally paint 3 sides so gluing the 4th side will give a better attachment.
The pre painting of the b stanchions is a great idea. I'll be using that on my build
 
Once the stanchions were in place it was time to paint them and the bulwarks. I used a fairly fine brush and it was a bit time consuming. The areas with the pre painted stanchions were much easier. After 2 coats white on the stanchions and bulwarks I touched up the gray on the waterways. View attachment 635126 View attachment 635127
The white stanchions and grey waterways came out very well, Rob. A nice touch-up.
Regards, Peter
 
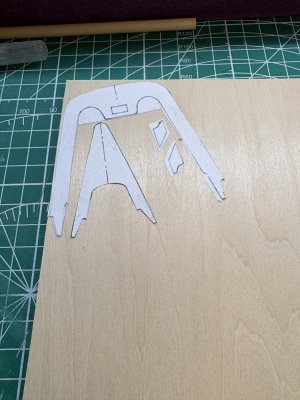
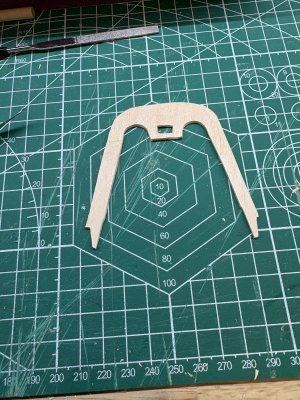
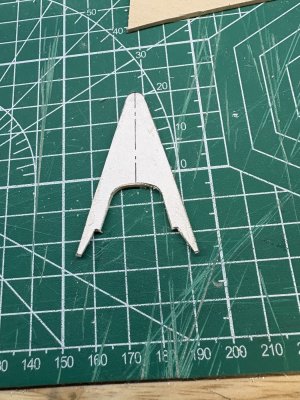
I am now at the point where I should be priming the hull, but for some reason I am reluctant to do so. Part of it is a kind of sadness for covering up the beautiful planking. So I decided to work a little on the rails that go on top of the stanchions. I bought this kit secondhand and one of the laser cut boards for the kit was missing. It is 1/16 inch thick material. Luckily one of the sheets of the plans are outlines of all the laser cut parts. I copied pictures of the bow and stern of the ship and cut out some of the outline to use as templates. While the piece that goes to the bow fit nicely, the stern template was too small for the back of the ship. I scanned in the plans and made them JPEGS. When I printed them out I enlarged them a bit. With some experimentation I found a 110% enlargement of the plant seemed to fit the stern exactly. I bought some 1/16" basswood sheets. I cut out copies of the enlarged stern rail fitting and the front and glued them onto the basswood sheets with rubber cement.

IMG_0410.jpeg

I tried to make sure that it did not go exactly across the grain. The pieces were then cut out using a sharpened blade and a steel ruler as a guide.

IMG_0412.jpeg
IMG_0414.jpeg

I sanded the edges. The curved parts were shaped and sanded by using the small rotary sander attachment of my nail drill.
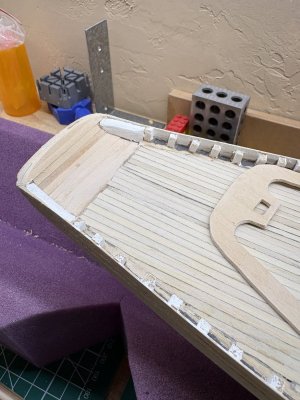
If you remember I built the back of the transom a little high. Using some 100 grit sand paper I reduced the height of the transom so it blended in better with the bulwarks.

IMG_0416.jpeg

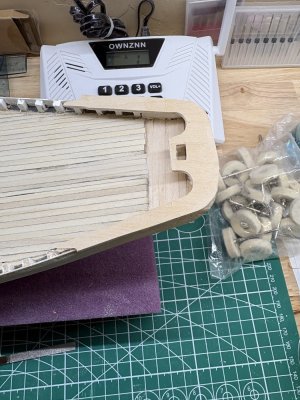
The stern part of the railing fit extremely well.

IMG_0413.jpeg
 
I am now at the point where I should be priming the hull, but for some reason I am reluctant to do so. Part of it is a kind of sadness for covering up the beautiful planking. So I decided to work a little on the rails that go on top of the stanchions. I bought this kit secondhand and one of the laser cut boards for the kit was missing. It is 1/16 inch thick material. Luckily one of the sheets of the plans are outlines of all the laser cut parts. I copied pictures of the bow and stern of the ship and cut out some of the outline to use as templates. While the piece that goes to the bow fit nicely, the stern template was too small for the back of the ship. I scanned in the plans and made them JPEGS. When I printed them out I enlarged them a bit. With some experimentation I found a 110% enlargement of the plant seemed to fit the stern exactly. I bought some 1/16" basswood sheets. I cut out copies of the enlarged stern rail fitting and the front and glued them onto the basswood sheets with rubber cement.

View attachment 636237

I tried to make sure that it did not go exactly across the grain. The pieces were then cut out using a sharpened blade and a steel ruler as a guide.

View attachment 636238
View attachment 636239

I sanded the edges. The curved parts were shaped and sanded by using the small rotary sander attachment of my nail drill.
If you remember I built the back of the transom a little high. Using some 100 grit sand paper I reduced the height of the transom so it blended in better with the bulwarks.

View attachment 636240

The stern part of the railing fit extremely well.

View attachment 636242
A nice approach to make this eye catching part. And it fits indeed very nice, Rob. A solid base and alignment for the rest of the Buffalo rail.
Regards, Peter
 
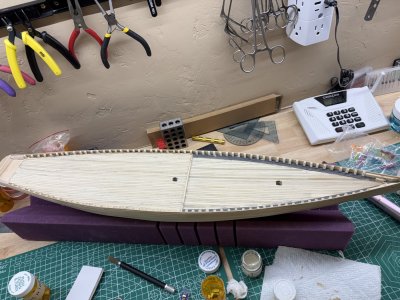
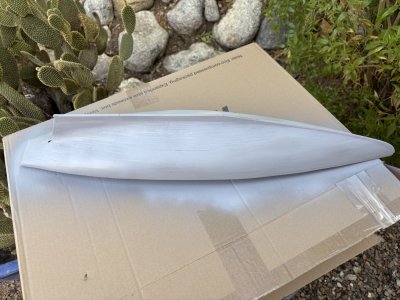
I finally bit the bullet and applied some primer to the hull. I first brushed the ship off and then used a tack cloth to get off anything that remained. It is impressive how much more the tack cloth can take off. Going outside I applied 2 thin coats of Rustoleum automotive primer sealer, waiting about 30 minutes between coats. This really should be done outside as it definitely gives off a strong smell. I was happy to see the hull looked very smooth after the primer with no real hills or valleys. However there were numerous areas that there were separations between the planking that were obvious.

I will be waiting a few hours to let the primer thoroughly dry, sand it and see what I can do about those linear separations.

IMG_0417.jpeg
 
Back
Top