Rattlesnake by MS

Finished the transom over a couple of days work. The provided white metal carvings for the transom did not in the wildest imagination fit the footprint of the laser cut transom. What to do, what to do... I decided to cut the britannia metal transom carving into three pieces: carvings to the left and right, plus the rattlesnake. I trimed all the metal as close as I could get off the carvings and snake, put a base coat of black in all the hollows, then brown all over to simulate wood. Then gilded highlights on the actual carvings left and right and the entire rattlesnake.

After mounting the carvings, some trim for the windows (gilt), plastic in back of the windows (from a microwave popcorn bag) painted a dull white and trim around the bottom of the transom and around the upper curve painted black to match the rest of the transom. Still have to apply the photo etched "rattlesnake" lettersView attachment 104665View attachment 104666View attachment 104667View attachment 104672View attachment 104673View attachment 104675 once they arrive from Model Dockyard fittings.
Wow! Impressive "workaround"! :)
 
I am catching up ... I thought I was subscribed to this post, but clearly I'm not since I have received no notification of new posts. But, before I leave this forum today, I will make sure I am! ;)
 
Just follow along, I'm trying to post step by step of what I'm doing. Bottom line is there will be mistakes but I'll let you in a little secret: only you will know where the mistakes are unless you specifically point them out. Just go slow and be resolved to spend an hour on something that should only take 30 minutes. Be a perfectionist. If you're not happy with how something came out, rip it out and do it over.
OMG My son did listen to some of the things I told him. ROTF

Beautiful job! I'm so glad I checked in today, when I got the newsletter from the site. I still have to make sure I am properly following this thread.

Update: It wasn't hard ... I just checked the box labeled "email" and I'll bet I start getting notification when there is a new post in this thread. Thumbsup
 
Five lines of lower hull planking, I'm about halfway done. So far my tapering strategy seems to be working. I might have to use one and hopefully only one stealer near the front, the aft sections is even better, perhaps no stealers at all. Once I lay down the garboard I'll know more.

thumbnail (1).jpgthumbnail (2).jpgthumbnail.jpg
 
It's shaping up so very nicely!
I found areas of the hull on my La Couronne build at this stage which were flat between bulkheads where the curvature of the hull was sharper. These changes in curvature tended to create subtle facets and boxiness in what should be smooth flowing curves in the hull. Spending lots of time filling in the flat areas and carefully inspecting the overall shape of the hull in the sunlight will result in a gracefully smooth hull shape, once the second layer of planks are applied. This part of the construction is so much fun because you get your first glimpse at how the ship will appear overall.

USS Rattlesnake appears to me to have been a great fast and light pirate sloop hunter and commerce raider itself.
 
Last edited:
Your hull planking process wellThumbsup
Hull planking it is what (for me) the most hazardous step to do
Luckily most of the people that look at my ship know nothing about model building so only the one that do build model (luckily not a lots in my neighbourhood:D) will see those annoying defect, now I use a lot my camera to spot mistake that I don’t see when my nose is to close to the hull and are able to correct some mistake a do.
 
Thanks ya'll. I can't wait to close the gap and start sanding. I think (90% sure) I'm going to paint per what's already out there instead of coppering below the waterline. I want something that looks distinctively different from my other two ships. White below the waterline, black band, yellow ochre, black high up on the poop deck.
 
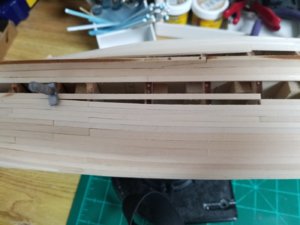
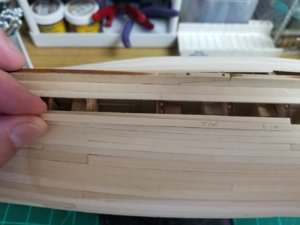
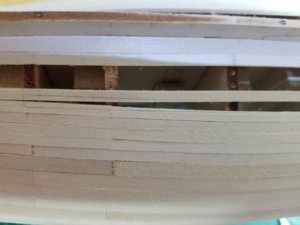
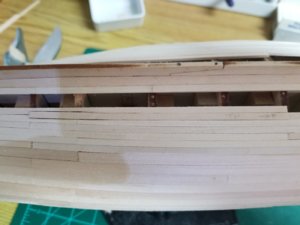
Almost done with the rough planking (before sanding). So far this is my first drop plank and in all truth my first attempt at inserting a drop plank.

To even up the last two lines of planking I started by laying down a plank and gluing it so the next and the last planks will be parallel.

Then I cut a length of plank that will fit in my cutout.

I laid that plank down and drew an outline.

I cutout the above and below planks on the outline I drew.

I set and glued the insert. It ain't perfect but wood filler and paint will cover up any gaps. The point being this method is better than having a plank that ends in a sharp point.

20190929_170833.jpg20190929_173946.jpg20190929_174105.jpg20190929_174711.jpg
 
Last edited:
Back
Top