1:20 Scale Victory & Constitution Gun Models by Signet [COMPLETED BUILD]

Try sanding or scraping the board to get level with wood, and as for color, is it new or weathered deck, the color changes from age, weather and scrubbing the decks.
 
Ciap Sigillo, why don't you try carbon paper?
I haven't used it for a long time, but I think it is really, really thin. Standard 20# printer paper is less than 0.004" thick, and I think carbon paper is about the same. Construction paper would work well, but is normally about 0.010" thick, although there is supposed to be some thicker.
 
I haven't used it for a long time, but I think it is really, really thin. Standard 20# printer paper is less than 0.004" thick, and I think carbon paper is about the same. Construction paper would work well, but is normally about 0.010" thick, although there is supposed to be some thicker.

true that the caulking of the bridges is also a subject to the eye but, there is no dimensional rule
 
Thanks for your thoughts. I am using thicker than normal planking, because it's what I have, and it is creating a base, not a part of a ship. So my planks are 0.2" or about 5mm thick. So the thread wouldn't fall through the "deck" to the area below (between cross beams), it would just fall below the surface, and look incorrect, and might be difficult to lift back up.
Could you chamfer slightly the top edges of the decking to creat a useable groove for your caulking?
 
Could you chamfer slightly the top edges of the decking to creat a useable groove for your caulking?
I could, but depending on how I created the caulking, I'm afraid the caulking would vary in width. Sanding a small chamfer, for example, would vary slightly (at least with my sanding). If it were fill completely flush, the caulk like would vary some in width. If I used thread, it might be difficult to keep straight and level, depending on the chamfer. Although it would certainly not fall down. I actually think I'm better off leaving the planks without rounding, as whatever is spaced between will look more precise.
 
I could, but depending on how I created the caulking, I'm afraid the caulking would vary in width. Sanding a small chamfer, for example, would vary slightly (at least with my sanding). If it were fill completely flush, the caulk like would vary some in width. If I used thread, it might be difficult to keep straight and level, depending on the chamfer. Although it would certainly not fall down. I actually think I'm better off leaving the planks without rounding, as whatever is spaced between will look more precise.
I understand. I think it could be done if you had a jig and a small block plane, but you need to stay with whatever you are comfortable with. Practice on scrap for sure.
 
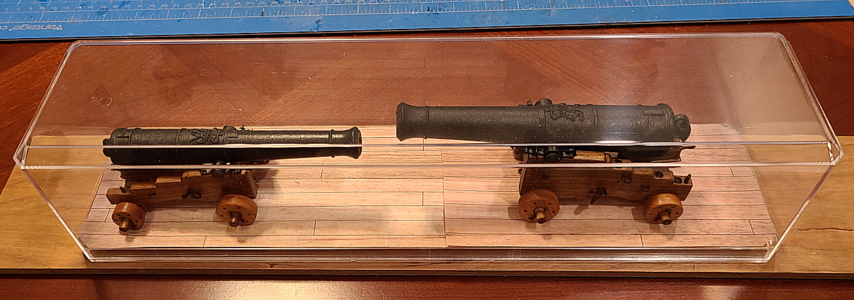
Still deciding on what to use for caulking lines (my son is bringing over some black construction paper I'll try), but in the meantime, I made a layout of the planking I will be using to be sure I like it. Just printed it out on a couple sheets of paper and put it in place in the case:
1671855846533.png
The planking will be 0.2" thick and contain the upper clear part of the case. The bottom of the case won't be used; instead the board underneath will be trimmed in length and the planking placed on top of it

Not that a printout is very representative, but the lines in the above are about 0.013" in width, or a scale 0.26". I'm thinking that isn't wide enough; can't imagine sailors on the Victory using all that cord and chisels and such on a 1/4" gap. My concern is if it's twice that thickness (more realistic, I think) it may stand out way too much if it's solid black. But I'll experiment more.

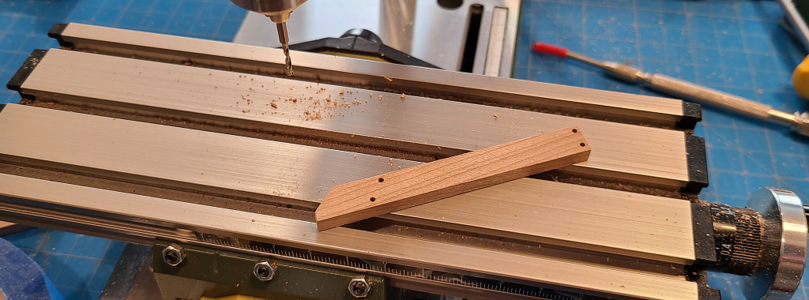
Oh, and I drilled some 1.1mm (scale 7/8") holes in the wood sample above and installed toothpick treenails, and after sanding and applying poly, I can barely see them, closeup with 3 diopter glasses. It seems that in this scale I should really include them, but I'd like to actually see my handiwork!
 
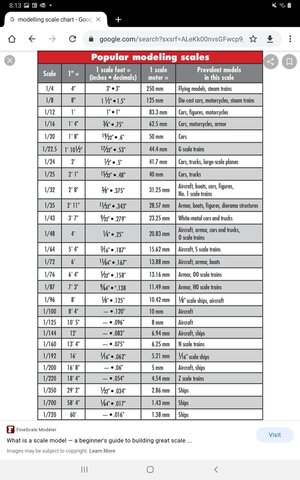
Some cosiderations with regards to your caulking endeavors. How wide, in real life, is the bead of caulk? Thinking of keeping to scale could be problematic, even at 1:22 scale. At this scale, one scale foot is about 1/2". Supposing the caulk width is about 1/2" itself, the scale caulk width might be about .02" on The model....I am attaching a chart for your perusal....

Screenshot_20210311-081357_Chrome.jpg
 
Some cosiderations with regards to your caulking endeavors. How wide, in real life, is the bead of caulk? Thinking of keeping to scale could be problematic, even at 1:22 scale. At this scale, one scale foot is about 1/2". Supposing the caulk width is about 1/2" itself, the scale caulk width might be about .02" on The model....I am attaching a chart for your perusal....
Right. That's why I've been converting my material thicknesses to inches. Like the 0.025" thick cardboard I have would represent got 1:20 scale would represent 1/2" wide caulk in real size. That seems like a reasonable value to me.
 
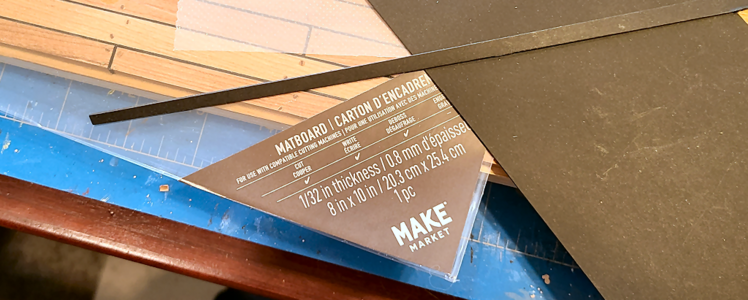
I finally found the material I wanted to use for caulking seams on my gun models' deck. It is black matboard from Michaels craft store, is 0.029" thick, which makes it 0.58" thick on my 1:20 scale model. I'll post a pic later of the material and package.

After laying out my deck area with the plank stagger I wanted, I cut my planks from 5x10mm cherry I had on hand from another project. These make for planks just under 8" wide, probably a bit narrow for the Victory, but not bad:
1672950199305.png

I then laid out the holes for treenails at the proper spacing for these planks on a separate plank to use as a template:
1672950251047.png

A trial on one of the planking pieces used 1.5mm holes (about 7/8" in full size):
1672950309296.png
Which then were filled with the normal round toothpicks:
1672950343879.png
I'm not sure how visible they will be after sanding flush and finishing, but if I was ever to use "real" treenails, this would be the model.

Continuing on:
1672950439963.png

After drilling all the holes and inserting and trimming the toothpicks (I found you can't hammer treenails in place too hard, especially at the ends), I took a look at the thin pieces of walnut used for the base, and changed my direction. I decided instead to use some 3/4" softwood I had (it won't be visible), and after complete, install moulding around the outsides. So I drew some centerlines and started by installing the first plank:
1672950591317.png
I just glued it in place with Titebond glue, held with weights:
1672950639364.png
Continuing on, cutting strips of the black matboard and gluing them to one side of the added planks, with a glue stick, which worked just great for this purpose:
1672950697829.png
1672950722858.png
1672950736060.png
Here is a close-up of the matboard glued to the side of a plank prior to installing. I think you can see a slight shine to the matboard; it really seems different than normal paper, so I'm not certain what it is.
1672950762812.png
Here's a closeup of the package of matboard the board itself and a strip cut from it:
1672950850329.png
Finally, all planks are in place:
1672950873875.png
The 3/4" board has been cut to fit the plastic case to the edge of it. The planks are supposed to be all inside the case, but turned out a bit too large. No problem: I'll straighten them out and make for a proper fit cut from below on my MicroMark table saw to get the plexi case to fit.
A final pic with a coat of wipe-on poly, to help glue to treenails in place (some came loose during working with them):
1672951087977.png

No more sanding for today, so will continue on that later.

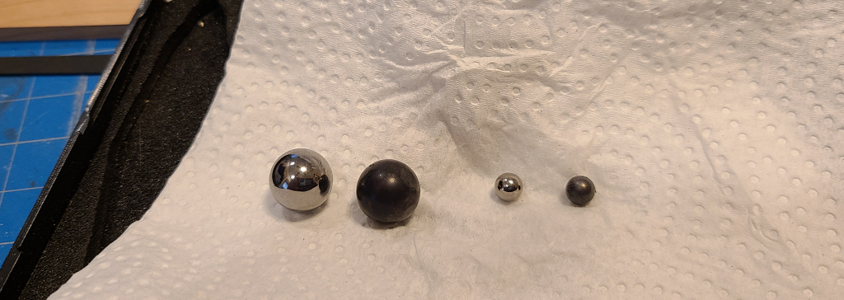
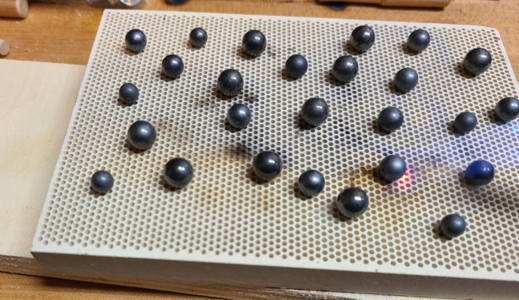
I also decided that it would fancy up my model a bit if I included stacks of cannonballs. I know they weren't usually used on ships, but are quite often in static, land-mounted displays, so felt they would work for me. I bought an assortment of 304 stainless ball bearings from Amazon for less than $10, not able to find any lead or dull ones. But from experience, I knew I could heat the stainless and hopefully get a good color.

Here are a couple sample balls, unheated and heated with a torch:
1672951160612.png
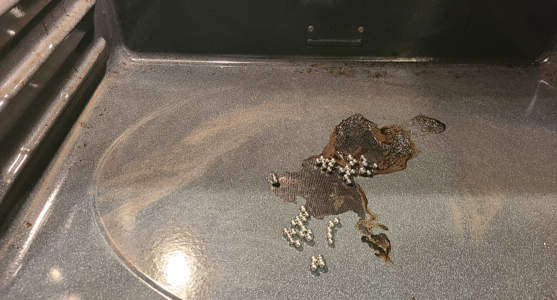
I liked the way they turned out, but wanted to try something faster, so offered to clean my wife's oven using the self-clean cycle (with the balls laying in the bottom):
1672951209279.png
1672951314122.png
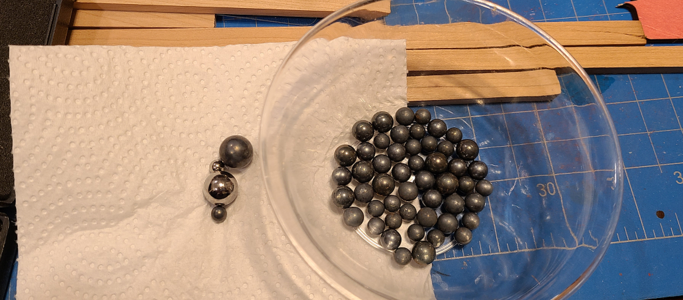
About half of them came out fine, the others a little shiny for me, so heated them with a torch:
1672951333564.png
I will probably use a combination of triangular and rectangular cannonball stacks, and found this site to be extremely useful in calculating what I needed and wanted:

Pyramid of Balls Calculator

I am using 6, 7 and 8mm balls to simulate my 12, 24 and 32 pound cannonballs.

More later; gotta run!
 
Last edited:
I turned the base upside down, and using my circular saw and fence, made consistent cuts around all sides, cutting only the 5mm thick planks, until I had a perfect fit on the inside of the plexi case:
1673027038853.png
I've sanded the planking with sandpaper just to 220 grit; I don't want the deck TOO smooth or glossy, so figured this would be a good compromise. I can now begin finishing the deck with MinWax Wipe-On Poly.

But first, I need to decide how I'm going to attach the guns to the decking, if at all. As a reminder, the positioning of the guns will be like this:
1673027811814.png
I've shown the cannonball pyramids in their approximate location. They will have wood retainers around them, and will be all glued directly to the planking.

My question is how to attach the guns to the deck. I have a number of choices:
  1. Don't attach them at all. But moving the display without great care may result in gun damage.
  2. Place chocks at the trucks (wheels). This is done oftentimes in display, and would /help/ the guns to stay in place, but not insure they would.
  3. Use a spot of Blu Tack on the bottom of the wheels. This would prevent them from rolling away and give some stability. Also a false sense of security, for someone other than me thinking they're firmly attached. Also, the Blu Tack may show.
  4. Glue the trucks to the base. This would be pretty secure, but not ultimately, and there's a chance of glue showing up or marking the planking.
  5. Use screws through the bottom of the base into the trucks. This would be most secure, and removable, but would make for permanent holes in the bottom of the trucks. And I only have 1/8" to 1/4" available to drill. There is also a chance of splitting the trucks! :eek: Exact location would be problematic, but using clear materials marked from the bottom, then transferred to the base, should work.
  6. Use screws from the bottom through the base into the truck axtrees. This would be secure, and would leave the trucks unmarked, be a bit easier to locate, but at certain angles the screws would be visible.
  7. Unknown - your suggestions. Hopefully some of you have better ideas based on your experience in doing similar mountings.
If anyone has any other suggestions for this display, I'd love to hear them as well. Come on, guys! Likes are great, but I'd love to hear some comments and suggestions here!
 
Last edited:
I turned the base upside down, and using my circular saw and fence, made consistent cuts around all sides, cutting only the 5mm thick planks, until I had a perfect fit on the inside of the plexi case:
View attachment 349471
I've sanded the planking with sandpaper just to 220 grit; I don't want the deck TOO smooth or glossy, so figured this would be a good compromise. I can now begin finishing the deck with MinWax Wipe-On Poly.

But first, I need to decide how I'm going to attach the guns to the decking, if at all. As a reminder, the positioning of the guns will be like this:
View attachment 349472
I've shown the cannonball pyramids in their approximate location. They will have wood retainers around them, and will be all glued directly to the planking.

My question is how to attach the guns to the deck. I have a number of choices:
  1. Don't attach them at all. But moving the display without great care may result in gun damage.
  2. Place chocks at the trucks (wheels). This is done oftentimes in display, and would /help/ the guns to stay in place, but not insure they would.
  3. Use a spot of Blu Tack on the bottom of the wheels. This would prevent them from rolling away and give some stability. Also a false sense of security, for someone other than me thinking they're firmly attached. Also, the Blu Tack may show.
  4. Glue the trucks to the base. This would be pretty secure, but not ultimately, and there's a chance of glue showing up or marking the planking.
  5. Use screws through the bottom of the base into the trucks. This would be most secure, and removable, but would make for permanent holes in the bottom of the trucks. Exact location would be problematic, but using clear materials marked from the bottom, then transferred to the base, should work.
  6. Use screws from the bottom through the base into the truck axtrees. This would be secure, and would leave the trucks unmarked, be a bit easier to locate, but at certain angles the screws would be visible.
  7. Unknown - your suggestions. Hopefully some of you have better ideas based on your experience in doing similar mountings.
If anyone has any other suggestions for this display, I'd love to hear them as well. Come on, guys! Likes are great, but I'd love to hear some comments and suggestions here!
I would use wedges to place that doesn't go back and forth,my opinion, (it counts for little), too shiny it loses its characteristics a lot but, you like it, that's fine, Frank
 
I would use wedges to place that doesn't go back and forth,my opinion, (it counts for little),
So, like chocks or wedges at each truck? And your opinion counts for a lot.
too shiny it loses its characteristics a lot but, you like it, that's fine, Frank
Assuming you're referring the the planking, I definitely agree, I don't want it too glossy at all, just a nice matte or satin finish.

Thanks for responding.
 
So, like chocks or wedges at each truck? And your opinion counts for a lot.

Assuming you're referring the the planking, I definitely agree, I don't want it too glossy at all, just a nice matte or satin finish.

Thanks for responding.
1) a wedge for each cart, 2) yes, the planking treated only with oil and smoothed with metal wool, Frank
 
Another possible mounting method:
8. Small diameter pins connecting the trucks and planks, drilled into each, could be mounted in the planks with only small holes drilled in the trucks. Even as small as pins. Probably hold well as long as not turned at too great an angle. Might not be obvious how it's held though, and damaged with excessive movement.
You were too fast. ROTF
 
Hello Signet, about the fixing. I have seen colleagues drill small holes in the wheels and put a wire pin in the back, then transfer the whole thing to the deck and then also drill small holes to fix the whole thing.
View attachment 349484
Thanks, Tobias. I do have the truck retaining pins on the carriages, of course. And yeah, separate pins from below into the trucks might work well.
 
I put just one coat of Watco Danish Oil on the decking and think it looks good:
1673045019196.png
I don't think I want it any glossier, so may just leave it the way it is.

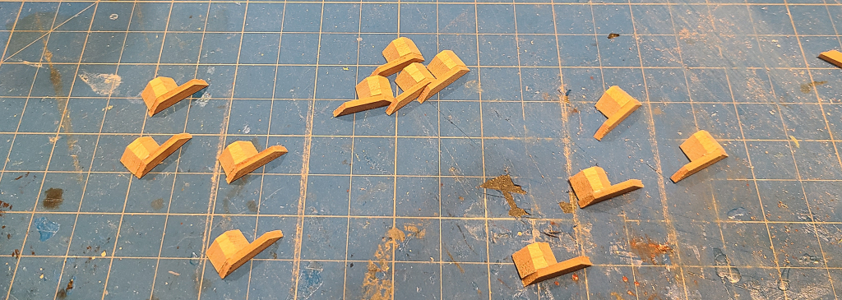
I'm not positive what restraint method I will be using for the guns, but since they'd be visible, went ahead and made up some wedges/chocks, as often used in static displays of cannon (I guess to keep people from rolling them home):
1673045121412.png
None of them are sanded yet, although my thought would be to leave them natural and unfinished (although a darker, worn finish might look more accurate). The 3rd set is for the Constitution's 24-Pounder, which will be in a separate case.

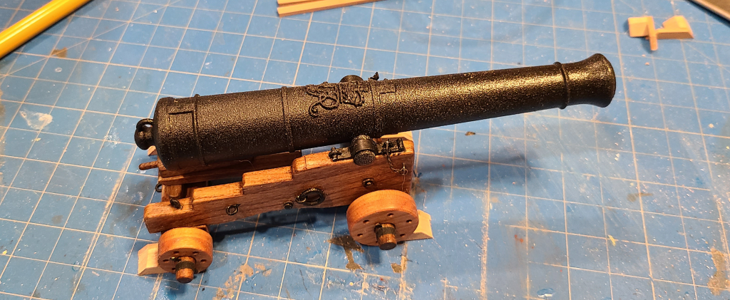
I mostly made them to see how they'd look in place under a gun:
1673045232630.png
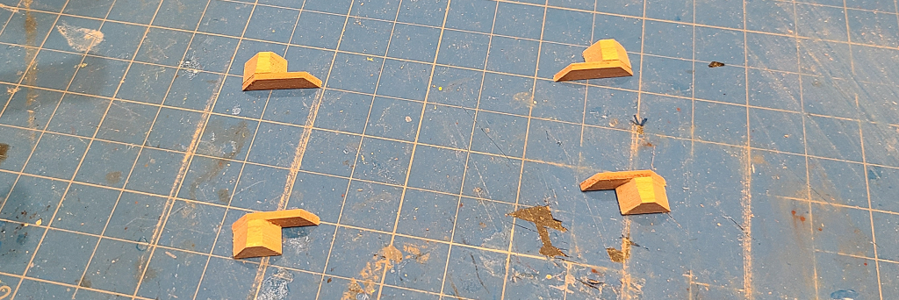
Shown in place without the gun, the inner extensions can be seen; although not required on a full size gun, here they help locate the gun and keep it from sliding sideways:
1673045311988.png
I'll sand them up and see how they look in place in the model. If I like the looks, may just go with them. That way the gun models can be easily removed for inspection or whatever, yet are held in position reasonably well. If I don't like them, or just change my mind, I can use any of the other methods discussed.
 
Back
Top