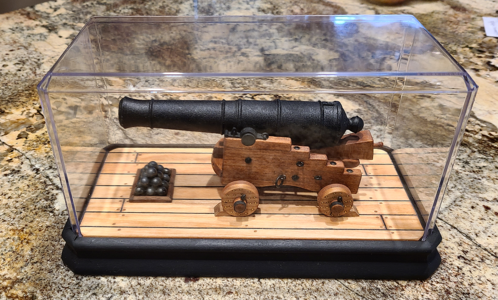
1:20 Scale Victory & Constitution Gun Models by Signet [COMPLETED BUILD]

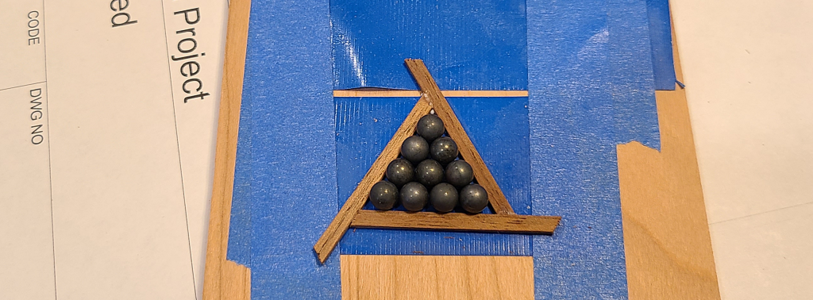
I've stained the chocks and am still considering them. In the meantime, I thought I'd work on the cannonball pyramids. The balls kept rolling around on my worktop, so I used tape, taped in place with the sticky side up, to hold them as well as the wood strips in place:
1673132669623.png
While the norm appears to be to cut the corners at 30 degrees and have them meet in a point, I found it easier to go with 60 degrees. In that way I can cut one end of each piece at the right angle, and adjust the length as needed to fit closely against the balls.

I then added similar pieces, but with the joints going the other direction, over top of the triangles. I needed the height, this way is naturally stronger, and mostly no joint goes through both pieces, so the joint is very strong:
1673132873211.png

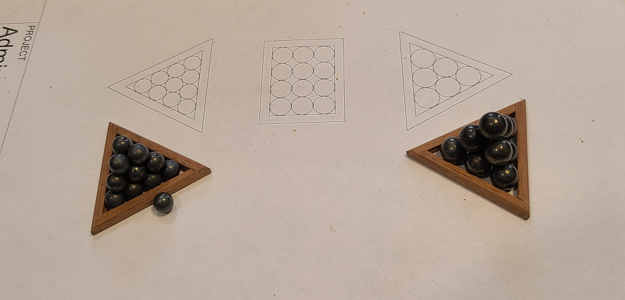
After drying, the excess was sanded off, and a small bevel was sanded at the top. Two were made up, one for the 12-pounder cannonballs simulated by 6mm balls, and the other for the 32-pounder cannonballs simulated by 8mm balls. That worked out to about 6% oversize for the 12s and less than 2% for the 32s, so close enough.
1673133087748.png
The ball bearing assortment I bought included 20 of the 6 and 7mm balls, but only 10 of the 8mm balls. So that determined the height of my pyramids. I'll glue the balls in place after I locate the triangles on the deck. My trembling fingers along with slight variations made it impossible to mount the top ball in my test of the 12-pounders. Hopefully they will all stay in place once glued. ;-)
 
I decided to make the cannonball stack for the USS Constitution in a rectangular configuration:
1673197053928.png
Americans have to be different, after all. :-) Interestingly, the 3x4 rectangular configuration uses the same number of balls as the 4-ball triangular configuration: 20.
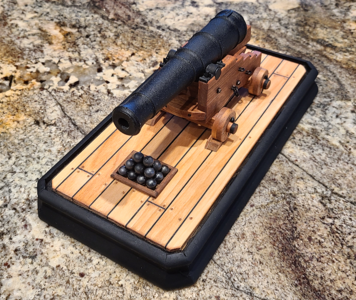
 
Very good appearance of your deck planking with the caulking - happy taht you have found a final and very good solution
 
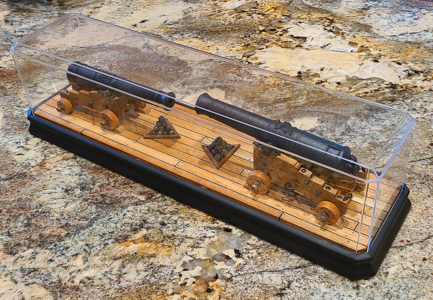
I finally finished the display with two guns from the Victory on a base, so thought I'd post some last build pics, and then the final result.

I had decided to use a small moulding all around the base, and found one in white hardwood at Lowes.com that was 1 1/4" wide. My local Lowes showed 1 on stock, so I ordered it for pickup, but it was cancelled as they couldn't find it. The Lowes a little further away showed they had 28, so I went there to buy one, but they didn't have any, despite what the computer said. In fact, most of their hardwood mouldings, all showing stock, were non-existent. And they wanted $79 to send one to me! So, I checked on HomeDepot.com, where they didn't have any on stock (or actually knew what they had and did not have), they would ship two (a minimum) to me, for FREE! So I ordered them, and they surprisingly showed up just a few days later, delivered by UPS, in a box over 8 feet long! With an 8 foot long large piece of fancy baseboard included for stiffness!
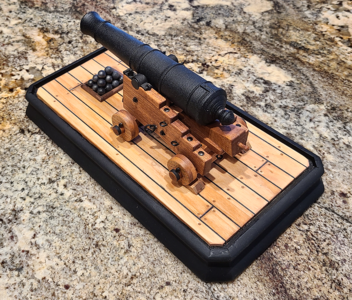
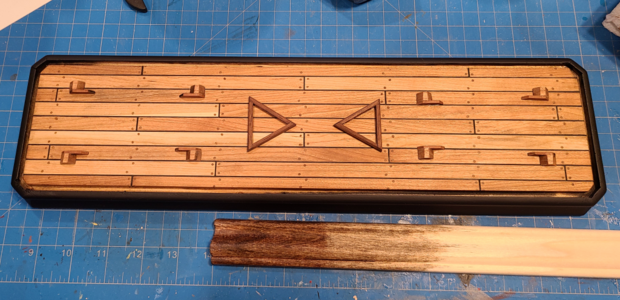
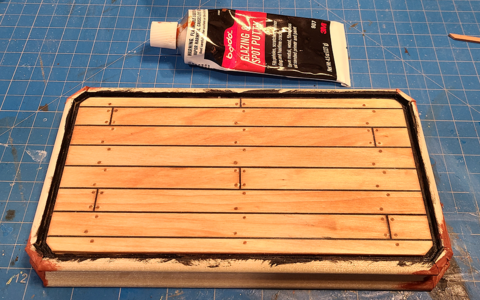
I decided to cut the moulding height/width down some, as I wanted the base to be minimized rather than be high. I stained the surrounding frame pieces with MinWax Special Walnut, but it didn't want to stain dark. I then tried MinWax Polyshades Satin Bombay Mahogany, but it was rougher than I liked and too glossy. So instead, I went to a Satin spray black, which of course ended up too glossy. I finally arrived at Flat Black, which isn't perfect, but I like it:
1674065778996.png
The black highlights the base well, and goes with anything. Below the base is a piece of the moulding before trimming, the right side stained with Special Walnut, the left with Polyshades. It ended up a bit darker, but still not to my liking.

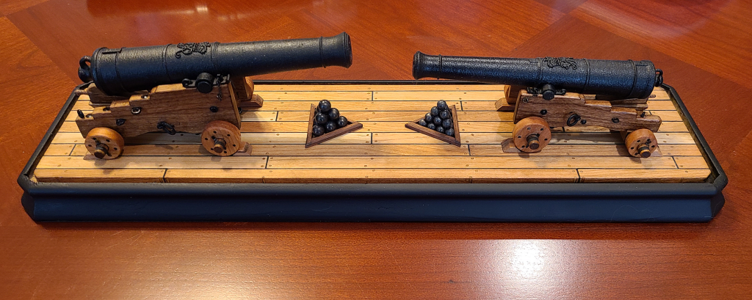
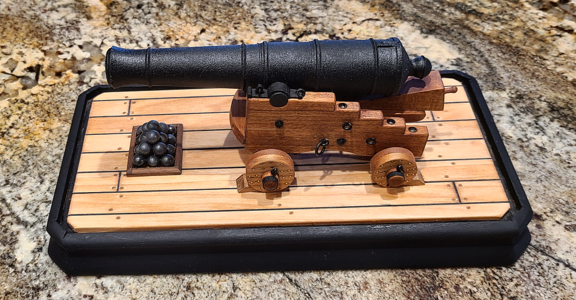
Next I put some black self-adhesive felt on the bottom of the base (wanting to keep it all as low as possible, not showing a discernable gap around the edge), and then mounted my cannon balls. I may put a bit more super glue on the balls to help keep them in place; I /certainly/ will if they fall off. With the guns in place, the model looks like this:
1674066148052.png

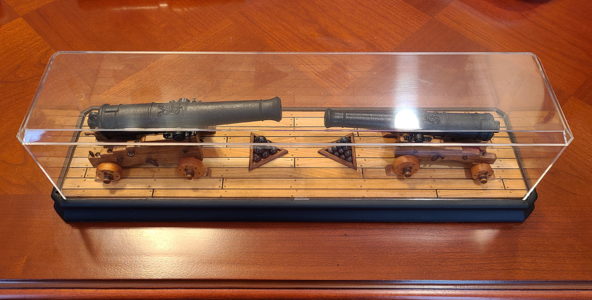
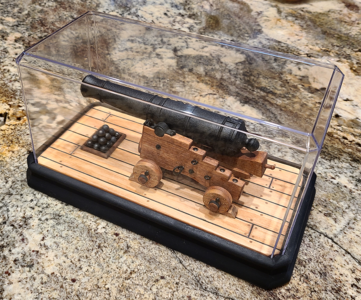
Of course, this entire display was designed with a plastic display case I'd purchased from Hobby Lobby for $8.99, as discussed previously, now looks like this on the desk in my den, aka my workbench:
1674066185586.png
1674066201686.png

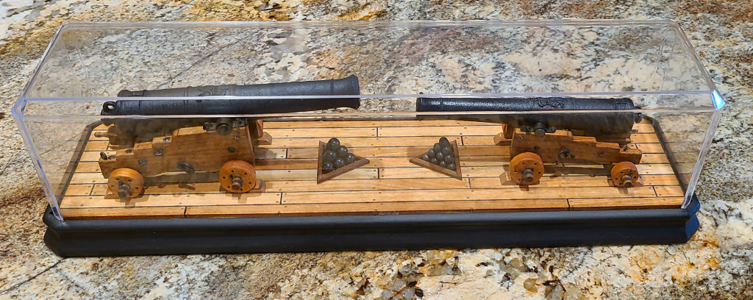
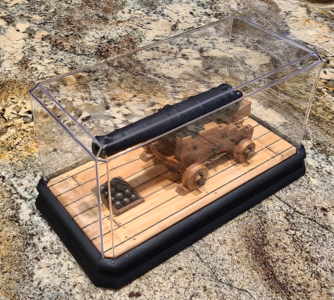
Some final pictures of the display case with guns from a couple angles:
1674066372643.png
1674066392783.png
1674066405852.png

That completes this model. I will now continue on the base of similar design for my single Constitution gun. It was a real problem getting the acrylic cover, but more on that next time. :)
 
I finally finished the display with two guns from the Victory on a base, so thought I'd post some last build pics, and then the final result.

I had decided to use a small moulding all around the base, and found one in white hardwood at Lowes.com that was 1 1/4" wide. My local Lowes showed 1 on stock, so I ordered it for pickup, but it was cancelled as they couldn't find it. The Lowes a little further away showed they had 28, so I went there to buy one, but they didn't have any, despite what the computer said. In fact, most of their hardwood mouldings, all showing stock, were non-existent. And they wanted $79 to send one to me! So, I checked on HomeDepot.com, where they didn't have any on stock (or actually knew what they had and did not have), they would ship two (a minimum) to me, for FREE! So I ordered them, and they surprisingly showed up just a few days later, delivered by UPS, in a box over 8 feet long! With an 8 foot long large piece of fancy baseboard included for stiffness!

I decided to cut the moulding height/width down some, as I wanted the base to be minimized rather than be high. I stained the surrounding frame pieces with MinWax Special Walnut, but it didn't want to stain dark. I then tried MinWax Polyshades Satin Bombay Mahogany, but it was rougher than I liked and too glossy. So instead, I went to a Satin spray black, which of course ended up too glossy. I finally arrived at Flat Black, which isn't perfect, but I like it:
View attachment 352154
The black highlights the base well, and goes with anything. Below the base is a piece of the moulding before trimming, the right side stained with Special Walnut, the left with Polyshades. It ended up a bit darker, but still not to my liking.

Next I put some black self-adhesive felt on the bottom of the base (wanting to keep it all as low as possible, not showing a discernable gap around the edge), and then mounted my cannon balls. I may put a bit more super glue on the balls to help keep them in place; I /certainly/ will if they fall off. With the guns in place, the model looks like this:
View attachment 352157

Of course, this entire display was designed with a plastic display case I'd purchased from Hobby Lobby for $8.99, as discussed previously, now looks like this on the desk in my den, aka my workbench:
View attachment 352158
View attachment 352159

Some final pictures of the display case with guns from a couple angles:
View attachment 352161
View attachment 352162
View attachment 352164

That completes this model. I will now continue on the base of similar design for my single Constitution gun. It was a real problem getting the acrylic cover, but more on that next time. :)
Congratulations
 
Just wonderful
even the size of the balls is correct - BRAVO
I am looking forward to see the final presentation of the Conny gun
 
Just wonderful
even the size of the balls is correct - BRAVO
Thank you again, so much. Yes, the balls are within about 5% or so of the correct size. I lucked out there.
I am looking forward to see the final presentation of the Conny gun
You've got it! Continuing on with the base for the USS Constitution's 24-Pounder:

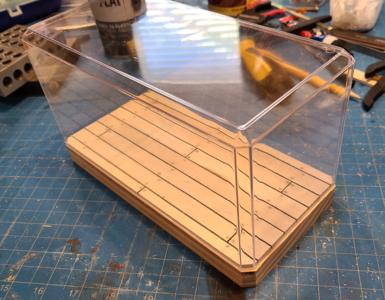
Again, I started with a display case from Hobby Lobby ($5.99 well spent). It took 4 tries to get one that had no scratches or damage, but this one's perfect.

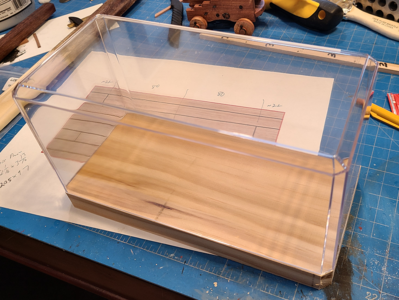
Please excuse any repetitions from the previous case; some things are different, at least. I first cut a piece of 3/4" pine I had on hand to be just barely larger than the outside of the case (I'm not using the base of the case):
1675017738801.png
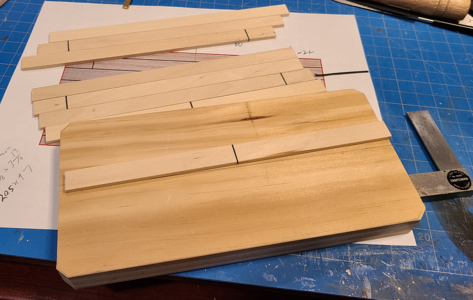
I then confirmed my layout across the width of the base, with scraps of the mattboard I used previously for caulking spacing:
1675017803336.png
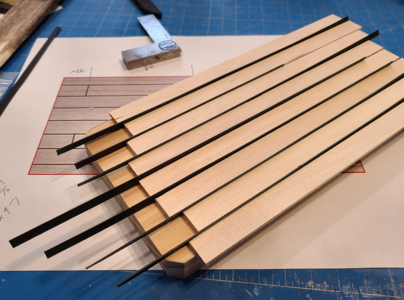
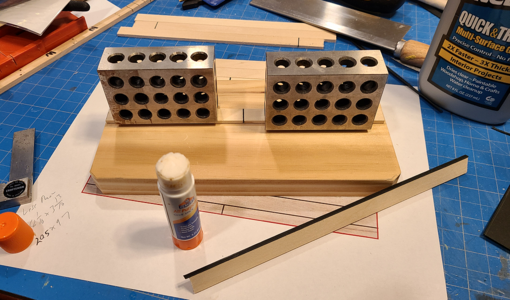
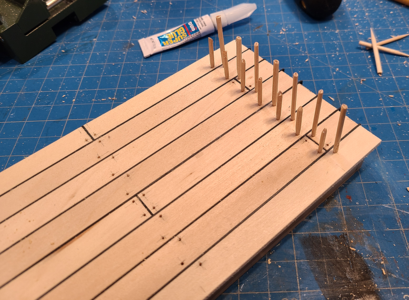
I made this base somewhat differently than the previous base. As it's shorter, I had at least some full length deck planks, so decided to make them all one piece, cutting a groove for the various joint planks:
1675017892083.png
I found that after a razor cut groove, a jig saw blade I had made for a perfect fit for the cut pieces of mattboard. The planks are 1/8" x 1/2" basswood, which scale to 2.5" thick x 10" wide full size in 1:20 scale, which are the correct width for the Conny's deck planks.

I also decided to place treenails after laying the planks, as I didn't think my previous method was consistent enough. After determining the center line, I placed and glued in place my first plank:
1675018171683.png
Note I have a little space between the end of the planks and pine base; I didn't need to do this, as I will cut it to proper size later, but I did.

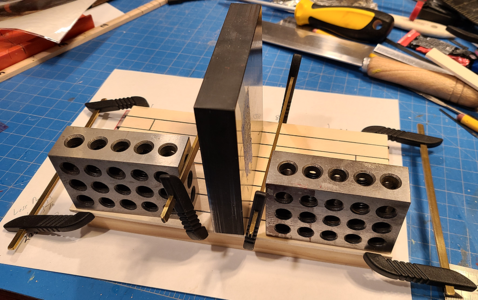
As done previously, I glued the cut pieces of mattboard to the side of the planks using a glue stick. With this method, it stuck in place very quickly, yet could be shifted slightly to be flush with the top, and held well when installing each plank:
1675018330912.png

Each plank was weighted in place and clamped to those already glued in place:
1675018377048.png

After alternating side-to-side, the last plank is installed:
1675018486872.png

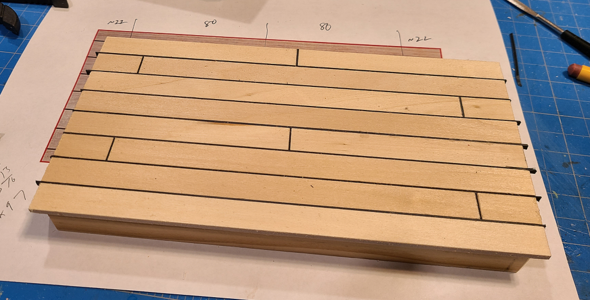
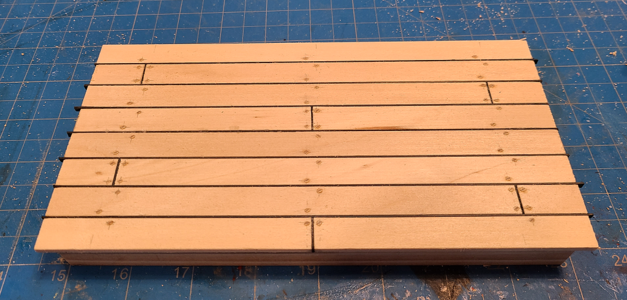
All planks are now glued in place. The overlaps will be fixed later. Note I decided I needed longer planks than I started with, to make them tight to the inside of the case.
1675018572665.png

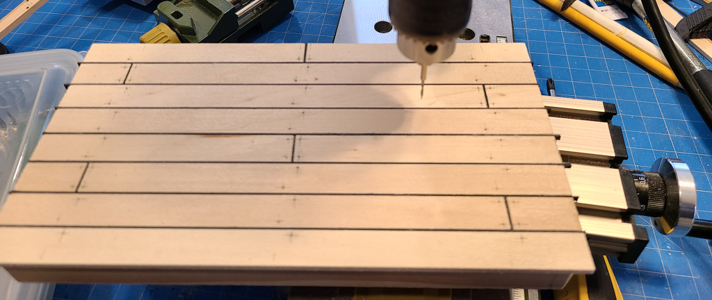
After laying out and center-punching holes for treenails, I drilled 1.3mm holes for them:
1675018634875.png
The holes scale to just over an inch full size, which I felt was reasonable for treenail size.

Treenails in process. I decided to place a drop of super glue on the tips before hammering in place, as one or two came loose in the previous base:
1675018747031.png

Treenails are now all in place and cut close to flush, but before sanding:
1675018789917.png

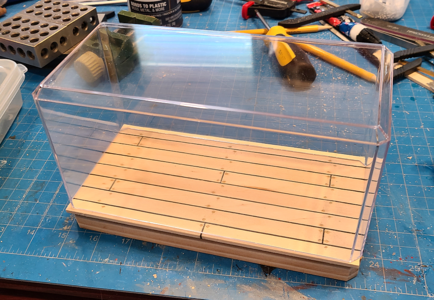
I then placed the case top in place to confirm placement and approximate amount to be trimmed off:
1675018853813.png

To make the recess upon which the case top sits, I turned the base upside down on my mini table saw, set the blade depth to approximately the plank thickness, and used the rip fence to determine how much to trim off.
1675018991379.png
The rip fence guides along the pine base, allowing me to accurately adjust the depth of the recess for the plastic case top. As expected, slightly different settings were required for the side, and the ends, and the 45-degree corners, but I simply cut until the top fit snuggly in place:
1675019110299.png

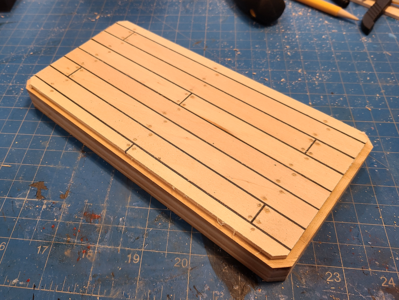
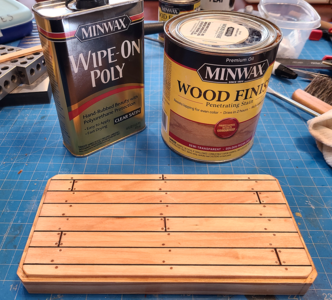
At this point I sanded the deck area, then stained and finished it:
1675019168479.png
I was a little unhappy that I used basswood. It was softer than I'd hoped, and allowed the sanded treenails to "smear" a little into the softwood, giving a slightly oval appearance. If I'd used hardwood planks instead, it would have been much cleaner. Oh well, live and learn.

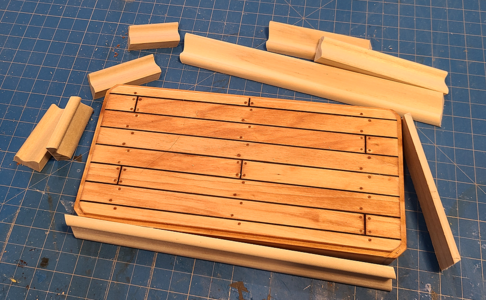
I cut the pieces of moulding I would use for the outside, leaving the oversize while cutting the right side with my 10" power miter saw. This actually cut cleaner and faster than my mini table saw, so half the cuts are better. I later found I didn't allow enough length for the main pieces, as the opposite 22.5 degree angle confused my brain, and had to remake them. So instead of saving a couple inches, I wasted a couple feet. At least I had extra.
1675019445953.png

After cutting my corner pieces, and re-cutting the rest, I decided to glue the corners in place first, again a change from my previous method:
1675019510163.png
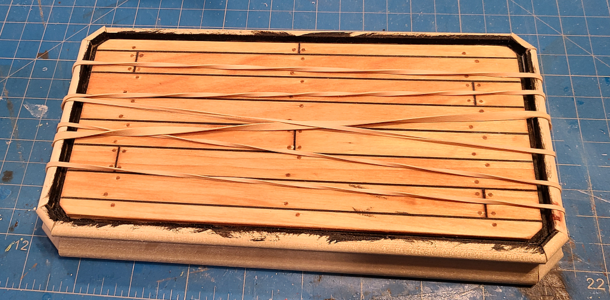
I had also painted the exposed pine on the base and the upper inside of the mouldings black so it would look better beneath the plastic top.

I then glued the other pieces of moulding on, a pair at a time. Slow drying, thick glue helps keep them in place, along with the rubber bands:
1675019608750.png

There were some very small gaps at the corners, so I used my favorite putty to fill the gaps. Of course, I couldn't use this if I were staining the moulding, but it works great with wood that will be painted.
1675019682566.png

The base moulding has now been sanded, and masking tape applied to protect the decking during spraying:
1675019739052.png

The completed base, with gun in place, using chocks as was done on the previous base. Cannonballs are in a rectangular 3x4 pyramid arrangement, different than the triangular arrangement done previously.
1675019863345.png
1675019881696.png
1675019898901.png
(I see in my photo that I need a bit of base touchup. Surprising that this shows things I can't see with the unaided eye.)

And with the case cover in place, my model is complete:
1675019986628.png
1675020034303.png
Whoops - reached my maximum of 25 pics. Continued:
 
And the last pic of the USS Constitution's 24-Pound Gun on its base:
1675020125186.png

One final pic of the Conny's gun along with the 12- and 32-pound guns from the HMS Victory in their case:
1675020175884.png

This has been a really fun project and my first really scratch built project. I enjoyed the various methods and workaround, using materials from wood to brass to iron to plastic as well as 3D models, as well as various techniques, many not standard. I hope you enjoyed them as well.

About the only model modifications I will make at this point would be to add gunlocks to all three guns (reversible double gunlock on the Constitution), if I can get my son to make them using his new 3D printer. Happy modeling!
 
And the last pic of the USS Constitution's 24-Pound Gun on its base:
View attachment 354285

One final pic of the Conny's gun along with the 12- and 32-pound guns from the HMS Victory in their case:
View attachment 354286

This has been a really fun project and my first really scratch built project. I enjoyed the various methods and workaround, using materials from wood to brass to iron to plastic as well as 3D models, as well as various techniques, many not standard. I hope you enjoyed them as well.

About the only model modifications I will make at this point would be to add gunlocks to all three guns (reversible double gunlock on the Constitution), if I can get my son to make them using his new 3D printer. Happy modeling!
Good morning. What a marvellous lesson on making cannons. Beautiful. Very well done. Cheers Grant
 
Back
Top