Has anyone had any luck translating the instructions into English? I have tried Google Translate several times and it is still in Chinese?
-

Win a Free Custom Engraved Brass Coin!!!
As a way to introduce our brass coins to the community, we will raffle off a free coin during the month of August. Follow link ABOVE for instructions for entering.
-

PRE-ORDER SHIPS IN SCALE TODAY!
The beloved Ships in Scale Magazine is back and charting a new course for 2026!
Discover new skills, new techniques, and new inspirations in every issue.
NOTE THAT OUR FIRST ISSUE WILL BE JAN/FEB 2026
You are using an out of date browser. It may not display this or other websites correctly.
You should upgrade or use an alternative browser.
You should upgrade or use an alternative browser.
1/24th scale POF 36' French Longboat, Cherry wood version from Unicorn
- Joined
- Jan 25, 2023
- Messages
- 543
- Points
- 308

Probably because there is no "text" in the instructions, just an image of text. It's like they took a picture of the text. The computer doesn't recognize it as text. I use the google translate phone app, you can use the camera to get a live translation or take a picture and it'll translate that.Has anyone had any luck translating the instructions into English? I have tried Google Translate several times and it is still in Chinese?
- Joined
- Sep 10, 2024
- Messages
- 1,022
- Points
- 393

Has anyone had any luck translating the instructions into English? I have tried Google Translate several times and it is still in Chinese?
I've started on it. I only have a page or two done due to time constraints. I'm at work now (don't tell my boss) and what I have done is on my home laptop. If you are at a particular spot and need a quick translation, give me the page and photo #s and I'll translate them for you.
I did the full translation for Unicorn's 1:160 Enterprize stern section and Zoly posted it on his site. My goal was to do this one and the upcoming midsection, but household duties have taken my time and it hasn't been a high priority. However, perhaps with some motivation ... Unicorn, are you listening?
This is your defense?Hey, you laugh all you want, but it takes skill to drill a hole with the drill going backward! Much less 20 of them. Though I did wonder why there was no sawdust about midway through.

- Joined
- Sep 10, 2024
- Messages
- 1,022
- Points
- 393

Hey, you laugh all you want, but it takes skill to drill a hole with the drill going backward! Much less 20 of them. Though I did wonder why there was no sawdust about midway through.
Soooo, the smoke didn't give you a clue?

- Joined
- Jan 25, 2023
- Messages
- 543
- Points
- 308

In my defense, don't you think 'I' should be forward and 'II' should be reverse?

Onward and upward. I drilled out all the nail holes.

I didn't intentionally drill through, I just needed a little extra depth for the CA to grip the brass better, but it did happen some.

Pour one out for the homies we lost along the way.

And yes, I did drill into my finger at least once.

I also received the gun and cradle assembly that was missing from the kit. I am not sure if I'll use it for this one, I think I want to do sails with this one and the gun for the pear wood version. But I will find a use for this somewhere, maybe a small vignette.


Onward and upward. I drilled out all the nail holes.

I didn't intentionally drill through, I just needed a little extra depth for the CA to grip the brass better, but it did happen some.

Pour one out for the homies we lost along the way.

And yes, I did drill into my finger at least once.

I also received the gun and cradle assembly that was missing from the kit. I am not sure if I'll use it for this one, I think I want to do sails with this one and the gun for the pear wood version. But I will find a use for this somewhere, maybe a small vignette.


Last edited:
- Joined
- Oct 1, 2023
- Messages
- 2,003
- Points
- 488

Looking good. I can't wait to get out of this COVID rehab facility and start back on my model.In my defense, don't you think 'I' should be forward and 'II' should be reverse?
View attachment 542206
Onward and upward. I drilled out all the nail holes.
View attachment 542203
I didn't intentionally drill through, I just needed a little extra depth for the CA to grip the brass better, but it did happen some.
View attachment 542204
Pour one out for the homies we lost along the way.
View attachment 542202
And yes, I did drill into my finger at least once.
View attachment 542205
I also received the gun and cradle assembly that was missing from the kit. I am not sure if I'll use it for this one, I think I want to do sails with this one and the gun for the pear wood version. But I will find a use for this somewhere, maybe a small vignette.
View attachment 542207
View attachment 542208
- Joined
- Jan 25, 2023
- Messages
- 543
- Points
- 308

Finally finished putting the nails in. I am using Bob Smith Extra Thick and just putting a blob down on a palette and dipping the ends of the wire in it, before inserting them. The CA glue says 10-25 seconds cure, but I can leave a small blob on the palette for 1/2 an hour or so without it losing any viscosity.

The last 7 frames will be hidden (something I didn't think about until I had already drilled them) so I can refrain from putting nails there, but I wonder if I should do some anyway just for the added structural benefit. Sanding the outside is gonna put a lot of stress on the frame, nailing the last seven frames could help, or it could hurt in some ways.


Next up, gotta figure out how to grind the nails closest to the keelson without gouging any of the decking or keelson. then I need to figure out how to sand everything down without destroying my entire stock of sandpaper. Then I need to figure out how to blacken them in situ.

The last 7 frames will be hidden (something I didn't think about until I had already drilled them) so I can refrain from putting nails there, but I wonder if I should do some anyway just for the added structural benefit. Sanding the outside is gonna put a lot of stress on the frame, nailing the last seven frames could help, or it could hurt in some ways.


Next up, gotta figure out how to grind the nails closest to the keelson without gouging any of the decking or keelson. then I need to figure out how to sand everything down without destroying my entire stock of sandpaper. Then I need to figure out how to blacken them in situ.
Just got my pearwood version of this kit. First look - very happy with the quality of the wood and other material. And the plan sheet will do for rigging as it looks quite complete - and unlike the instructions, the plan sheet has English text on it.
Thank you Rob, for vetting this kit.
But first - I have to finish rigging my Vanguard Models HM Sherbourne ...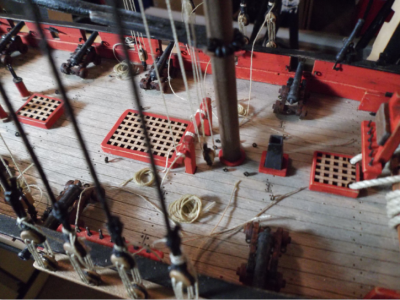
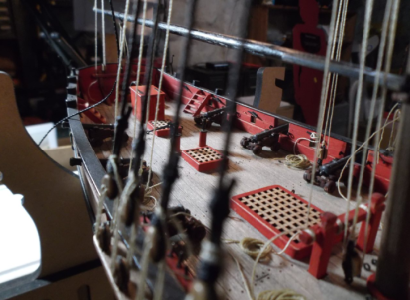
Thank you Rob, for vetting this kit.
But first - I have to finish rigging my Vanguard Models HM Sherbourne ...


Last edited:
- Joined
- Jan 25, 2023
- Messages
- 543
- Points
- 308

Whew, that was a rough one.
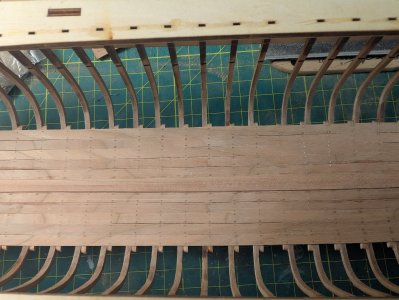
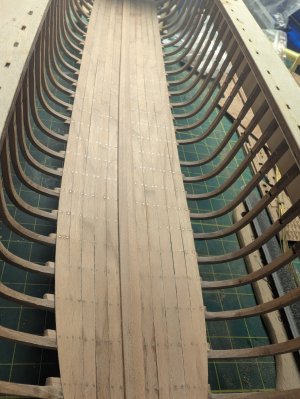
Getting rid of the nubs of the brass wire after gluing them in was pretty rough. I tried everything in my arsenal and then some and it was just kicking my posterior. I finally got these today in an effort to combat them. The flapper wheels were useless, too short to flap they ended up just being a worse drum sanding bit. But then I tried the other one and finally!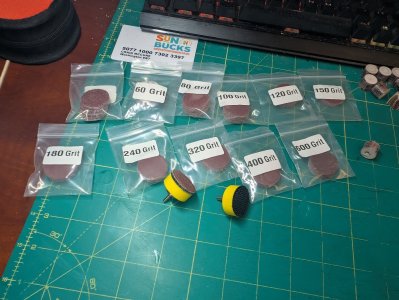
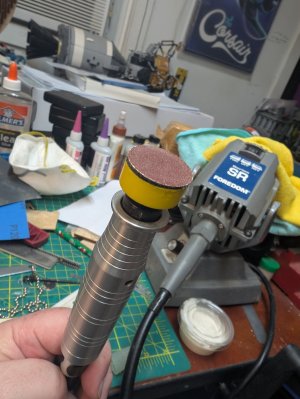
This thing at a halfway decent speed made very quick work of them. Chewed them right down tot he wood. I did scuff a couple spots deeper than I would have liked so I must get better at using it, but all in all I am glad to finally be done with the inner nails. The outer ones should not pose nearly as much problem as they will be far easier to reach.
When I finished I practiced making trennels. I still need more practice, but last time I only made it down to the mid 40's and this time I made it to the low 30's.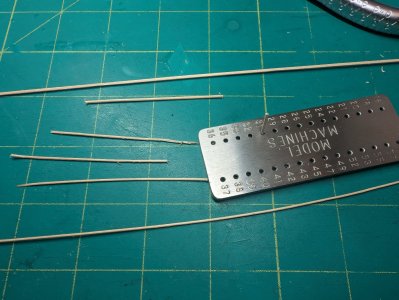
The brass wire on the kit is .6 mm (.023"). I am not sure I can get all the way down to that, but I really don't want to use brass wire on the Swiss Pear one. This is maple out of an Occre kit I no longer want to build. I think it would contrast well with the pear. I think wood nails would simplify things hugely! It would so much easier to use a chisel to get rid of the nubs.


Getting rid of the nubs of the brass wire after gluing them in was pretty rough. I tried everything in my arsenal and then some and it was just kicking my posterior. I finally got these today in an effort to combat them. The flapper wheels were useless, too short to flap they ended up just being a worse drum sanding bit. But then I tried the other one and finally!

This thing at a halfway decent speed made very quick work of them. Chewed them right down tot he wood. I did scuff a couple spots deeper than I would have liked so I must get better at using it, but all in all I am glad to finally be done with the inner nails. The outer ones should not pose nearly as much problem as they will be far easier to reach.

When I finished I practiced making trennels. I still need more practice, but last time I only made it down to the mid 40's and this time I made it to the low 30's.

The brass wire on the kit is .6 mm (.023"). I am not sure I can get all the way down to that, but I really don't want to use brass wire on the Swiss Pear one. This is maple out of an Occre kit I no longer want to build. I think it would contrast well with the pear. I think wood nails would simplify things hugely! It would so much easier to use a chisel to get rid of the nubs.
- Joined
- Sep 10, 2024
- Messages
- 1,022
- Points
- 393

This is maple out of an Occre kit I no longer want to build. I think it would contrast well with the pear.
Have you tried bamboo kabab skewers? Much stronger when pulling through the drawplate, very close to the color of maple and relatively inexpensive at your local grocer.
Started on my kit. So far, just getting setup. And translating the Chinese into English. Using google translate for that - tried others, but this works best for me. I translate on my laptop, then transfer the English instructions to my iPad as jpegs - which is easy to position and view while I model. (Translating on my iPad had issues)
I discovered that I couldn't translate a whole pdf page - as the whole page resolution was too crappy - and instead had to blow up the pdf, copy that part into a pic, and translate the pic and save it.
Still haven't even removed any char, much less glued or cut anything. But the keel parts and jig are laid out - ready to be worked up. Once I'm sure I understand everything in the instructions - I'll start.
I'm looking for a way to be sure the keel's stem is lined up properly with the keel before I glue it together. I may use the plan sheet for that. First I'll glue up the 3 straight keel sections. Then I'll flatten the plan sheet, spread it out on my work bench, and lay the straight keel section and the stem on top of it for alignment.
That plan sheet is hanging up now, where I can see it easily while working. Plan sheet says it's not for 1:1 work, but it happens to be accurately 1:1 - mercy.
I'm going to pin my frames together, but not glue em, until I've put em into the jig. Not sure what the instructions suggest for that.
Looking fwd to your next posting.
I have translated the instructions - I had to create 3 sections for each page, in order to get good translations. Each translated section is about 1.5mb and includes the pics. There are 23 files total. If anybody wants a copy - I'll send em to you ... tell me how you'd like to get em. They are currently in png format. And as I said, each one is about 1.5mb. And the zip file is 32mb. I included one of the section files so you know what I'm offering.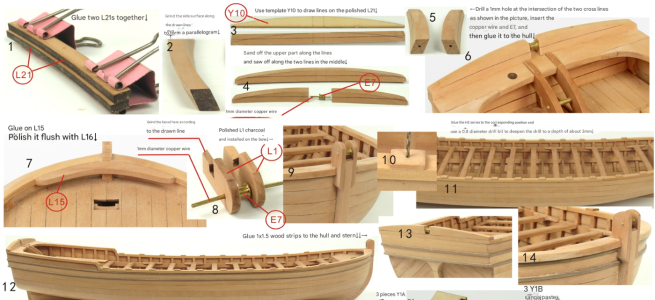


 , I'm probably being overly sarcastic and reductive. Being a man and a father, I feel the need to be stoic and not really emotive so I hide behind humor. In all honesty, I am really enjoying this, even if it feels a bit tedious sometimes.