Incredible work, Nigel. The PE set for this kit is pretty amazingly detailed, and I would say mastery is already your domain.
-

Win a Free Custom Engraved Brass Coin!!!
As a way to introduce our brass coins to the community, we will raffle off a free coin during the month of August. Follow link ABOVE for instructions for entering.
-

PRE-ORDER SHIPS IN SCALE TODAY!
The beloved Ships in Scale Magazine is back and charting a new course for 2026!
Discover new skills, new techniques, and new inspirations in every issue.
NOTE THAT OUR FIRST ISSUE WILL BE JAN/FEB 2026
You are using an out of date browser. It may not display this or other websites correctly.
You should upgrade or use an alternative browser.
You should upgrade or use an alternative browser.
1/350 Akagi Hasegawa - Completion of a project long overdue
Thank You. I haven't heard of Alliance model works. Let my search begin again.
I had to buy my Alliance parts (also have some replacement AA guns from them for this model from a stockist in Germany
Incredible work, Nigel. The PE set for this kit is pretty amazingly detailed, and I would say mastery is already your domain.
Thankyou very much Mark.I do look at some of the 1/700 work on YouTube and I am humbled.The photo etch kit for this was THE kit at the time.I look at this though and compare it to the Tetra set I have for the Fujimi Kaga and think the Tetra set trumps this.
I also have the Trumpeter Piotr Veliky missile cruiser in the stash and the Five Star etch set.The photo etch radar arrays in that set are mind blowing and will cause me much frustration when I eventually come to build it
 There are pictures on Youtube of the kit with set built by a Russian modeller and it is incredible
When I first started model making,I remember seeing jaw dropping pictures of 1/700 ships with all the railings etc made from stretched sprue, that really is talent
Kind Regards
Nigel
I encountered an issue when trial fitting the front superstructure in that the pins no longer lined up with the holes on the deck.This used to do but over time since I built this section things have moved a little My solution is to remove the locating pins and fill the holes in the deck.I did try to flex the short legs but the styrene has become brittle and it resulted in a snapped leg which I had the glue back on.
As I had replaced the kit deck to allow me to drill the tiny holes around the base of the superstructure,I had to replace the ribbing.This has been reinstated using Evergreen styrene section
Kind Regards
Nigel
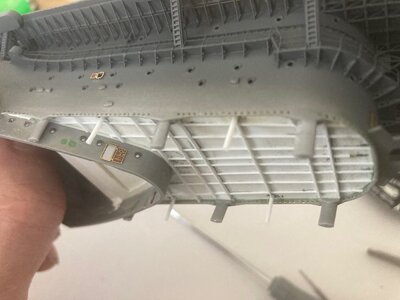
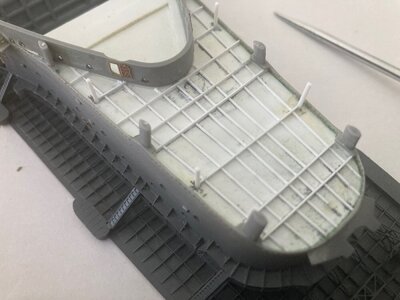
As I had replaced the kit deck to allow me to drill the tiny holes around the base of the superstructure,I had to replace the ribbing.This has been reinstated using Evergreen styrene section
Kind Regards
Nigel


Nigel, Just worked through your build log. Very impressive PE work especially since you say no previous experience! As always, masterful approach to everything you do. I'm following - have the Indianapolis and Iowa on the shelf - along with upgrade packs.Make no mistake Will, will all the additions, this kit is a mammoth task. I had no photo etch experience when I started this, by the time I finish it I feel I will have mastered the art
Kind Regards
Nigel
It's definitely becoming the PE standard to measure. Snake charming that's a new one I think I'll use it.
It's definitely becoming the PE standard to measure. Snake charming that's a new one I think I'll use it.
Thankyou Will
The second from top one had to be fed inside the front columns as it was one single length. The air was blue numerous times as the little railing feet snagged on anything and everything
Kind Regards
Nigel
The fact that the railings are perfectly straight is a testimony to your mastery over PE. Bravo!
Thankyou PaulThe fact that the railings are perfectly straight is a testimony to your mastery over PE. Bravo!
I chose to use the Eduard railings for the deck because they have a continuous bottom rail to glue t
Kind Regards
Nigel
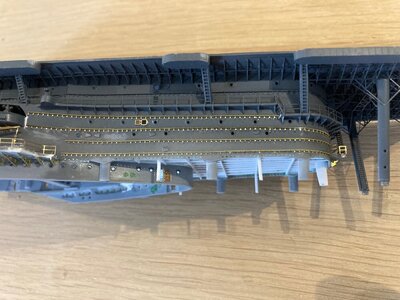
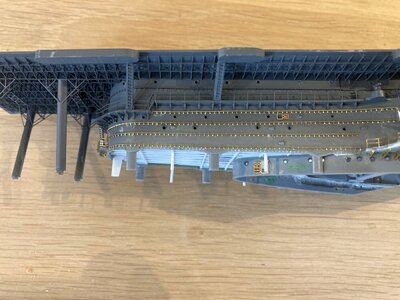
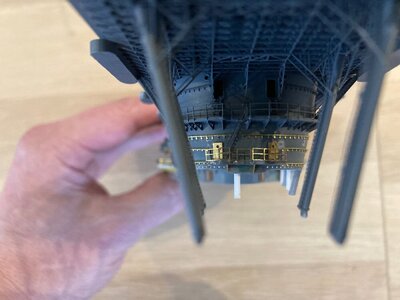
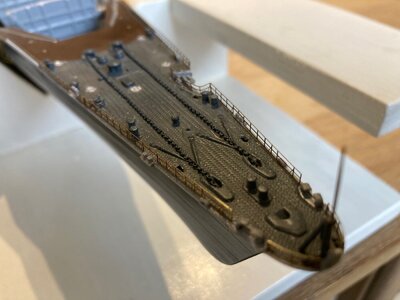
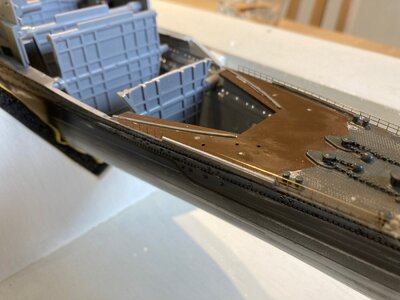
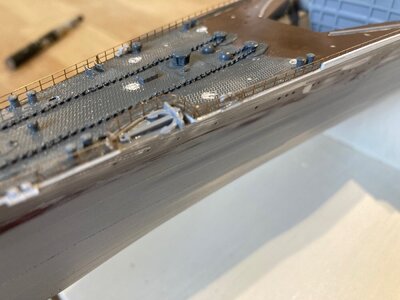
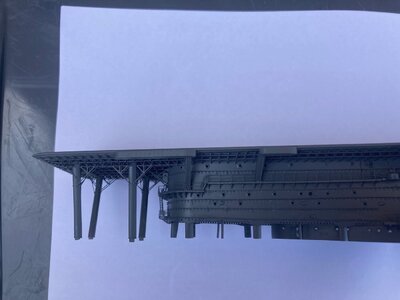
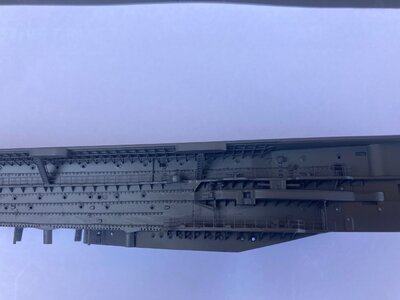
I have dusted the metal parts with Mr hobby metal primer and then applied some light coats of Tamiya LP13 Sasebo grey.
These pictures are very "warts and all" and show the raw painted finish of the photo etch.The paint will be left to fully cure for at least a week and then the rough areas and visible glue will be toned right down with a combination of fibreglass pencil and pieces of 1500 grit sanding sponge before applying another hit of Sasebo grey
Kind Regards
Nigel
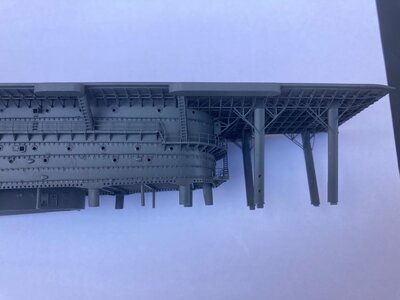
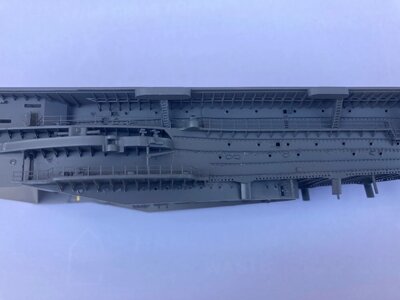


The jackstays look amazing. What detail, brings the side into center view I'll definitely take your advice and simply highlight mine with black wash. Your work is fun to watch.
Thanks Will, the jackstays are an insane amount of work though and as I said only a small improvement over the kit moulded detail which looks really good with a black wash.No matter how hard I try, I cannot get them perfectly straight given the cramped work area and the minuscule size of them.
Kind Regards
Nigel
Kind Regards
Nigel
Last edited:
Yeah, it definitely takes a knack to draw-out sprue to specific fine diameters. I love the steel-navy stuff; it's a different form of complication, more akin to watch-making, than the baroque ornament of our beloved Frenchies.Thankyou very much Mark.I do look at some of the 1/700 work on YouTube and I am humbled.The photo etch kit for this was THE kit at the time.I look at this though and compare it to the Tetra set I have for the Fujimi Kaga and think the Tetra set trumps this.
I also have the Trumpeter Piotr Veliky missile cruiser in the stash and the Five Star etch set.The photo etch radar arrays in that set are mind blowing and will cause me much frustration when I eventually come to build itThere are pictures on Youtube of the kit with set built by a Russian modeller and it is incredible
When I first started model making,I remember seeing jaw dropping pictures of 1/700 ships with all the railings etc made from stretched sprue, that really is talent
Kind Regards
Nigel
Whatever a fiberglass pencil is, exactly, it sounds like something I need to possess; a pointed abrasive?I have dusted the metal parts with Mr hobby metal primer and then applied some light coats of Tamiya LP13 Sasebo grey.
These pictures are very "warts and all" and show the raw painted finish of the photo etch.The paint will be left to fully cure for at least a week and then the rough areas and visible glue will be toned right down with a combination of fibreglass pencil and pieces of 1500 grit sanding sponge before applying another hit of Sasebo grey
Kind Regards
Nigel
View attachment 386451View attachment 386452View attachment 386453View attachment 386454
BTW, I echo Paul's sentiments about your railings and PE work, generally - brilliant stuff!
Nigel, I've never seen these before - just ordered a set from Amazon! Love trying new thingsThanks Marc
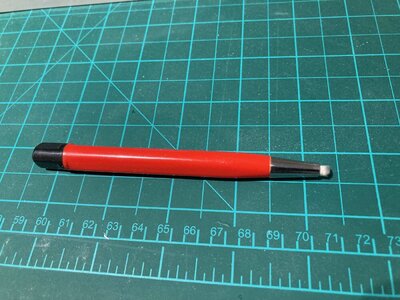
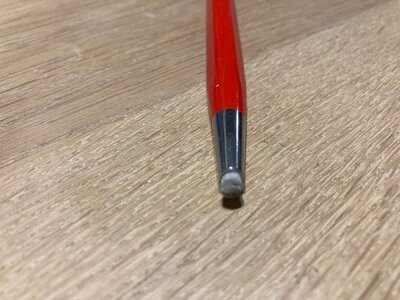
Below is the fibreglass pencil I use for fine polishing of painted areas that are awkward to sand.Cheap as chips from Halfords in the UK so easy to replace when they loose their effectiveness
Kind Regards
Nigel
View attachment 387105View attachment 387106
Hi and good morning. Excellent work your doing on this model so much to be admired PE wise. My question, do you wear a mask while using the fibre-glass pencil and is that the Vallejo pencil?Thanks Marc
Below is the fibreglass pencil I use for fine polishing of painted areas that are awkward to sand.Cheap as chips from Halfords in the UK so easy to replace when they loose their effectiveness
Kind Regards
Nigel
View attachment 387105View attachment 387106
Hi and good morning. Excellent work your doing on this model so much to be admired PE wise. My question, do you wear a mask while using the fibre-glass pencil and is that the Vallejo pencil?
Thankyou and no I don't, The amount of sanding dust produced is microscopic and never gets the chance to be airborne as the process is so slow and light.No this isn't a Vallejo product, just one meant for automotive chip touch ups.
I have a set of these with different filaments. I’ve used them to clean up metal bits before burnishing. A handy tool.


