Nigel that woulds be wonderful of you to help. I spent yesterday reviewing the SSmodelkit pe it appears to be very complete, 12 sheets in all. Thanks again
-

Win a Free Custom Engraved Brass Coin!!!
As a way to introduce our brass coins to the community, we will raffle off a free coin during the month of August. Follow link ABOVE for instructions for entering.
-

PRE-ORDER SHIPS IN SCALE TODAY!
The beloved Ships in Scale Magazine is back and charting a new course for 2026!
Discover new skills, new techniques, and new inspirations in every issue.
NOTE THAT OUR FIRST ISSUE WILL BE JAN/FEB 2026
You are using an out of date browser. It may not display this or other websites correctly.
You should upgrade or use an alternative browser.
You should upgrade or use an alternative browser.
1/350 Akagi Hasegawa - Completion of a project long overdue
- Joined
- Jul 8, 2023
- Messages
- 34
- Points
- 48

Hey guys, I am new hear I found this thread actually from wills IJN cruiser aircraft carrier build, and I gotta say I love both of your work and hope to be sharing mine with you all soon, I'm working on a 1/350 USS New Jersey post 1981 kit it's the largest scale I've ever built. But that's not what made me want to comment it's actually your drill bit discussion.Micromot 50E with transformer. I like it because it is so lightweight and easy to hold, almost pen like.
I get my drills from drill-service.co.uk. These sizes are not cheap, I can buy a set of DIY drills for the price of one of these
Kind Regards
Nigel
I live in the US and local to me we have a tool store that sells cheap tools for the do it your selfer, most of these tools wouldn't be considered high quality but they are good enough for someone doing a little weekend work around the house or garage and not looking to spend the money on name brand tools that may only be needed for a few jobs. Any ways the store does have some pretty cool rare jems and one of those happens to be a complete set of carbide micro drill bits very similar to the ones you posted in a picture. The set comes with I believe 20 bits 2 bits of each size and the smallest is roughly insulin needle thin or smaller, I'll post a picture for you when I have a chance cause I'm buying a new set this week due to breaking a few from side loading.
Anyways the best part about these bits the price 10 bucks ( US dollars). The Store is called Harbor Freight.
Funny side note I accidentally slapped my hand down on the smallest bit as it was standing point up in its stand.. in a quick reaction I pulled my hand way not realizing what I had done.
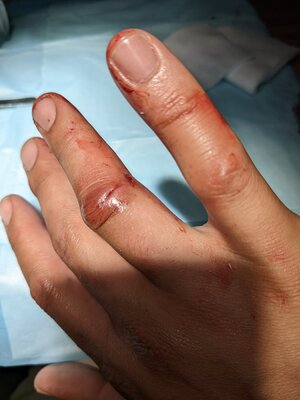
A Few moments later I noticed a pain in my knuckle joint ... And then the horror hit me as I looked down at my bit stand and then at my finger.
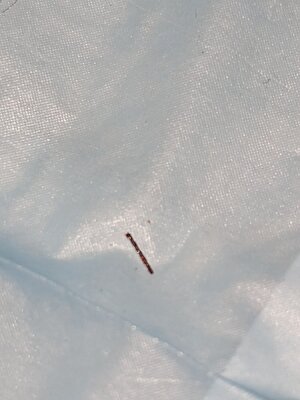
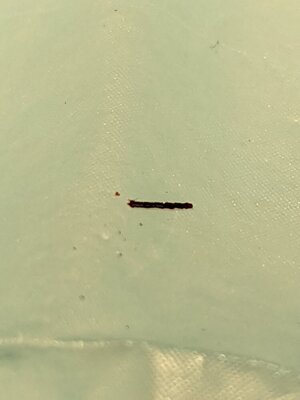
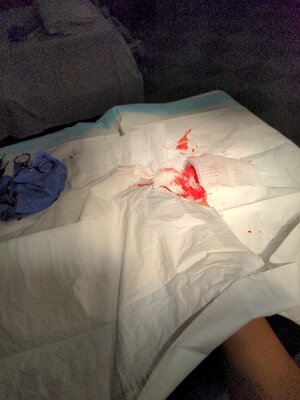
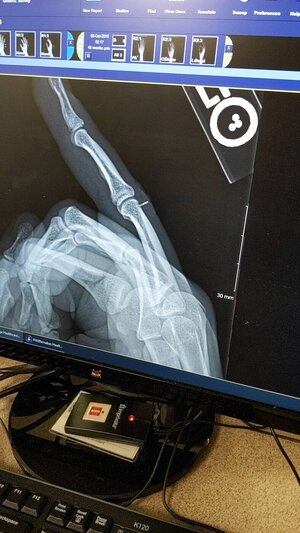
The bit had penetrated my skin went directly into the joint and snapped off, I had to go to the hospital and have it surgically removed in the ER. I got pictures to share.
Perhaps you guys can get your bits online threw Harbor freight and save a bunch of money
Drill bit in knuckle. OCH!
- Joined
- Jul 8, 2023
- Messages
- 34
- Points
- 48

As I mentioned earlier these are the micro drill bits or what's left of my recent set. The smaller ones are very fragile and don't take side loading well so I wind up breaking at least one each build, fortunately they are cheap enough I can just run to the store an pick up a set or two for spares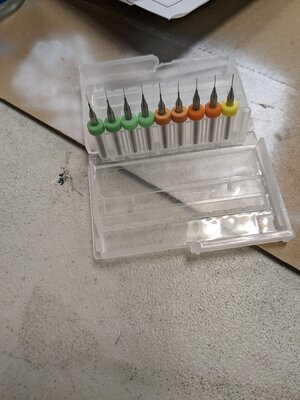
This is just one half of the set there is another box similar to this with the slightly larger sizes. Let me know if you guys would like me to send you the store link. I hope this could be helpful

This is just one half of the set there is another box similar to this with the slightly larger sizes. Let me know if you guys would like me to send you the store link. I hope this could be helpful
- Joined
- Jan 21, 2023
- Messages
- 372
- Points
- 138

at least it was not a table saw accident like that that happened with 2 friends in their respective workshops. the 1 friend lost 2/3 of 1 finger close to the thumb & the other friend lost 2 fingers with the other 2 fingers not fully functional & i think lost part of the thumb.
I have had a little break, now back on with things. I decided to focus on completing the bow deck and superstructure section. I forgot how many layers of detail there are to add.
First job was to metal prime and then topcoat the area where I had two platforms to fit and I did the underlying structure whilst I was at it.
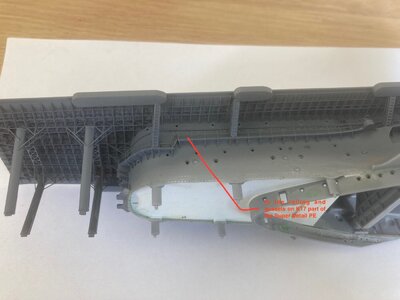
After this, I installed the two platforms I made earlier, well actually several years ago.The tabs on the platforms had to have the back edge trimmed to allow the platforms to slide in, marked with the arrows
I added gussets underneath from Allianz Modelworks universal set and the remaining details to these areas. The etch Paravane cranes were fun Only one included in the Eduard set so good job I have two sets!
Kind Regards
Nigel
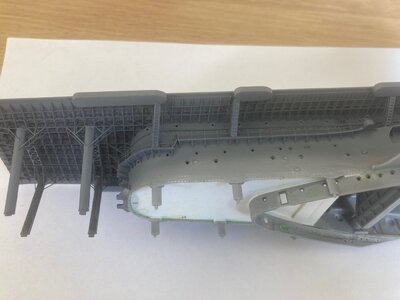
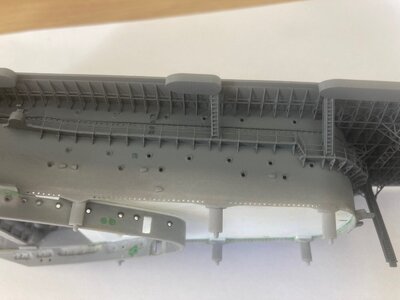
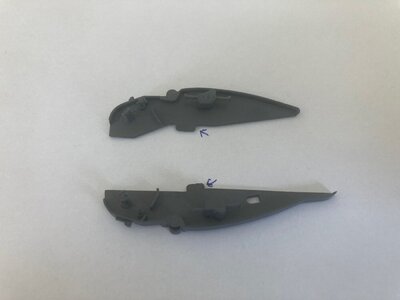
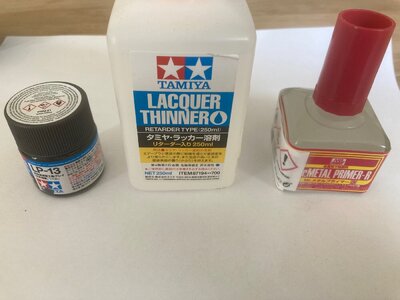
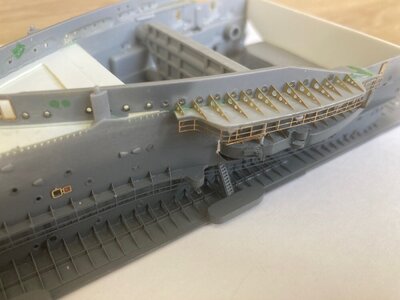
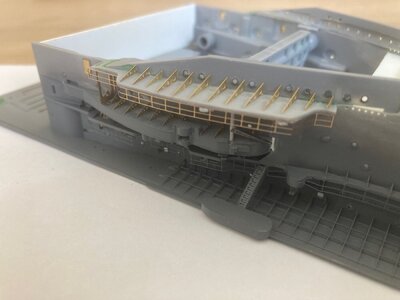
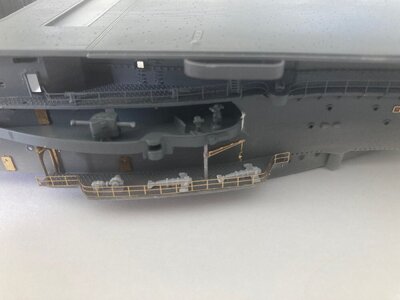
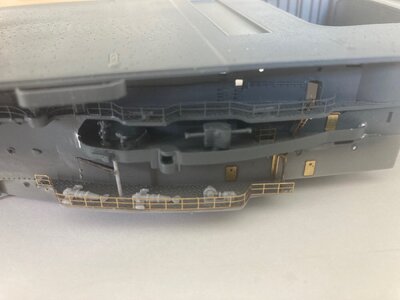
First job was to metal prime and then topcoat the area where I had two platforms to fit and I did the underlying structure whilst I was at it.
After this, I installed the two platforms I made earlier, well actually several years ago.The tabs on the platforms had to have the back edge trimmed to allow the platforms to slide in, marked with the arrows
I added gussets underneath from Allianz Modelworks universal set and the remaining details to these areas. The etch Paravane cranes were fun
Kind Regards
Nigel


I look at your work and realize what I have ahead of me. You set the standard for me to achieve.I have had a little break, now back on with things. I decided to focus on completing the bow deck and superstructure section. I forgot how many layers of detail there are to add.
First job was to metal prime and then topcoat the area where I had two platforms to fit and I did the underlying structure whilst I was at it.
After this, I installed the two platforms I made earlier, well actually several years ago.The tabs on the platforms had to have the back edge trimmed to allow the platforms to slide in, marked with the arrows
I added gussets underneath from Allianz Modelworks universal set and the remaining details to these areas. The etch Paravane cranes were funOnly one included in the Eduard set so good job I have two sets!
Kind Regards
Nigel
View attachment 385143View attachment 385144View attachment 385145View attachment 385146View attachment 385147View attachment 385148View attachment 385149View attachment 385150
Make no mistake Will, will all the additions, this kit is a mammoth task. I had no photo etch experience when I started this, by the time I finish it I feel I will have mastered the art
Kind Regards
Nigel

Kind Regards
Nigel
As I mentioned earlier these are the micro drill bits or what's left of my recent set. The smaller ones are very fragile and don't take side loading well so I wind up breaking at least one each build, fortunately they are cheap enough I can just run to the store an pick up a set or two for sparesView attachment 383861
This is just one half of the set there is another box similar to this with the slightly larger sizes. Let me know if you guys would like me to send you the store link. I hope this could be helpful
I have bought similar sets before, only issue was the smallest drill wasn't small enough
- Joined
- Jul 8, 2023
- Messages
- 34
- Points
- 48

I honestly can't imagine what you would need anything smaller then the smallest bit in this kit as it's like Insulin needle thin but I haven't got to the skill level your at yet so maybe it's yet to come for me but I'll say this if it's smaller then whats in the kit I'm not sure I'd bother lol cause I'd surely break the bit in the attemptI have bought similar sets before, only issue was the smallest drill wasn't small enough
I honestly can't imagine what you would need anything smaller then the smallest bit in this kit as it's like Insulin needle thin but I haven't got to the skill level your at yet so maybe it's yet to come for me but I'll say this if it's smaller then whats in the kit I'm not sure I'd bother lol cause I'd surely break the bit in the attempt
I use 0.18mm drills for the ladder rungs, smallest in the kit I bought was 0.3mm and yes they do snap easy
- Joined
- Jul 8, 2023
- Messages
- 34
- Points
- 48

I didn't think of this but now that makes sense, though I'm pretty sure in my kit my smallest bit would be able to do the job though I've never specifically tried. If I had a jig/template for marking holes for ladder connections it might make my job of attaching them alot easier, this is something I might consider and experiment withI use 0.18mm drills for the ladder rungs, smallest in the kit I bought was 0.3mm and yes they do snap easy
Yes the North Star rungs came with a template, no way I could have drilled the holes otherwise to anywhere near the accuracy requiredI didn't think of this but now that makes sense, though I'm pretty sure in my kit my smallest bit would be able to do the job though I've never specifically tried. If I had a jig/template for marking holes for ladder connections it might make my job of attaching them alot easier, this is something I might consider and experiment with
Just catching up on your build log Nigel. You are making steady progress.
Just catching up on your build log Nigel. You are making steady progress.
Thanks Brian, slowly slowly catchee Monkey
Kind Regards
Nigel
Painting the PE beneath the deck the IJN grey seems to be a tragedy. The shiny PE was like a piece of modern metal art. A question, the railing on the below video what PE kit is it from?
View attachment 385861
Thanks Nigel. It's looking fantastic.
Thankyou Will
The railing on the walkway is out of Hasegawa's Set A.The Gussets are Alliance model works universal IJN gussets
Kind Regards
Nigel
Thank You. I haven't heard of Alliance model works. Let my search begin again.


