That is a really cool technique, Nigel!
-

Win a Free Custom Engraved Brass Coin!!!
As a way to introduce our brass coins to the community, we will raffle off a free coin during the month of August. Follow link ABOVE for instructions for entering.
-

PRE-ORDER SHIPS IN SCALE TODAY!
The beloved Ships in Scale Magazine is back and charting a new course for 2026!
Discover new skills, new techniques, and new inspirations in every issue.
NOTE THAT OUR FIRST ISSUE WILL BE JAN/FEB 2026
You are using an out of date browser. It may not display this or other websites correctly.
You should upgrade or use an alternative browser.
You should upgrade or use an alternative browser.
1/350 Akagi Hasegawa - Completion of a project long overdue
Sen Navy vids well worth a watch Nathan. He is based in Taiwan and obviously a proFasinating details Nigel, you are taking it to another level. I m highly interested in the painting technic you mentioned, going to check it out on Yutube
Nigel thank you for the nice comments on my Mogami build. Presently I'm building the USS Gambier Bay with Hasegawa detail upgrades and other than that it will be an out of the box build. Next I plan on the IJN Akagi and I've gathered up all the Hasegawa a, b, c, jack stays and a super detail up knock off by SSmodels and need the Hasegawa super detail up (40071) kit any ideas of where to get one?
Hi Will
You may have a search on your hands as these tend to be limited runs. I sourced mine from Japan.I frequently use HLJ.com and 1999.jp, great service from both.
Failing that Ebay ,I am afraid. Came up trumps for me though regarding Tetra super detail kit for Fujimi 1/350 Kaga.Found that in China and only one available globally at the time.
Good Luck!
Nigel
Great work on the ironwork beneath the deck. Very nice and a shame to paint. I bought the SSModels knockoff of the Hasegawa 40071 and did not come with any directions so would it be too much to ask for a copy of the super detail kit (40071) instructions.
Great work on the ironwork beneath the deck. Very nice and a shame to paint. I bought the SSModels knockoff of the Hasegawa 40071 and did not come with any directions so would it be too much to ask for a copy of the super detail kit (40071) instructions.
Thanks Will. Leave it with me,I will scan them this weekend

Kind Regards
Nigel
Nigel, Would you please explain how you join pieces of the PE together? Are they glued, soldered? Curious minds want to know.
Randy
Randy
Hi Randy
The latticework was slotted together and tack glued using the tiniest amount of medium CA on the tip of a scalpel blade.This was on the side that contacts the flight deck.The assembled frame was then put on the underside side of the flight deck and tack glued in just a few locations.
Watered down Mig Ultra glue was then applied to every joint using a small paintbrush.This glue wicks into all the joins.I invariably use this glue now rather than CA, it is more forgiving and gives a cleaner result.Items like the crane track are glue with medium CA due to the minimal size of the joints.
Regards
Nigel
I'm not familiar with Mig Ultra but looking at your work and results I'll give it a try. Thanks again Nigel
Fancied a break from planking Soleil Royal for a bit so Akagi is on the bench, or kitchen table in this case. Since my last update, I have made a work stand, 19mm ply, self adhesive foam strip and some household paint and job done. The flat rail on the front is a hand rest, this is a massive improvement than working on the hull just sat on the bench.
I am continuing with a view to completing the etch details on the Starboard side.This includes adding the rest of the Portholes, Tamiya Degaussing cable and individual ladder rungs. There is also a jackstay ( Hasegawa's term, actually a grab/footrail) to fit just above the waterline for nearly the full length of the hull
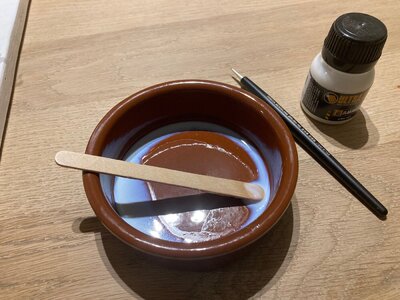
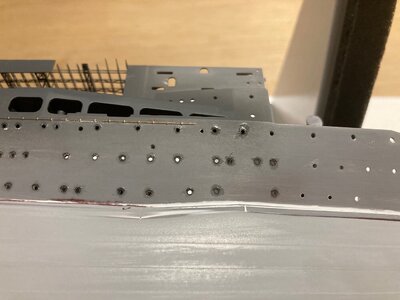
Currently working on the Portholes. The ultra glue is thinned with tap water to the viscosity of milk and applied to the prepositioned part with a very fine brush.Capillary reaction wicks the glue into the joint and when dry, the glue shrinks back to be almost invisible after paint (unlike CA).These portholes (@1mm diameter) can be fine tuned into final alignment with the brush bristles.
Can do about 30 of these max, then need a break due to the extreme concentration required
Kind Regards
Nigel
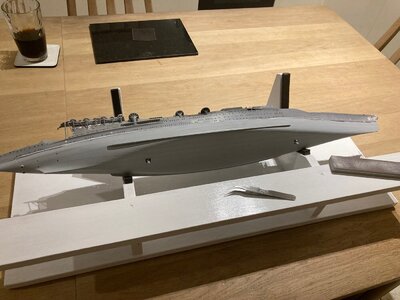
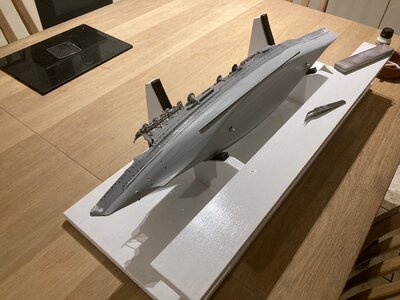
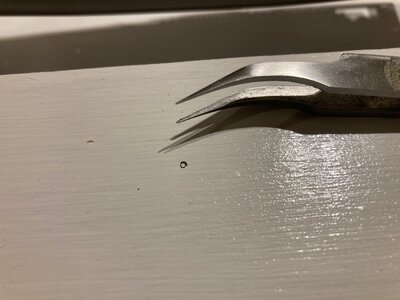
I am continuing with a view to completing the etch details on the Starboard side.This includes adding the rest of the Portholes, Tamiya Degaussing cable and individual ladder rungs. There is also a jackstay ( Hasegawa's term, actually a grab/footrail) to fit just above the waterline for nearly the full length of the hull
Currently working on the Portholes. The ultra glue is thinned with tap water to the viscosity of milk and applied to the prepositioned part with a very fine brush.Capillary reaction wicks the glue into the joint and when dry, the glue shrinks back to be almost invisible after paint (unlike CA).These portholes (@1mm diameter) can be fine tuned into final alignment with the brush bristles.
Can do about 30 of these max, then need a break due to the extreme concentration required

Kind Regards
Nigel


Wonderful work on the JN Akagi it's pleasure to follow the build. My total concentration on portholes would be limited to 6 so I'm extremely impressed by your 30. I note you use MIG Ultra glue which is currently Out of Stock in NZ so will purchase from Aust. for my next Trumpeter 1/350 - My question; Do you use or have you used MIG Ultra as a replacement for CA on ship's rigging? cheers.
Wonderful work on the JN Akagi it's pleasure to follow the build. My total concentration on portholes would be limited to 6 so I'm extremely impressed by your 30. I note you use MIG Ultra glue which is currently Out of Stock in NZ so will purchase from Aust. for my next Trumpeter 1/350 - My question; Do you use or have you used MIG Ultra as a replacement for CA on ship's rigging? cheers.
Thankyou.
Excellent question and my answer, no, not yet. It would make a lot of sense as it remains flexible and would wick right into the knot, this is assuming you mean wooden builds. Only downside is it may leave a glossy finish (you can do windows with this stuff similar to Kristal Klear). Nothing a dab of matt varnish wouldn't sort though
As to rigging plastic models with Eze line etc, no, will stick to CA, the elastic nature of the line means you can get away with a rigid bond.
Kind Regards
Nigel
Let me understand you will add portholes for each on the ship from the Eduard pe, is this correct? The reason for thinning the hull thickness around the portholes is for visual effect. I saw a video where that had added clear plastic behind the portholes for added realism, have you thought of this?
Amazing amount of work and looking fantastic. When I build my Akagi I'll only be using the Hasegawa pe kits with the SSmodel for the super detail pe and while I love to watch your work I think mine will be more generic. Our basement is being finished so my wood shop will be available again to start up on my HM Cheerful by Syren drawings.
Amazing amount of work and looking fantastic. When I build my Akagi I'll only be using the Hasegawa pe kits with the SSmodel for the super detail pe and while I love to watch your work I think mine will be more generic. Our basement is being finished so my wood shop will be available again to start up on my HM Cheerful by Syren drawings.
I am a big fan of your precision work on every model you make. The question I have today is how do you align portholes with the actual hole?
Let me understand you will add portholes for each on the ship from the Eduard pe, is this correct? The reason for thinning the hull thickness around the portholes is for visual effect. I saw a video where that had added clear plastic behind the portholes for added realism, have you thought of this?
Amazing amount of work and looking fantastic. When I build my Akagi I'll only be using the Hasegawa pe kits with the SSmodel for the super detail pe and while I love to watch your work I think mine will be more generic. Our basement is being finished so my wood shop will be available again to start up on my HM Cheerful by Syren drawings.
Thankyou Will.
Main reason for adding the Portholes is to reinstate the eyebrows. After removing the moulded on Jackstays and the mould misalignment at one quarter in from each end it was a thankless task to keep the moulded eyebrows. In addition because of moulding constraints, the upper row of portholes under the foredeck are a pronounced oval. Just finished fitting the portholes on this section and the etch only just hides this.
To try and fit clear glazing on this model would be a nightmare as you would need to do it before joining the hull halves but after paint.It is bad enough with the design of the overhanging flight decks and associated ironwork. Great feature but a nightmare to work round the order of paint and assembly.
The Fujimi Kaga and Tetra etch I recently purchased is even more complex. Even more visual interest than Akagi but even more of a paint nightmare. I must enjoy punishing myself
Kind Regards
Nigel
I am a big fan of your precision work on every model you make. The question I have today is how do you align portholes with the actual hole?
Thanks Jim
By eye! Tried using a piece of brass wire to line up but the etch moves when you pull the wire out.Leaving the wire in place when gluing would almost certainly mean the whole lot would be bonded together
Kind Regards
Nigel
Keep it up Nigel as you punish yourself that leave us in another category as voyeurs watching and learning from your pain. lol Its great to learn from you and the posts are what I look forward to reading and learning
Yes I was referring to sailing ship rigging. Using CA has unpleasant effects on my breathing and further to your post re MIG ultra glue it's worth my trying once the product is back in stock down here in Australasia. As far as glossy finish is concerned Gunze do a nice clear matt product as does Vallejo and Tamiya all would suffice for matting down and touch-ups. I'm enjoying the wood ship build but still have 1/350 plastic models to start and complete. For these riggings I use fly fishing thread but one day hopefully the art of Sprue Stretching could be mastered. (not holding my breath thoughThankyou.
Excellent question and my answer, no, not yet. It would make a lot of sense as it remains flexible and would wick right into the knot, this is assuming you mean wooden builds. Only downside is it may leave a glossy finish (you can do windows with this stuff similar to Kristal Klear). Nothing a dab of matt varnish wouldn't sort though
As to rigging plastic models with Eze line etc, no, will stick to CA, the elastic nature of the line means you can get away with a rigid bond.
Kind Regards
Nigel
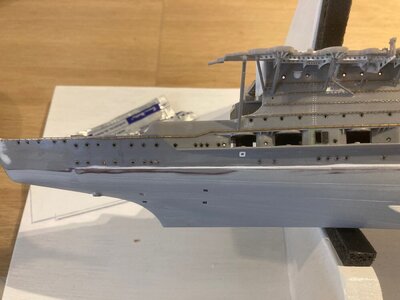
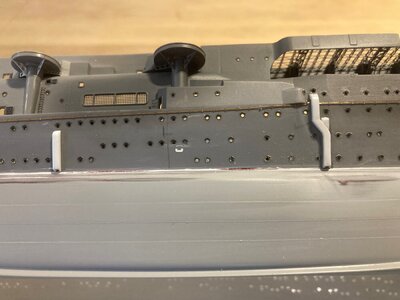
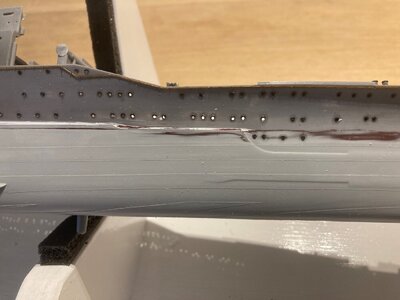
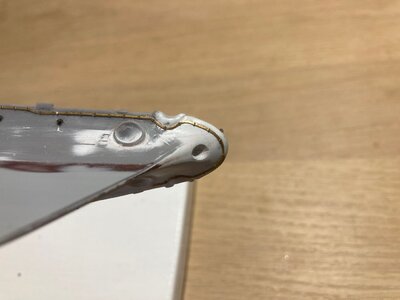
I have completed Portholes and Degaussing cable on the Starboard side. There are 6 or so portholes left but these are next to the join of the superstructure under the forward flight deck. These will be added later just incase I have any filling to do to eradicate the join line.
I have scratch built replacements for the two chutes I removed when cleaning the hull of moulded detail from stock styrene.
Next job is to drill the hull for the individual ladder rungs. The rungs are by North Star and come with a jig for drilling using a 0.18mm drill. I have already drilled the holes in the upper works and need to drill the remainder as I will not be able to tape the drilling jig to the model once the jackstays are fitted.
Apologies for the white sanding dust, didn't notice this untill looking at the images
Kind Regards
Nigel
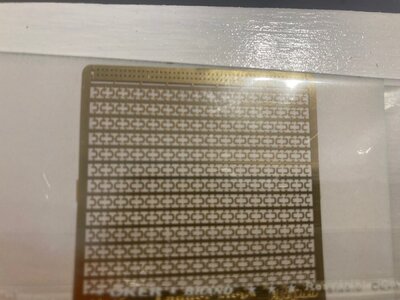
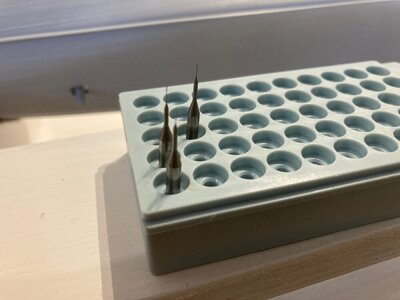


OK Nigel you are certified nuts. North Star ladder steps drill a 0.18mm hole through a template that is going to be something to see. Over the pond 0.18mm is .007 or in other words very small. How do you plan to drill without a press or mill?
Besides all that Its looking good.
Besides all that Its looking good.


