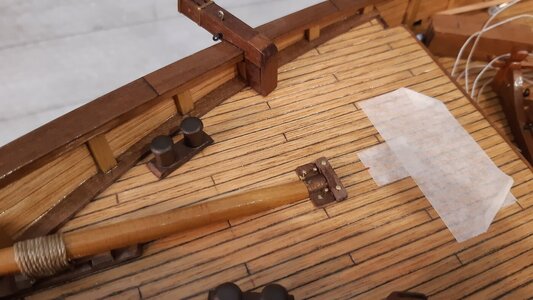
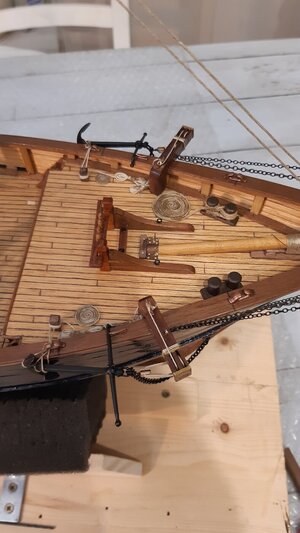
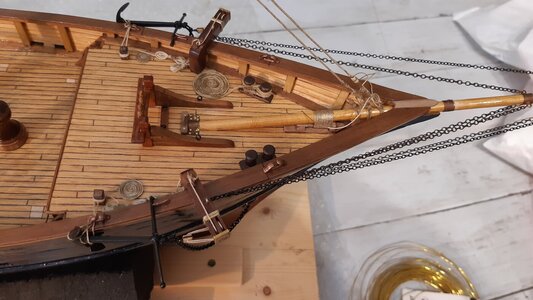
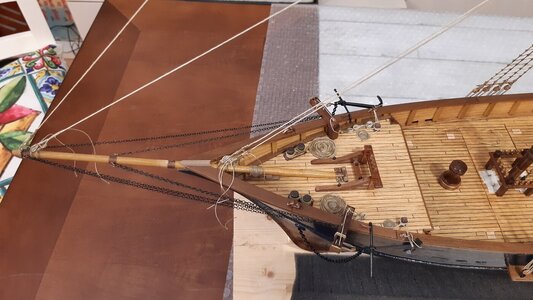
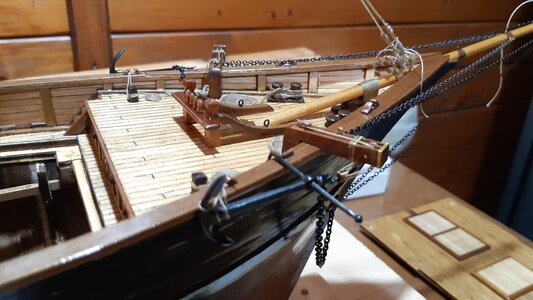
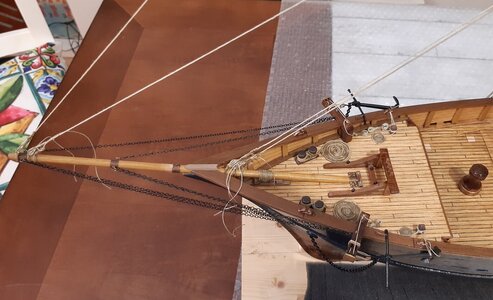
Very good result -> Bravo !
-

Win a Free Custom Engraved Brass Coin!!!
As a way to introduce our brass coins to the community, we will raffle off a free coin during the month of August. Follow link ABOVE for instructions for entering.
-

PRE-ORDER SHIPS IN SCALE TODAY!
The beloved Ships in Scale Magazine is back and charting a new course for 2026!
Discover new skills, new techniques, and new inspirations in every issue.
NOTE THAT OUR FIRST ISSUE WILL BE JAN/FEB 2026
You are using an out of date browser. It may not display this or other websites correctly.
You should upgrade or use an alternative browser.
You should upgrade or use an alternative browser.
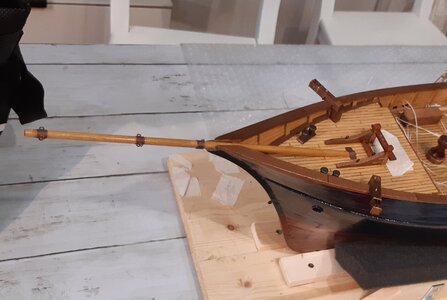
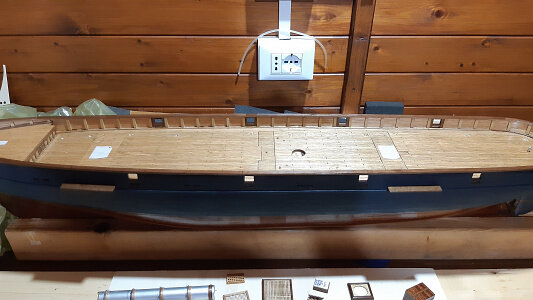
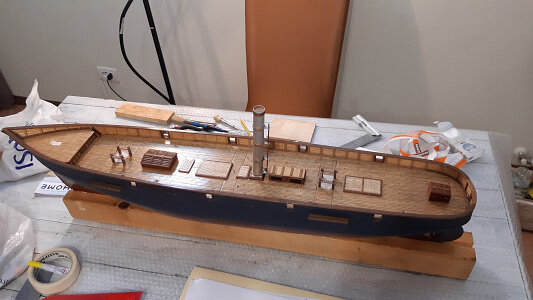
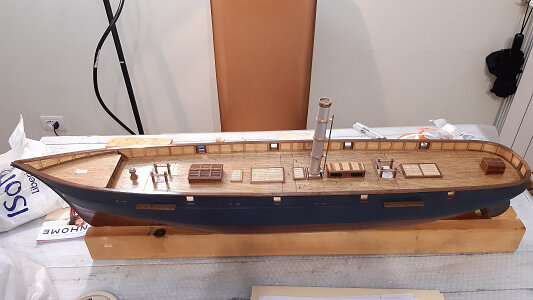
1/60 scale RC model of a schooner, loosely based on a gunboat steamship from the second half of the 19th century.
- Thread starter AlessandroROMA
- Start date
- Watchers 17
- Joined
- Sep 22, 2023
- Messages
- 238
- Points
- 213

- Joined
- Sep 3, 2021
- Messages
- 5,199
- Points
- 738

https://shipsofscale.com/sosforums/threads/yq-bluenose-by-johan.8304/page-36#post-266538I'd love to see your method, if you took intermediate photos of the work.
I know that photos are often taken at the last minute and not while working, but if you have them I would like to see them to learn some modeling methods.
https://shipsofscale.com/sosforums/threads/yq-bluenose-by-johan.8304/page-37#post-266775
Herewith two of my posts describing how I bend the planks for the monkey rails on my Bluenose.
- Joined
- Sep 22, 2023
- Messages
- 238
- Points
- 213

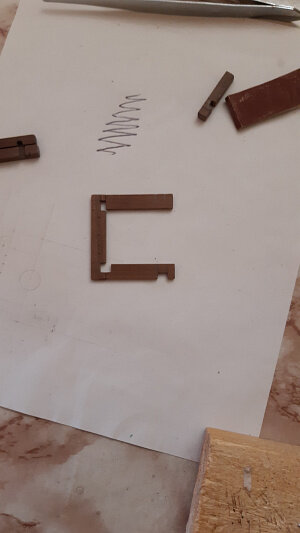
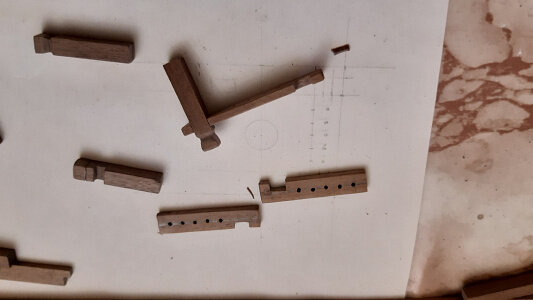
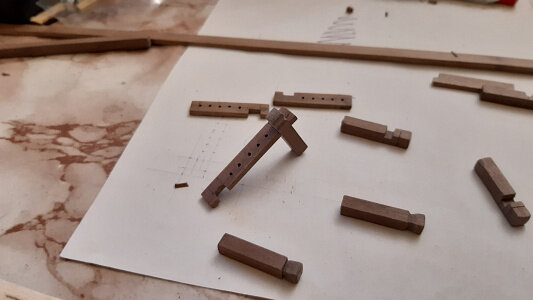
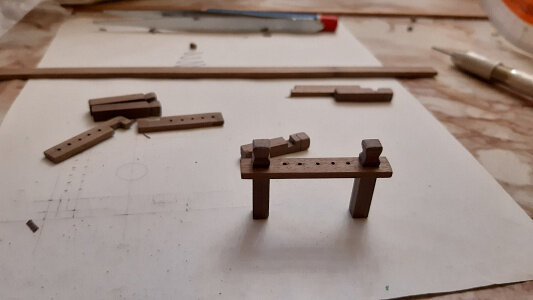
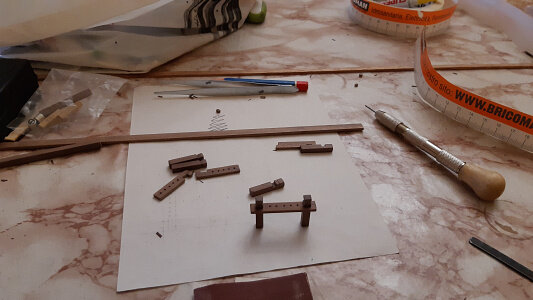
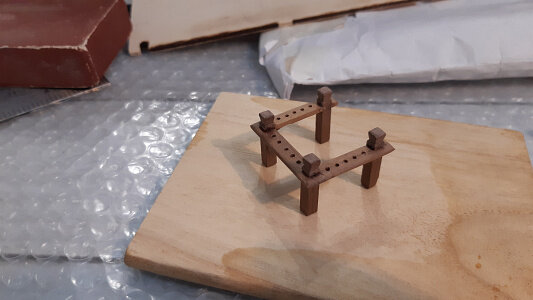
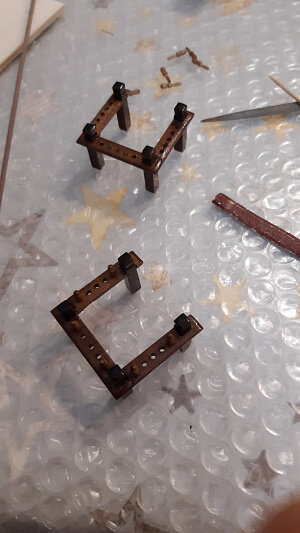
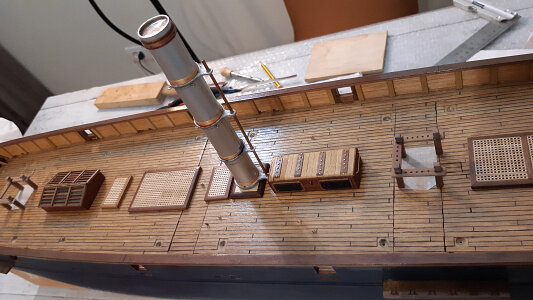
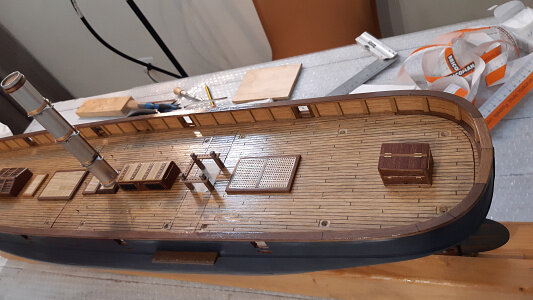
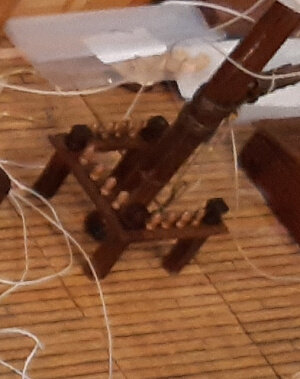
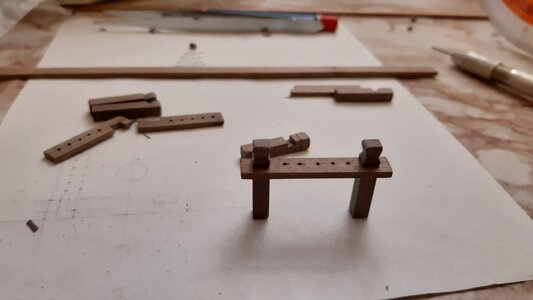
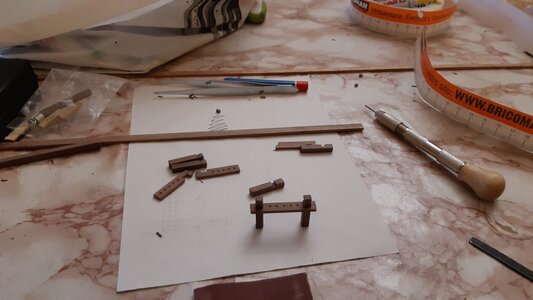
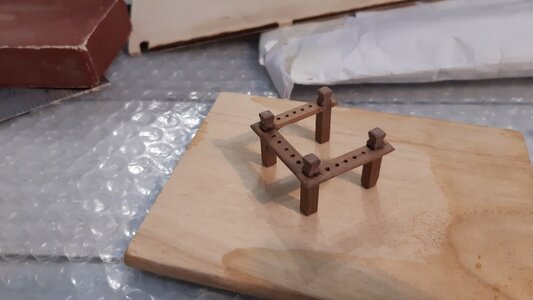
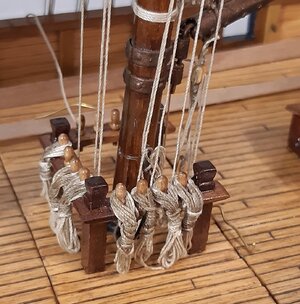
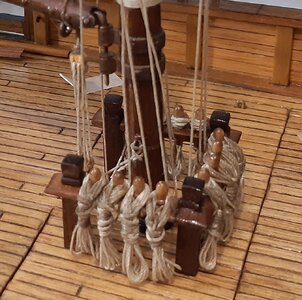
Buona sera a tutti.
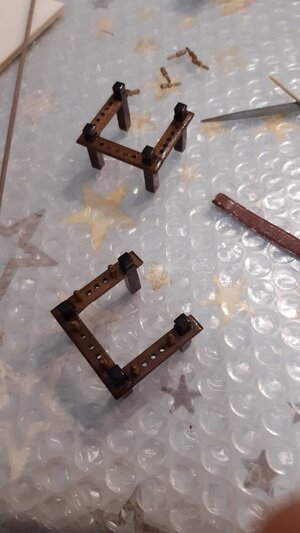
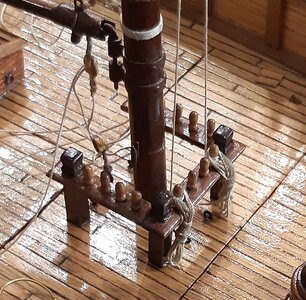
Ho dedicato molto tempo a questo pezzo. È mostrato nelle prime immagini.
In italiano si chiama "pazienza" che in inglese verrebbe tradotto con patience.
Penso che sia meglio chiamarlo bitta o bitta.
Le "caviglie" vengono inserite nelle tavole.
In realtà ci sono due bitte, una su ogni albero.
Ho passato molto tempo a capire come venivano realizzati quelli della metà del XIX secolo.
Ho anche cercato le dimensioni precise delle caviglie per poterli scalare alla giusta dimensione. Alla fine dovevo capire quante manovre correnti avere.
Ad ogni manovra corrispondeva una caviglia.
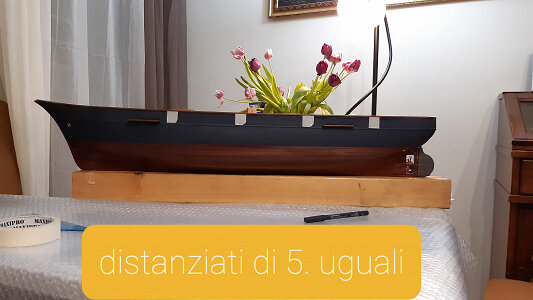
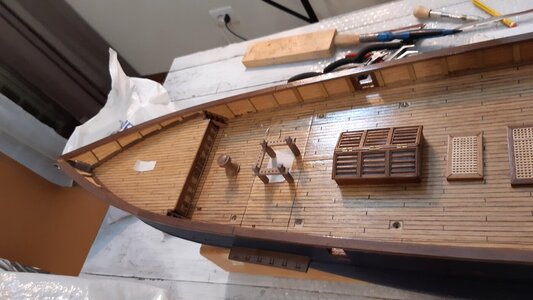
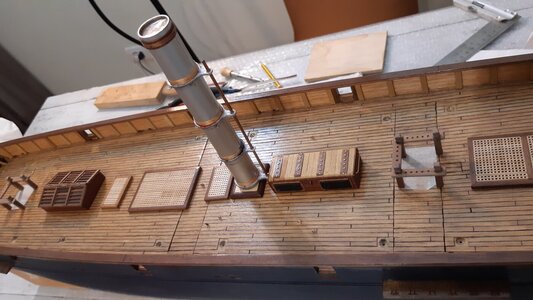
L'altro problema era l'apertura dell'impavesata, cioè le aperture per i cannoni.
Un discorso a parte andrebbe aperto sui cannoni di quel periodo, in quanto l'argomento è vasto ed interessante.
Purtroppo (che io sappia) nessuna casa modello produce cannoni di quel periodo. Ci sono molti periodi precedenti e successivi ma nessuno di quel periodo.
Sono principalmente i tipi Dahlgreen, provenienti dagli Stati Uniti.
Ho provato a riprodurli con il disegno 3D di alcune foto, non avendo le misure esatte, e poi li ho fatti stampare in 3D. Ma questo lo vedremo più avanti.
Adesso parlerò solo delle aperture perché ho modificato un po’ il piano iniziale.
Alla fine, dopo molte prove, ho creato otto aperture per altrettanti cannoni posizionati in batteria.
In realtà, per rispettare l'assetto bellico di una cannoniera, avrei dovuto mettere un cannone in caccia (e non tutto in batteria) o uno a centro nave. Avrei dovuto differenziare anche i pezzi di artiglieria. Quelli a caccia e a centro nave di calibro maggiore.
Non potevo mettere il cannone in caccia perché avrebbe intralciato le manovre dei fiocchi (già abbastanza difficili per me) e non c'era spazio.
Con il pezzo a centro nave avrei dovuto demolire gran parte della murata e l'idea non mi piaceva per niente.
Molte scelte sono condizionate dal fatto che si tratta di un modello RC e ho sempre dovuto trovare il giusto compromesso.
Good evening everyone.
I spent a lot of time on this piece. It is shown in the first images.
In Italian it is called "pazienza" which in English would be translated as patience.
I think it's better to call it a bitt or bollard.
The belay pins are inserted onto the boards.
In reality there are two bitts, one on each tree.
I spent a lot of time understanding how those from the mid-19th century were made.
I also looked for the precise dimensions of the belay pins (or belaying pins) to be able to scale them to the right size.
Finally I had to figure out how many running maneuvers to have. Each maneuver corresponded to a belay pin.
The other problem was the opening of the "ports", i.e. the openings for the cannons.
A separate topic should be opened on the cannons of that period, as the topic is vast and interesting.
Unfortunately (that I know of) no model house produces cannons from that period. There are many previous and subsequent periods but none from that period.
They are mainly the Dahlgreen types, from the United States.
I tried to reproduce them with the 3D drawing from some photos, not having the exact measurements, and then I had them printed in 3D. But this should be seen later. Now I will only talk about the openings because I modified the initial plan a bit.
In the end, after much racking, I created eight openings for as many cannons positioned in battery.
In reality, to respect the war layout of a gunboat, I would have had to put one cannon in the hunt (and not all in battery) or one amidships. I also should have differentiated the artillery pieces. Those in the hunt and amidships of larger caliber.
I couldn't put the cannon in the hunt because it would have hindered the maneuvers of the jibs (already difficult enough for me) and there was no space.
With the piece amidships I would have had to demolish a large part of the bulwark and I didn't like the idea at all.
Many choices are conditioned by the fact that this is an RC model and I always had to find the right compromise.
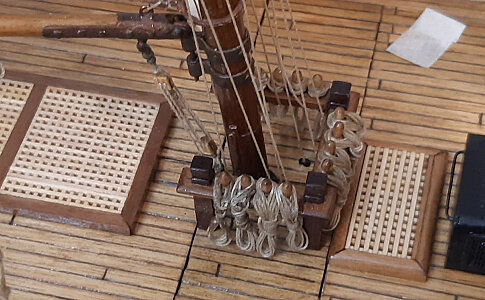


Last edited by a moderator:
Very good progress,,,,
Unfortunatly you uploaded your photos only in small size, so we can not see all the details
It woiuld be great, if you upload them here in SOS with full size ......
Unfortunatly you uploaded your photos only in small size, so we can not see all the details
It woiuld be great, if you upload them here in SOS with full size ......
- Joined
- Sep 3, 2021
- Messages
- 5,199
- Points
- 738

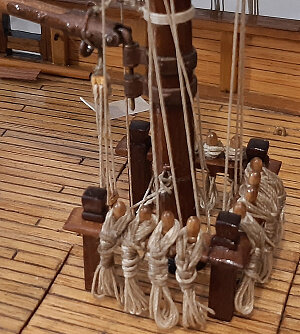
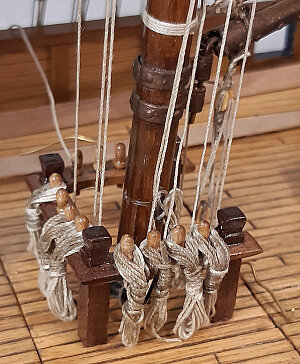
Great work on the fife rails. Your hanks look great too!Buona sera a tutti.
Ho dedicato molto tempo a questo pezzo. È mostrato nelle prime immagini.
In italiano si chiama "pazienza" che in inglese verrebbe tradotto con patience.
Penso che sia meglio chiamarlo bitta o bitta.
Le "caviglie" vengono inserite nelle tavole.
In realtà ci sono due bitte, una su ogni albero.
Ho passato molto tempo a capire come venivano realizzati quelli della metà del XIX secolo.
Ho anche cercato le dimensioni precise delle caviglie per poterli scalare alla giusta dimensione. Alla fine dovevo capire quante manovre correnti avere.
Ad ogni manovra corrispondeva una caviglia.
L'altro problema era l'apertura dell'impavesata, cioè le aperture per i cannoni.
Un discorso a parte andrebbe aperto sui cannoni di quel periodo, in quanto l'argomento è vasto ed interessante.
Purtroppo (che io sappia) nessuna casa modello produce cannoni di quel periodo. Ci sono molti periodi precedenti e successivi ma nessuno di quel periodo.
Sono principalmente i tipi Dahlgreen, provenienti dagli Stati Uniti.
Ho provato a riprodurli con il disegno 3D di alcune foto, non avendo le misure esatte, e poi li ho fatti stampare in 3D. Ma questo lo vedremo più avanti.
Adesso parlerò solo delle aperture perché ho modificato un po’ il piano iniziale.
Alla fine, dopo molte prove, ho creato otto aperture per altrettanti cannoni posizionati in batteria.
In realtà, per rispettare l'assetto bellico di una cannoniera, avrei dovuto mettere un cannone in caccia (e non tutto in batteria) o uno a centro nave. Avrei dovuto differenziare anche i pezzi di artiglieria. Quelli a caccia e a centro nave di calibro maggiore.
Non potevo mettere il cannone in caccia perché avrebbe intralciato le manovre dei fiocchi (già abbastanza difficili per me) e non c'era spazio.
Con il pezzo a centro nave avrei dovuto demolire gran parte della murata e l'idea non mi piaceva per niente.
Molte scelte sono condizionate dal fatto che si tratta di un modello RC e ho sempre dovuto trovare il giusto compromesso.
Good evening everyone.
I spent a lot of time on this piece. It is shown in the first images.
In Italian it is called "pazienza" which in English would be translated as patience.
I think it's better to call it a bitt or bollard.
The belay pins are inserted onto the boards.
In reality there are two bitts, one on each tree.
I spent a lot of time understanding how those from the mid-19th century were made.
I also looked for the precise dimensions of the belay pins (or belaying pins) to be able to scale them to the right size.
Finally I had to figure out how many running maneuvers to have. Each maneuver corresponded to a belay pin.
The other problem was the opening of the "ports", i.e. the openings for the cannons.
A separate topic should be opened on the cannons of that period, as the topic is vast and interesting.
Unfortunately (that I know of) no model house produces cannons from that period. There are many previous and subsequent periods but none from that period.
They are mainly the Dahlgreen types, from the United States.
I tried to reproduce them with the 3D drawing from some photos, not having the exact measurements, and then I had them printed in 3D. But this should be seen later. Now I will only talk about the openings because I modified the initial plan a bit.
In the end, after much racking, I created eight openings for as many cannons positioned in battery.
In reality, to respect the war layout of a gunboat, I would have had to put one cannon in the hunt (and not all in battery) or one amidships. I also should have differentiated the artillery pieces. Those in the hunt and amidships of larger caliber.
I couldn't put the cannon in the hunt because it would have hindered the maneuvers of the jibs (already difficult enough for me) and there was no space.
With the piece amidships I would have had to demolish a large part of the bulwark and I didn't like the idea at all.
Many choices are conditioned by the fact that this is an RC model and I always had to find the right compromise.
View attachment 410561
View attachment 410562
View attachment 410563
View attachment 410564
View attachment 410565
View attachment 410566
View attachment 410567
View attachment 410568
View attachment 410569
View attachment 410570
View attachment 410571
View attachment 410572
View attachment 410573
View attachment 410574
View attachment 410575
View attachment 410576
View attachment 410577
View attachment 410578
View attachment 410579
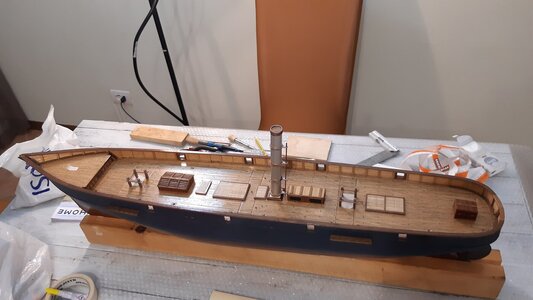
I would have sworn your chimney was painted black, to my surprise I now see a metal finish on your chimney.
- Joined
- Sep 22, 2023
- Messages
- 238
- Points
- 213

Grazie Uwek.Very good progress,,,,
Unfortunatly you uploaded your photos only in small size, so we can not see all the details
It woiuld be great, if you upload them here in SOS with full size ......
Non mi fa caricare immagini originali.
Vuole che riduca la dimensione altrimenti l'upload delle foto fallisce.
Io riesco a vederle, riproverò a caricare quelle originali perchè mi dispiace che tu non possa vedere i dettagli.
Thanks Uwek.
It won't let me upload original images.
He wants me to reduce the size otherwise the photo upload will fail.
can see them, I will try to upload the original ones again because I'm sorry that you can't see the details.
- Joined
- Sep 22, 2023
- Messages
- 238
- Points
- 213

Grazie Johan.Great work on the fife rails. Your hanks look great too!
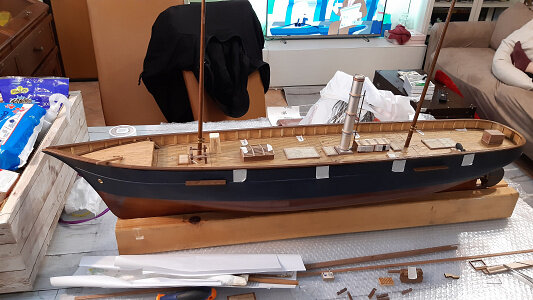
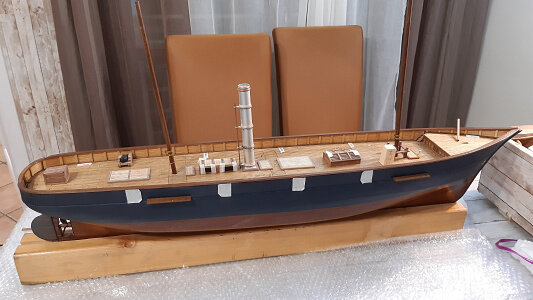
I would have sworn your chimney was painted black, to my surprise I now see a metal finish on your chimney.
Mi devo ricordare di postare il mio metodo per fare le hanks. Sono curioso di conoscere il tuo parere.
Certo, certo il chimney è dipinto di nero e già completo anche con i tiranti. Hai visto bene.
Lo vedi così (in una fase precedente al completamento) perchè ho scelto delle foto in cui era possibile vedere le fasi di costruzione del "fife rails" (copio la tua parola, da te imparo sempre nuovi termini in inglese).
A tal proposito voglio ricordare che finora sto inserendo immagini e descrizioni di fasi già superate del mio lavoro. Conto di arrivare quanto prima allo stato attuale e illustrare le problematiche attuali chiedendo i vostri consigli e pareri.
Scusate se non sono stato chiaro.
Thanks Johan.
I have to remember to post my method for making hanks.
I'm curious to know your opinion.
Of course, of course the chimney is painted black and already complete with the tie rods too.
You saw well.
You see it like this (in a phase prior to completion) because I chose photos in which it was possible to see the construction phases of the "fife rails" (I copy your word, I always learn new terms in English from you).
In this regard, I want to remind you that so far I am inserting images and descriptions of already completed phases of my work.
I plan to get to the current state as soon as possible and illustrate the current problems by asking for your advice and opinions.
Sorry if I wasn't clear.
Our forum software is reducing the size automatically to the best size - so we have no limitation in the sizeGrazie Uwek.
Non mi fa caricare immagini originali.
Vuole che riduca la dimensione altrimenti l'upload delle foto fallisce.
Io riesco a vederle, riproverò a caricare quelle originali perchè mi dispiace che tu non possa vedere i dettagli.
Thanks Uwek.
It won't let me upload original images.
He wants me to reduce the size otherwise the photo upload will fail.
can see them, I will try to upload the original ones again because I'm sorry that you can't see the details.
- Joined
- Sep 22, 2023
- Messages
- 238
- Points
- 213

- Joined
- Sep 22, 2023
- Messages
- 238
- Points
- 213

Ciao Uwek. E' andata bene, ma è strano qualche tempo fa mi diceva che le foto erano troppo grandi (troppo pesanti).
Hi Uwek. It went well, but it's strange some time ago she told me that the photos were too big (too heavy).
Hi Uwek. It went well, but it's strange some time ago she told me that the photos were too big (too heavy).
- Joined
- Sep 22, 2023
- Messages
- 238
- Points
- 213

Un saluto a tutti i modellisti.
I miei ringraziamenti a Shota 70, Jimsky, Uwek, Adry, Johan e Peter Voogt.
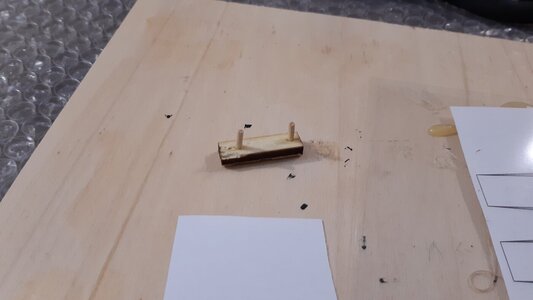
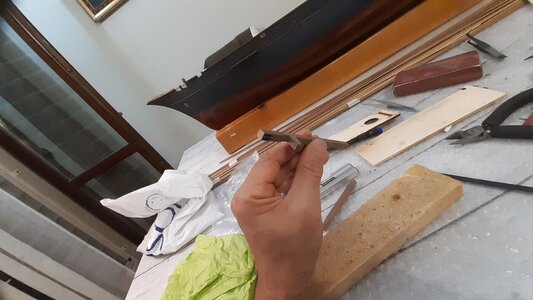
Prima di andare avanti voglio farvi vedere lo strumento che ho usato per avvolgere le manovre sulle caviglie.
E' mostrato nella prima immagine. Alta tecnologia! Ahahahahahahah.
E' banale ma mi è stato utilissimo per farle tutte della stessa lunghezza e con un certo ordine.
Potevano venire meglio ma la pazienza certe volte mi manca.
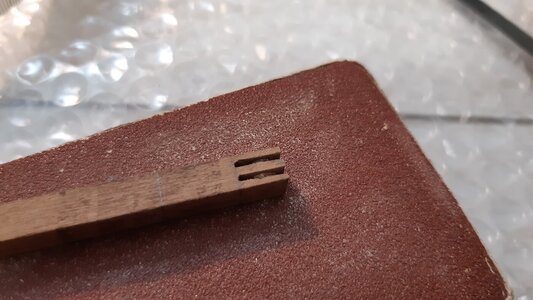
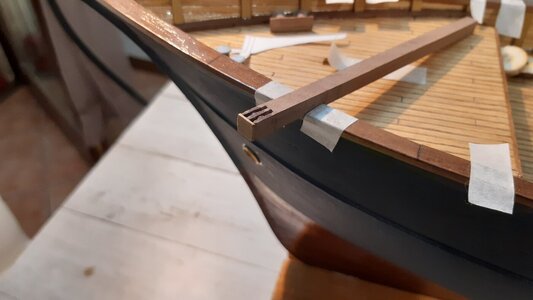
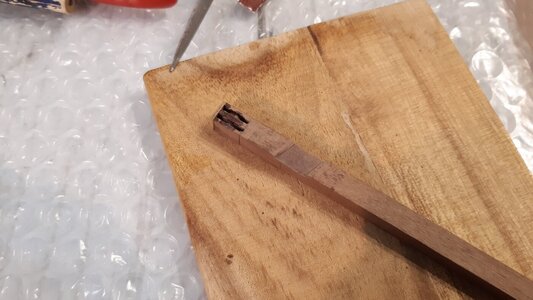
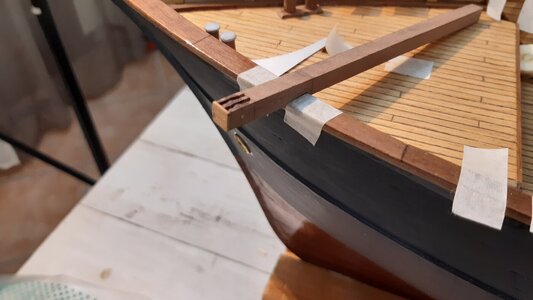
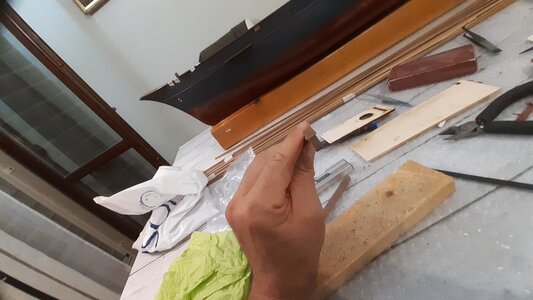
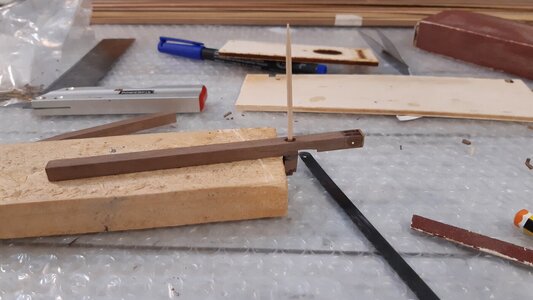
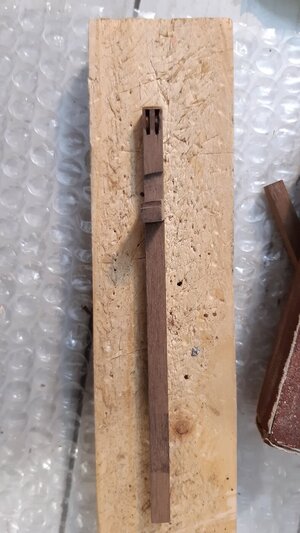
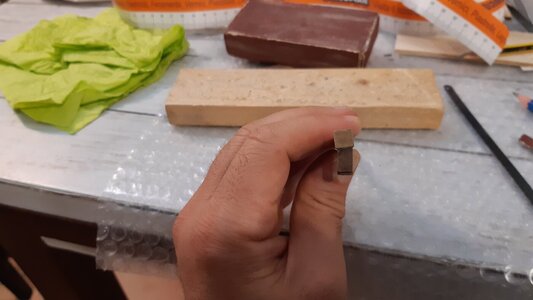
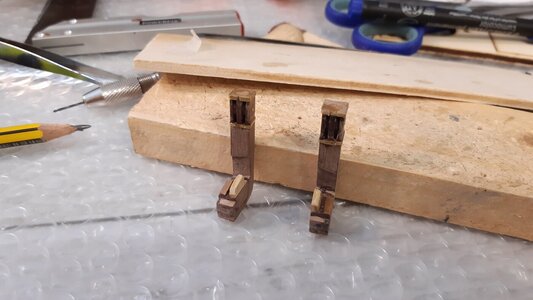
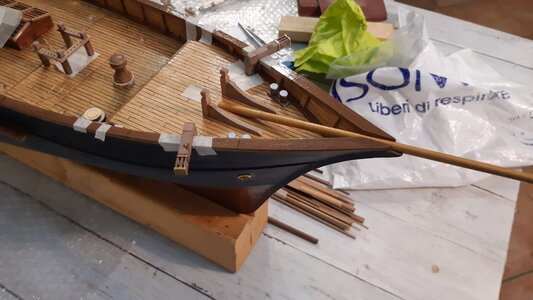
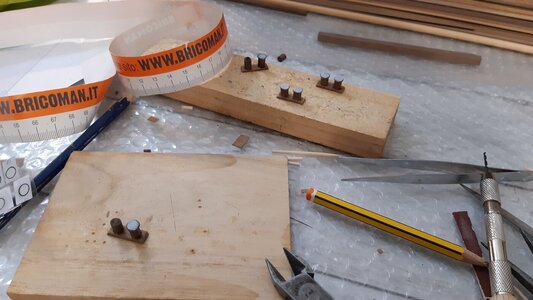
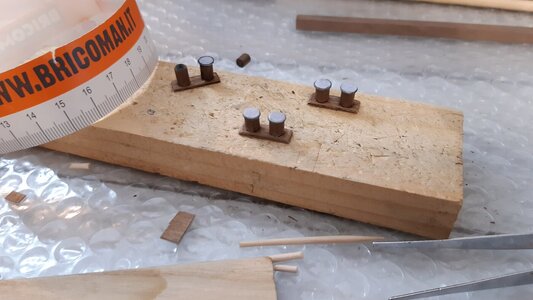
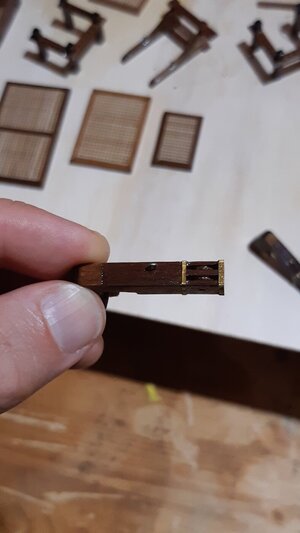
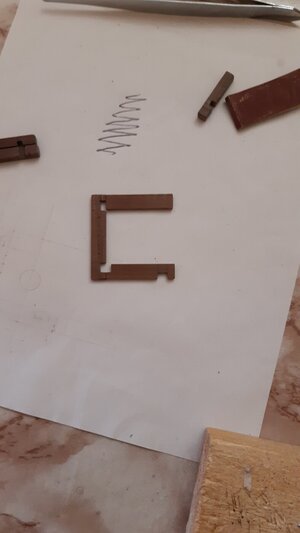
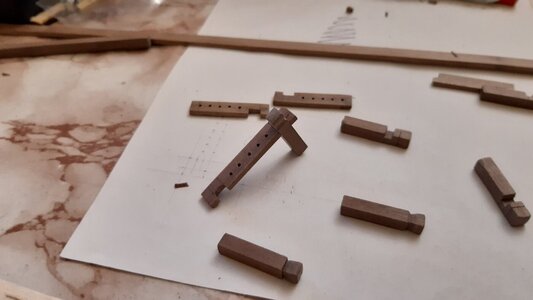
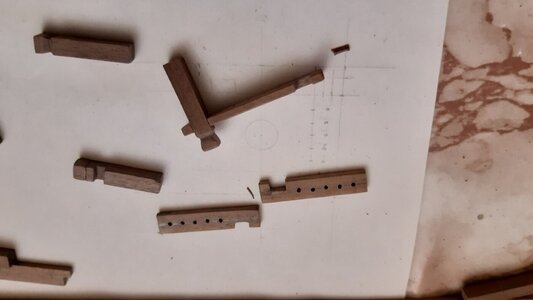
Nelle foto successive potete vedere le fasi produttive di alcuni pezzi che non so tradurre.
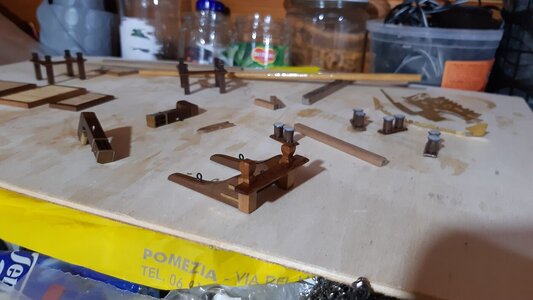
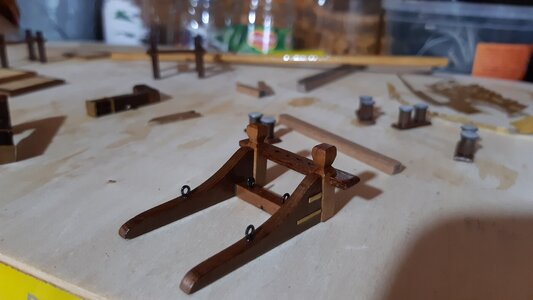
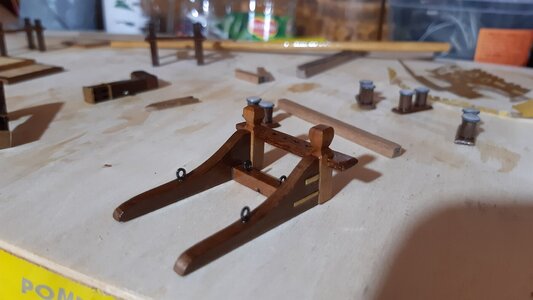
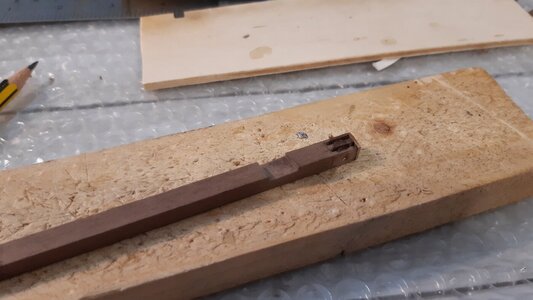
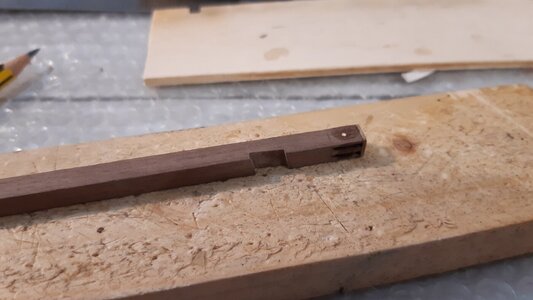
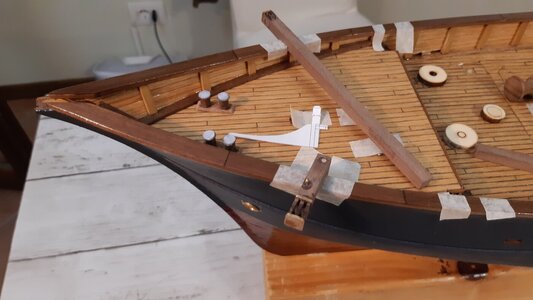
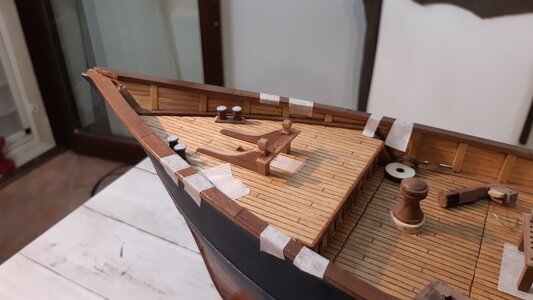
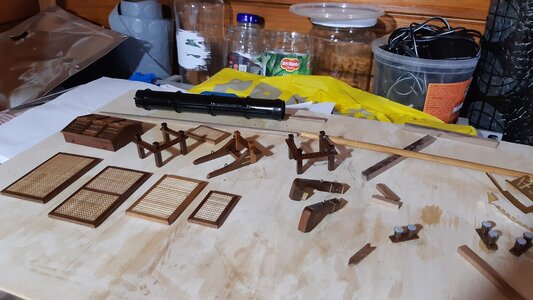
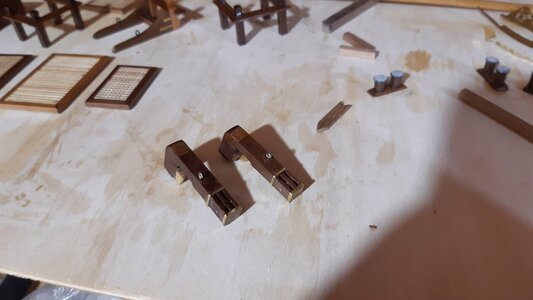
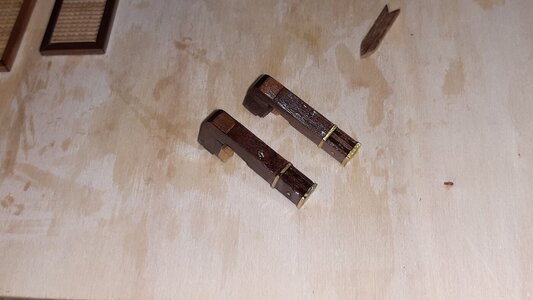
1. È il "gru di capone" in italiano. Quella sarebbe la gru dedicata all'ancora.
2. Bitte a due colonne per l'ormeggio.
3. La grande bitta di prua. Dove sono presenti anche le caviglie a cui sono legate alcune manovre di fiocco.
La prima sequenza di immagini riguarda il "gru di capone".
Le ancore sono acquistabili dal catalogo Amati, ho scelto la misura giusta per rispettare la scala.
Lo so un vero modellista avrebbe dovute farle da solo. In ottone ci sarei anche riuscito, ma volevo accellerare i tempi. Questo lavoro dura da troppi anni e volevo fare delle prove in acqua il prima possibile.
Greetings to all modelers.
My thanks to Shota 70, Jimsky, Uwek, Adry, Johan and Peter Voogt.
Before going further I want to show the tool I used to make the hanks.
It is shown in the first image. High technology! Ahahahahahahaha.
It's trivial but it was very useful for making them all the same length and in a certain order.
They could have come out better but sometimes I lack patience.
In the following photos you can see the production phases of some pieces that I don't know how to translate.
1. It is the "gru di capone" in Italian. That would be the dedicated anchor crane.
2. Two-column mooring bollards.
3. The large bow cleat. Where there are also also rolling pins to which some jib maneuvers are tied.
The first sequence of images concerns the "gru di capone".
The anchors can be purchased from the Amati catalogue, I chose the right size to respect the scale.
I know a real model maker should have made them himself.
In brass I would have succeeded, but I wanted to speed up the process.
This work has been going on for too many years and I wanted to do some tests in the water as soon as possible.
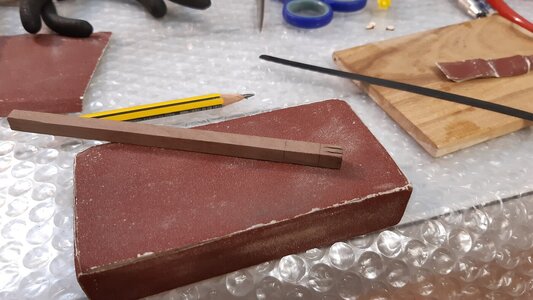
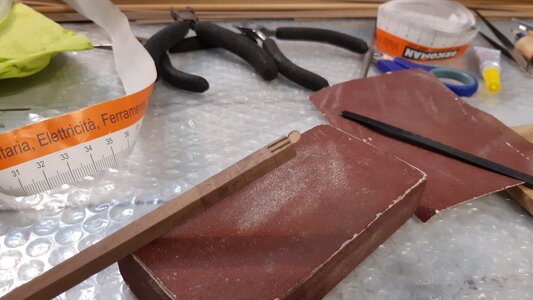


- Joined
- Sep 22, 2023
- Messages
- 238
- Points
- 213

- Joined
- Sep 22, 2023
- Messages
- 238
- Points
- 213

Ciao Johan.
Dire ad un modello dinamico che sembra un modello statico è il più bel complimento che potesse ricevere. Il mio modello è lusingato e ti ringrazia, ahahahah.
Scherzo, ti ringrazio per le tue parole di apprezzamento.
Hi Johan.
Telling a dynamic model that it looks like a static model is the best compliment you could receive. My model is flattered and thanks you, hahahaha.
Just kidding, thank you for your words of appreciation.
Last edited:
- Joined
- Jun 17, 2021
- Messages
- 3,203
- Points
- 588

Very good progress,,,Unfortunatly you uploaded your photos only in small size, so we can not see all the detailsIt woiuld be great, if you upload them here in SOS with full size ......
- Joined
- Jun 17, 2021
- Messages
- 3,203
- Points
- 588

I have to go back and catch up on this wonderful build!
- Joined
- Sep 22, 2023
- Messages
- 238
- Points
- 213

Grazie molto Peter.
Sarei onorato se facessi visita alla mia costruzione fin dall'inizio. Mi farebbe molto piacere.
Ti avviso che il modello è ancora in fase di costruzione ma ho postato velocemente le fasi già compiute. Conto di arrivare fra un pò alle fasi attuali.
Thanks very much Peter.
I would be honored if you would visit my building right from the start. I would be very happy.
I warn you that the model is still under construction but I quickly posted the phases already completed. I plan to arrive at the current phases shortly.
Very good work
- Joined
- Sep 22, 2023
- Messages
- 238
- Points
- 213


![psazienza[1].jpg psazienza[1].jpg](https://shipsofscale.com/sosforums/data/attachments/395/395221-1974f1be5521973123dc321d9fbffdf2.jpg?hash=GXTxvlUhlz)
