-

Win a Free Custom Engraved Brass Coin!!!
As a way to introduce our brass coins to the community, we will raffle off a free coin during the month of August. Follow link ABOVE for instructions for entering.
-

PRE-ORDER SHIPS IN SCALE TODAY!
The beloved Ships in Scale Magazine is back and charting a new course for 2026!
Discover new skills, new techniques, and new inspirations in every issue.
NOTE THAT OUR FIRST ISSUE WILL BE JAN/FEB 2026
- Home
- Forums
- Ships of Scale Build Logs
- Super Detailing Static Models / Other Genres
- Historical Trailways, Guns, Aircraft, and Cars
You are using an out of date browser. It may not display this or other websites correctly.
You should upgrade or use an alternative browser.
You should upgrade or use an alternative browser.
1930 Bentley Blower by Aifix 1/12 build log [COMPLETED BUILD]
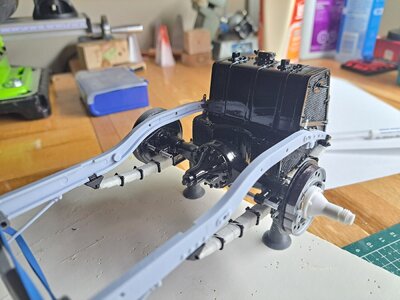
Will these inner details and parts be hidden - or will it be a "motor repair under way"-model?Test fitted the fuel tank in the chassis, it fitted fine.
View attachment 382945View attachment 382946
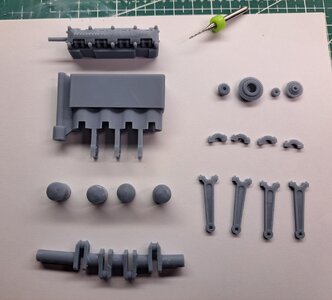
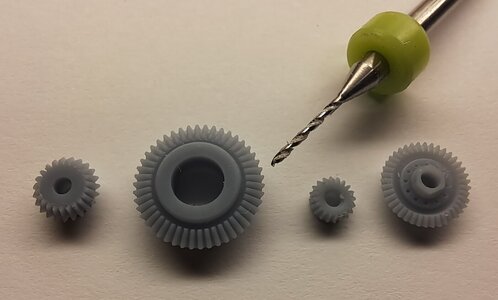
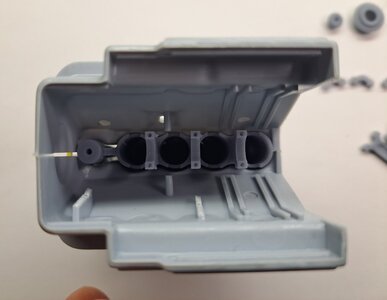
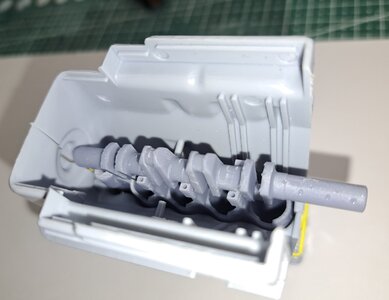
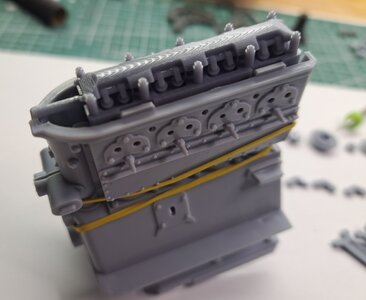
I also received all the internal parts for the engine, there's a lot of fitting to do but the result should be nice.View attachment 382941View attachment 382942View attachment 382944View attachment 382940View attachment 382943
amazing
A bit like on the Alfa projet, the working parts will be visible from under by removing the oil pan. The head the it's drive gears should be visible by removing the head cover. Since the reference car is brand new, I might display the model in a being assembled stage, I haven't decided yet.
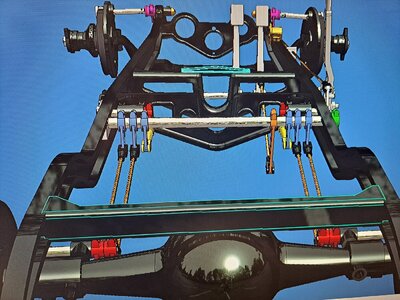
I've pretty much finished the brake linkage modeling, l should be ready to send these parts to resin print next week. 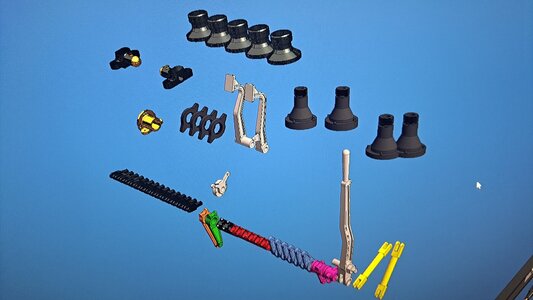
View attachment 20230706_222859.mp4
I decided to tackle the steering box. To my 'not so big surprise', the steering wheel is not linked to the wheels on this kit, in other words, the front wheels won't steer by turning the steering wheel. That's not acceptable. So I decided to add a worm gear combo to fix this.
Here's what the kit provides
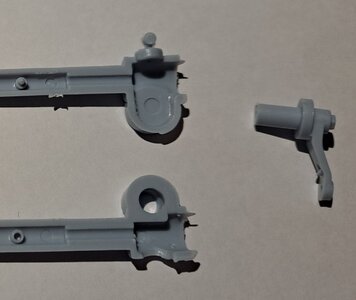
what's surprising is that there seems to be a space already moulded in to receive a worm gear. Could it be that in the past, the kit provided something for this?
So here's what I wanted to do
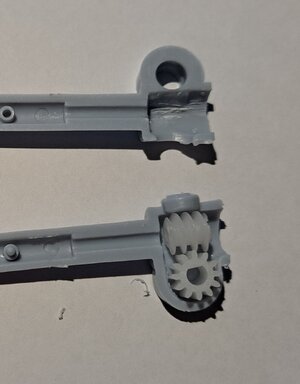
and after final fitting

and the result
View attachment 20230706_214017.mp4
I should be ready to start the frame rail modifications soon and should have a glued up frame shortly.


View attachment 20230706_222859.mp4
I decided to tackle the steering box. To my 'not so big surprise', the steering wheel is not linked to the wheels on this kit, in other words, the front wheels won't steer by turning the steering wheel. That's not acceptable. So I decided to add a worm gear combo to fix this.
Here's what the kit provides

what's surprising is that there seems to be a space already moulded in to receive a worm gear. Could it be that in the past, the kit provided something for this?
So here's what I wanted to do

and after final fitting

and the result
View attachment 20230706_214017.mp4
I should be ready to start the frame rail modifications soon and should have a glued up frame shortly.
Did some more work these ladt few days. Added the front brake shoes with spring
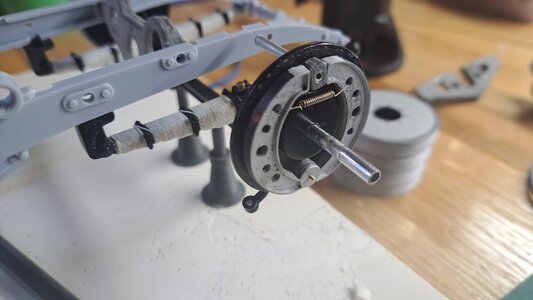
Modified the rear shoes to simulate the double shoe setup (I missed that one). The real setup calls for one pair of shoes actuated by the foot pedal and one pair actuated by the hand brake.
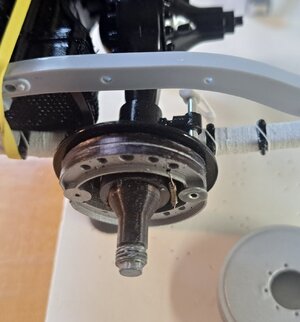
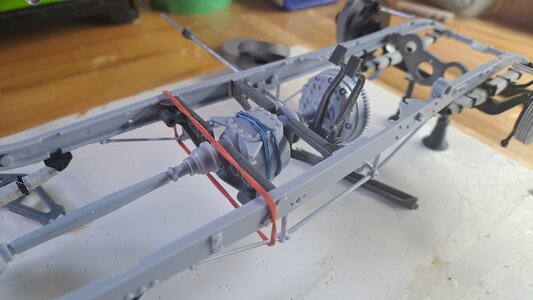
Started tinkering with the gear box and drive shaft.
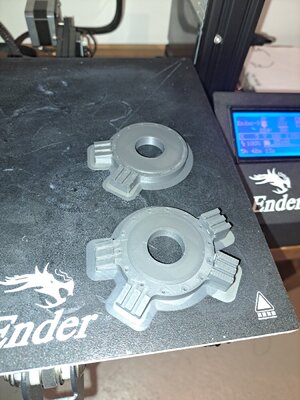
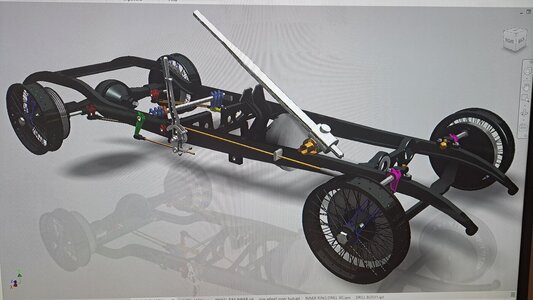
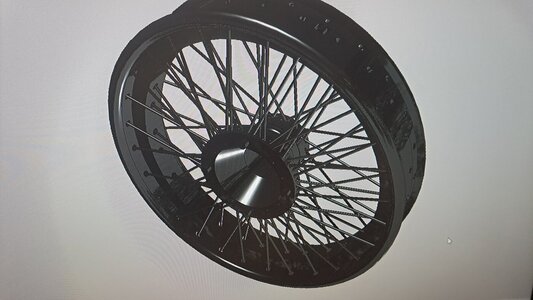
I 3d modeled the wire wheels.
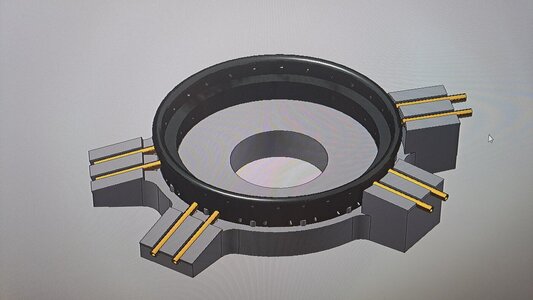
it's not 100% accurate but all I needed was to create the hole patterns on the rim so I could design the drill jig.The kit's wheel are not accurate, they have 1 set of holes on the outside rime and 2 sets on the center portion.
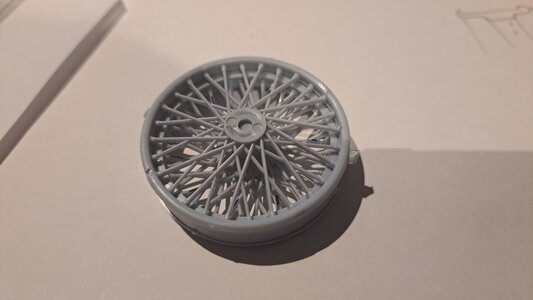
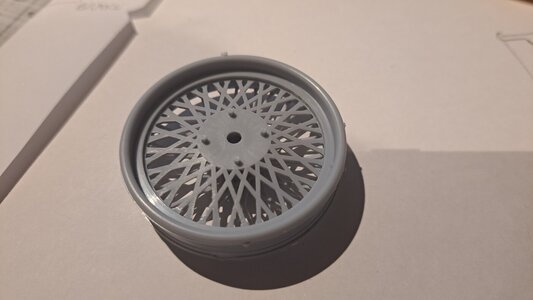
In reality, it's 1 set on the outside rim, 1 set in the center and 1 set on the inside rim. The hubs will be printed.

And the jig
I'm still not happy with the brake drums I printed. New one are being printed as I write this.
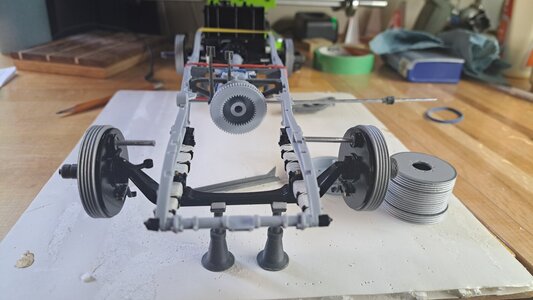
I also added pedal pads with the Bentley 'B' on thems. And the clutch fork.
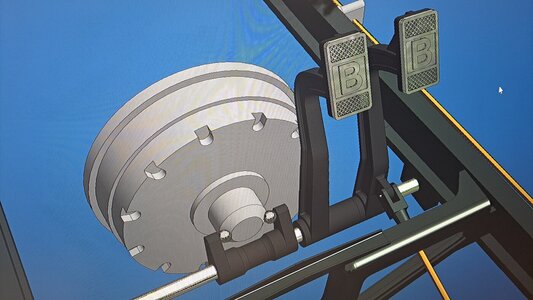
That's pretty much it for now.

Modified the rear shoes to simulate the double shoe setup (I missed that one). The real setup calls for one pair of shoes actuated by the foot pedal and one pair actuated by the hand brake.

Started tinkering with the gear box and drive shaft.

I 3d modeled the wire wheels.

it's not 100% accurate but all I needed was to create the hole patterns on the rim so I could design the drill jig.The kit's wheel are not accurate, they have 1 set of holes on the outside rime and 2 sets on the center portion.


In reality, it's 1 set on the outside rim, 1 set in the center and 1 set on the inside rim. The hubs will be printed.


And the jig

I'm still not happy with the brake drums I printed. New one are being printed as I write this.


I also added pedal pads with the Bentley 'B' on thems. And the clutch fork.

That's pretty much it for now.
- Joined
- Apr 20, 2020
- Messages
- 6,241
- Points
- 738

Dear FrançoisDid some more work these ladt few days. Added the front brake shoes with spring
View attachment 384356
Modified the rear shoes to simulate the double shoe setup (I missed that one). The real setup calls for one pair of shoes actuated by the foot pedal and one pair actuated by the hand brake.
View attachment 384357
Started tinkering with the gear box and drive shaft.
View attachment 384361
I 3d modeled the wire wheels.
View attachment 384354
it's not 100% accurate but all I needed was to create the hole patterns on the rim so I could design the drill jig.The kit's wheel are not accurate, they have 1 set of holes on the outside rime and 2 sets on the center portion.
View attachment 384353
View attachment 384351
In reality, it's 1 set on the outside rim, 1 set in the center and 1 set on the inside rim. The hubs will be printed.
View attachment 384352
View attachment 384350
And the jig
View attachment 384349
I'm still not happy with the brake drums I printed. New one are being printed as I write this.
View attachment 384359
View attachment 384355
I also added pedal pads with the Bentley 'B' on thems. And the clutch fork.
View attachment 384360
That's pretty much it for now.
you are doing wonderful work on this Bentley , thanks for the explanation and the movies
Hallo my friend,
I got yesterday a newsletter from a well known car-dealer for historic cars - so I was thinking about your building log
- so if you have the money you could buy a Bentley 4,5 Ltr Le Mans Special - not completely historical correct, but it is a great Bentley and relatively "cheap" - and "cheap" is relative
I love this car - but ....... I have a Horex
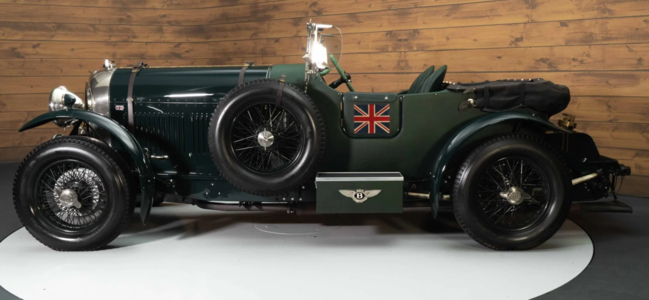
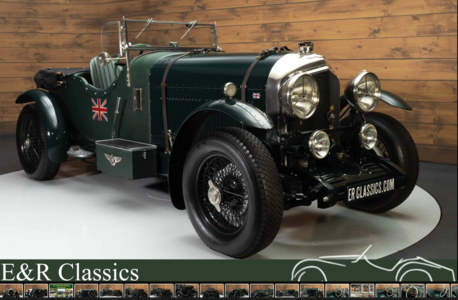
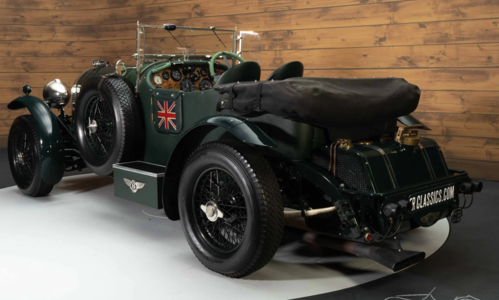

 www.erclassics.de
I got yesterday a newsletter from a well known car-dealer for historic cars - so I was thinking about your building log
- so if you have the money you could buy a Bentley 4,5 Ltr Le Mans Special - not completely historical correct, but it is a great Bentley and relatively "cheap" - and "cheap" is relative
I love this car - but ....... I have a Horex


Bentley 4.5 Ltr. Le Mans Special
Zu verkaufen: Bentley 4,5 Ltr. Le Mans Special in Top-Zustand. Besuchen Sie jetzt unsere Website, um diesen klassischen Bentley zu kaufen.
Hello all, it's been a while.
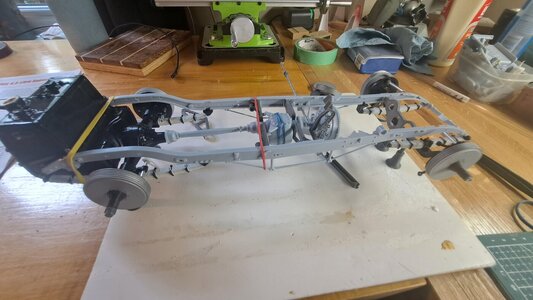
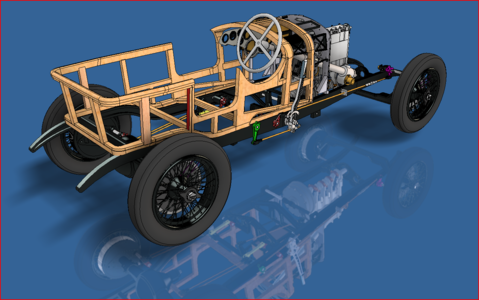
2 big steps were achived today. I finally assembled the ladder frame with a mix on kit parts and newly printed parts. Everything went together well.
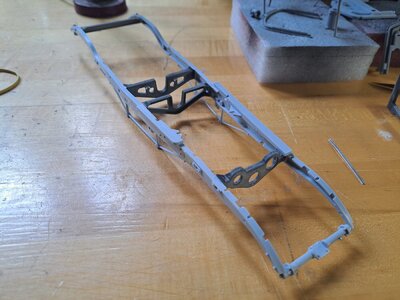
next, I test printed the front portion of the body. I wanted to see if the parts were printable and how they would fit together. Again, I'm very happy with the result. Even if preliminary, it is promissing Althougt I'm not sure l'll ever make it in wood.
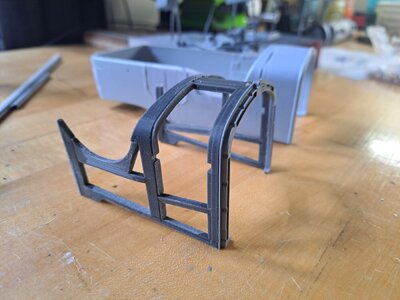
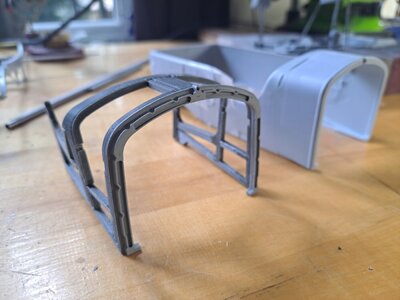
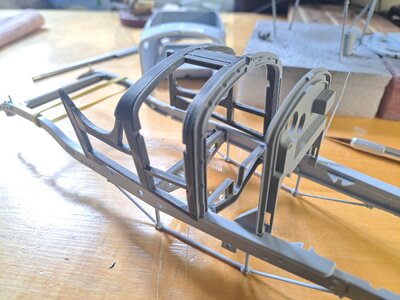
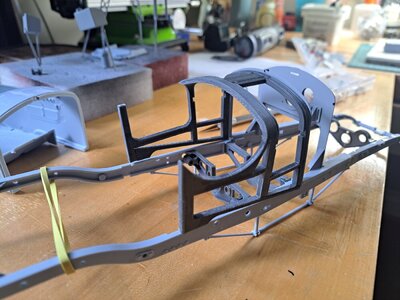
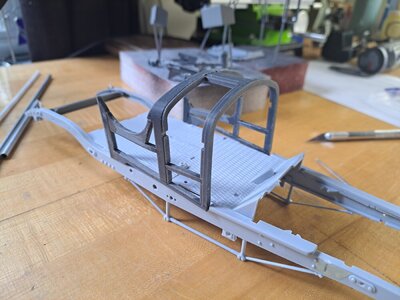
Here the newly completed 3d body on the frame
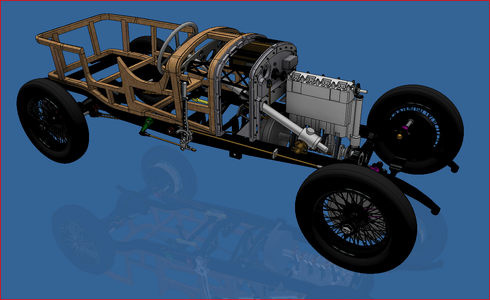
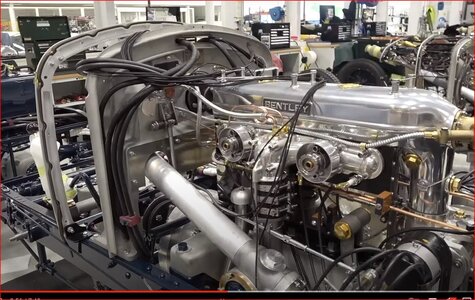
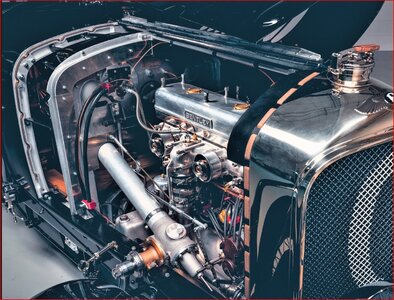
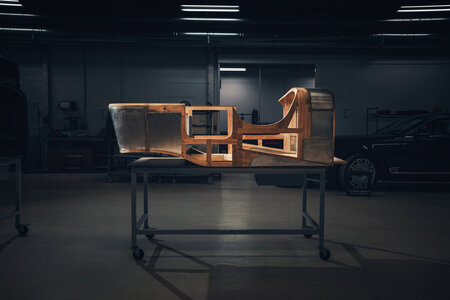
and as a reminder, the real thing
Next, I'll do some test fitting of the aluminium sheets on the body.
2 big steps were achived today. I finally assembled the ladder frame with a mix on kit parts and newly printed parts. Everything went together well.

next, I test printed the front portion of the body. I wanted to see if the parts were printable and how they would fit together. Again, I'm very happy with the result. Even if preliminary, it is promissing Althougt I'm not sure l'll ever make it in wood.


Here the newly completed 3d body on the frame


and as a reminder, the real thing

Next, I'll do some test fitting of the aluminium sheets on the body.
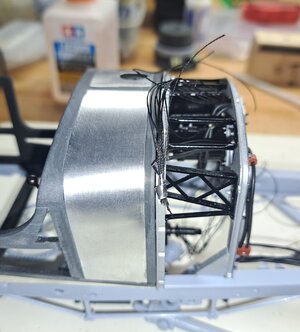
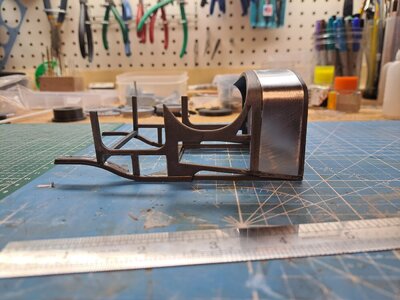
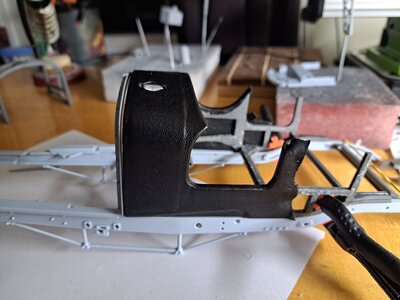
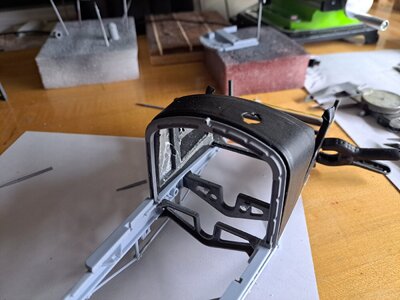
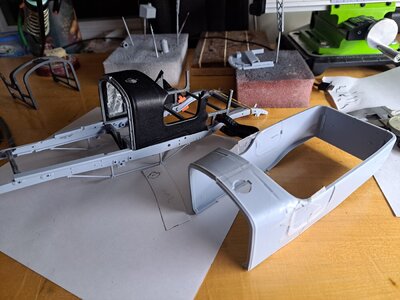
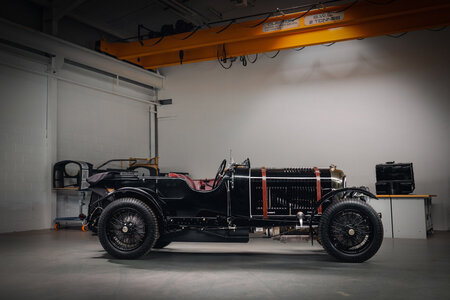
Still working on the second body prototype. Added the aluminium sheets to the front portion and tried my hand at covering it with the faux leather I found. Not to bad for a first try. I still have to work on the flatness of the assembly so that the seams aren't as visible. Not sure about my fabric choice. The ref car look a bit more shiny.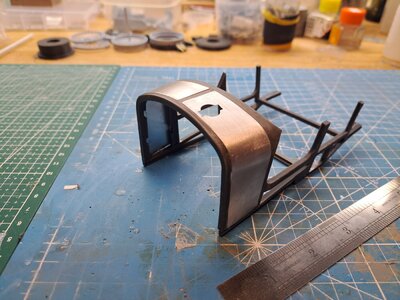


Great body work - I like the aluminium and leather finish very much 
- very accurate work

- very accurate work
- Joined
- Jul 26, 2013
- Messages
- 443
- Points
- 158

The original car is also a museum display! From memory, period Weymann body cars looked a little flat/dull. A little wax will bring up the shine, but I think your test scuttle looks great at scale.
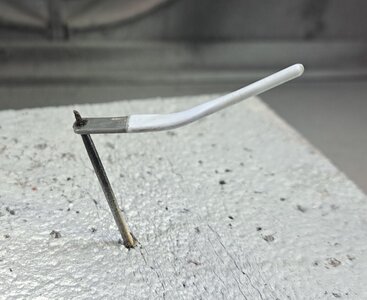
After several unsuccessful tries at removing the airfix chrome, I finally found the right product. It's ferric chloride, and this stuff is nasty. Gloves, goggles and a mask are a must. But after about 30 to 60 sec , the chrome is off and about another 2min to remove the copper. And yes, there is copper under the airfix chrome because unlike other kits, and despite what others may say, the chromed parts on the airfix bentley are actually chrome, not paint, and not an aluminium deposit. The process is similar to chroming a metal part except that the copper layer is applied via an electroless process since plastic is not conductive. Once the copper is there, the chrome can be applied thru a normal electro plating process. This producess a very hard chrome which is why it can not be scrapped or sanded off without serious damage to the part itself.
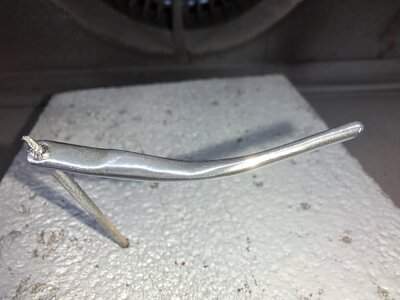
I tested Revell's chrome paint on the gear shifter and, althought very pricey at around 35$ canadian, the result is very surprising and extremely simple. No black primer, no clear. Just spray and let dry for 48 hrs. I'll never fuss with Alclad products again.
Here's the shifter before
and after the chrome paint.
I've also completed the body's framework. I printed an assembly jig which made assembling all 20 parts a breeze and everything came out straight.
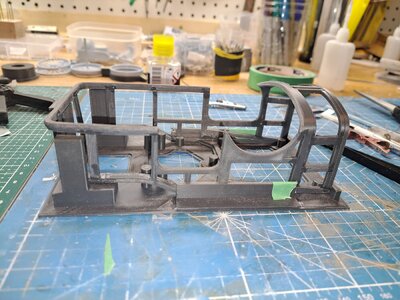
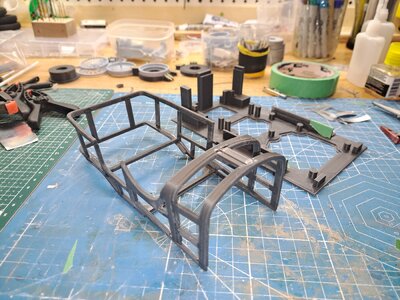
I then added the aluminium sheeting
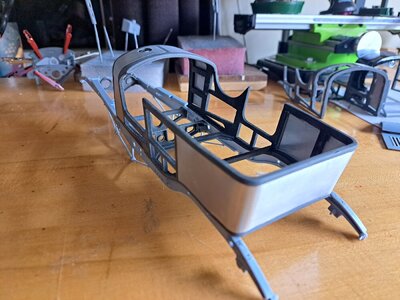
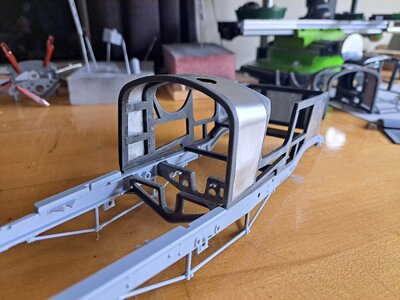
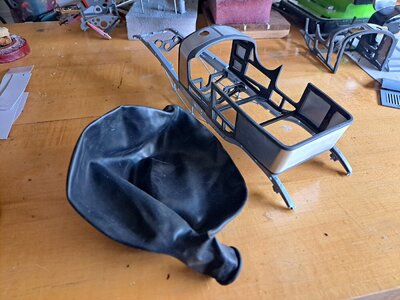
It's now ready to wrap. I tested several materials but didn't like the look of them or the ease of application. So I decided to use latex instead. It's very thin (about .005" which gives 1/16" scaled up and that's about right) and very strenchy. I couldn't find a latex sheet so I decided to use a large size party balloon. I'll start by wrapping the frame with a thin layer of either felt or foam to give the latex a soft backing. The real car seems to have some type of padding under the skin. Once the small end of the balloon is cut off, I'm left with a dome which can be stretched over the frame and glued very carefully. The latex finish is a bit too dull but I can use a latex shinning liquid to give it a nice sheen. Well that's the plan, now I have to make it work.
My frame next to the latex balloon
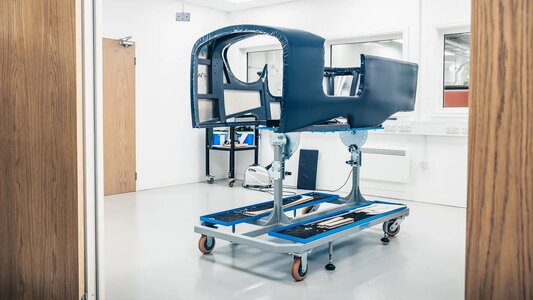
And a real coverded frame
I tested Revell's chrome paint on the gear shifter and, althought very pricey at around 35$ canadian, the result is very surprising and extremely simple. No black primer, no clear. Just spray and let dry for 48 hrs. I'll never fuss with Alclad products again.
Here's the shifter before

and after the chrome paint.

I've also completed the body's framework. I printed an assembly jig which made assembling all 20 parts a breeze and everything came out straight.


I then added the aluminium sheeting


It's now ready to wrap. I tested several materials but didn't like the look of them or the ease of application. So I decided to use latex instead. It's very thin (about .005" which gives 1/16" scaled up and that's about right) and very strenchy. I couldn't find a latex sheet so I decided to use a large size party balloon. I'll start by wrapping the frame with a thin layer of either felt or foam to give the latex a soft backing. The real car seems to have some type of padding under the skin. Once the small end of the balloon is cut off, I'm left with a dome which can be stretched over the frame and glued very carefully. The latex finish is a bit too dull but I can use a latex shinning liquid to give it a nice sheen. Well that's the plan, now I have to make it work.
My frame next to the latex balloon

And a real coverded frame

It is commendable how much energy and attention you put into it to achieve a representative result, François.
What I see is just great.
Regards, Peter
What I see is just great.
Regards, Peter
i gotta say there is many kinds of crazy in the modelling community, and this is exactly my kind of crazy! Absolutely stunning work so far, can't wait to see the final outcome!
Thank you pugwash, my ref car is the car 'zero' of the new continuation series recently built by Bentley. Back in the late 20's/early 30's, the Bentley blower was being constantly modified so Bentley had to choose what moment in time they would base the new car on. They decided on the 1930 Lemans race, and on sir Tim Birkin's blown car. The original still exist, it was completetly dismantle, 3d scanned and, in the process, restored.
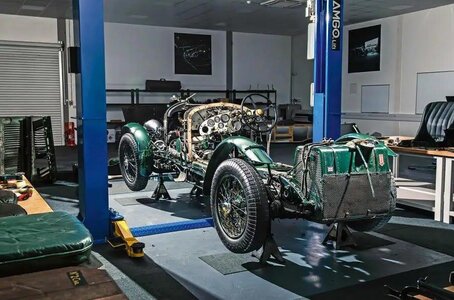
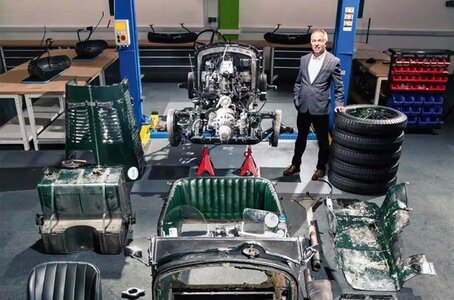
Armed with all this data, they built the prototype car 'zero', first on a 12 car series.
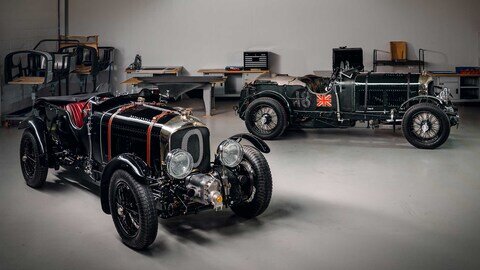
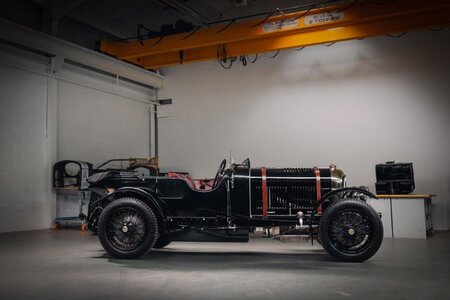
You can find many different articles on this project on the web. The photos are all the same and scare.


Armed with all this data, they built the prototype car 'zero', first on a 12 car series.


You can find many different articles on this project on the web. The photos are all the same and scare.
Last edited:
Completed the gearbox today. I'm not 100% satisfied with the shifter gate. Right now, it's painted to look like brass but I might try and make a real brass one. Espacialy since the gate and shifter are the only 2 things from the gearbox assy that are visible once the model is complet.
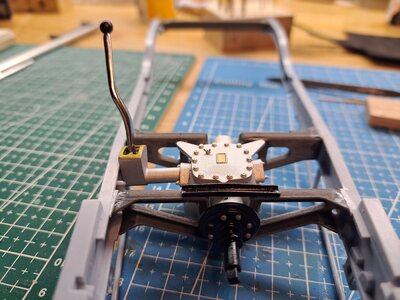
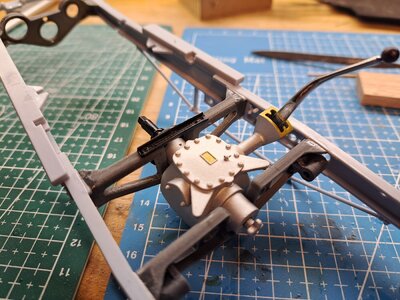
View attachment 20230731_215821.mp4
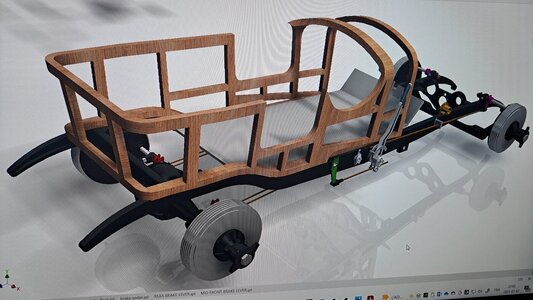
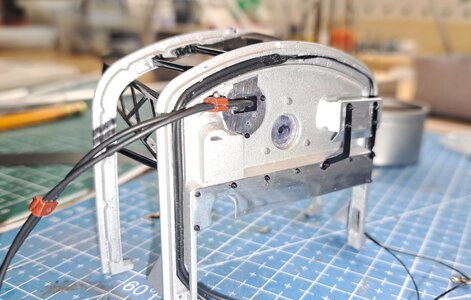
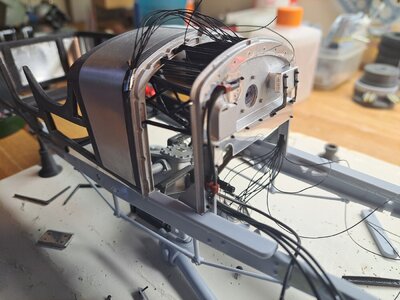
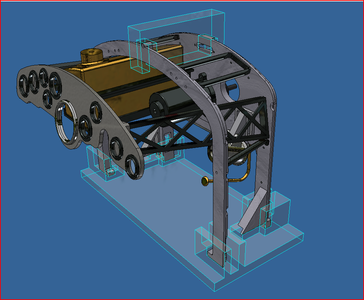
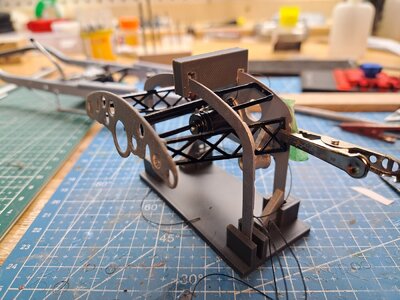
l also printed a holding fixture to hold both bulkheads in relation while I glue some brackets in place.
Here's the design (hi-lighted in blue)
And the fixture in use
I'm still scratching my head as to how l'll glue the latex covering on the body, it's getting clearer but I'm not quite there yet. I do know that I'll probably glue a thin felt between the body and the latex to give a little more volume and roundness to the latex.


View attachment 20230731_215821.mp4
l also printed a holding fixture to hold both bulkheads in relation while I glue some brackets in place.
Here's the design (hi-lighted in blue)

And the fixture in use

I'm still scratching my head as to how l'll glue the latex covering on the body, it's getting clearer but I'm not quite there yet. I do know that I'll probably glue a thin felt between the body and the latex to give a little more volume and roundness to the latex.


