
- Home
- Forums
- Ships of Scale Build Logs
- Super Detailing Static Models / Other Genres
- Historical Trailways, Guns, Aircraft, and Cars
You are using an out of date browser. It may not display this or other websites correctly.
You should upgrade or use an alternative browser.
You should upgrade or use an alternative browser.
1930 Bentley Blower by Aifix 1/12 build log
- Thread starter François
- Start date
- Watchers 34
-
- Tags
- 1930 airfix bentley blower

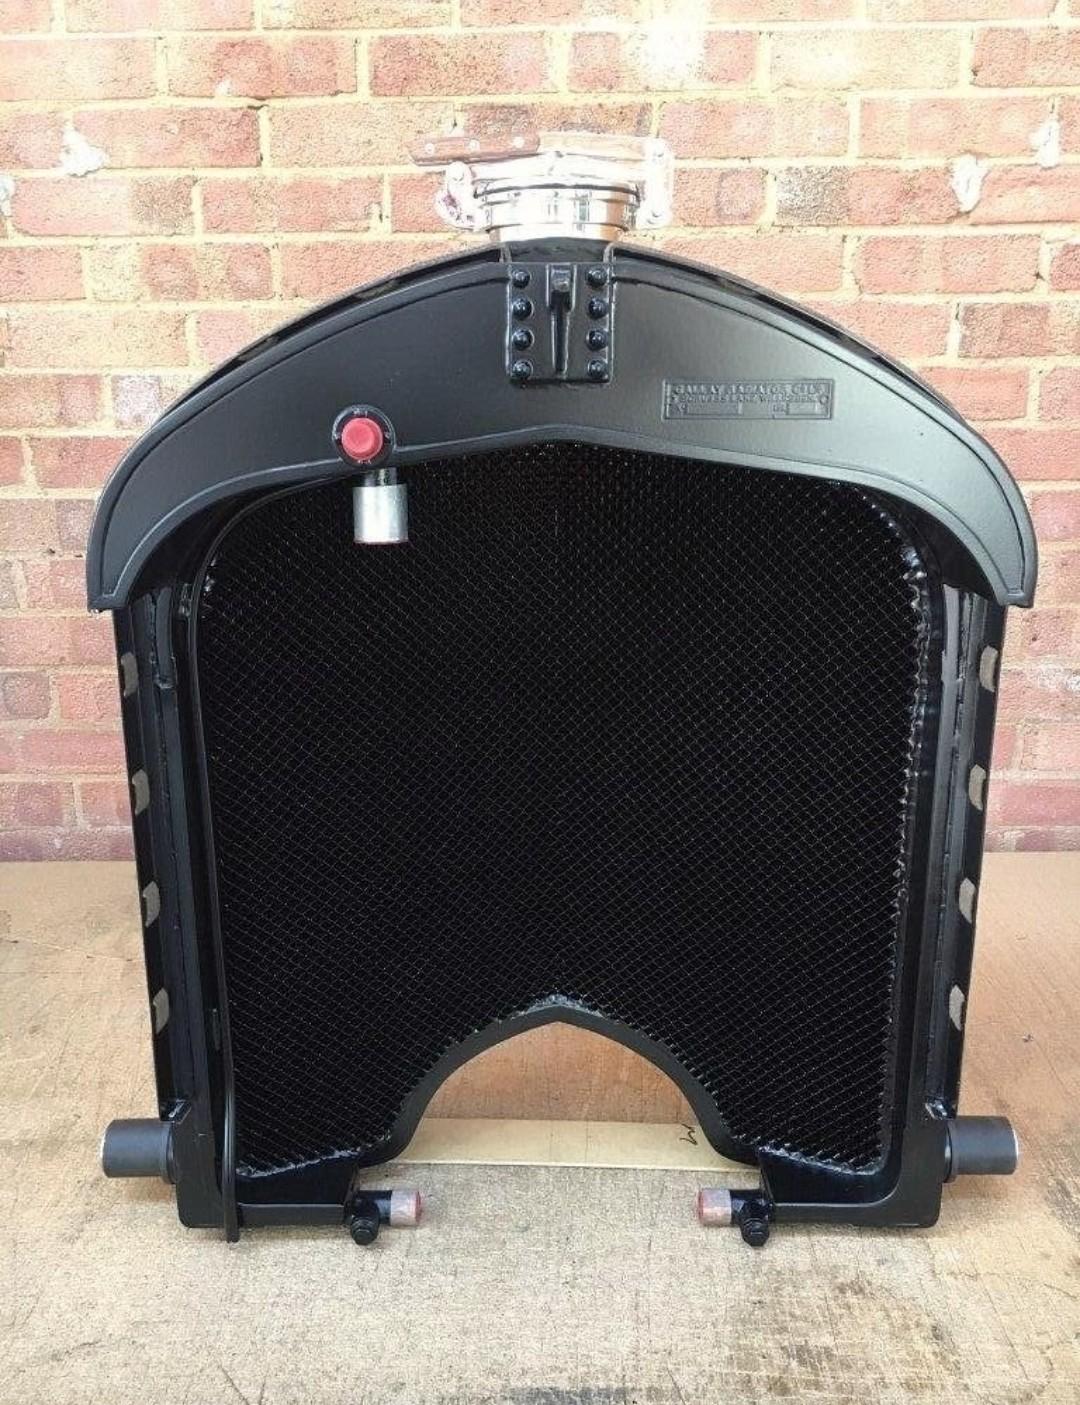
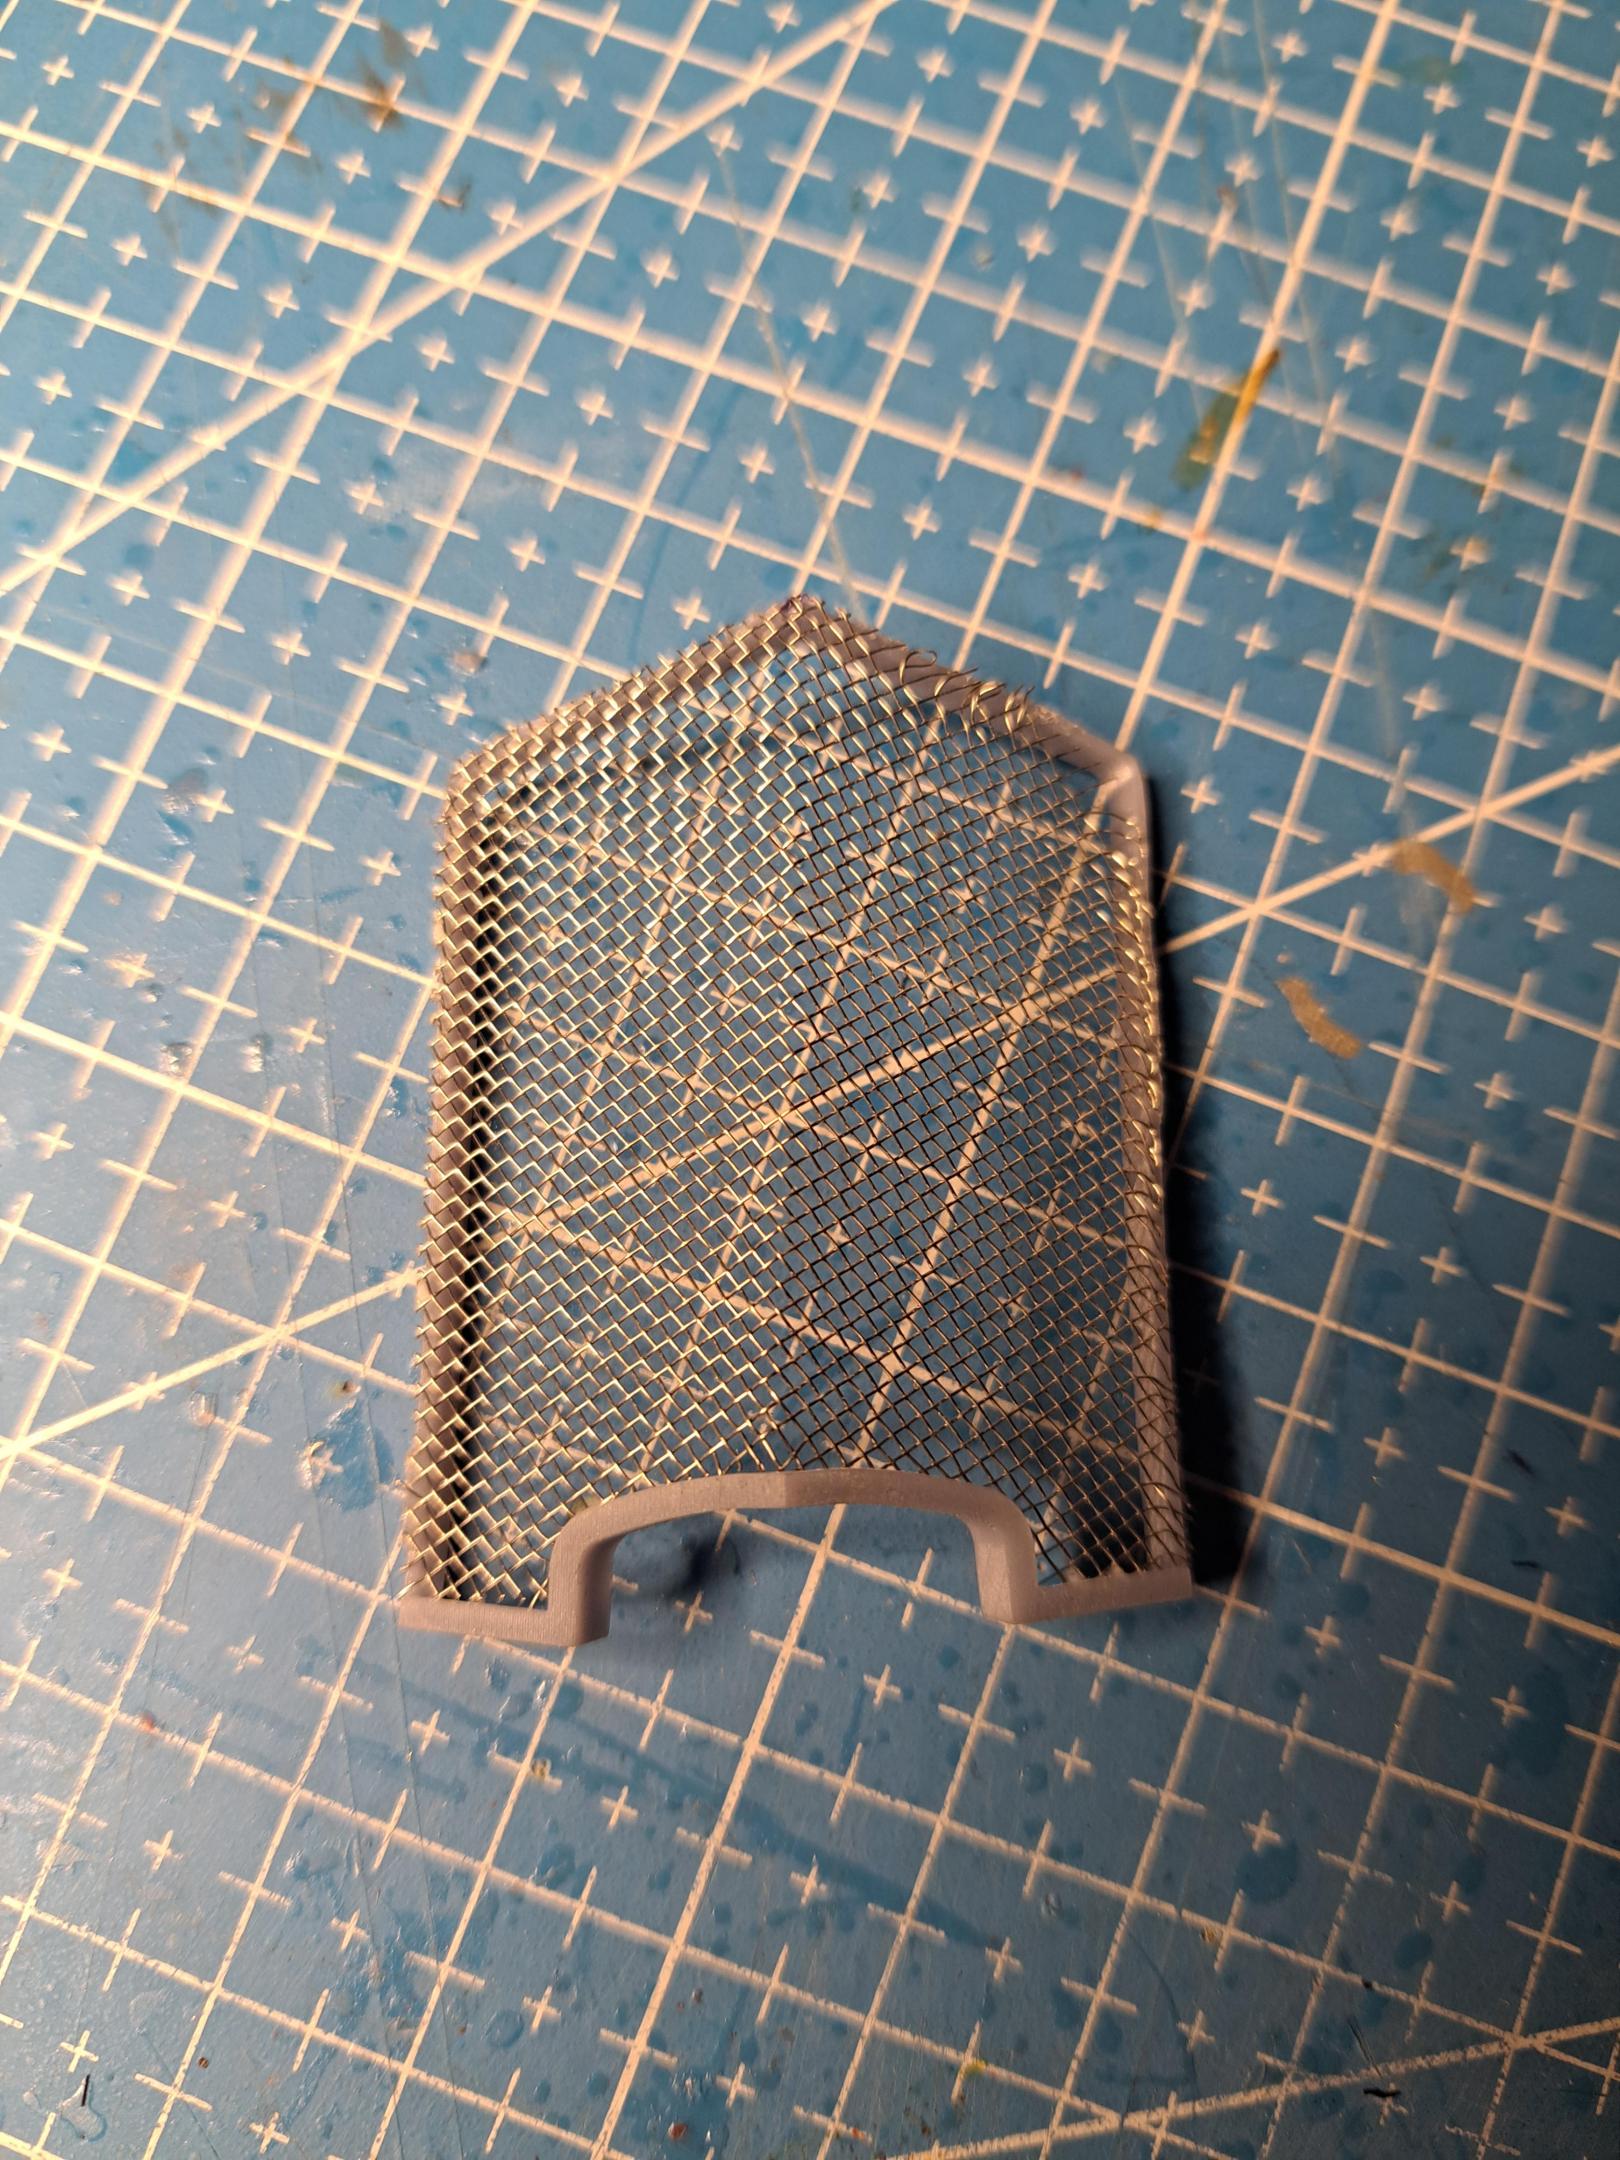
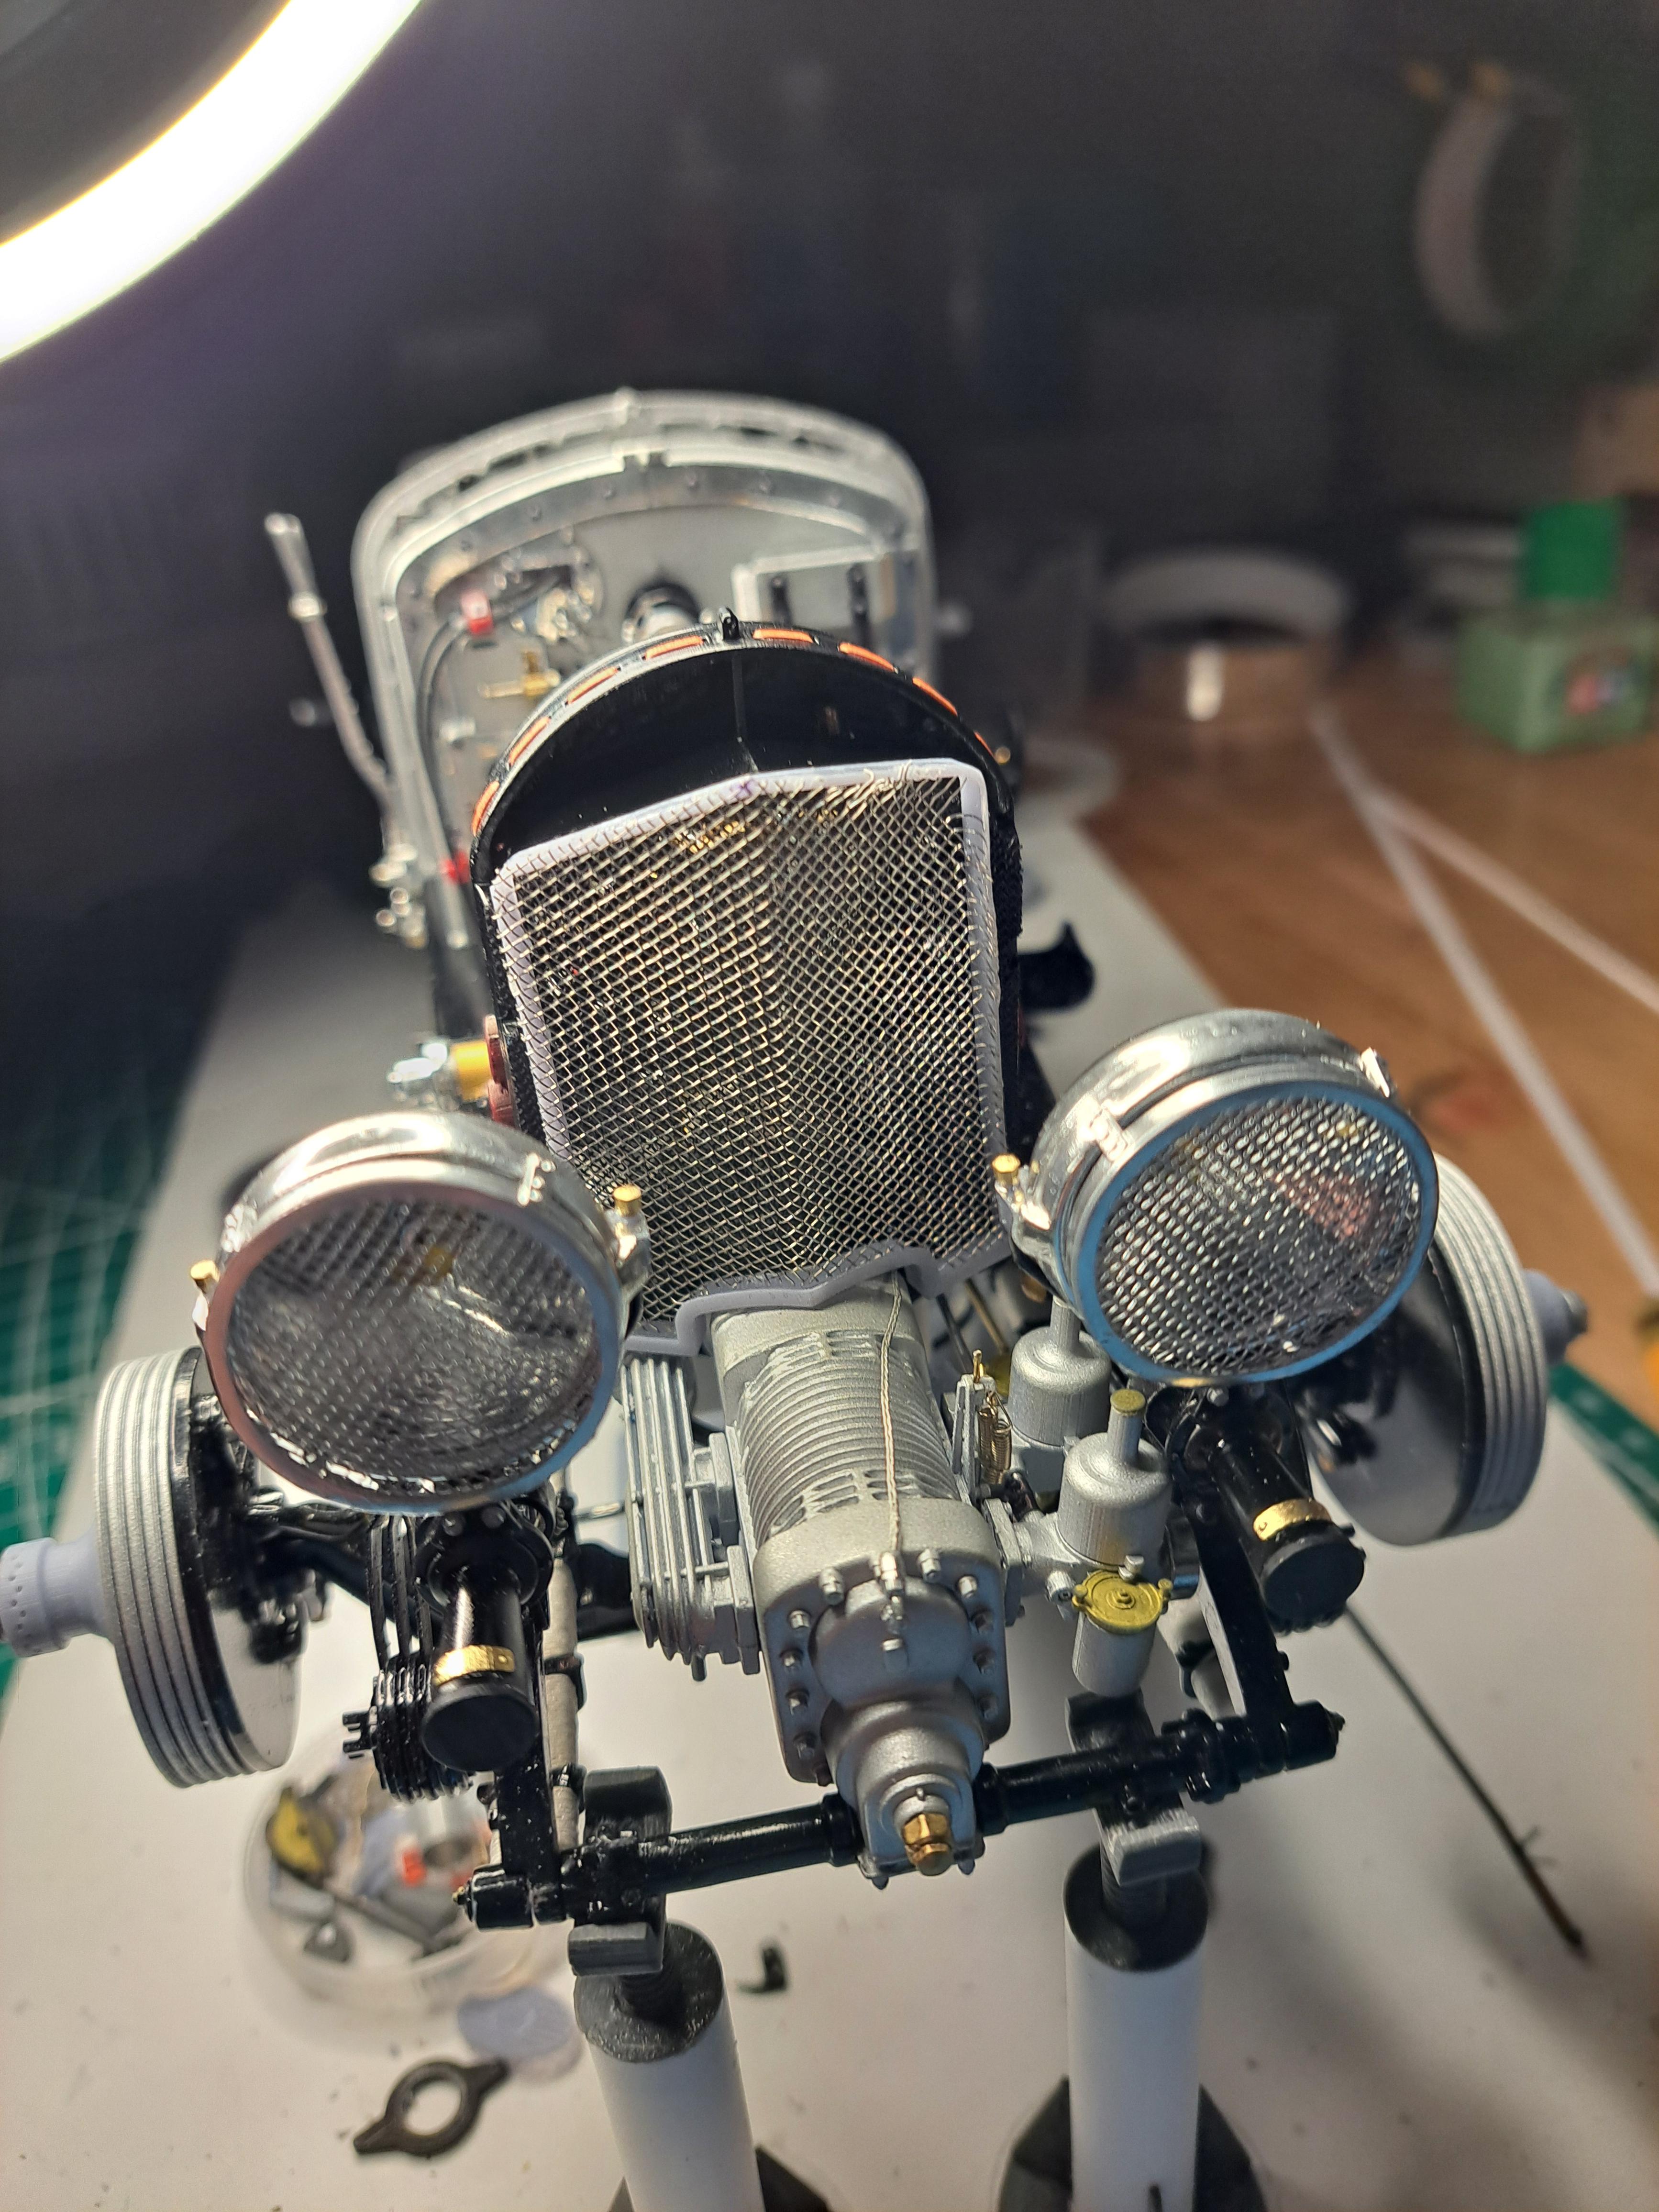
Reprinted the radiator core and this time I got wedding patters right. And since I was reprinting, I added a small name tag. I'm not sure it's on my ref car but it was on a picture of a new core9 I have. I also installed the wire mesh. Naturally, unlike mine, you would't see thru a real core. But I kinda like it like this since the fans and water pump should be fisible from the front grill. I did a test with the front grill, not quite there yet but it's promissing.
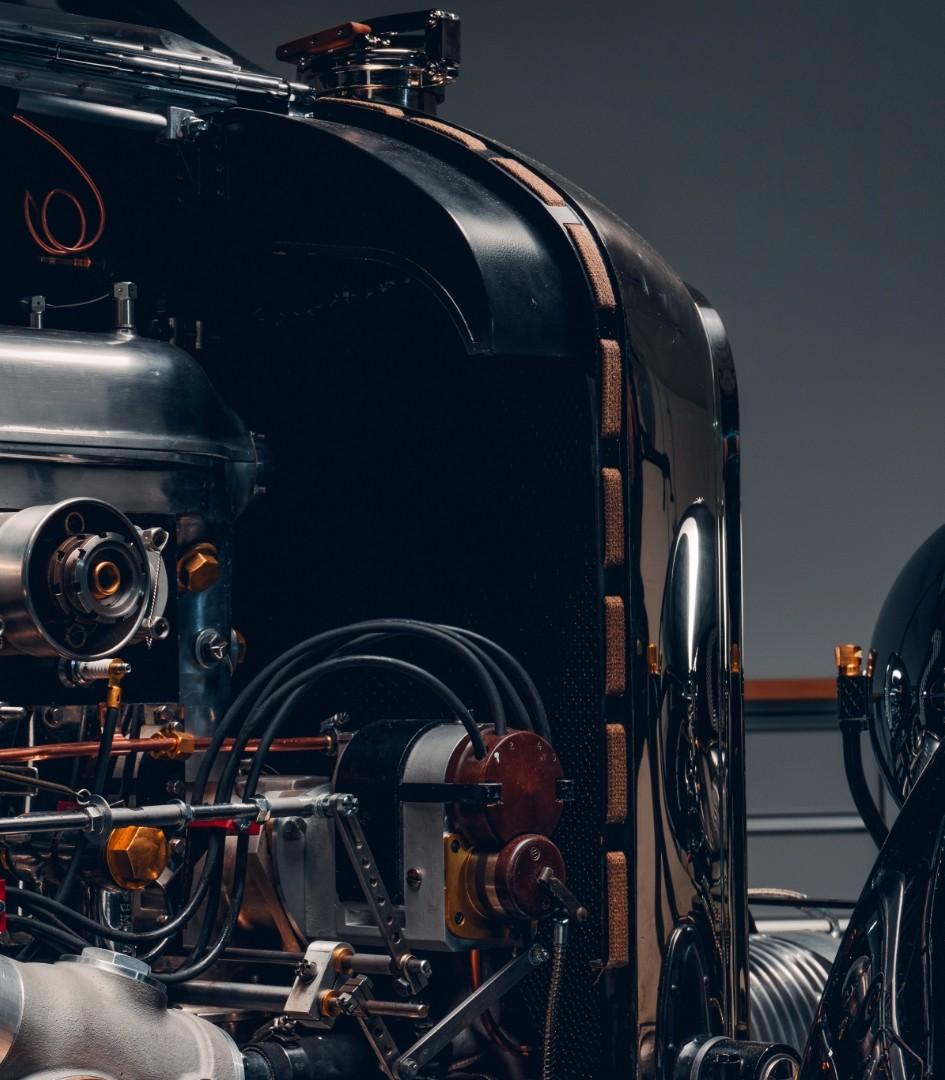
Here's a real core
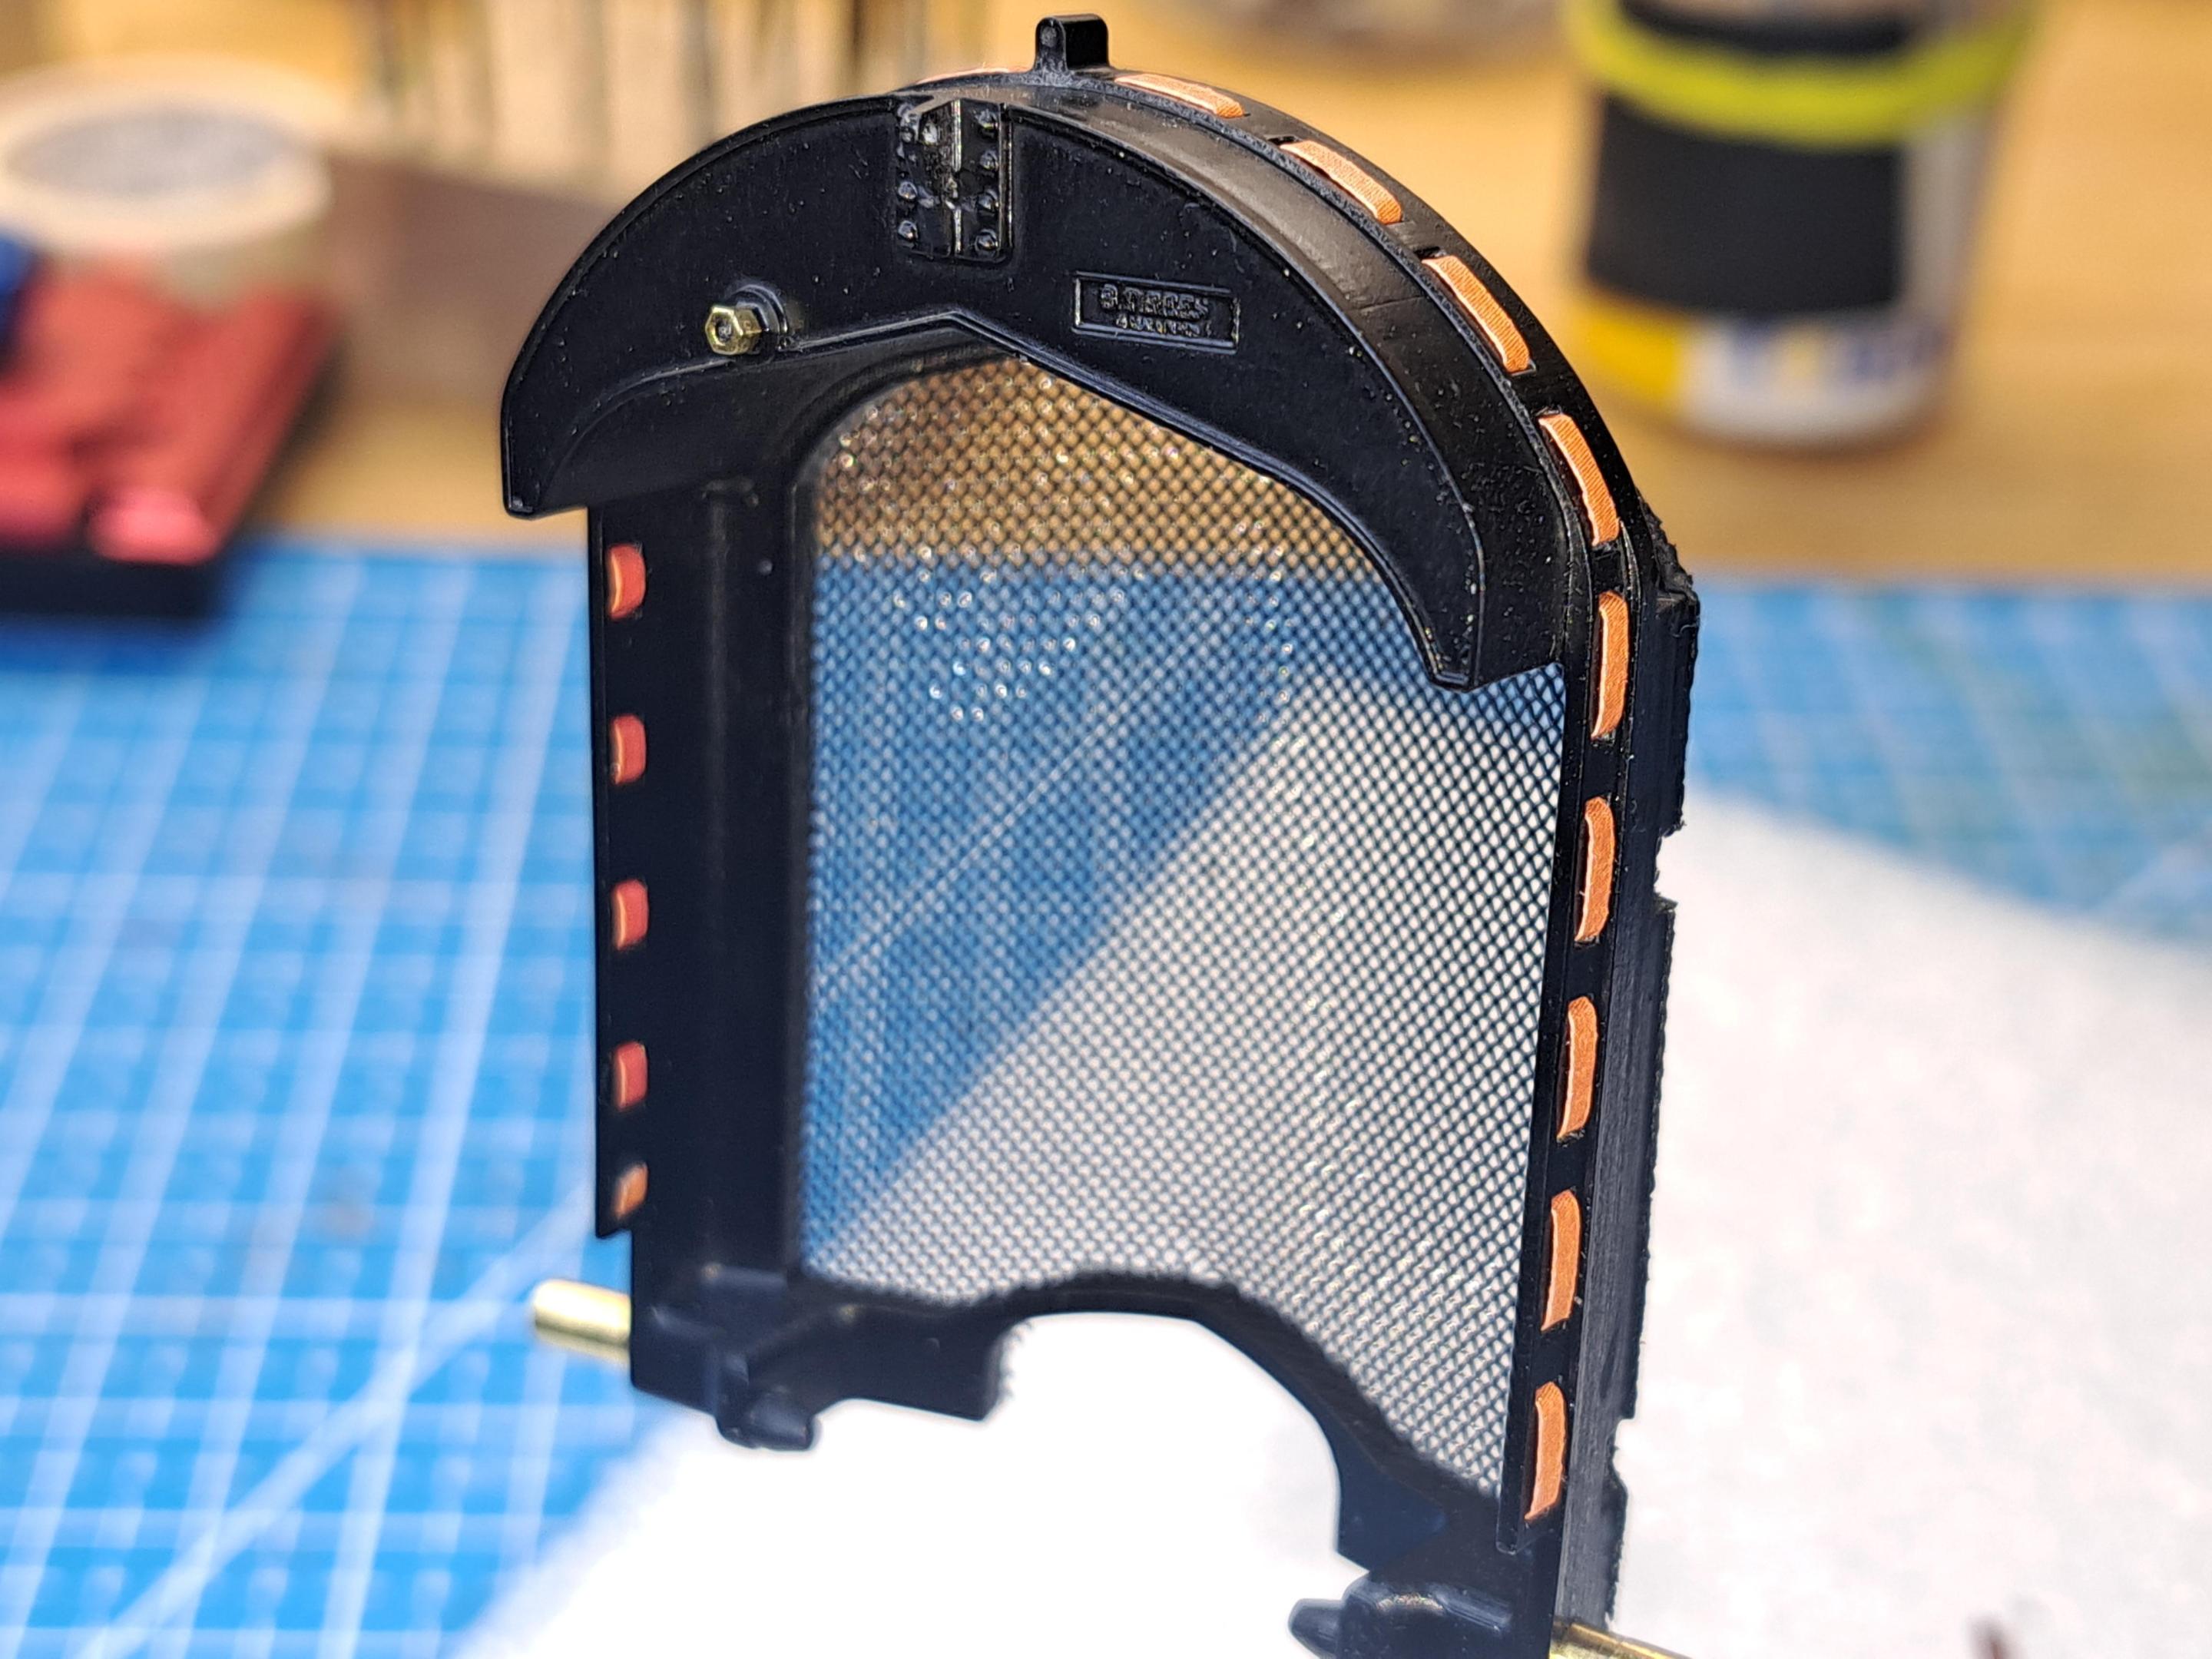
And here is mine
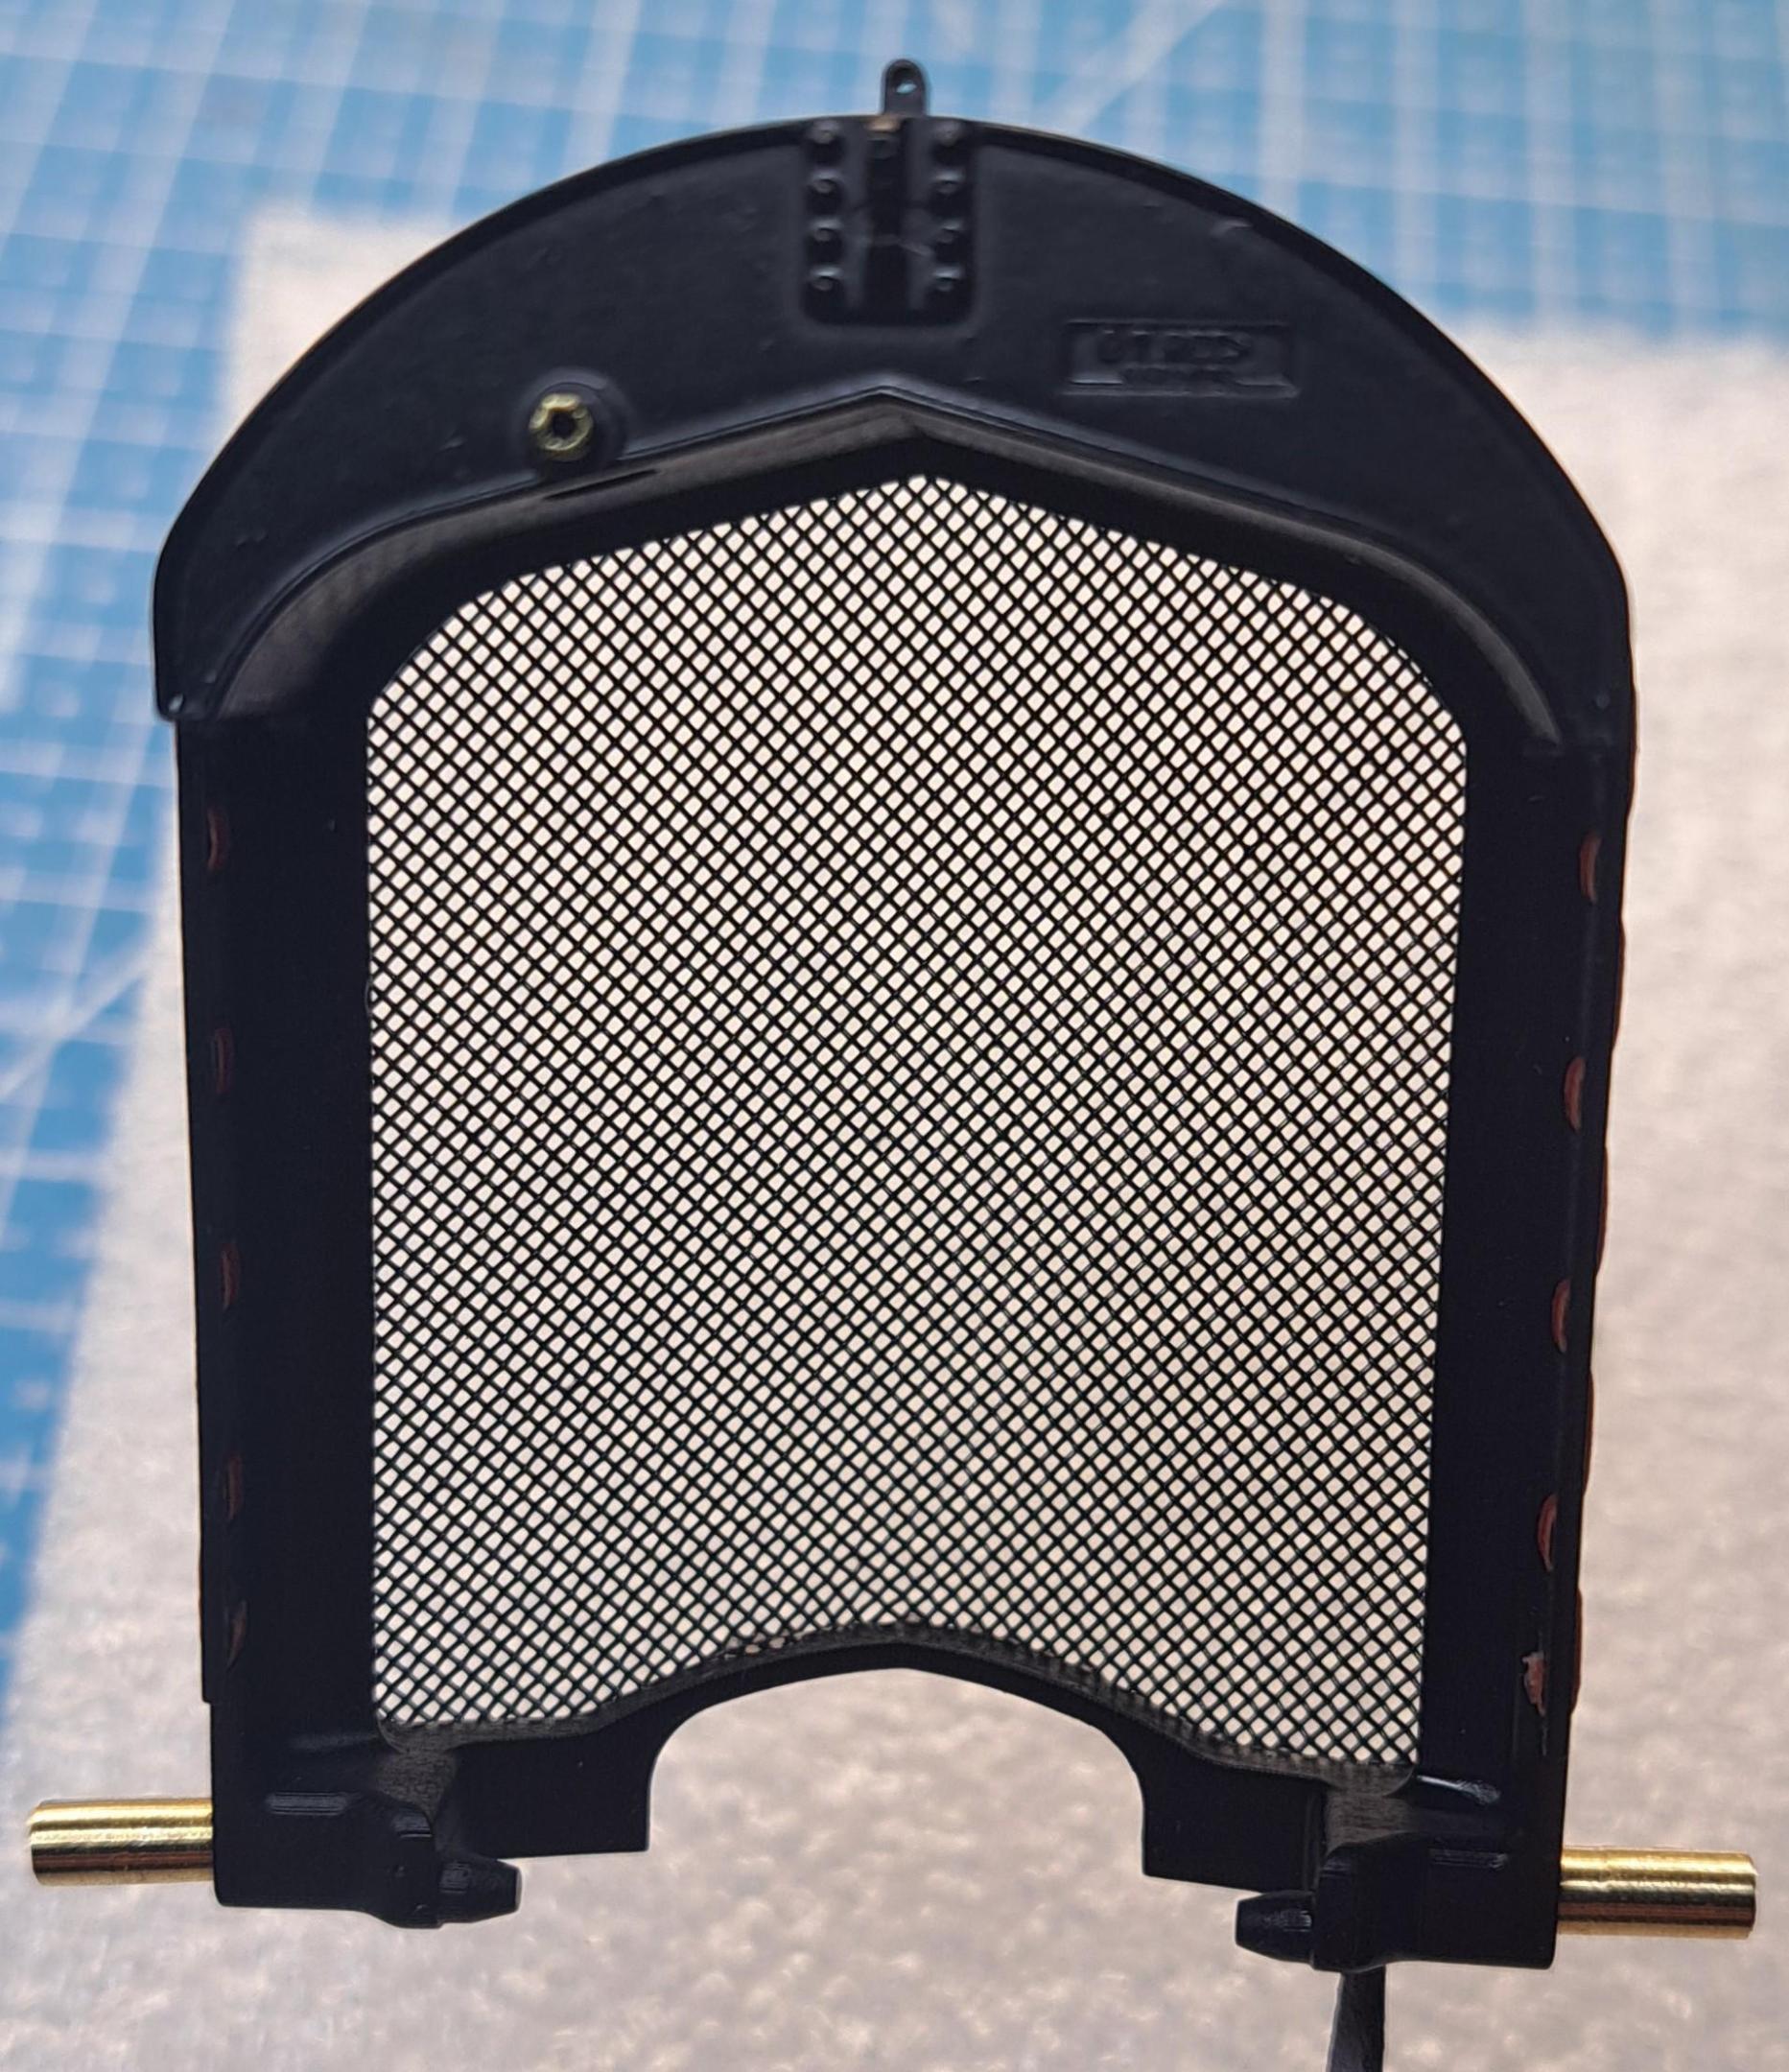
the real webbing
And mine
And the name plate
Front grill test

Here's a real core
And here is mine

the real webbing
And mine


And the name plate

Front grill test

So, I was out skiing today when 2 members of another forum 'decided' that I had to move the bentley radiator badge because it was molded to low. I took every ski lift time to think of a way to do this, here's what I did.
First I found a good 2d cad line drawing of the logo

then using this 2d drawing as a sketch in my 3d software, I embossed the logo on a curved surface that has the same radius as the radiator cover

After several maneuvers I was able to isolate the logo and got this

After printing, I got this. I also printed a test spout. Still a bit of tweaking to do but I'm quite satisfied. Noting is glued yet, once glued in place, the fit should be better.

And the real thing

So I think it safe for me to remove the kit's logo and replace it with the new better positionned one.
First I found a good 2d cad line drawing of the logo
then using this 2d drawing as a sketch in my 3d software, I embossed the logo on a curved surface that has the same radius as the radiator cover
After several maneuvers I was able to isolate the logo and got this
After printing, I got this. I also printed a test spout. Still a bit of tweaking to do but I'm quite satisfied. Noting is glued yet, once glued in place, the fit should be better.
And the real thing
So I think it safe for me to remove the kit's logo and replace it with the new better positionned one.

That looks great ! Always amazing!
Thanks
I 3d modeled the radiator cap and am trying to make it operational but so far, the print results are not to great. I haven't said my last word on that one.


I also installed the wire mesh on the front grill frame, took me 2 tries but I'm happy with the result.


I 3d modeled the radiator cap and am trying to make it operational but so far, the print results are not to great. I haven't said my last word on that one.
I also installed the wire mesh on the front grill frame, took me 2 tries but I'm happy with the result.
Your Bently logo is more accurate than the one molded on the kit. The one in the kit has the wings wrong. ")
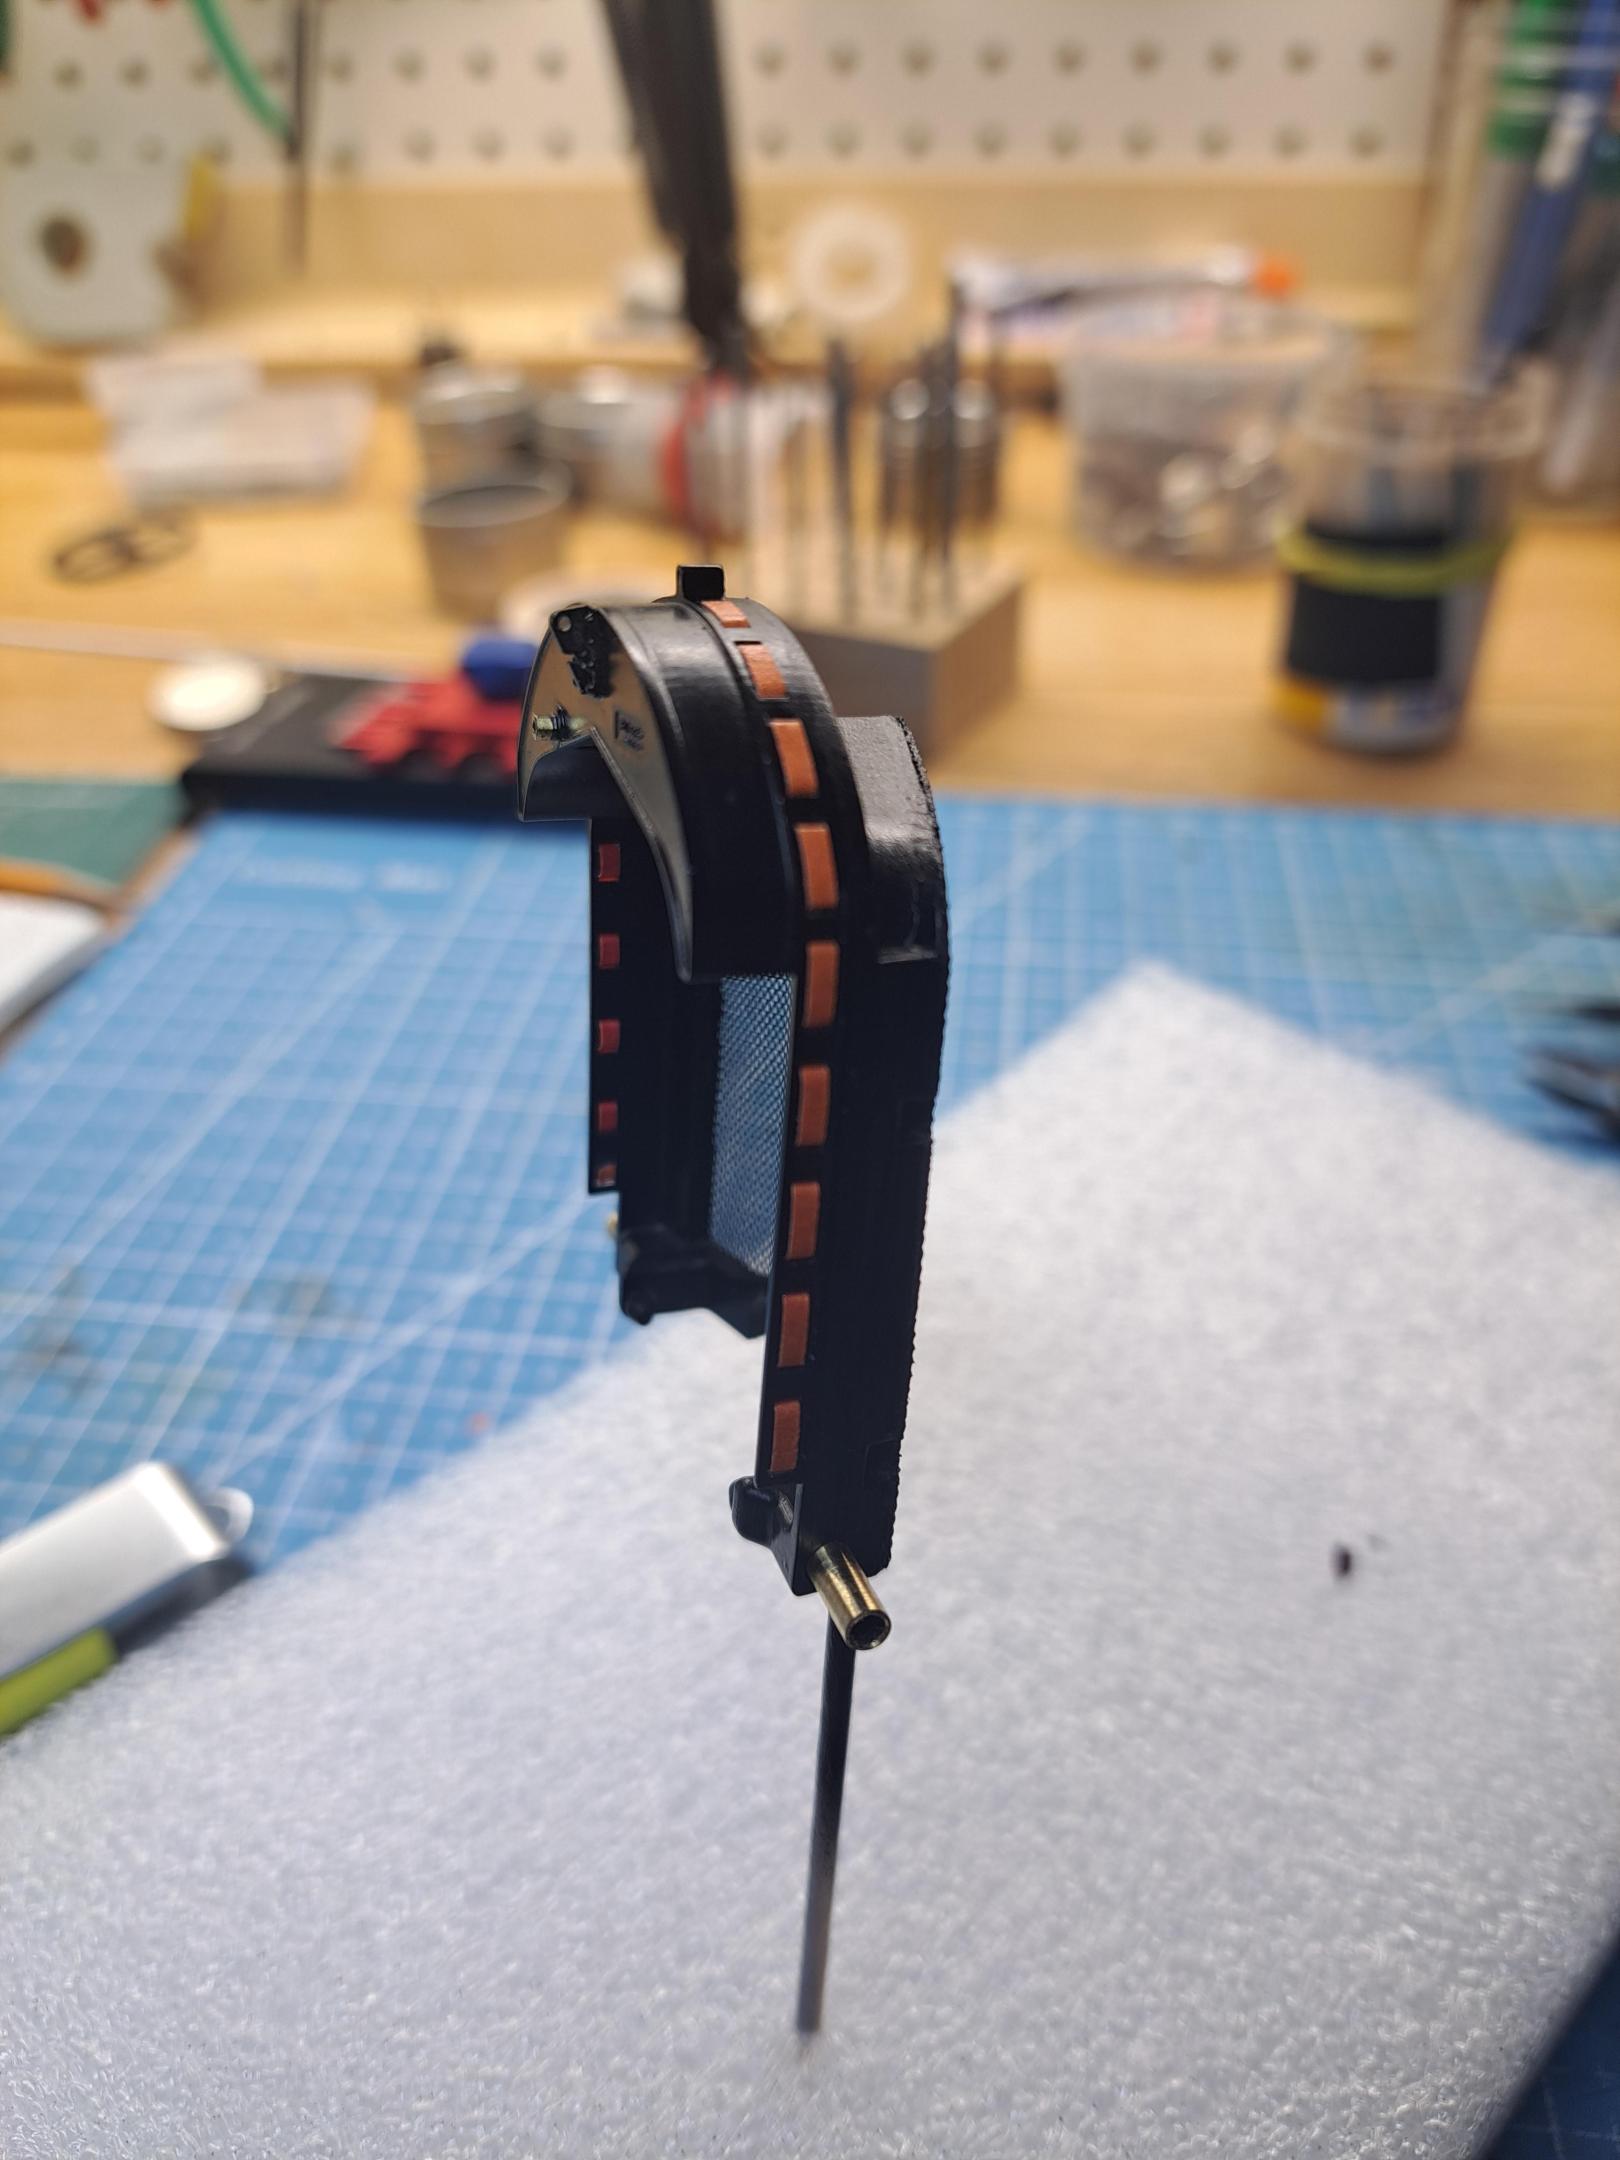
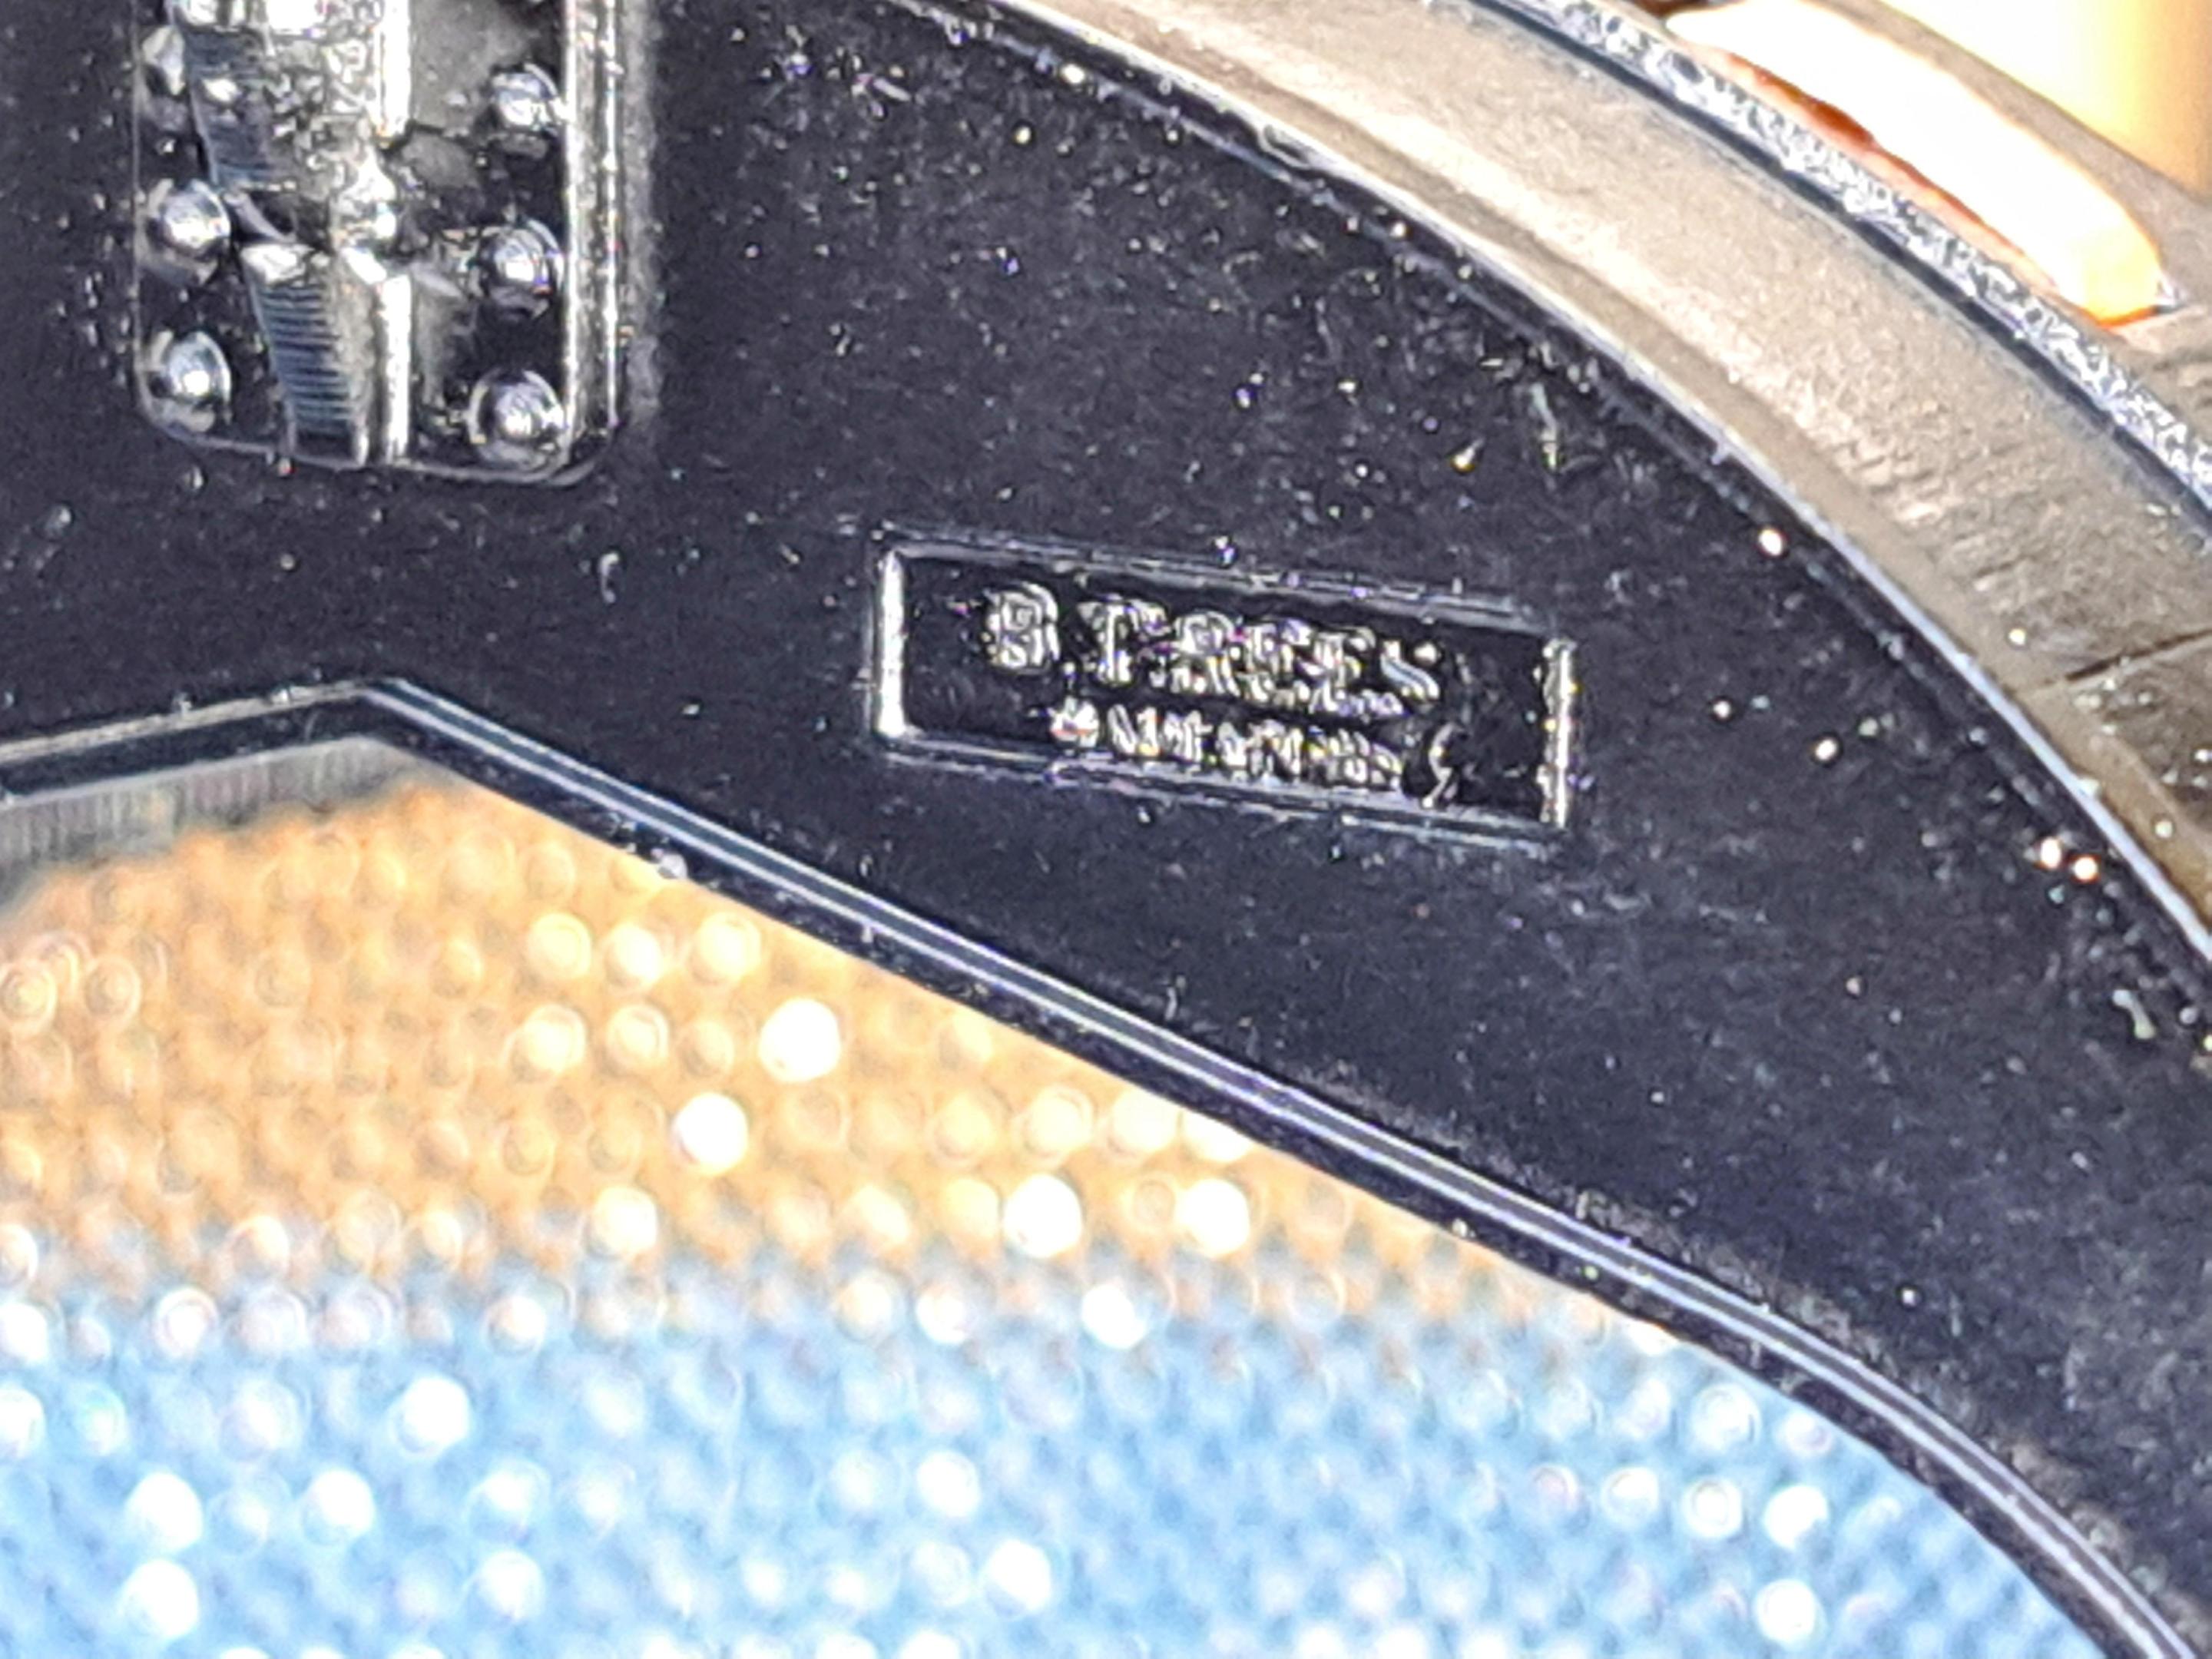
Did the final print of the radiator cap and it turned out good. I also removed the logo from the front of the radiator cover and will glue on the new once I finish prepping the cover.
Cap closed

Handle opened

Cap fully opened

Radiator mounting bracket installed

Getting ready to paint the '0' on the front grill

Radiator to bulkhead link bar

And a bit of cad vs reality


Cap closed
Handle opened
Cap fully opened
Radiator mounting bracket installed
Getting ready to paint the '0' on the front grill
Radiator to bulkhead link bar
And a bit of cad vs reality

Do not forget the rubber sealing ring on your cap
WOW - great details
WOW - great details
Ok so, the radiator fab is all done. The new logo and filler neck are glued on, the front grill is painted black and 'zeroed' in white. All that is left to do is to chrome it.


But first, I decided to fit the hood. Now because of all the added details I did, I wasn't too surprised to see that the hood panels didn't fit. The added fans and better detailed water pump meant that I had to move the radiator assembly forward a bit. Combined with the completetly scratch built bulkhead assy meant that the hood panels were too short. Also, the more detailed magnetos did not align with the bumps moulded on both side panels. So I first removed the bumps and opened up the holes to better fit the new magnetos. I printed and glued on new larger bumps and added some styrene strips at both ends to lenghten the hood panels. There is still some fitting to do but it looks promissing.
Side panel before mod

After cut-out and added strips

New bumps in place

Trial fit

I also stared the hood hinged

But first, I decided to fit the hood. Now because of all the added details I did, I wasn't too surprised to see that the hood panels didn't fit. The added fans and better detailed water pump meant that I had to move the radiator assembly forward a bit. Combined with the completetly scratch built bulkhead assy meant that the hood panels were too short. Also, the more detailed magnetos did not align with the bumps moulded on both side panels. So I first removed the bumps and opened up the holes to better fit the new magnetos. I printed and glued on new larger bumps and added some styrene strips at both ends to lenghten the hood panels. There is still some fitting to do but it looks promissing.
Side panel before mod
After cut-out and added strips
New bumps in place
Trial fit
I also stared the hood hinged
Thank you pugwash, I did have to make a small modification to the louvres because of the added details. But before showing you pictures of the real ones, i'm curious to see how good your eye is. Did you find the modification I did? I do have to say that the kit's panel thickness is way out of scale, at .05 in, it would scale up to a bullet proof .6 in. But I imagine that moulding fairly large flat parts was a challenge at the time these molds were made. I'm tempted to try and print one with a more accurate thickness and more refined louvres, l could even include the hinges... we'll see...
- Joined
- Apr 21, 2018
- Messages
- 506
- Points
- 268

It's the side panel louvres which seem unreal, especially on the left, where there are suspicious gaps.
That side is where the exhaust manifold would no doubt be glowing red under race conditions, so were a number of louvres be removed entirely, providing increased ventilation?
I haven't seen photographs of real cars configured like that.
I can only assume these louvres rotated open or closed.
As they are at the moment they are mere suggestions of what is actually there.
Clearly you have the skills to refine these items.

I've been enjoying the craftsmanship of this build!
I do have to say that the hood louvers, for no better word, look kinda clunky - that is well out of scale. I'm not sure that 3D printing can make them much better in that they would be very delicate. I might try, if my build, to try some thin metal, possibly shim stock. McMaster-Carr has carbon steel from .001" to .032 and in many widths. Difficult to work with for sure though. https://www.mcmaster.com/products/shims/shim-stock-6/
I do have to say that the hood louvers, for no better word, look kinda clunky - that is well out of scale. I'm not sure that 3D printing can make them much better in that they would be very delicate. I might try, if my build, to try some thin metal, possibly shim stock. McMaster-Carr has carbon steel from .001" to .032 and in many widths. Difficult to work with for sure though. https://www.mcmaster.com/products/shims/shim-stock-6/
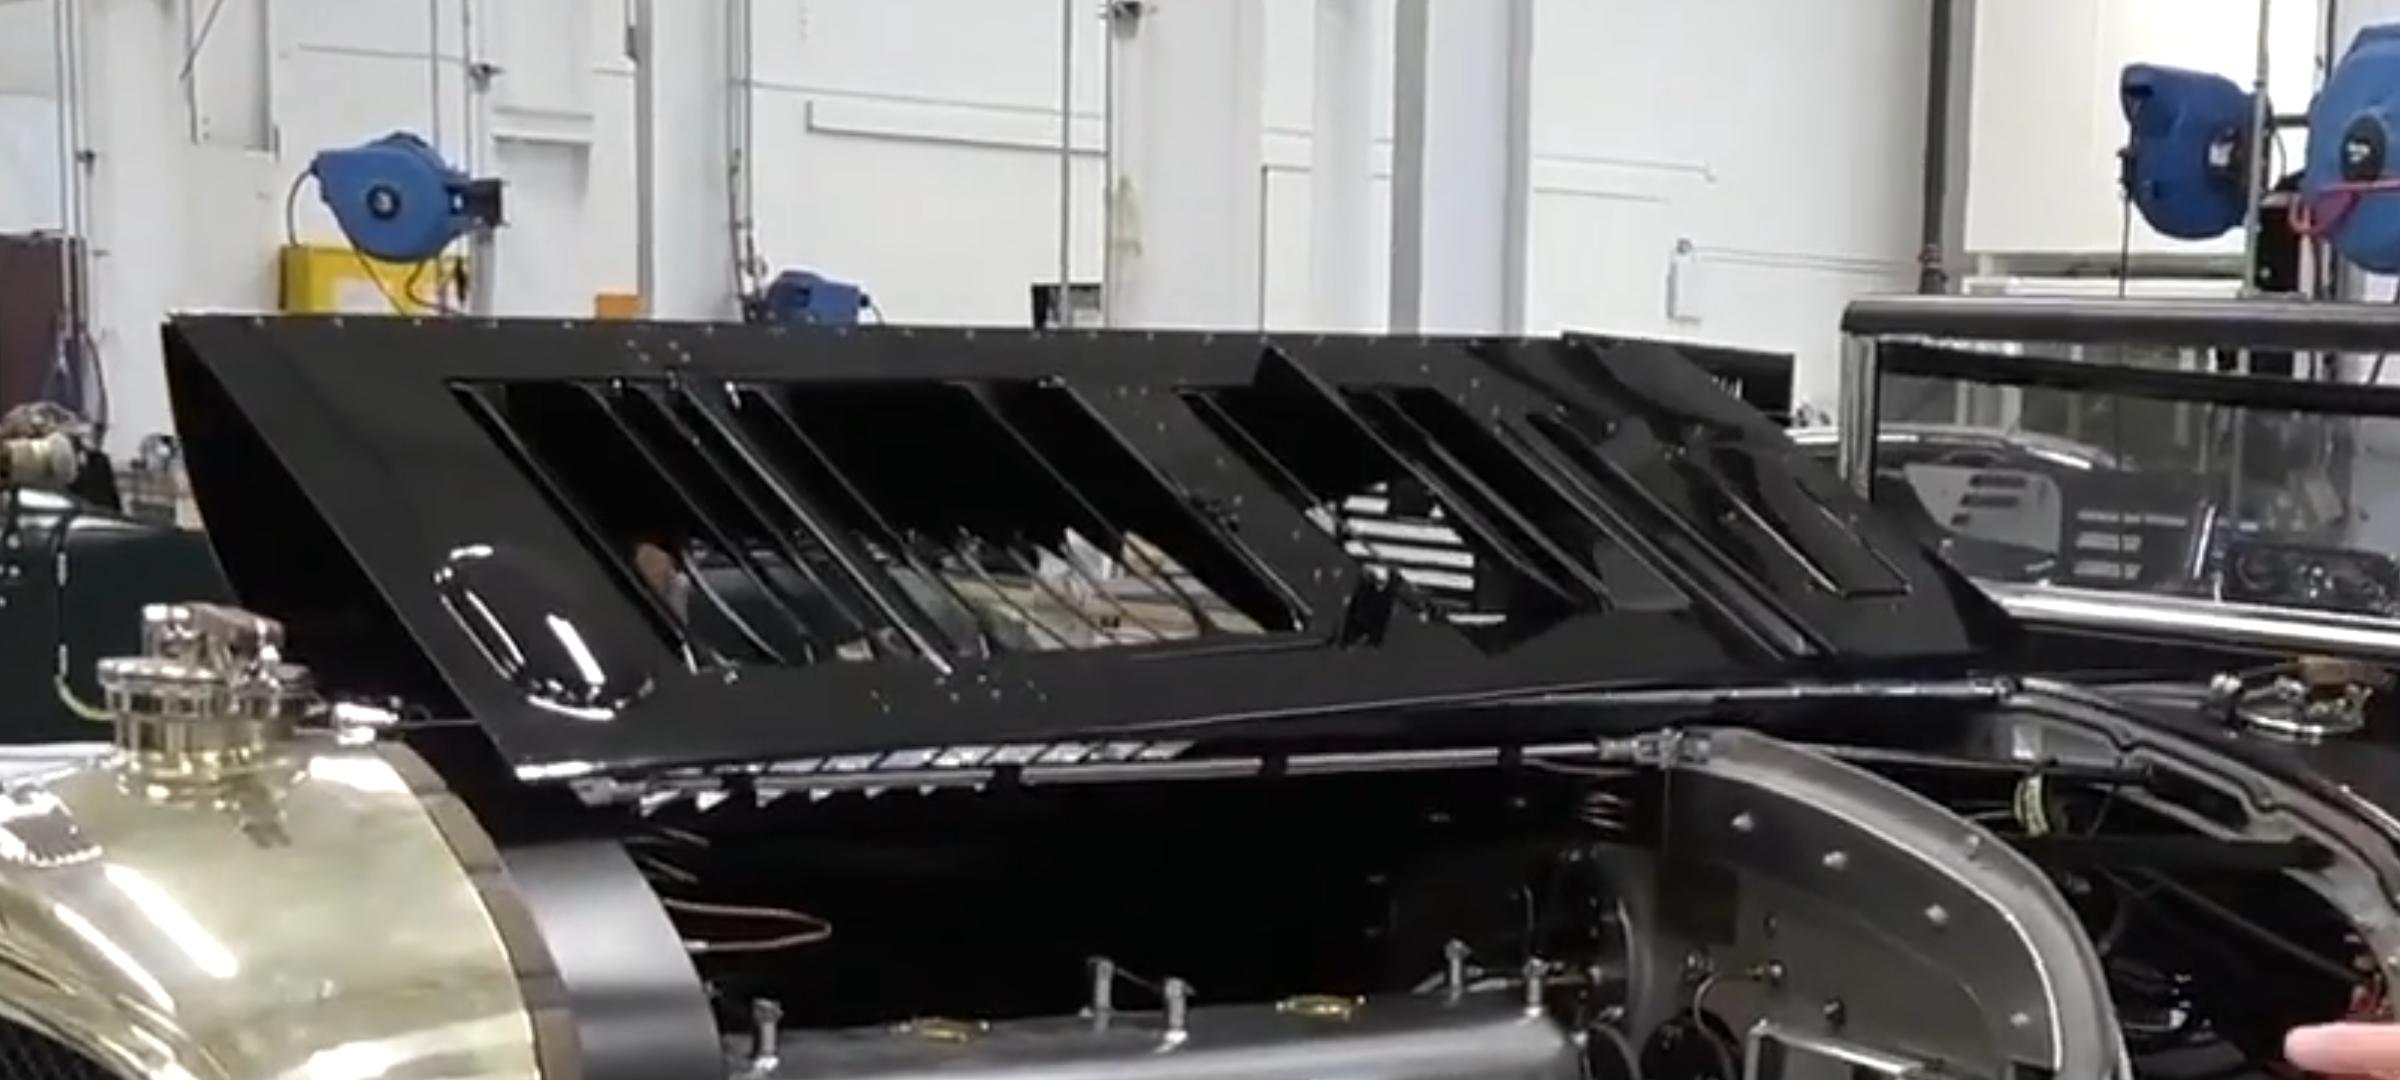
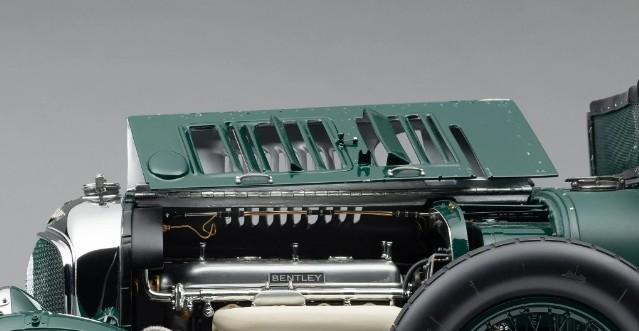
You do have a good eye. I had to remove one louver to provide room for the oil filler cap handle (it's a bit big). But, I have to say that the kit's louvers are not all that off from my ref car. It's very hard to find a good pictures but here are a few shots showing just how few louvers are on the left side. As for the right side, it's pretty much as airfix depicted it.
Here is where I had to remove 1 louver

And here are a few shots of my ref car
The left side

And the right
Here is where I had to remove 1 louver
And here are a few shots of my ref car
The left side
And the right
Dave, to print them in scale, they would effectively be extremely thin and would be too fragile. On the pictures I posted, they have not been cleaned up yet. They do look a bit better once cleaned. It would be fun to try and redo the panels out of metal but I would use thin aluminium, much easier to work. I have some .01 in stock, that would come to 1/8 in scaled up. Still too thick but much more realistic. I could try to print some sort of forming die. It's the 2 top panel (curved ones) that scare me most.I've been enjoying the craftsmanship of this build!
I do have to say that the hood louvers, for no better word, look kinda clunky - that is well out of scale. I'm not sure that 3D printing can make them much better in that they would be very delicate. I might try, if my build, to try some thin metal, possibly shim stock. McMaster-Carr has carbon steel from .001" to .032 and in many widths. Difficult to work with for sure though. https://www.mcmaster.com/products/shims/shim-stock-6/

Hi Francois,it would scale up to a bullet proof .6 in.
Your observation is absolutely correct. Even in the 1/8 scale that I like to play with, the thicknesses of panels makes them well out of scale. It's a real challenge to shave off just enough of the ends of panels to make them look right in pictures. Well done!
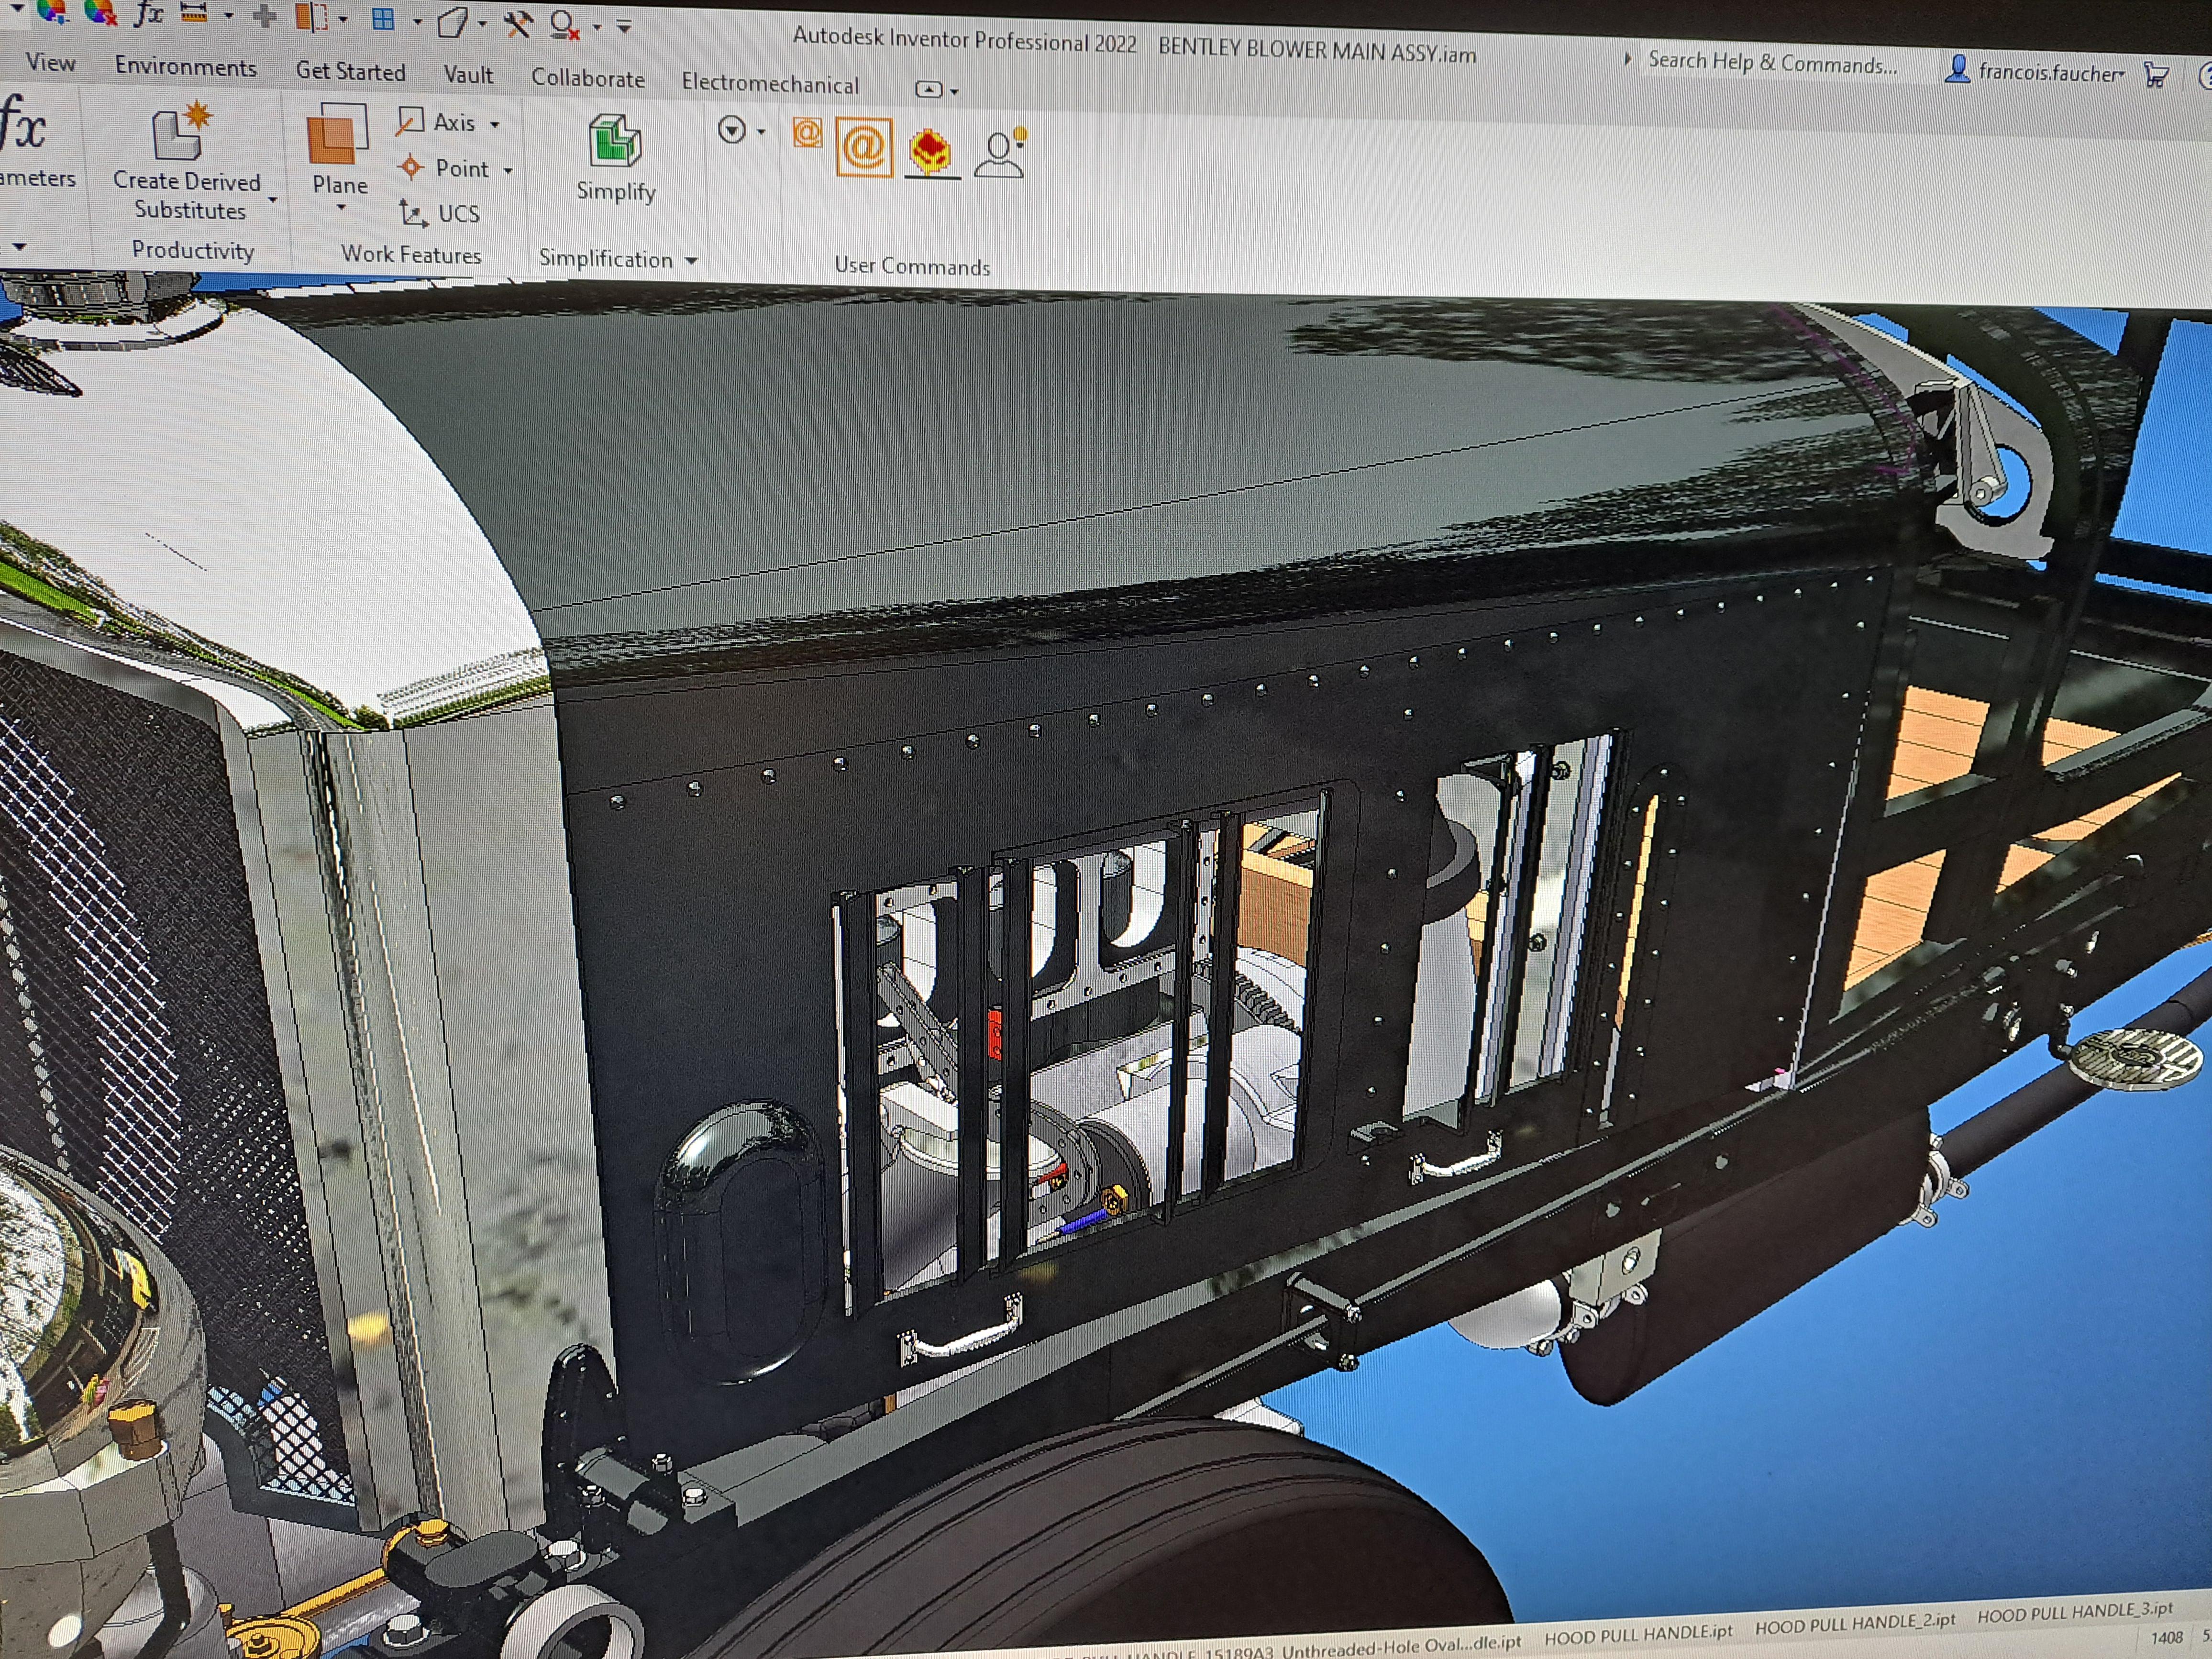
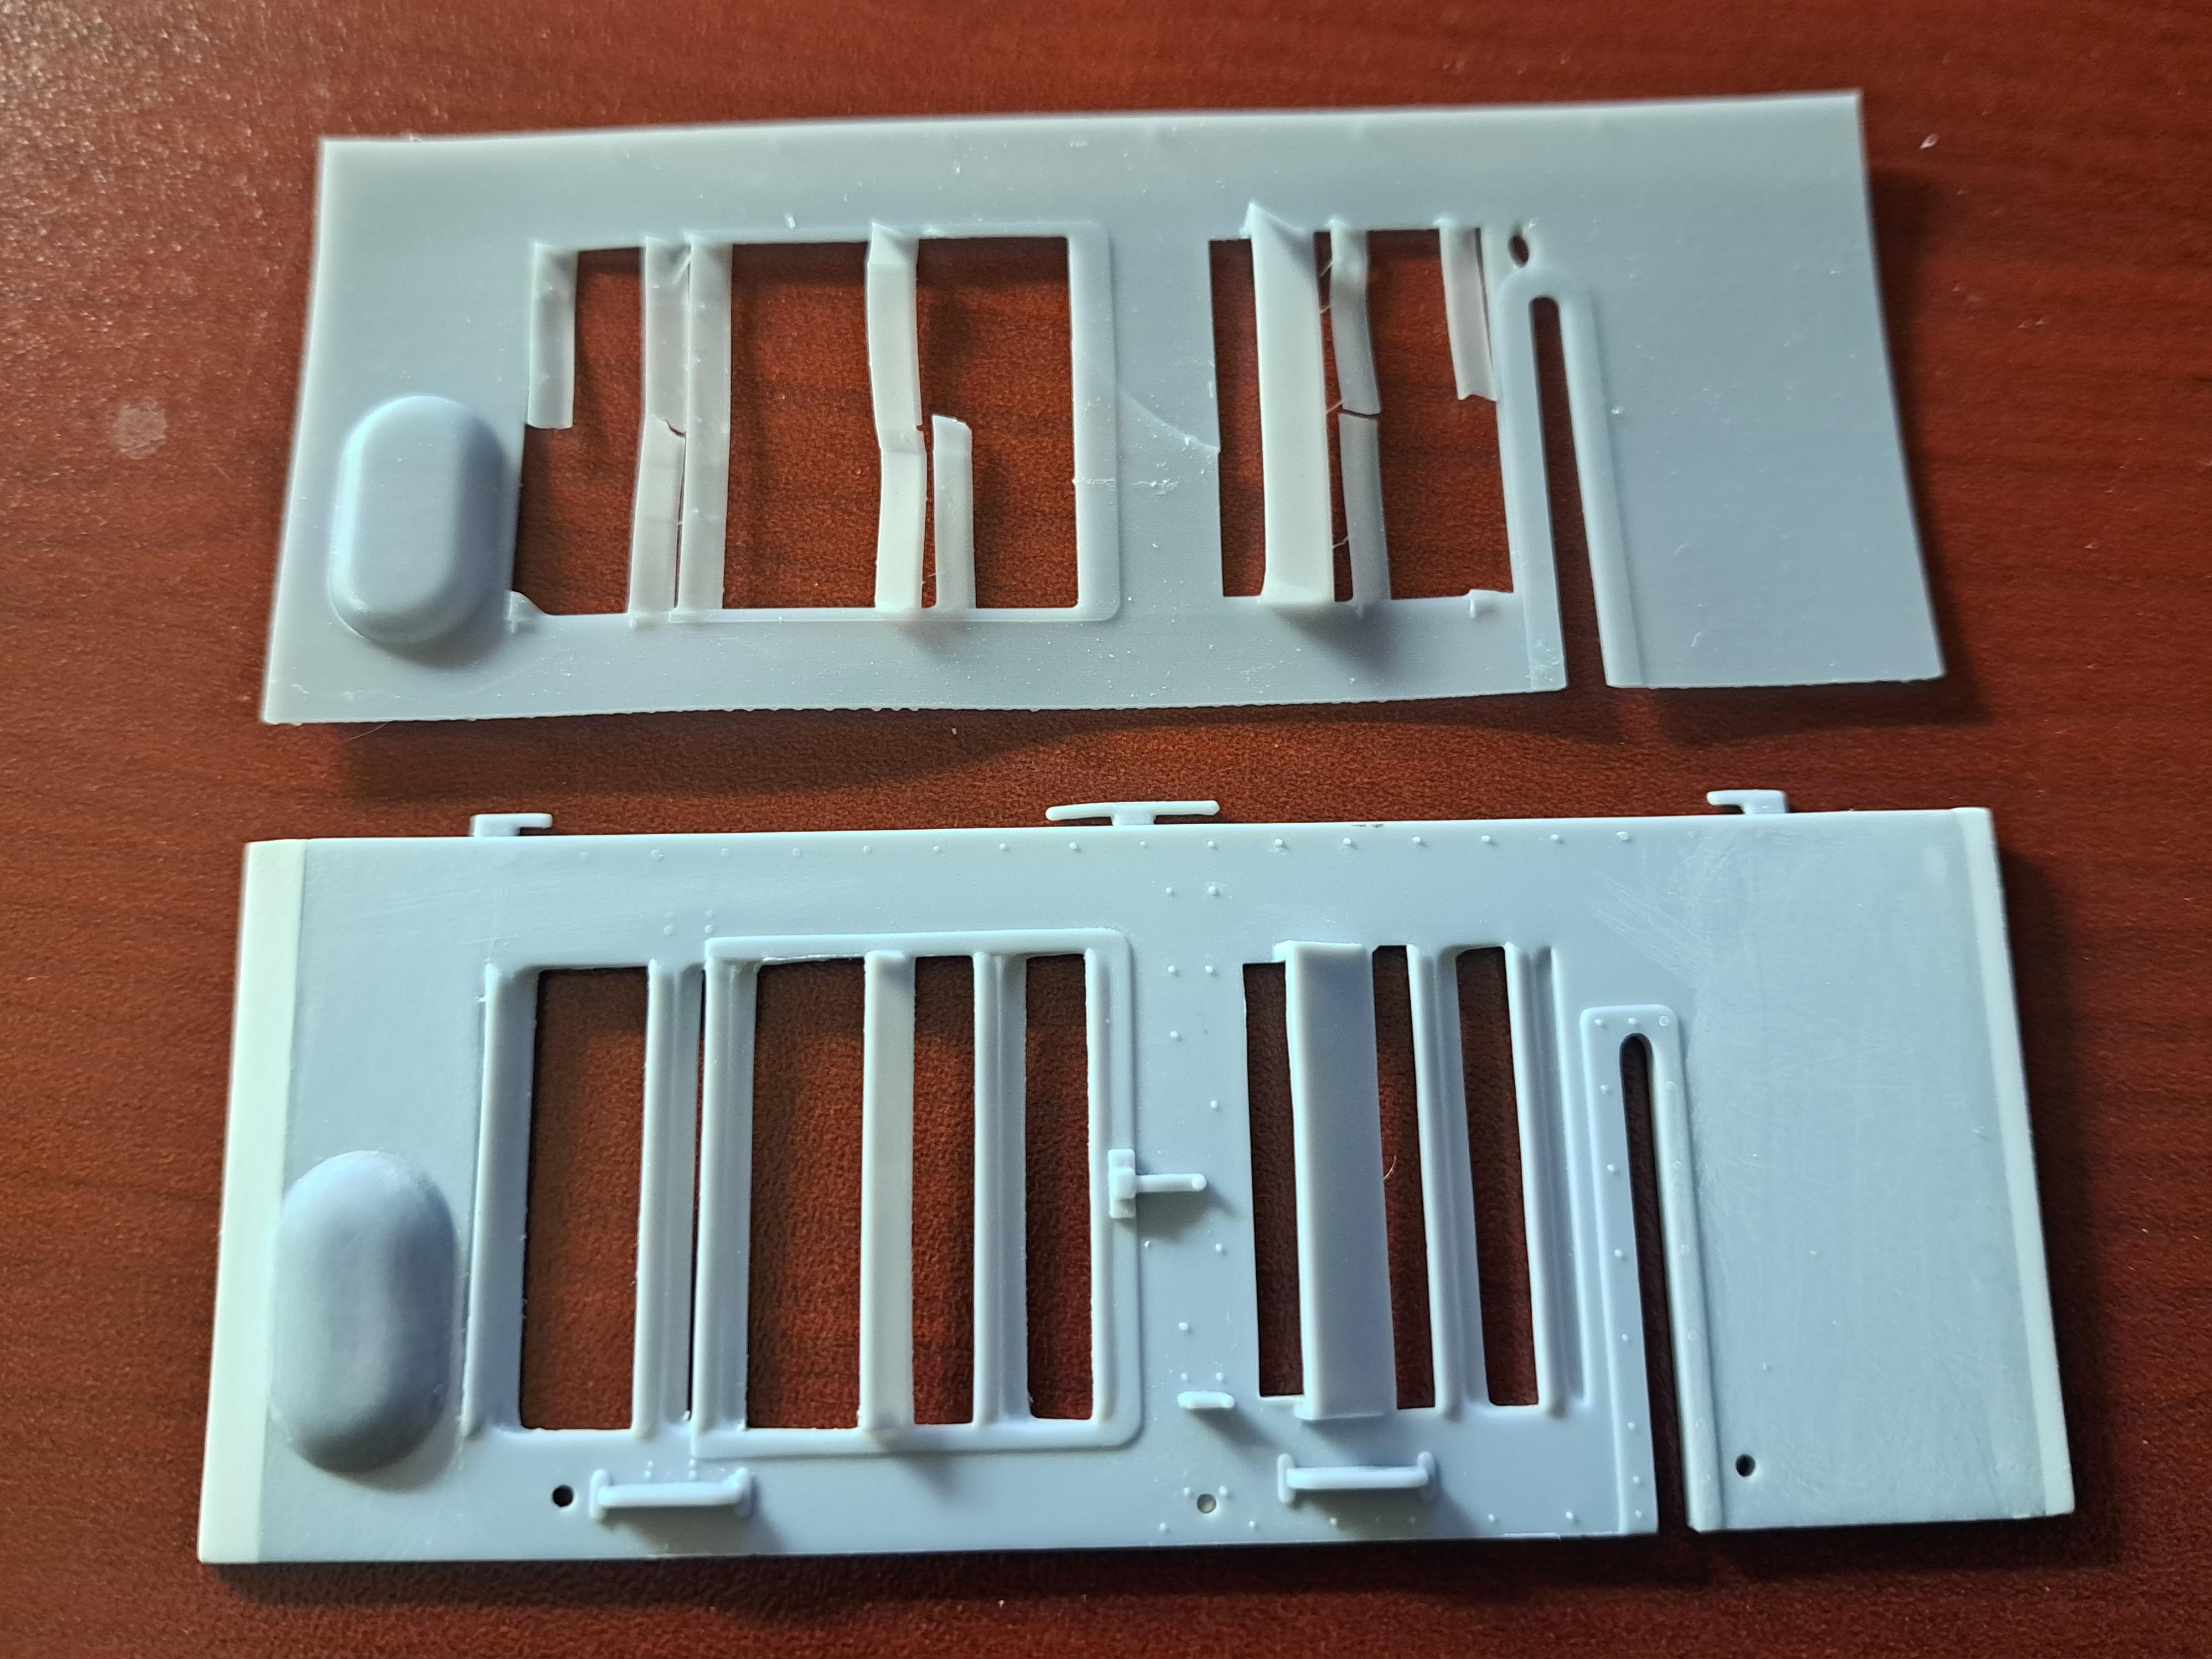
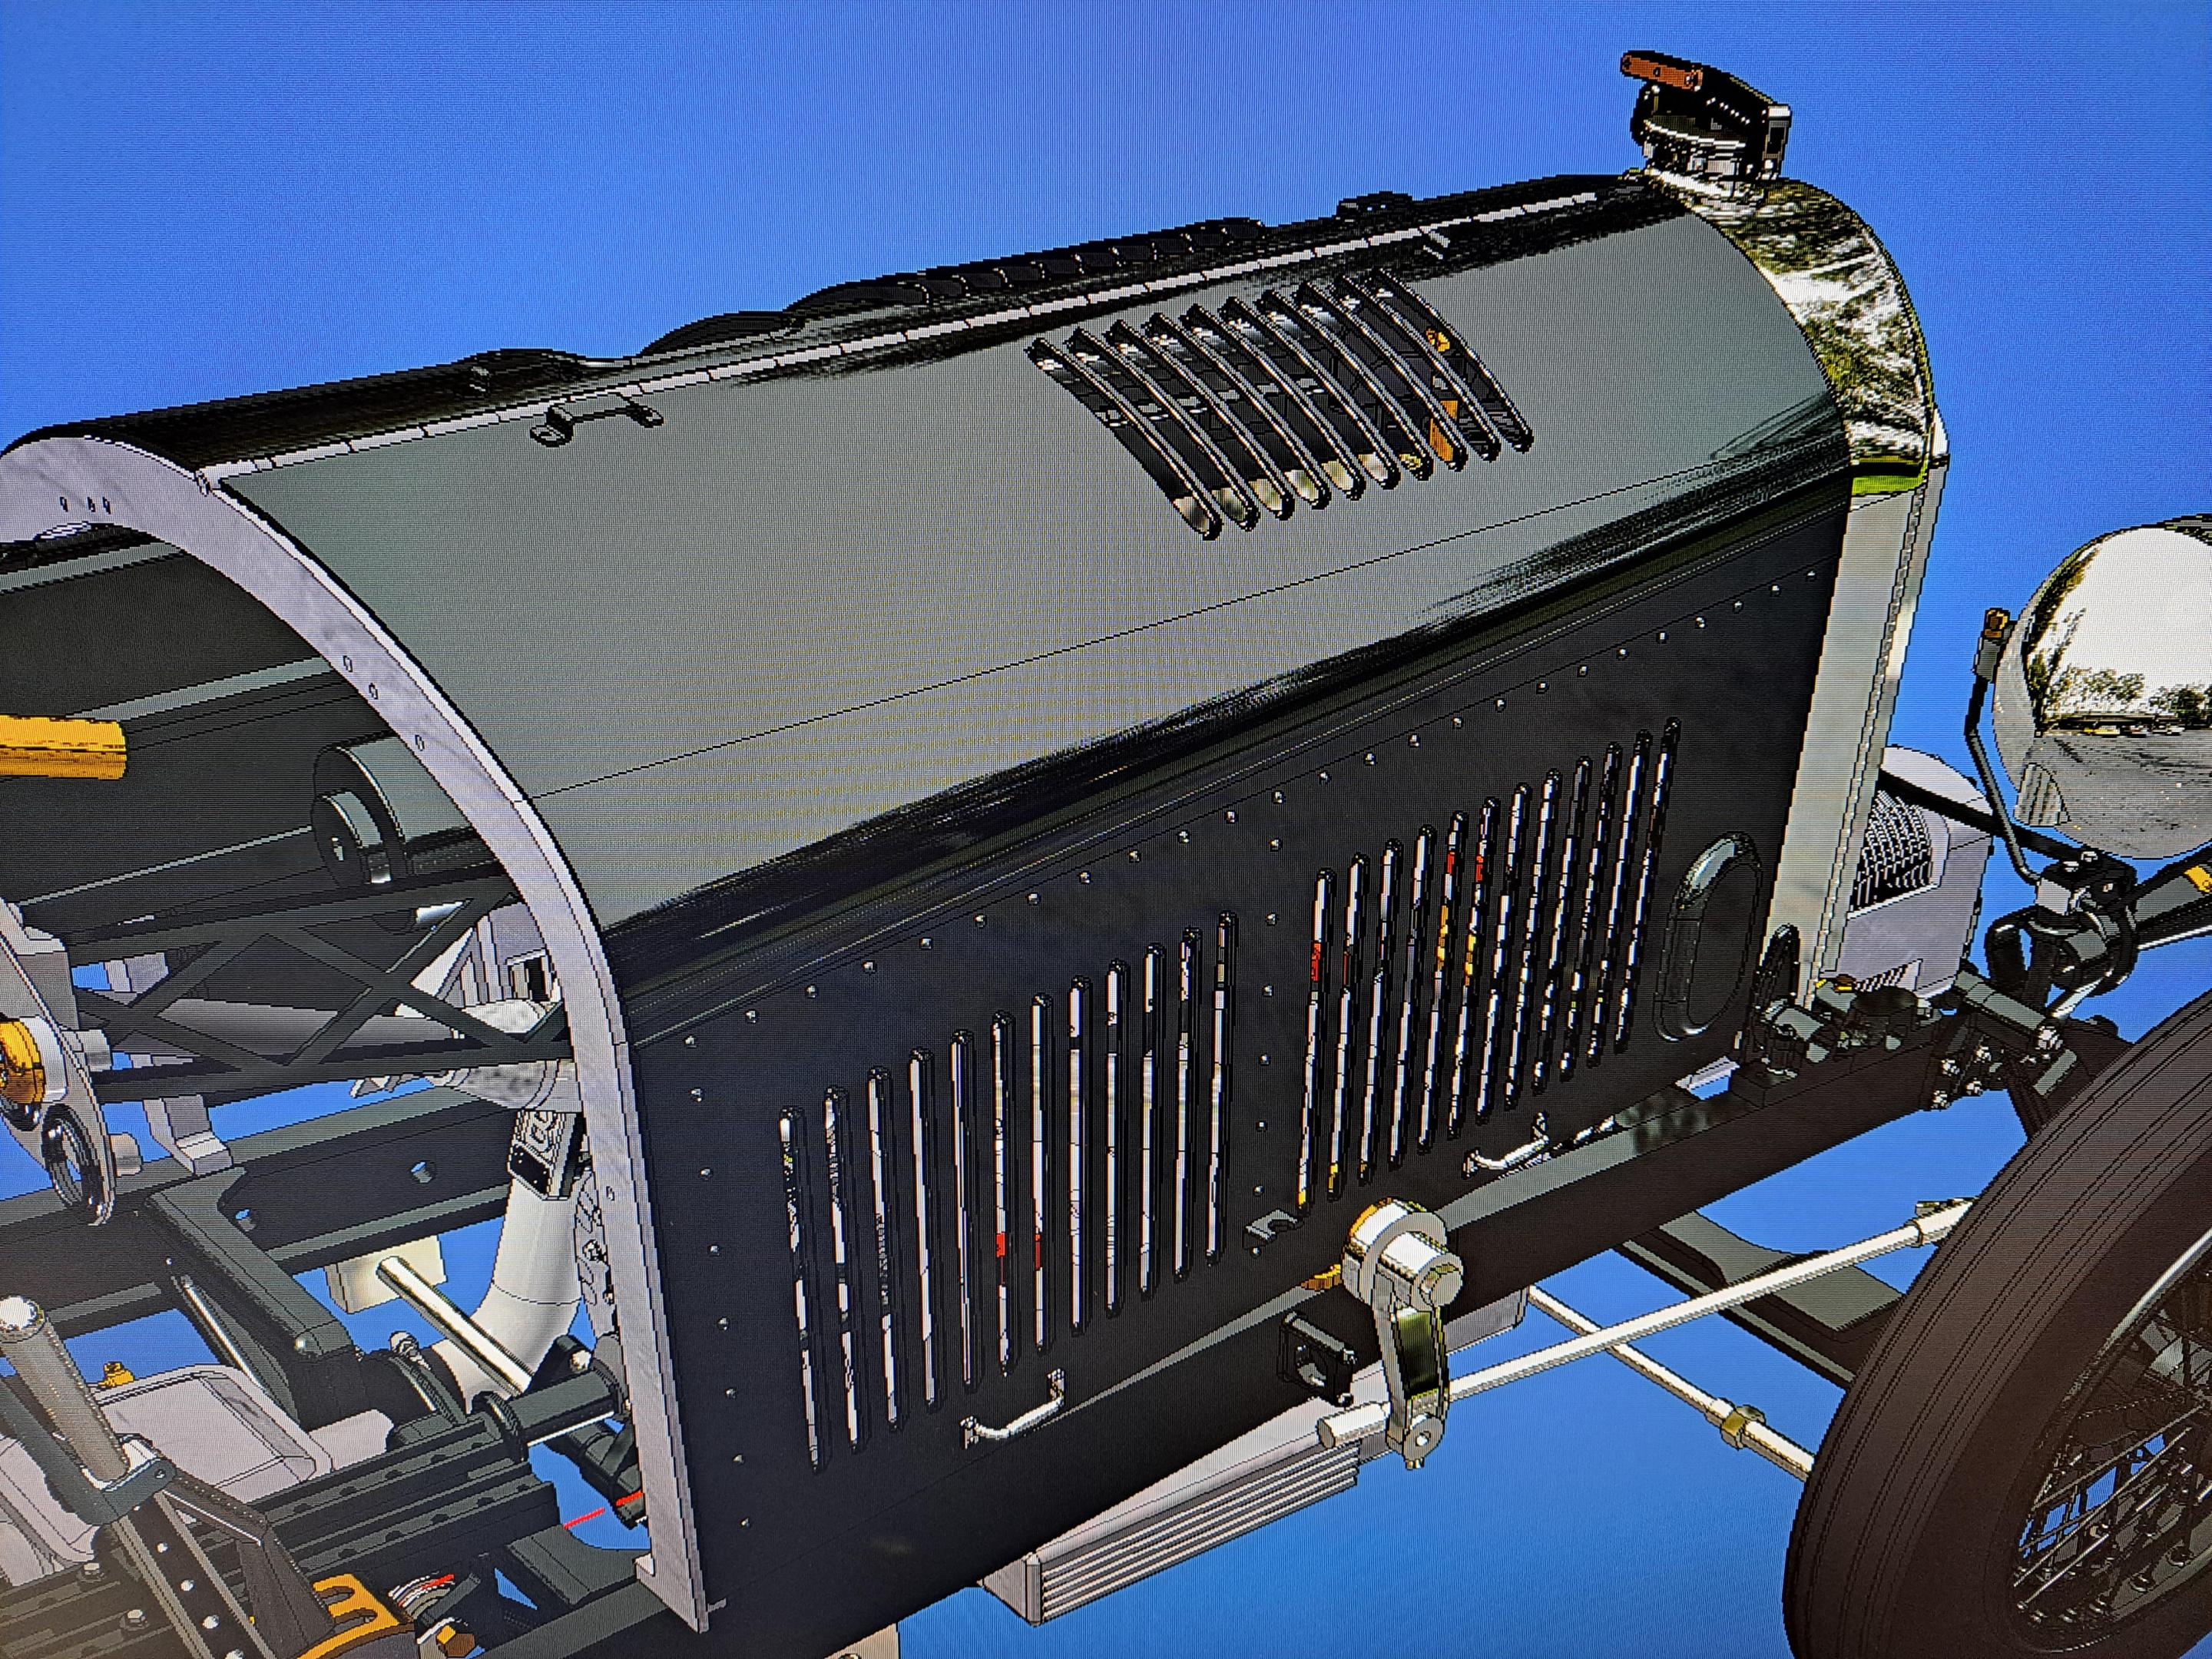
I continued fitting the hood panels today but I find the at .05in, the thickness is way out of scale. I understand that they could not be molded to the correct thickness which would be around .005in for a 1/16 panel, it's just not possible. It was suggested I try making them out of metal sheet. A .01in aluminium sheet would be feasable but making the louvers would be quite a challenge. I could print a forming die of some sort but in order to design the die, I first have to 3d model the panels. So that's what I did starting with the left side vertical panel which is the most complicated because of the different louver sizes.
Here's the first panel modeled.

I used both the kit's panel, a picture of a real panel and a picture from a 1/5 scale Amalgam model as reference.
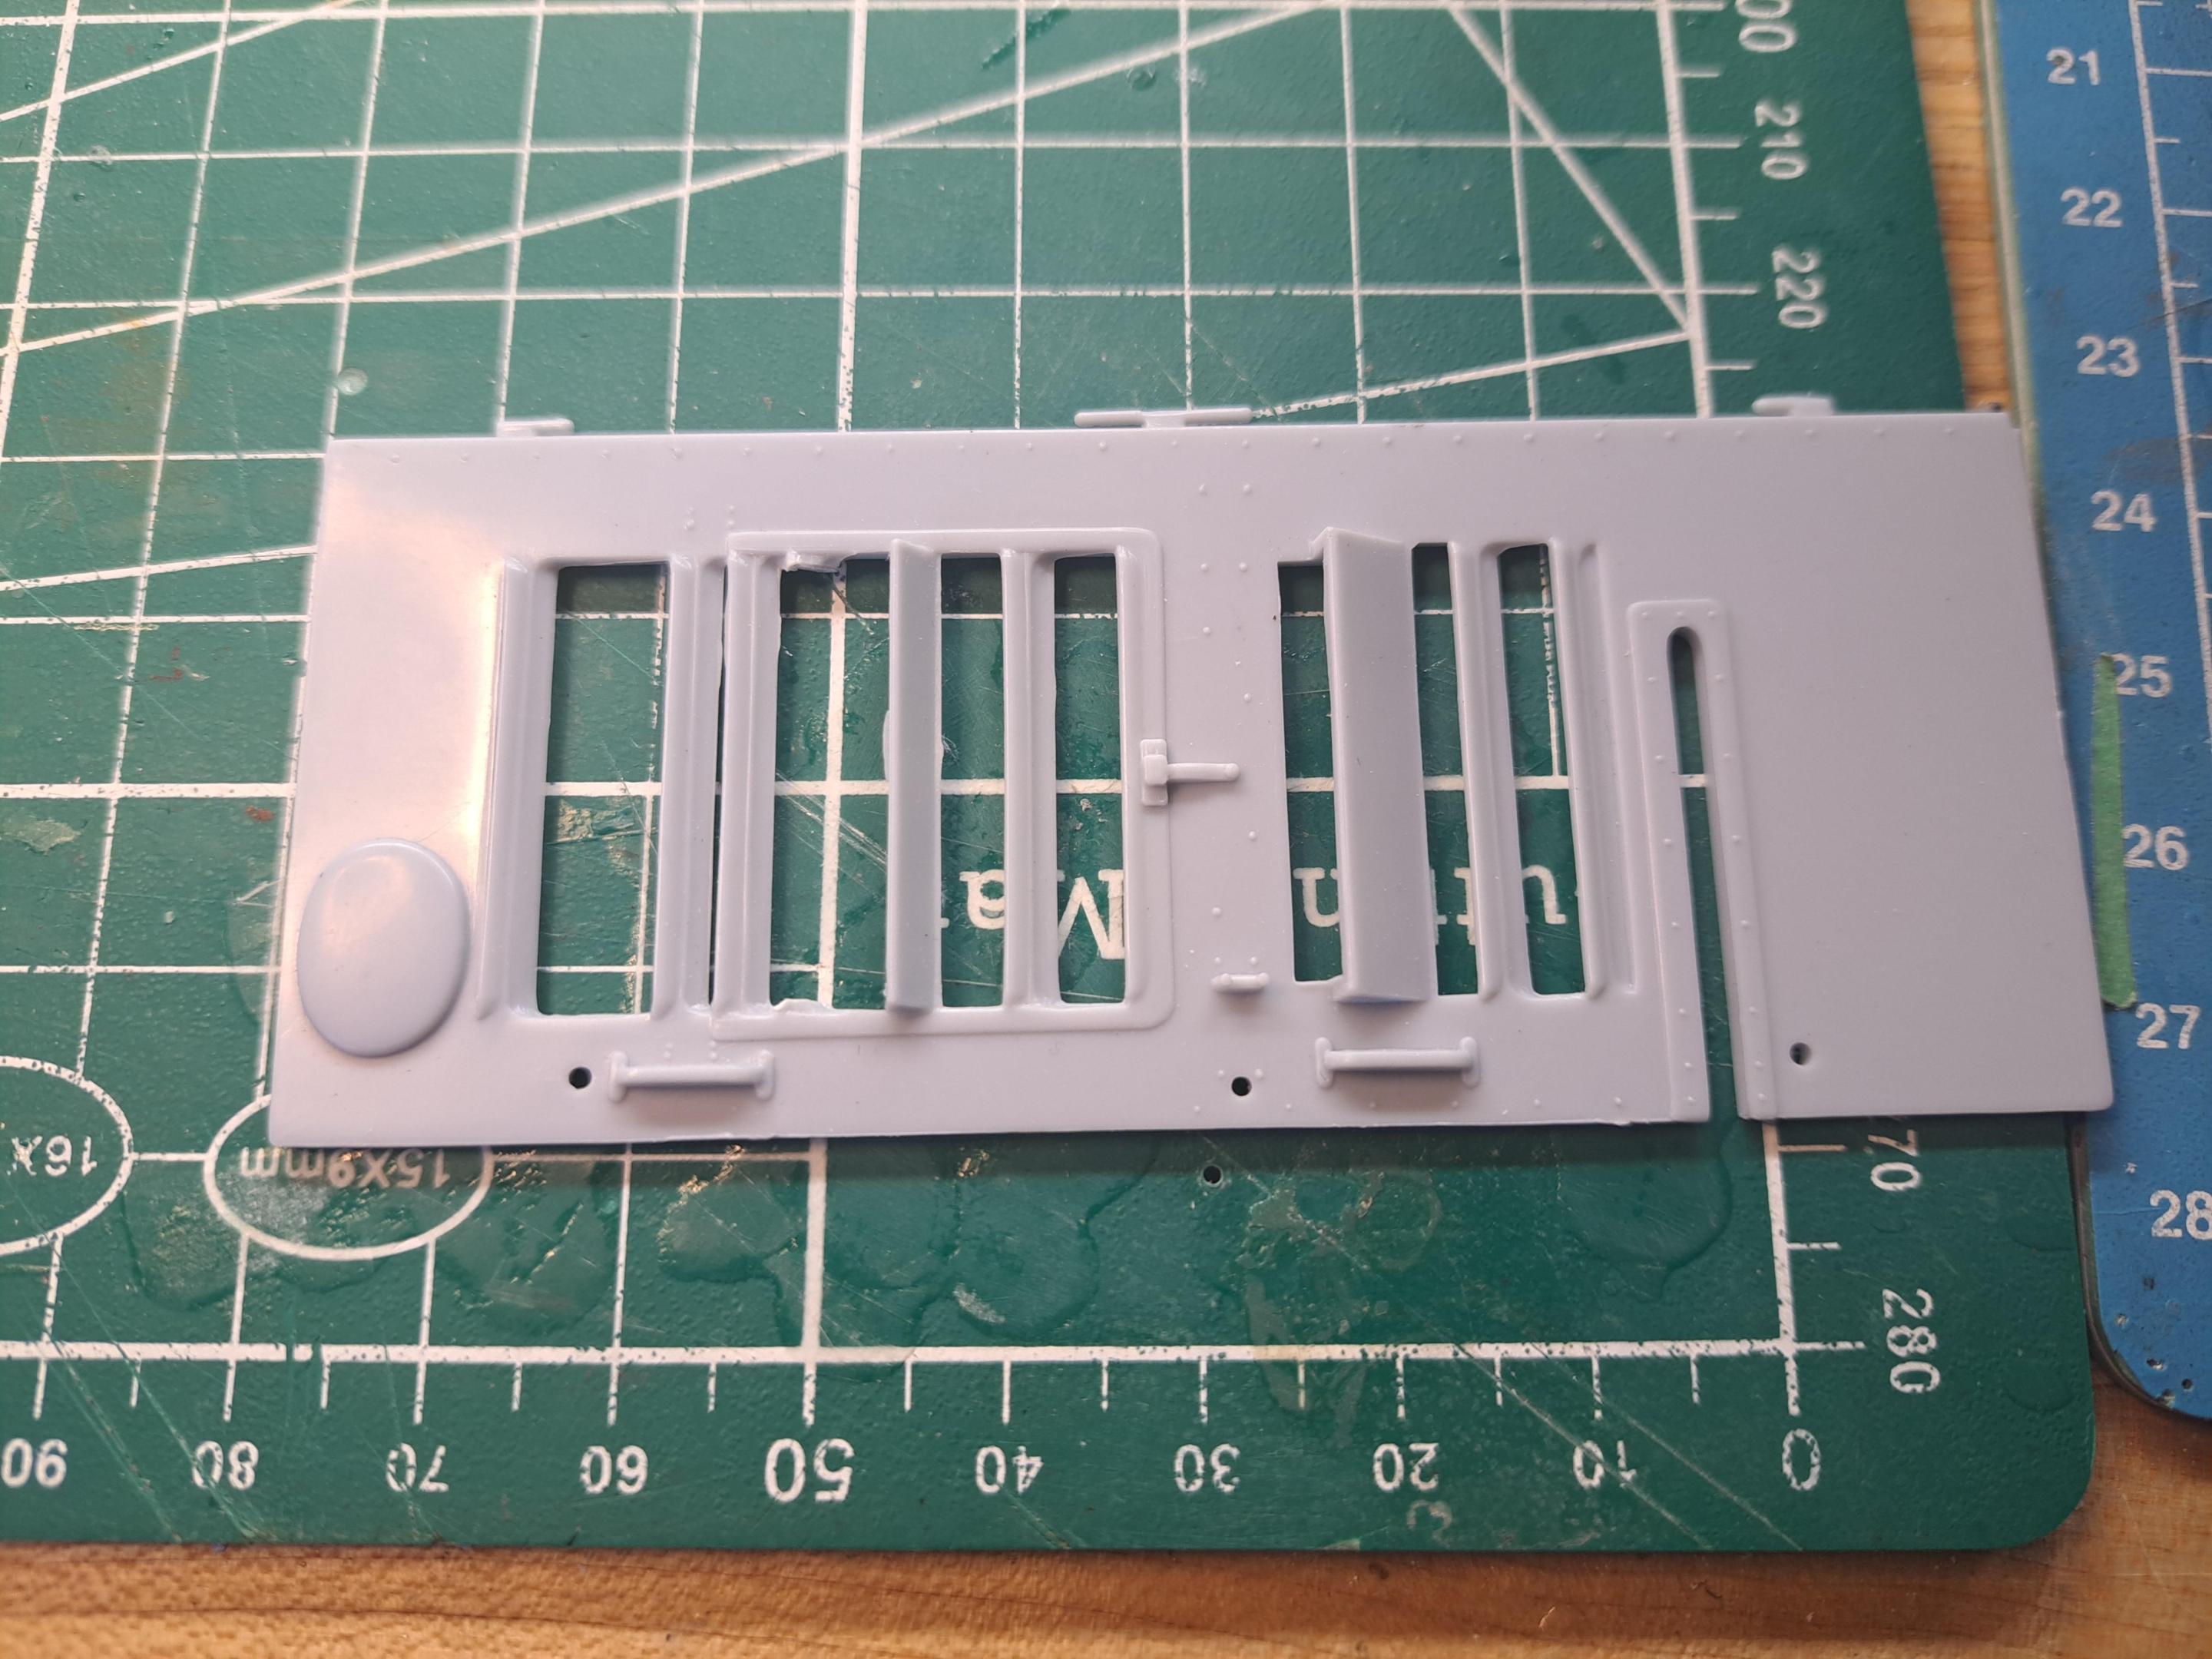
Since the panel is now in 3d, why not try to print it and see. My firts try was not a success, I put the panel thickness at .02in and the louvers at .01in, not a good idea. The panel is warped and most louvers didn't make it.
Top is the printed panel, bottom the kit's

I reprinted with a panel thickness of .03 and louver thickness of .02in. I also added a stiffener at the bulkhead end. I couldn't find any info on such stiffeners but I can see rivet lines that could very well be for just that. It's better but still not quite right. The .03 panel thickness should do the trick but the louvers are still to flimsy. I'll try again tomorrow.
Fresh off the printer


Here's the first panel modeled.
I used both the kit's panel, a picture of a real panel and a picture from a 1/5 scale Amalgam model as reference.

Since the panel is now in 3d, why not try to print it and see. My firts try was not a success, I put the panel thickness at .02in and the louvers at .01in, not a good idea. The panel is warped and most louvers didn't make it.
Top is the printed panel, bottom the kit's
I reprinted with a panel thickness of .03 and louver thickness of .02in. I also added a stiffener at the bulkhead end. I couldn't find any info on such stiffeners but I can see rivet lines that could very well be for just that. It's better but still not quite right. The .03 panel thickness should do the trick but the louvers are still to flimsy. I'll try again tomorrow.
Fresh off the printer
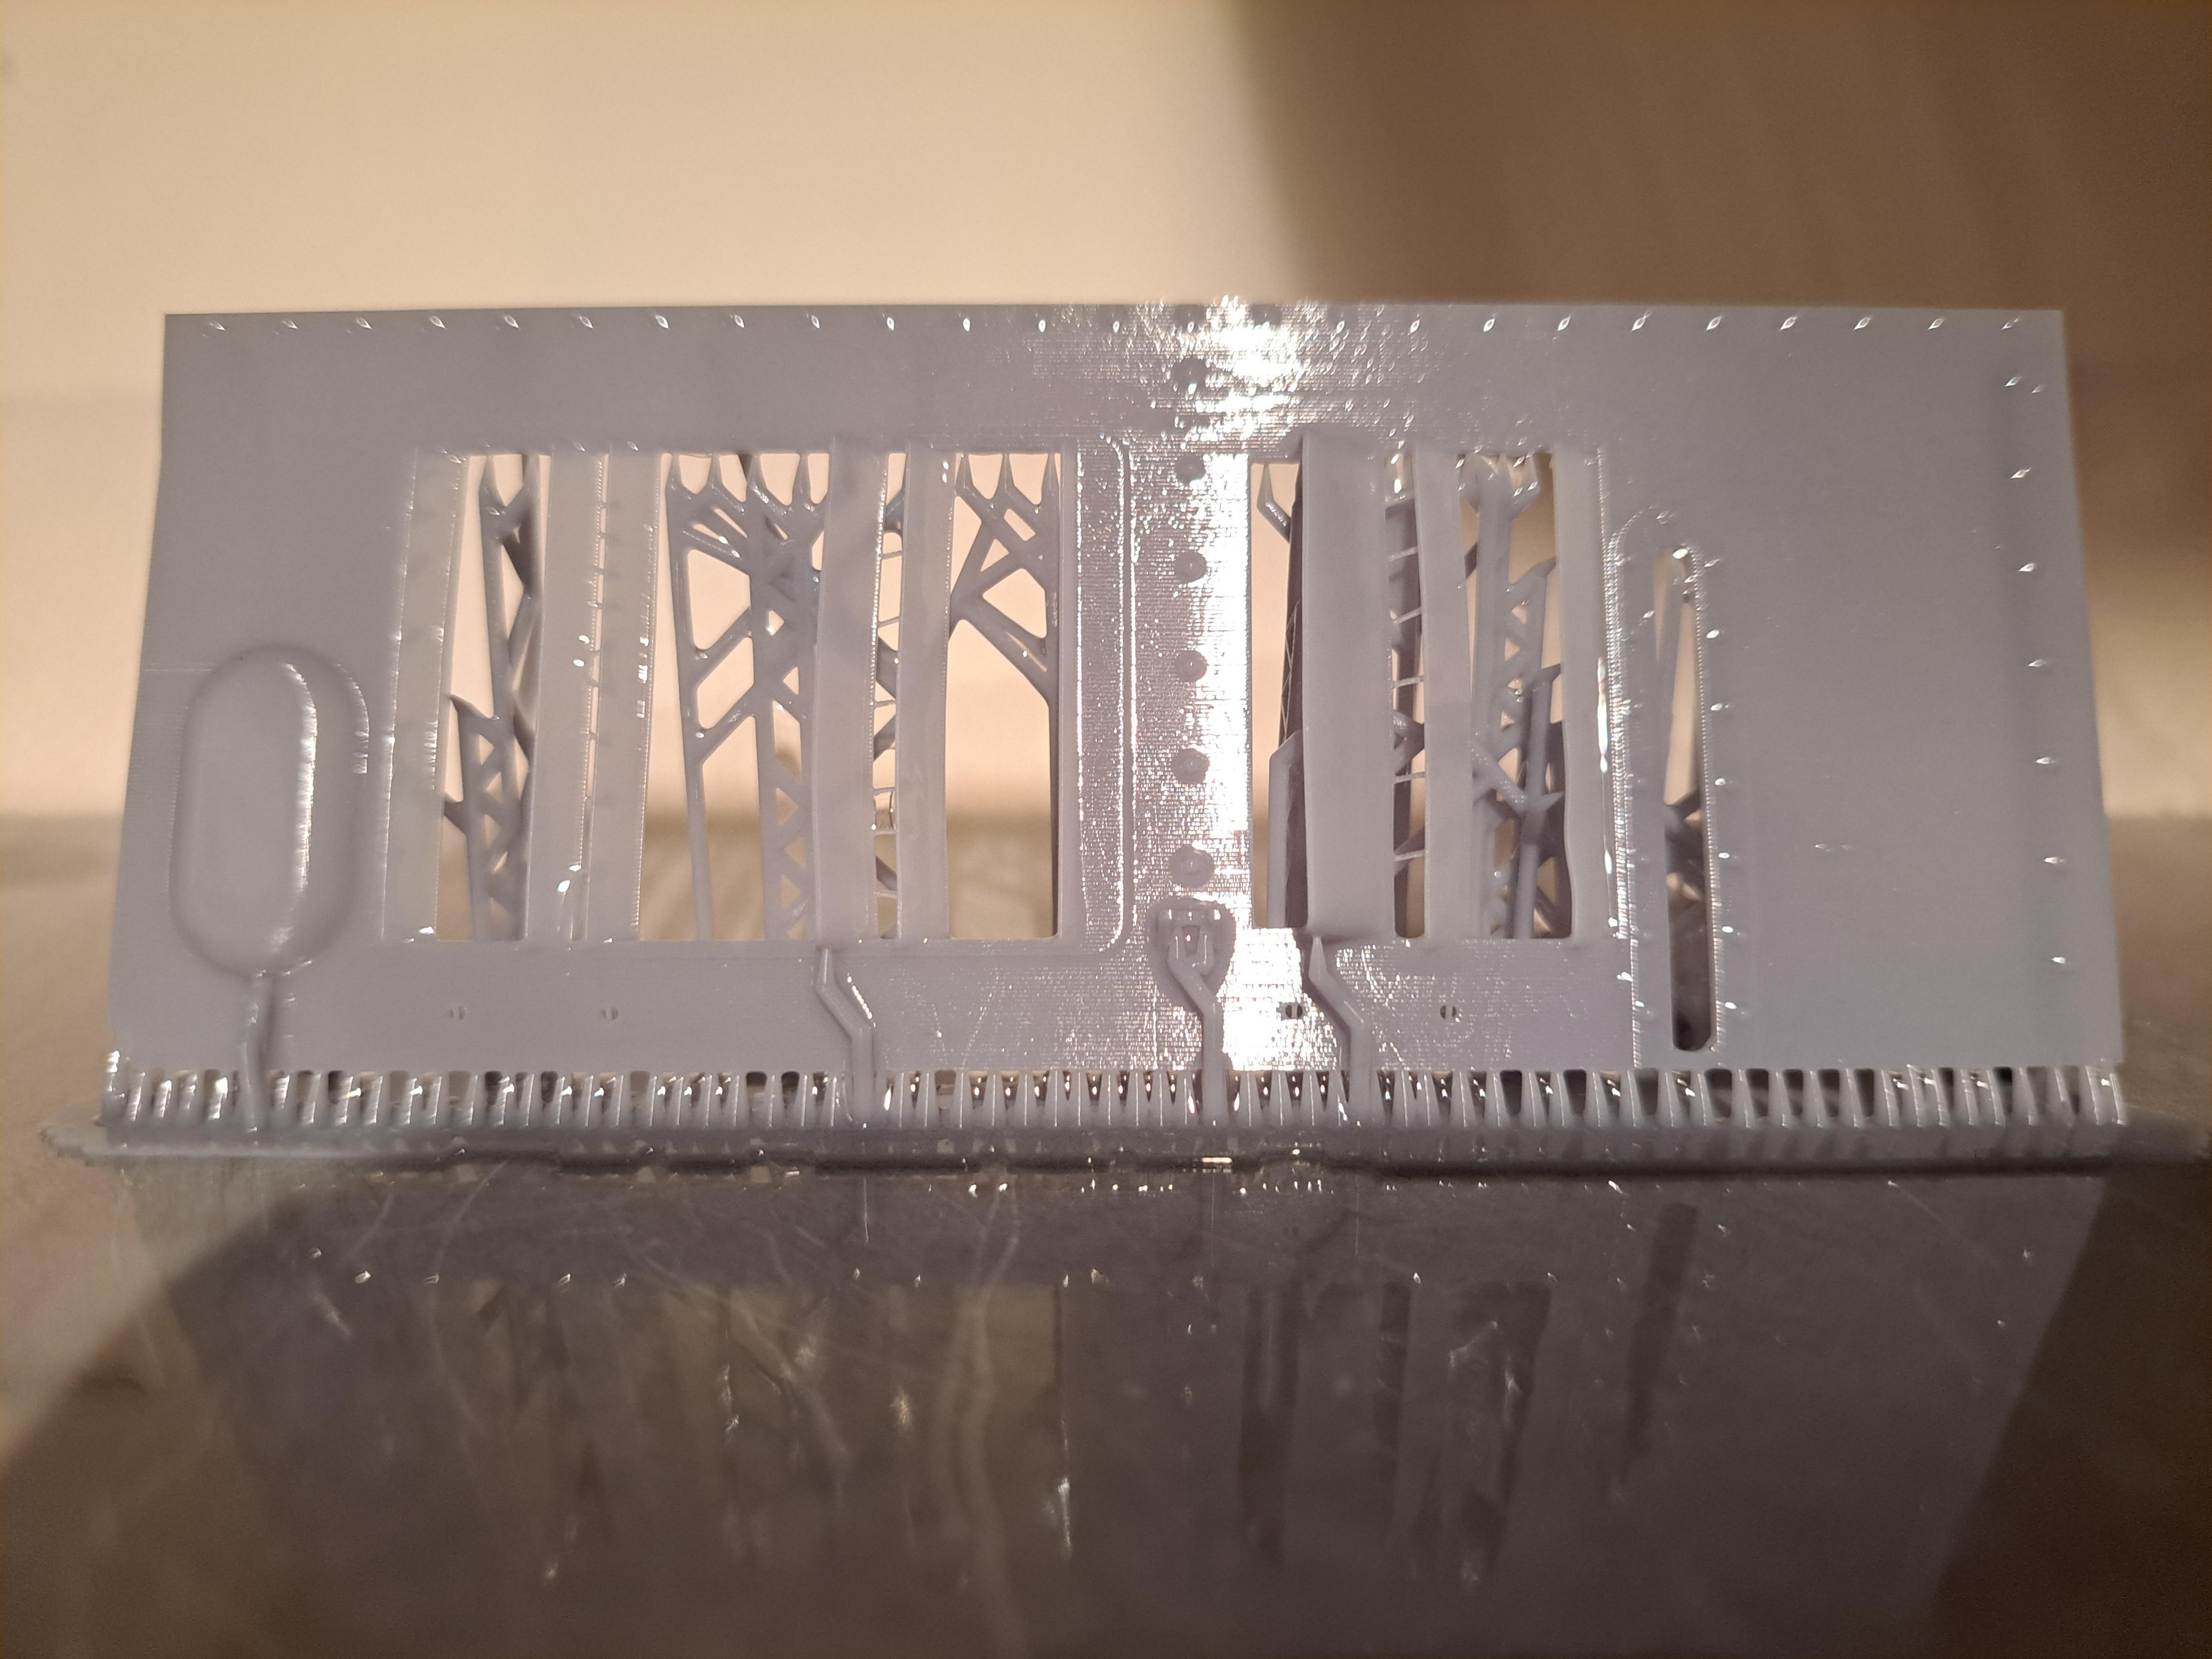

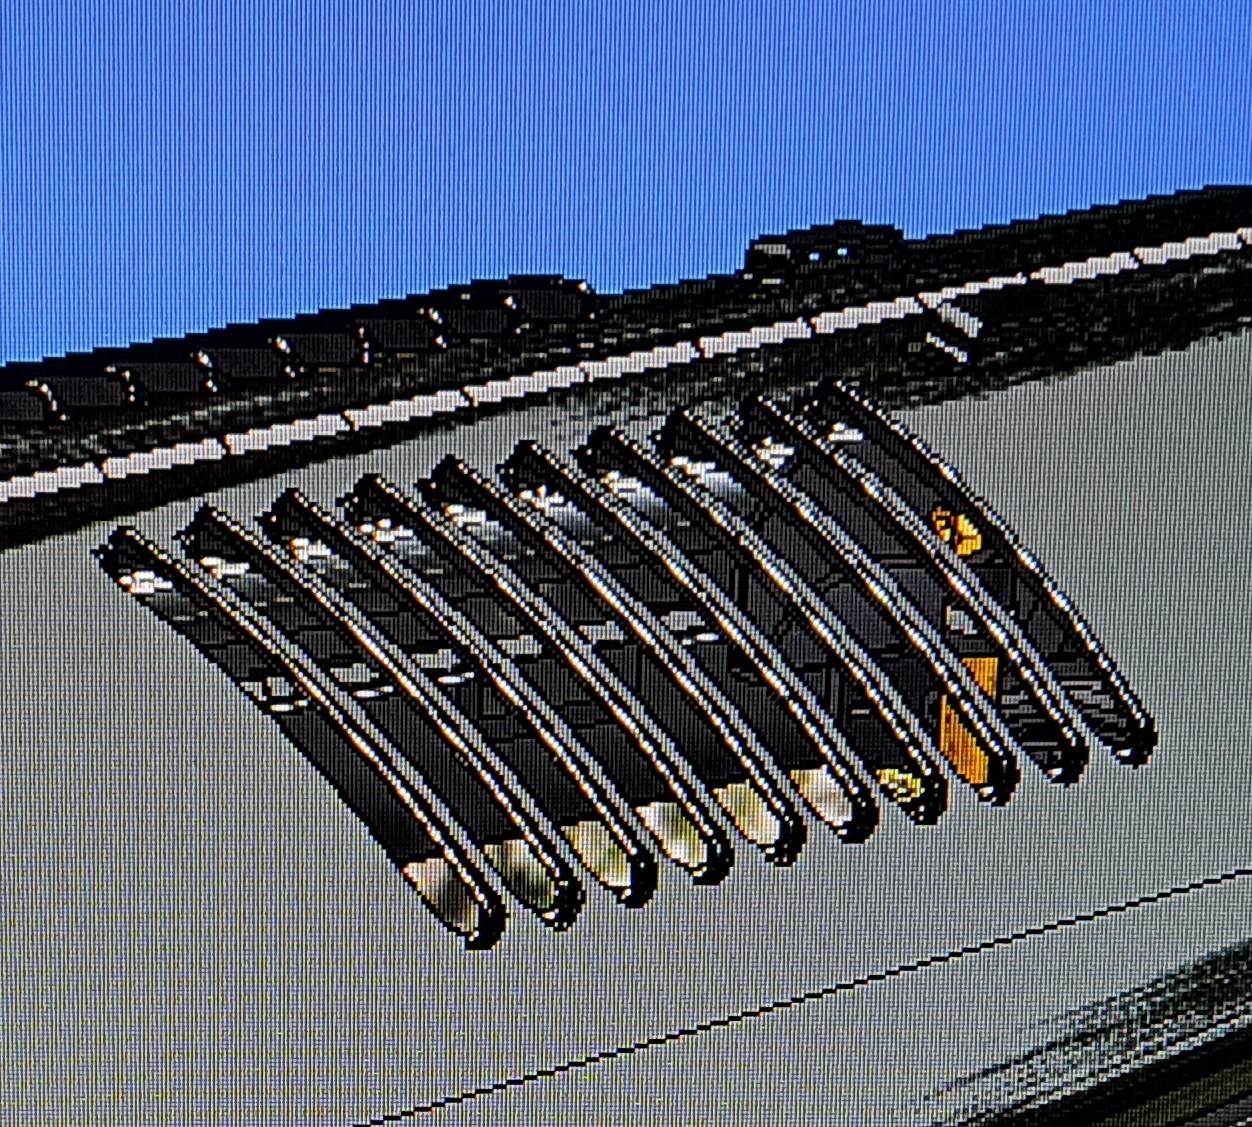
Well, like I've said before, live and learn. And today was definatly a 'live and learn ' day. On my previous post, I mentionned that I tried printing a side panel. First try was no good. As for the second try, the panel itself was ok but the louvers still too flimsy. At least, that's what I thought. So here's the live and learn moment. It appears that long thin part, like the louvers, will straighten up as they dry after the wash, before the curing. On my first panel try, I cured the part right after washing. But on my second try, it dried overnight and to my surprise, all louvers were straight as arrows this morning.
This is the second print right after washing last night
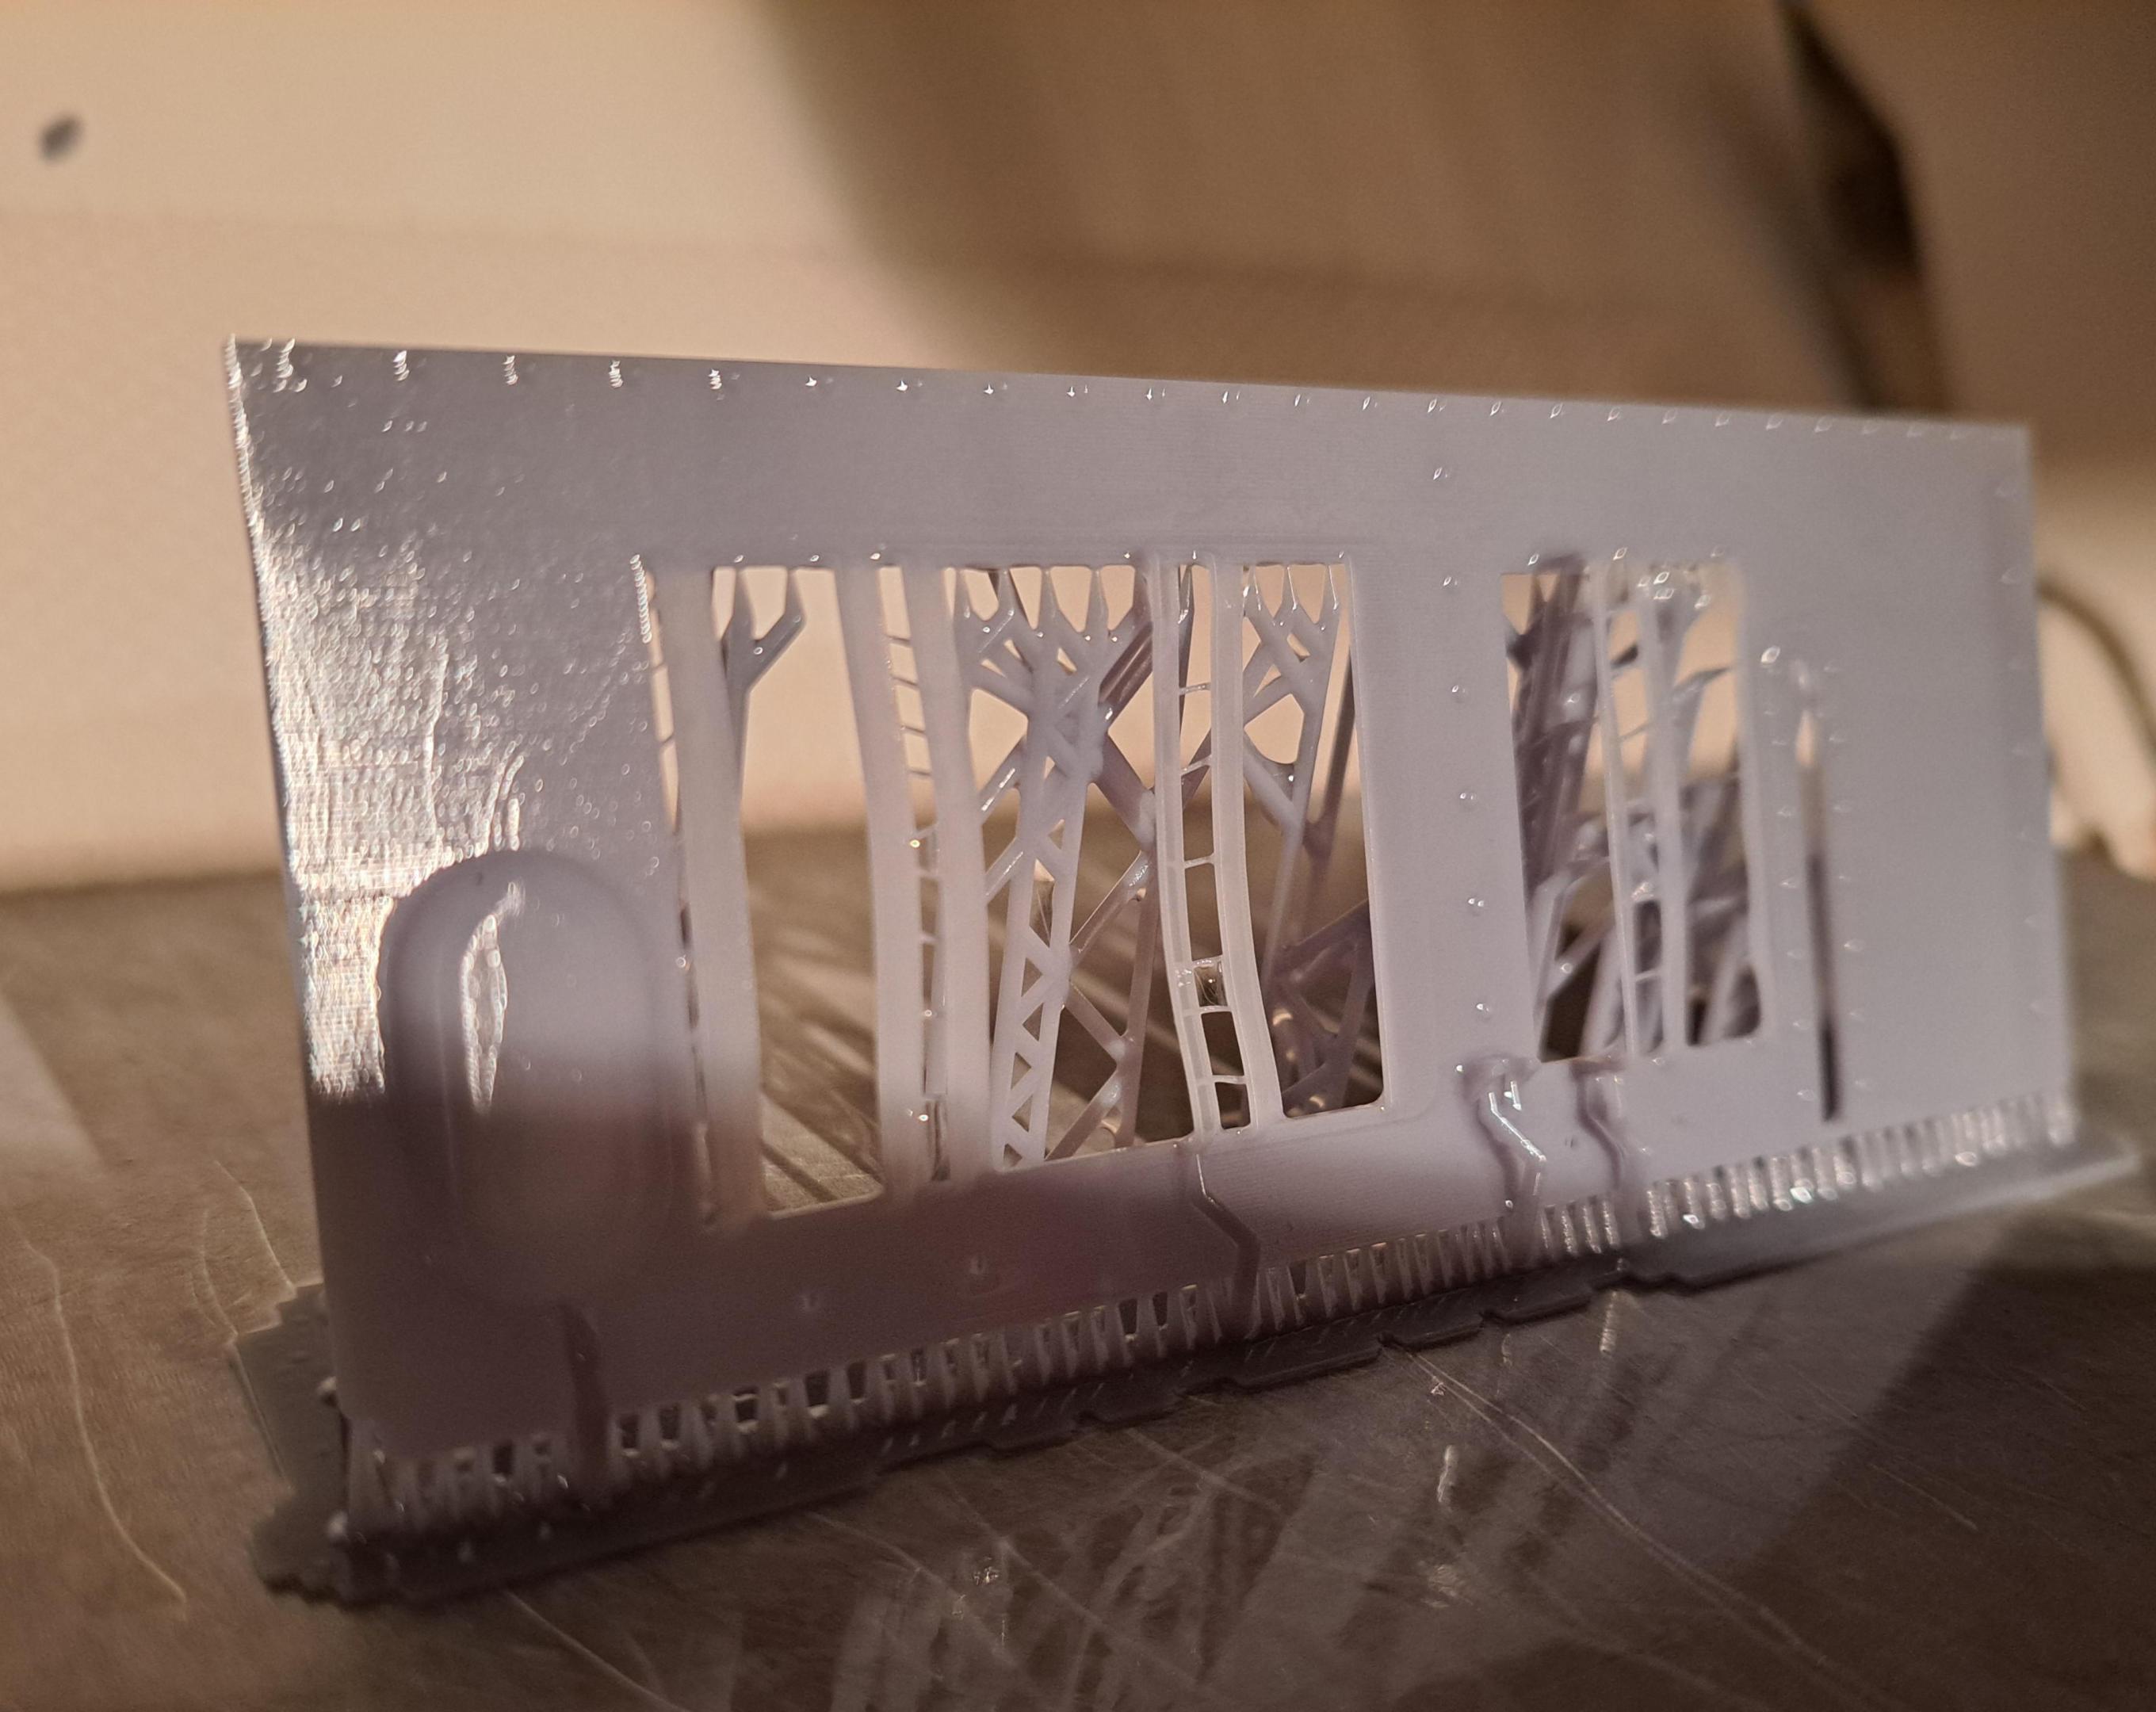
And this is what it looked like this morning

you can clearly see the flatness of the louvers.
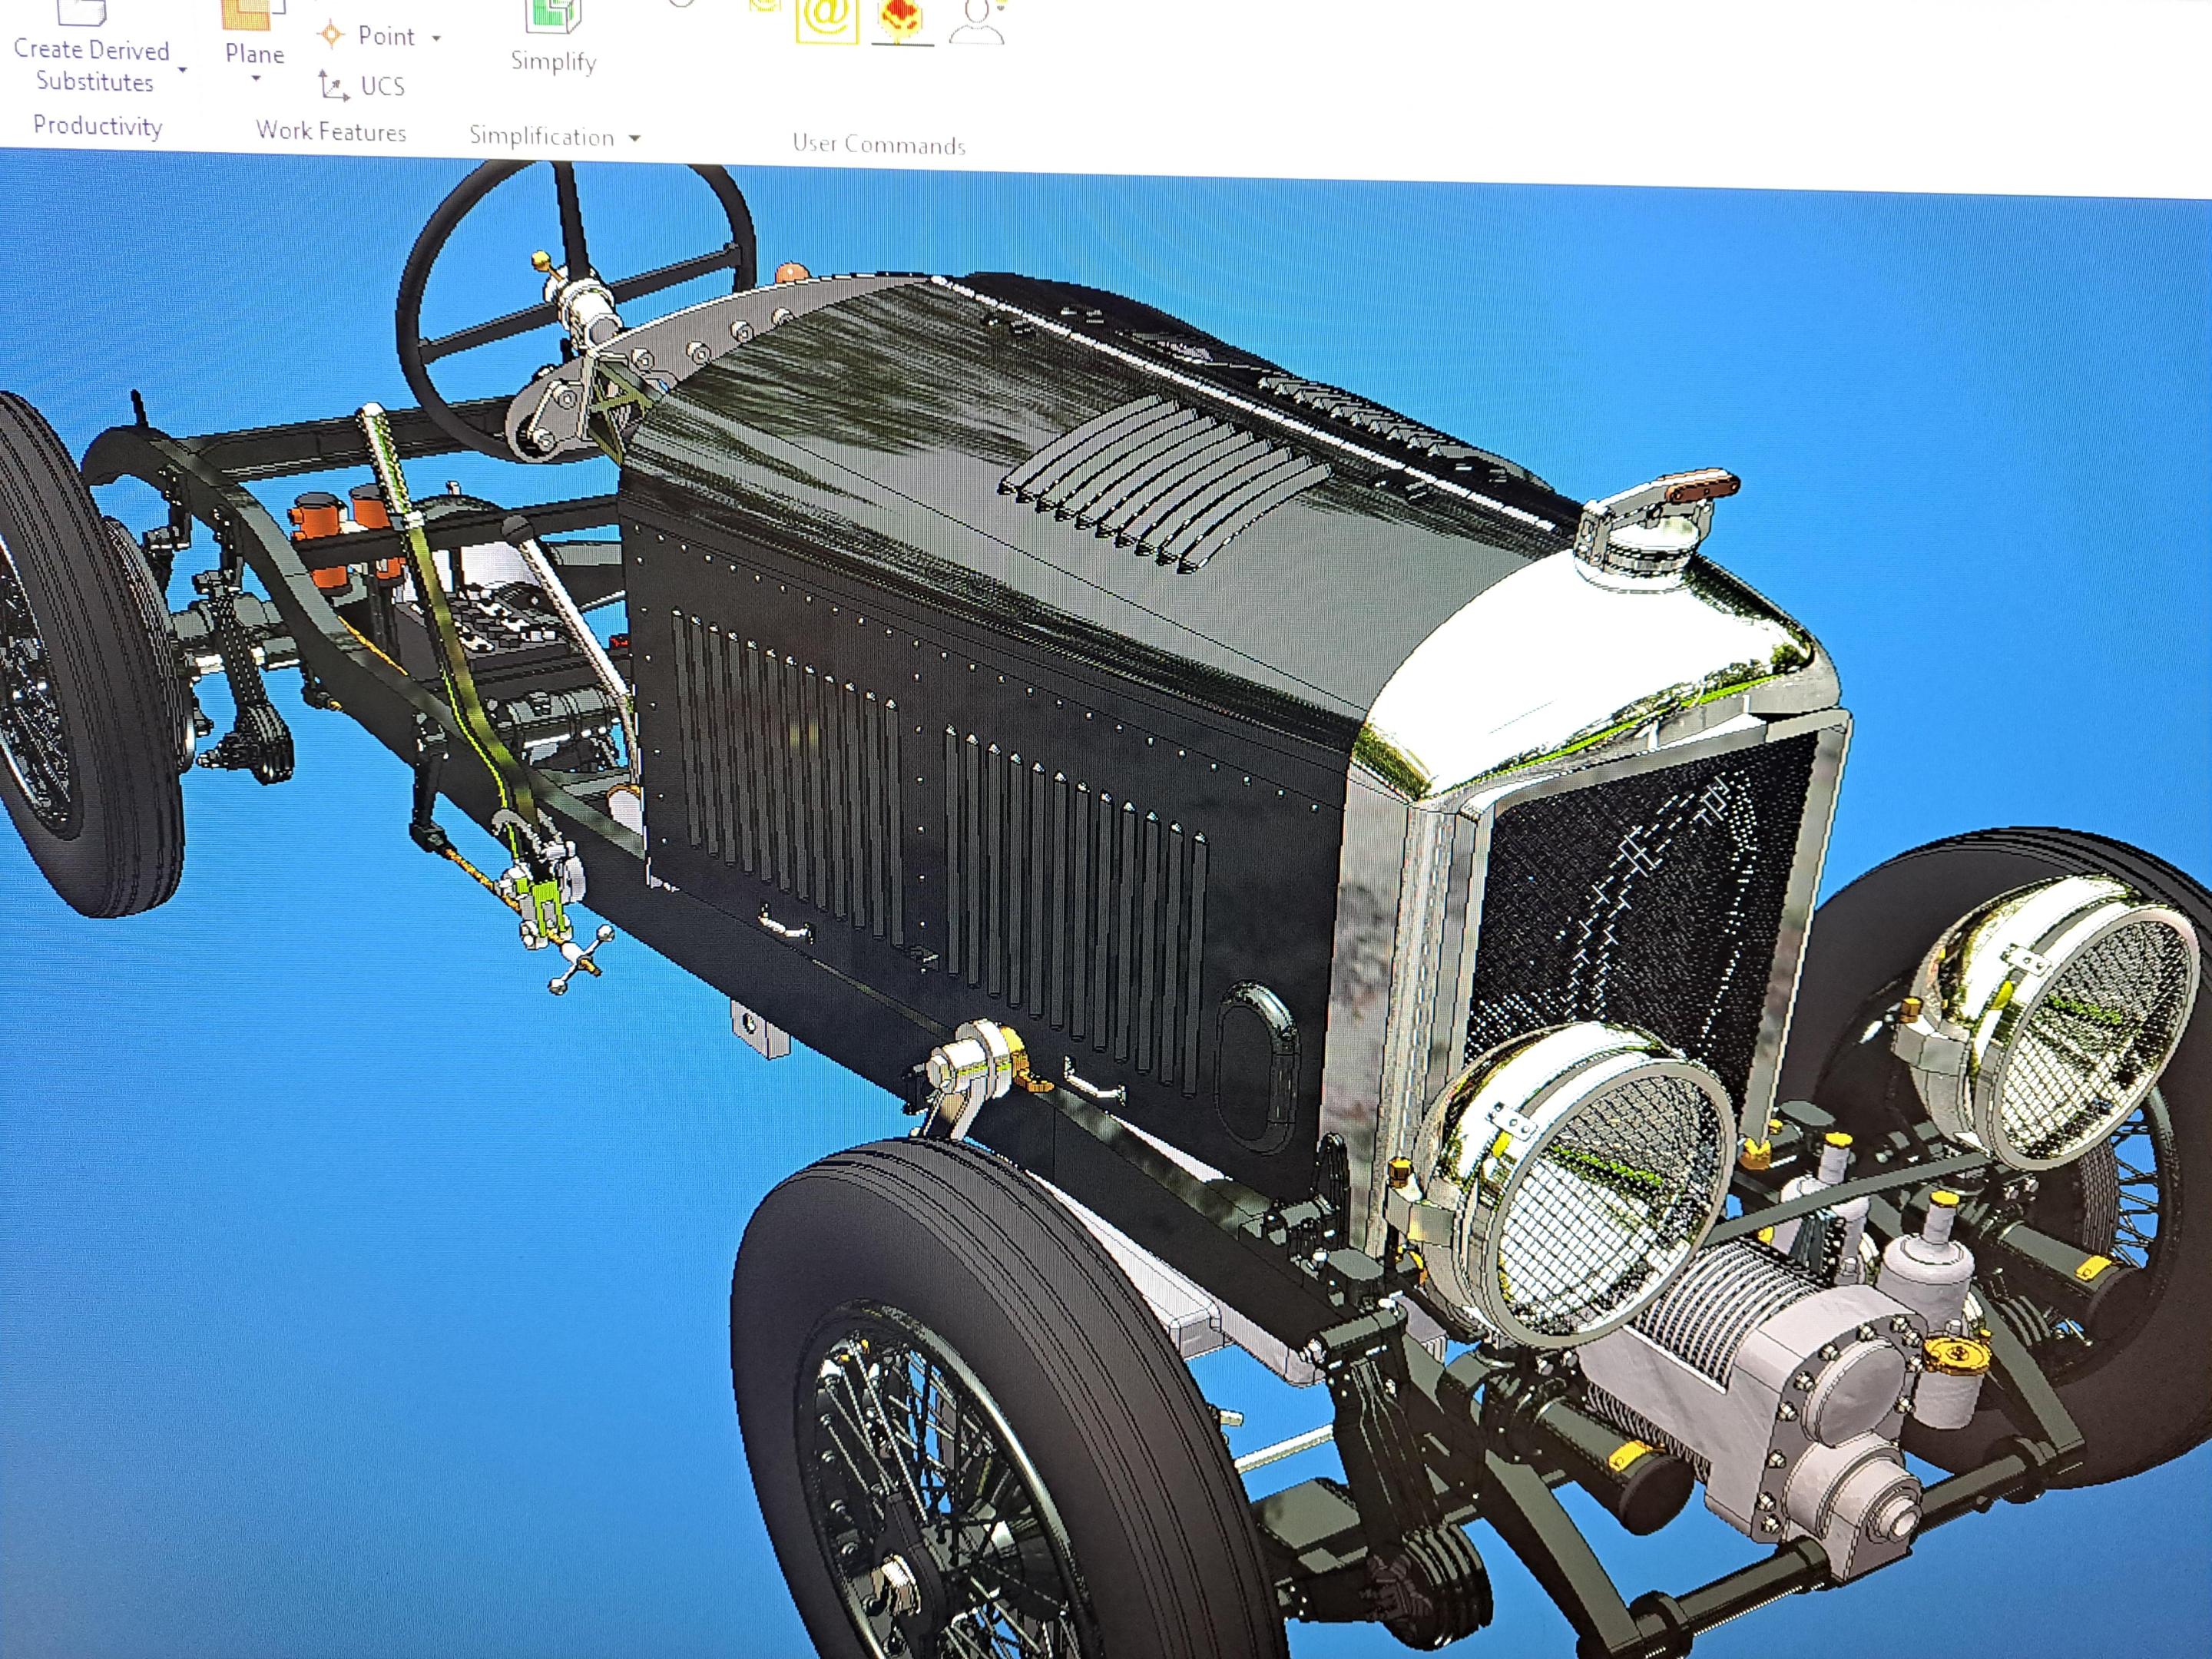
So now enriched with this lesson, I spent the entire day 3d modeling the 3 renaining panels, getting them ready for print. The hinges are all modeled directly on the panel so no more printing a bunch of tiny hinge to be glue afterward. I have to say that the louvers on the top panels were a real challenge but I think I got them pretty good.
Here are some pictures of the model

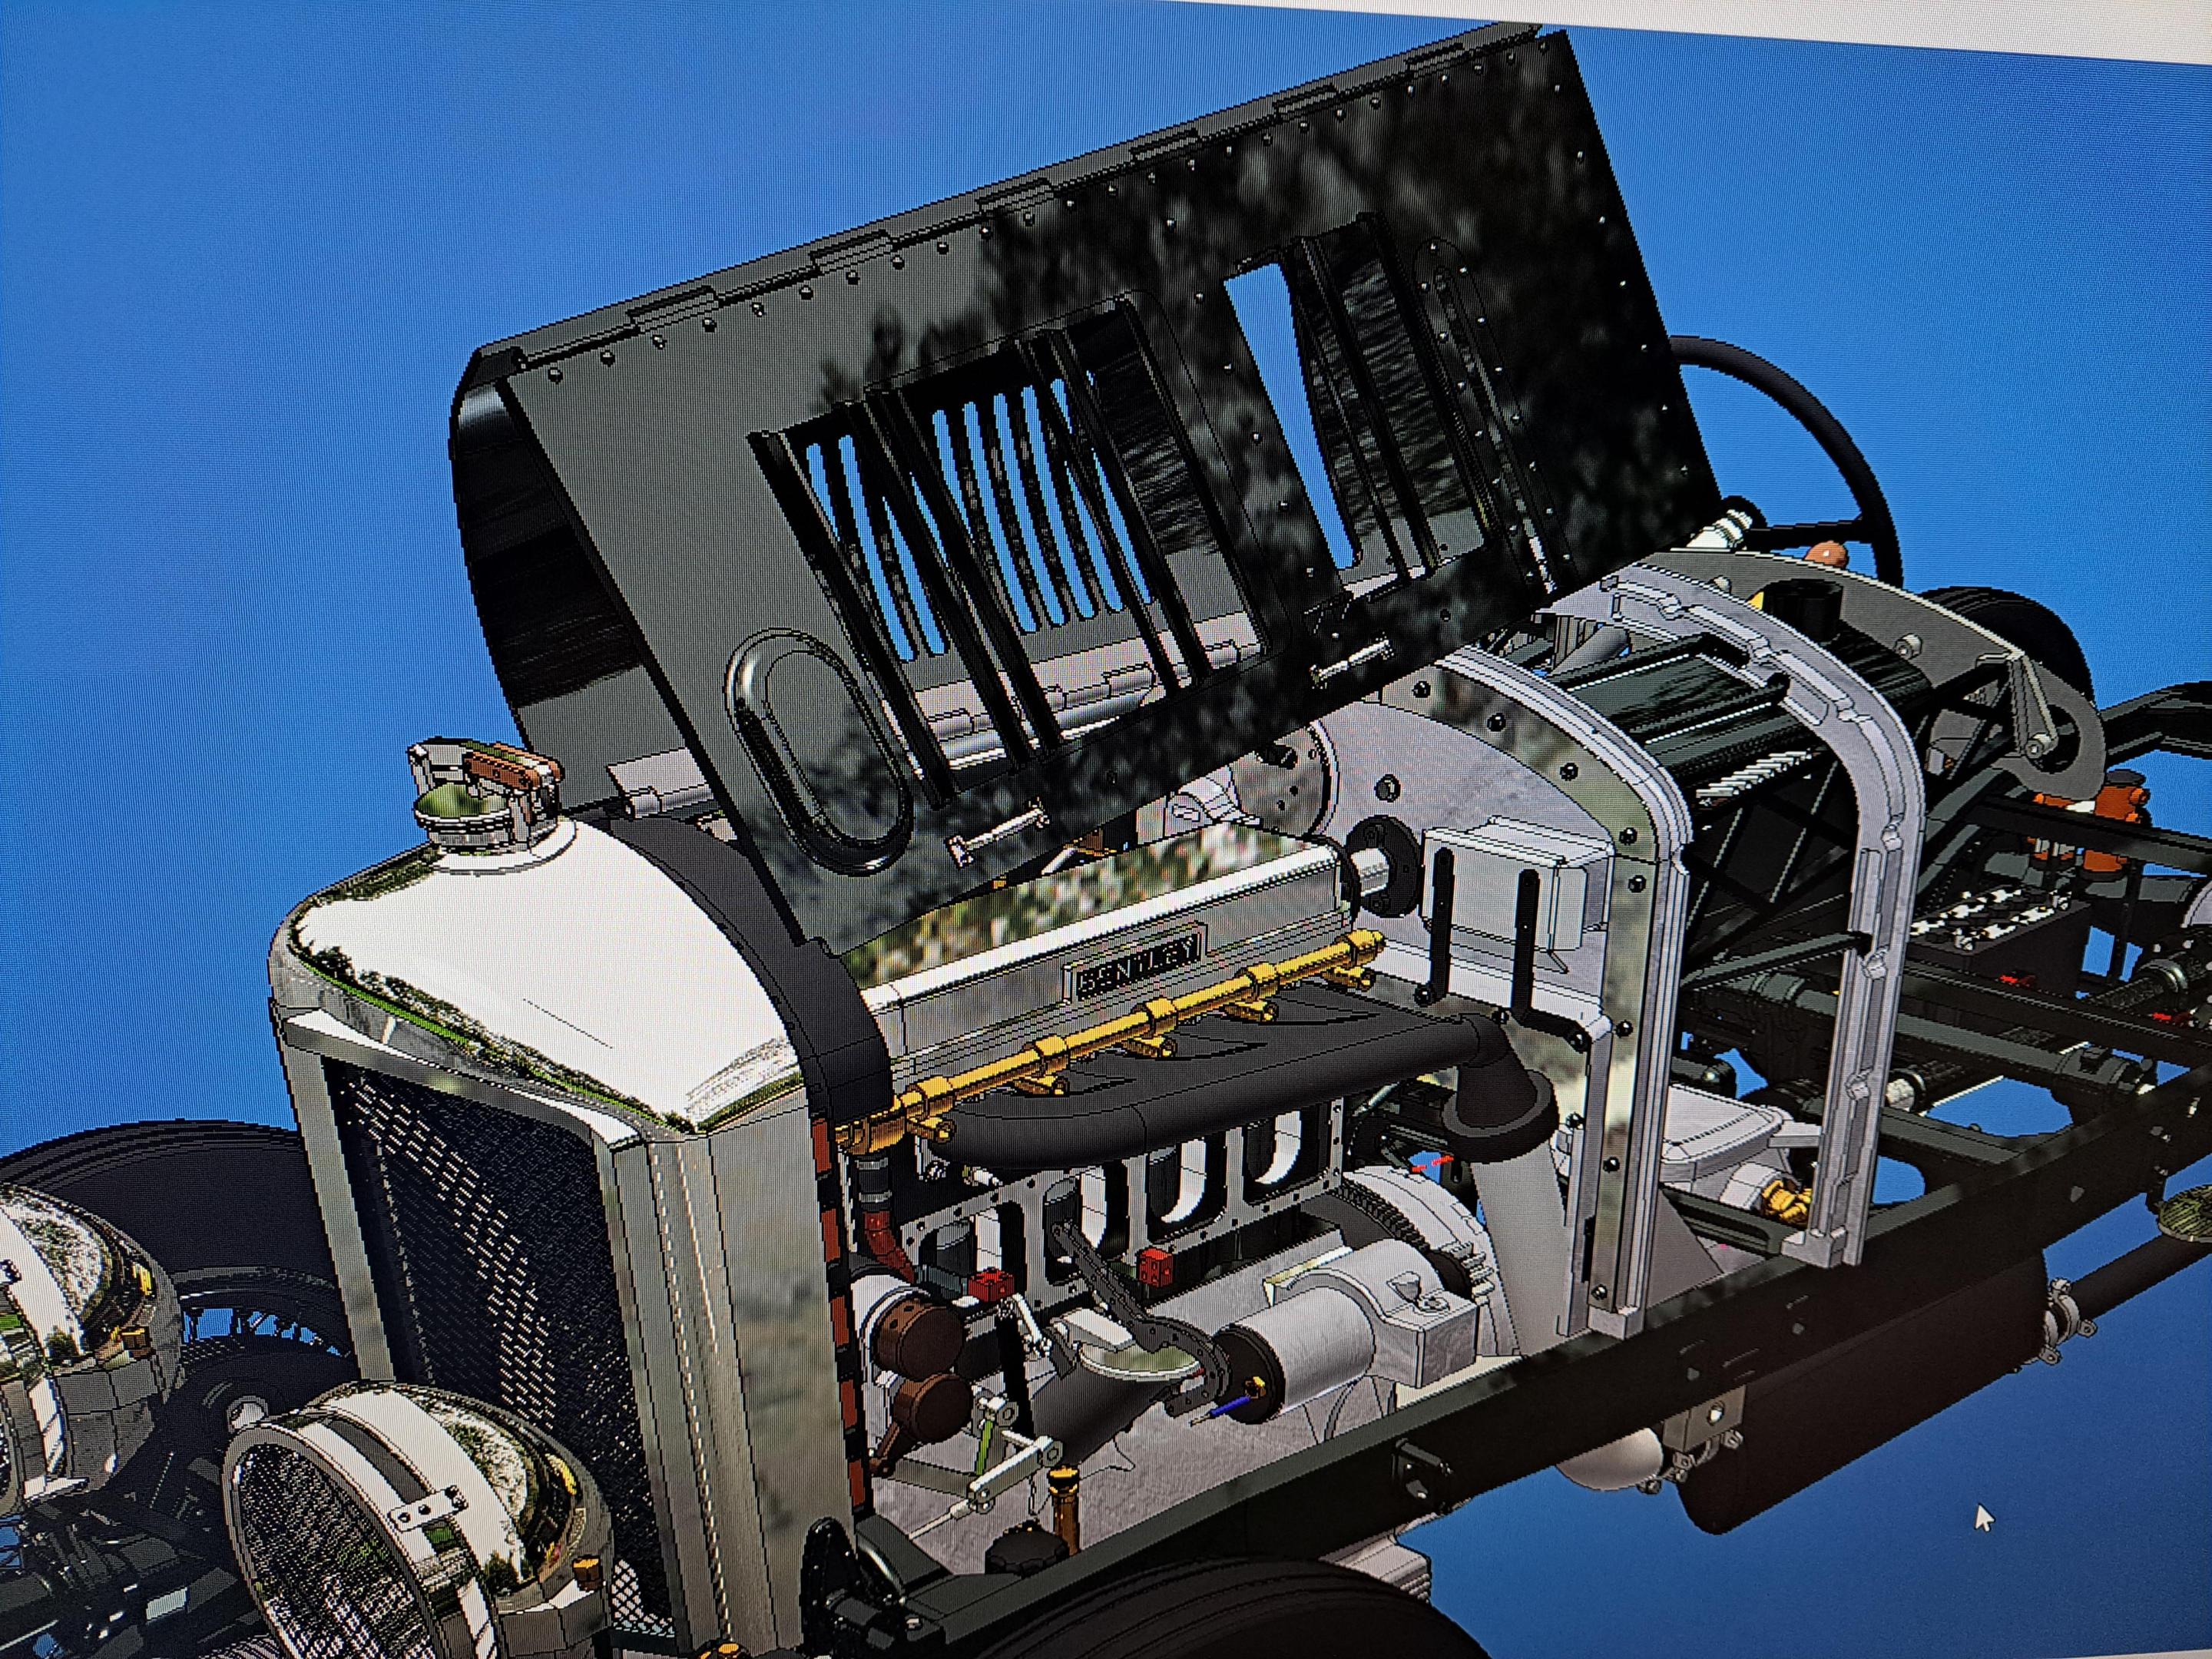
And again some cad vs reality
This is the second print right after washing last night

And this is what it looked like this morning

you can clearly see the flatness of the louvers.
So now enriched with this lesson, I spent the entire day 3d modeling the 3 renaining panels, getting them ready for print. The hinges are all modeled directly on the panel so no more printing a bunch of tiny hinge to be glue afterward. I have to say that the louvers on the top panels were a real challenge but I think I got them pretty good.
Here are some pictures of the model


And again some cad vs reality


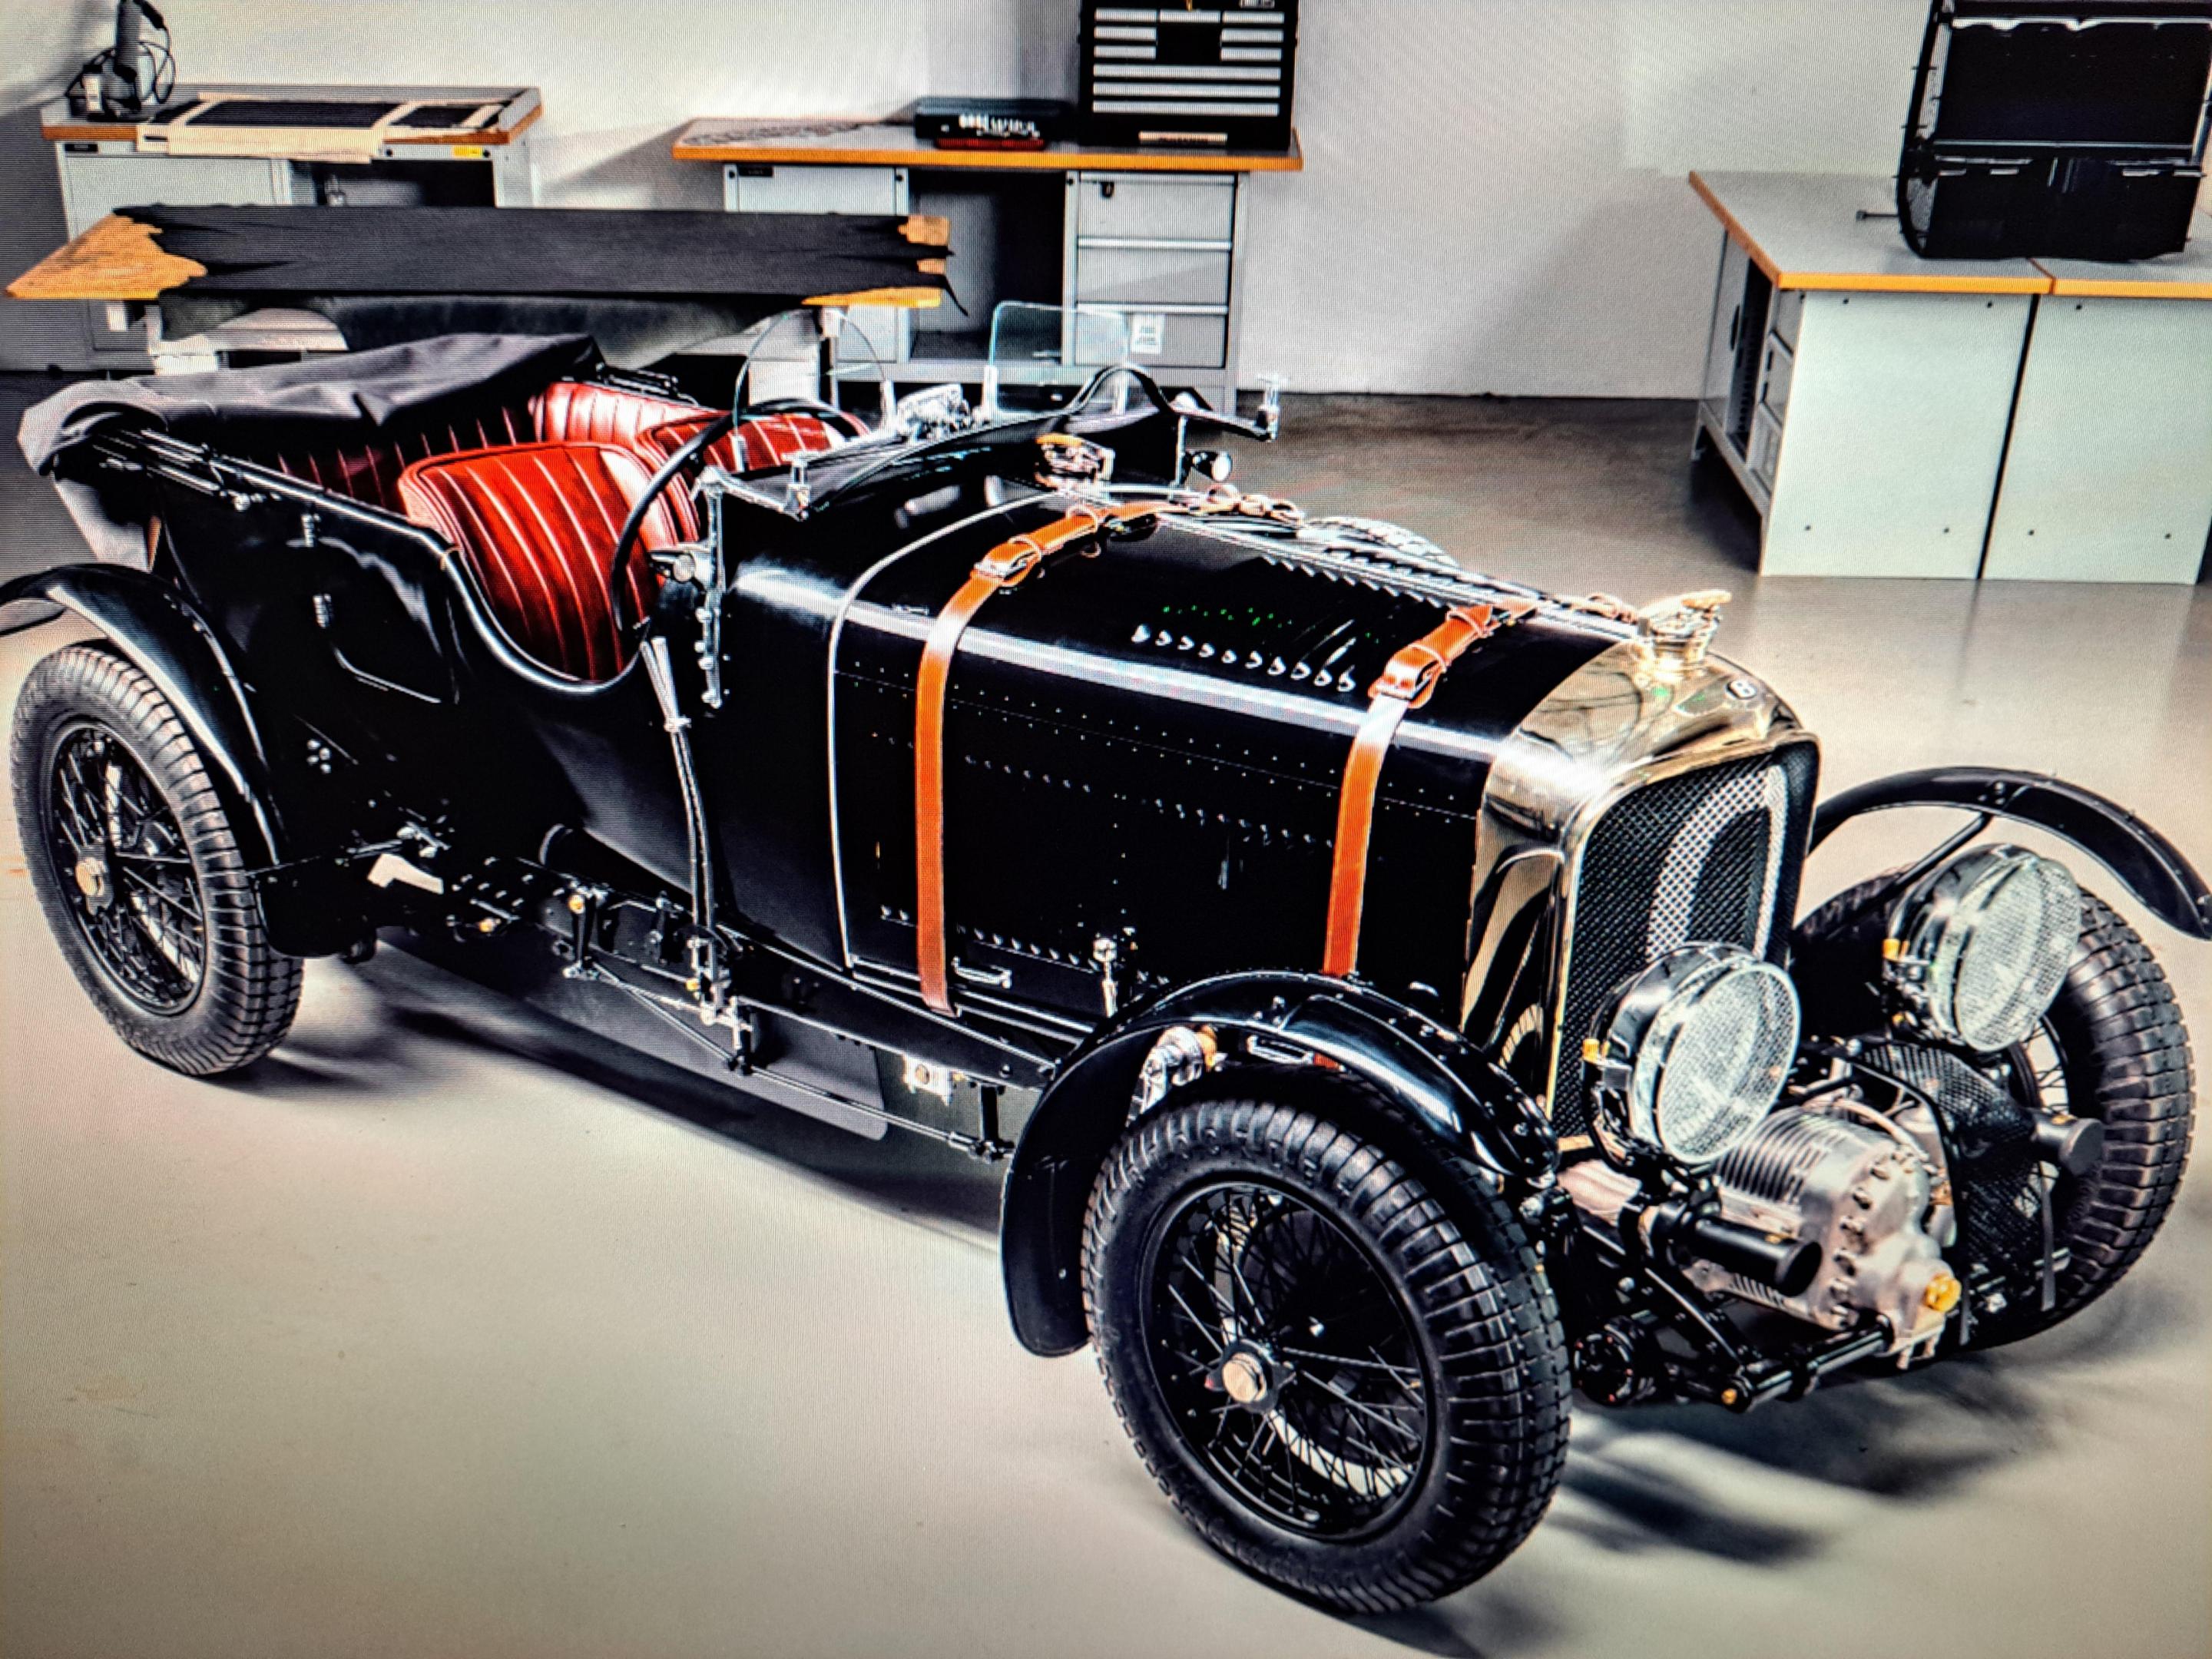
Extremely cool idea. Best of luck, nice.Hello, I recently purchase an Airfix 1/12 scale Bentley Blower. I'm starting this log not because I'm starting the build, that's many months away but because I wanted to talk a bit about the ground work I'm doing and the route I intend to take. This is an old model dating back to the 70's. Airfix keeps moulding the kits using the same mold and keeps selling them. It's a very popular kit and has been done in a multitune of way, from the plain 'follow the plan' way to some major work of art with major scratch built add-ons. I started to research a bit on what had been done and fell on a Topgear article that explained how in 2020, Bentley decided to fabricate 12 brand new 'old' Bentley Blower using the original 1930's plans. They spared no expense and did a fabulous job. But what caught my eye were pictures of the body work. Like may cars of that era, the body was made of wood but unlike many others who's wood frame was then covered in sheet metal, the Bentley was covered with a material called Rexine. A flexible and water-resistant manmade material. Cheap back then, but very expensive today.
On Bentley build I found, the builders will, depending on their skills, either simply paint the plastic body, texture paint it or cover it with a fabric. I intend to go one step further by scratch buiding a wooden frame and then covering it with a fabric to be determined. So the first step was to 3d model the body using the Airfix plastic parts for dimensional references but also the pictures of the new 'old' Bentley I found. The operative word here is 'intend', I have no clue as to what kind of result I'll get but if worst comes to worst, I'll still have the plastic body to work with. Here a picture of one build in particular that is simply mind blowing and that I will be using as a reference along with some pictures of an actuel wooden Bentley frame and finally my 3d model whitch is not 100% complet).View attachment 372986
Mind blowing buildView attachment 338544
Actual wooden frameView attachment 338538View attachment 338540
My 3d model
View attachment 338542View attachment 338543
So it's a start. You might not hear from this log for a while since I've got a few other projects I wish to do first.
Thanks