
Looks absolutely natural.

- Home
- Forums
- Ships of Scale Build Logs
- Super Detailing Static Models / Other Genres
- Historical Trailways, Guns, Aircraft, and Cars
You are using an out of date browser. It may not display this or other websites correctly.
You should upgrade or use an alternative browser.
You should upgrade or use an alternative browser.
1930 Bentley Blower by Aifix 1/12 build log
- Thread starter François
- Start date
- Watchers 34
-
- Tags
- 1930 airfix bentley blower
Thank you corsaire and Walterone. Keep looking, more fun stuff to come.

Your chrome is looking better than the chrome on my bike (in scale 1:1) - very good work
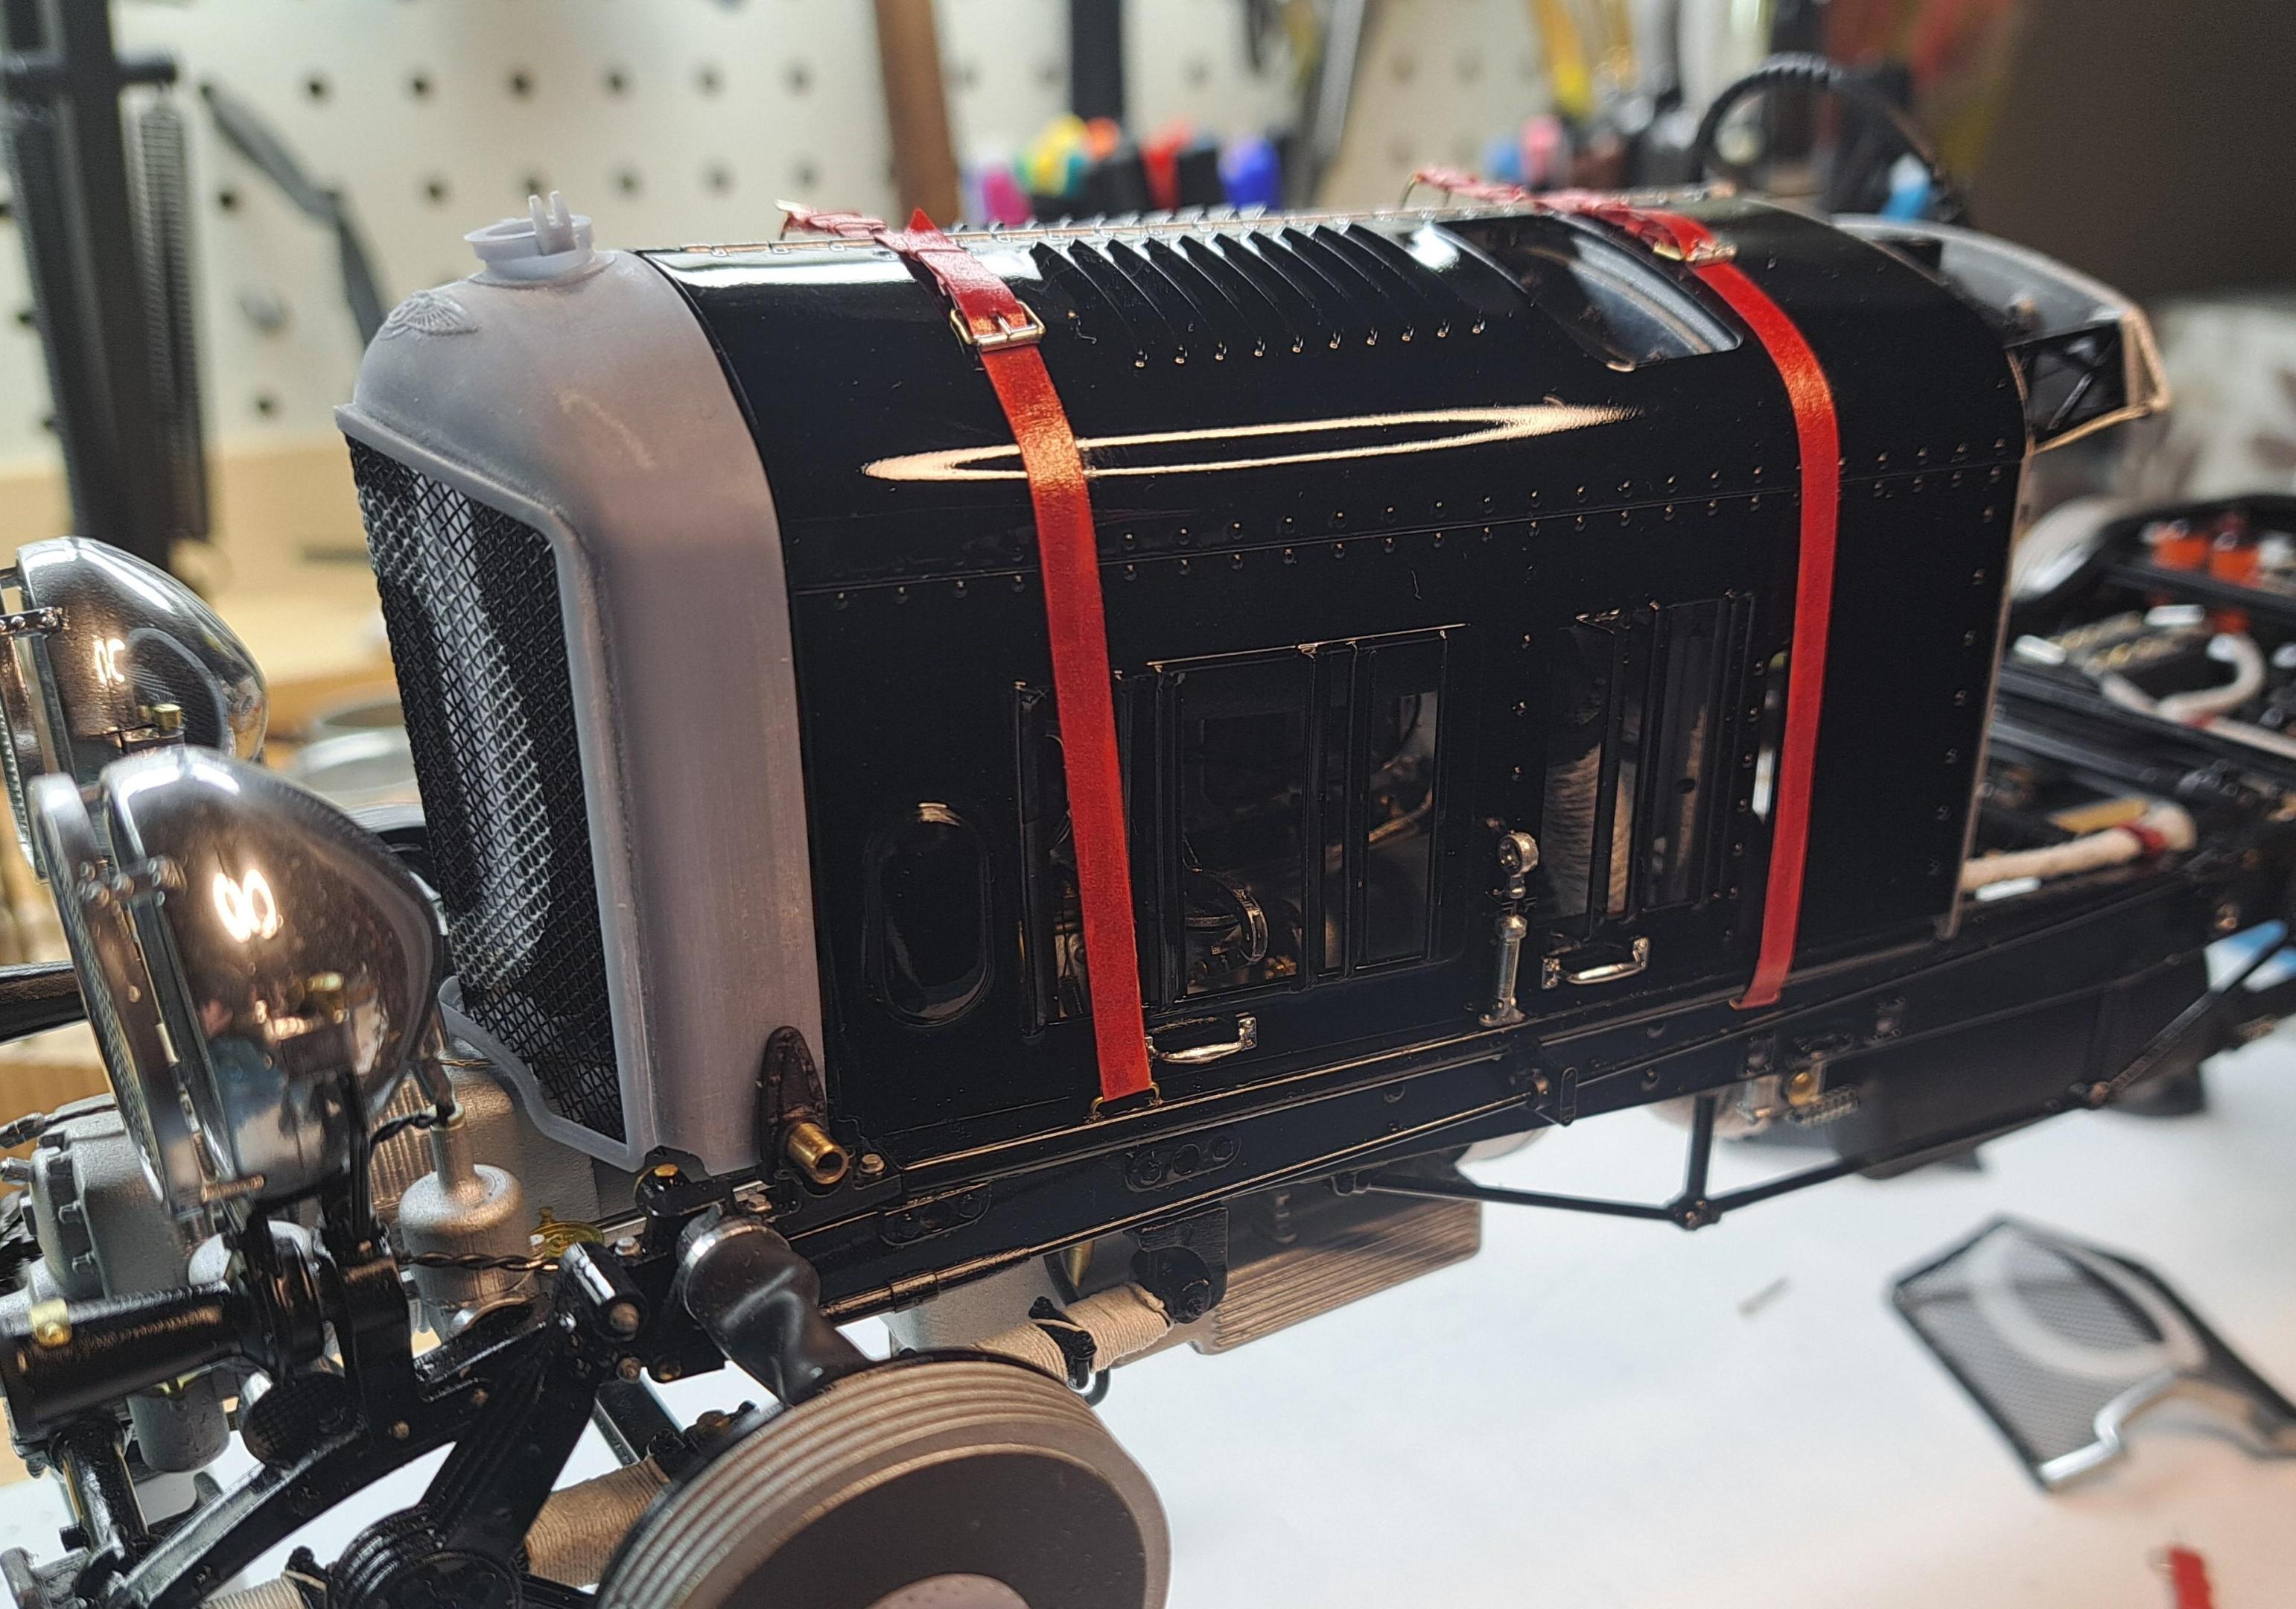
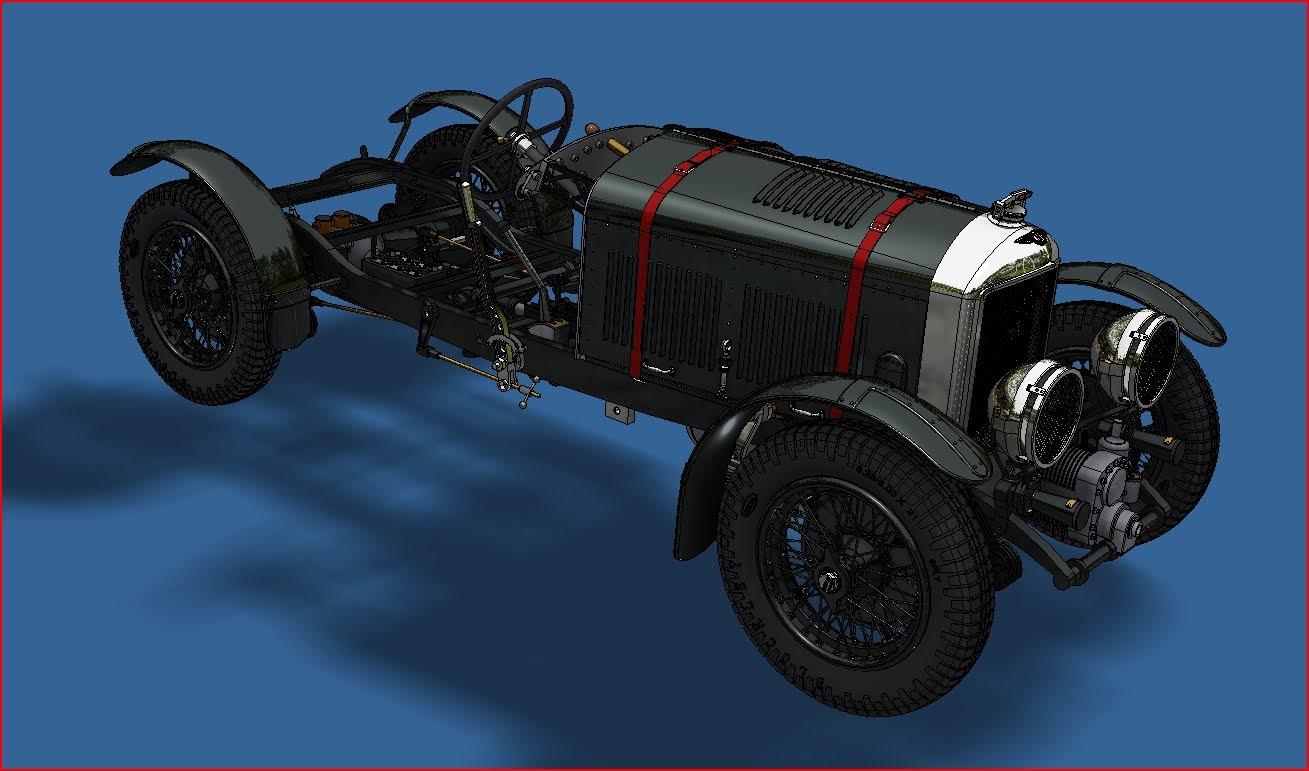
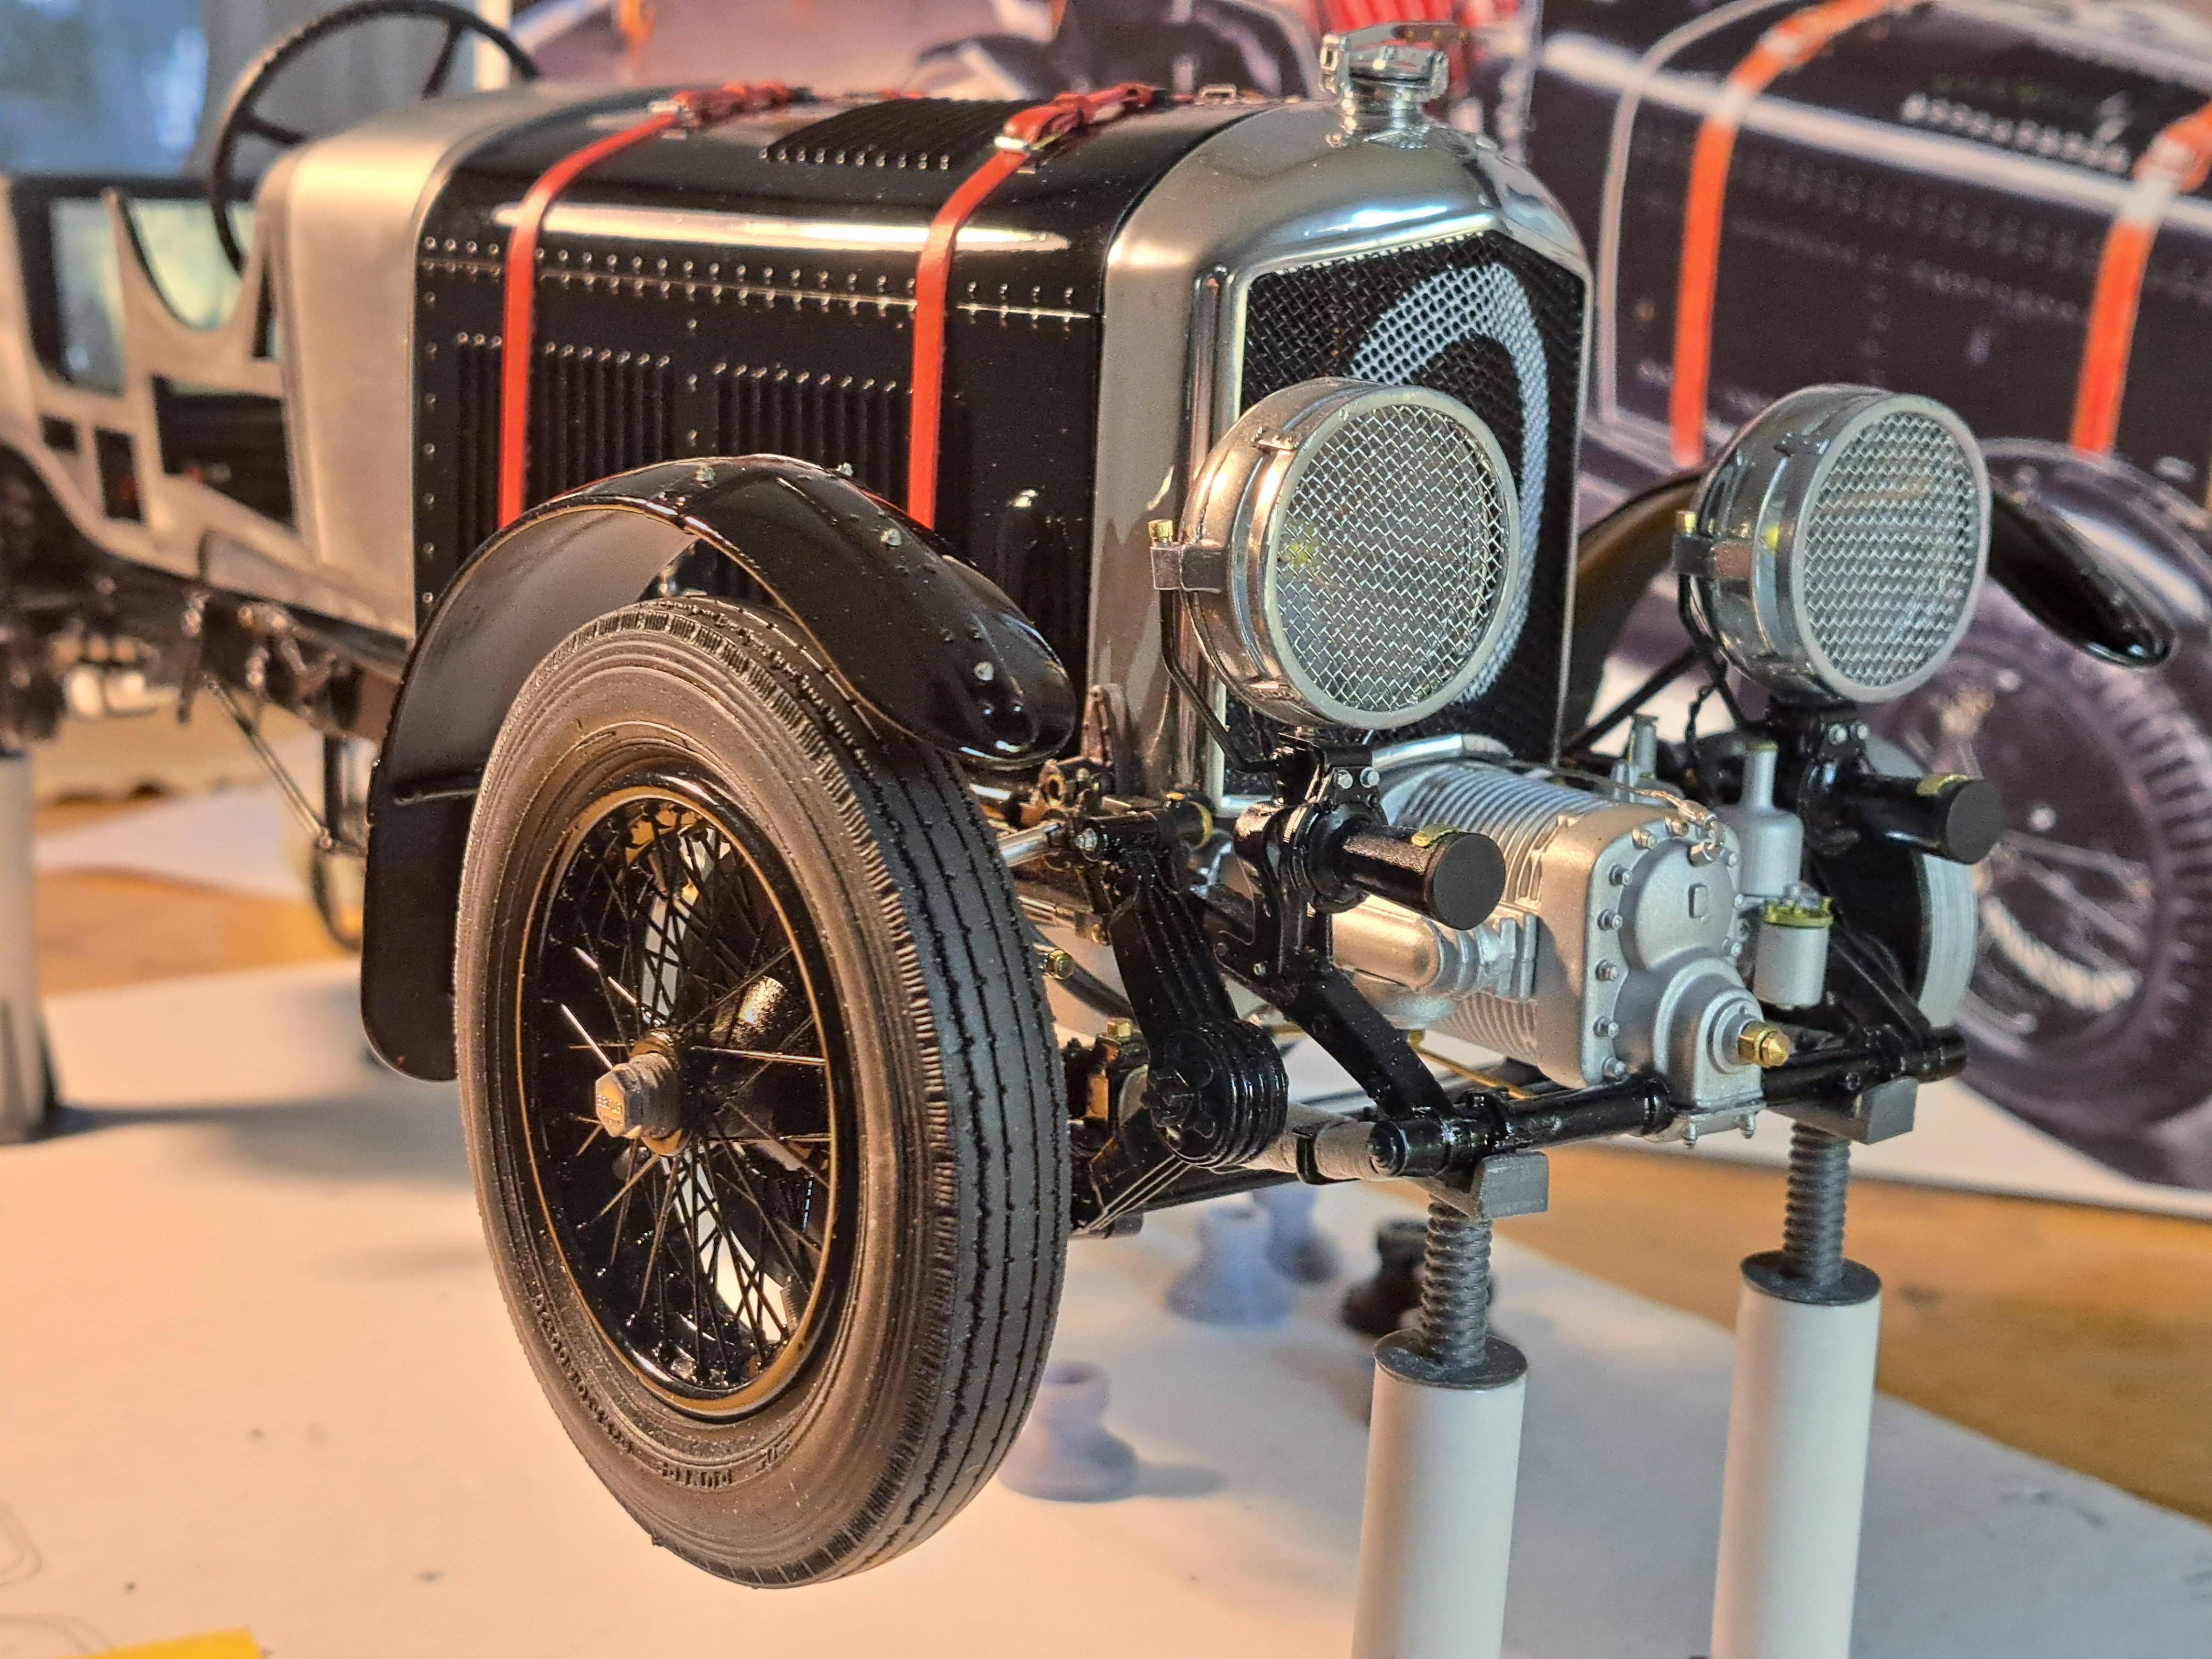
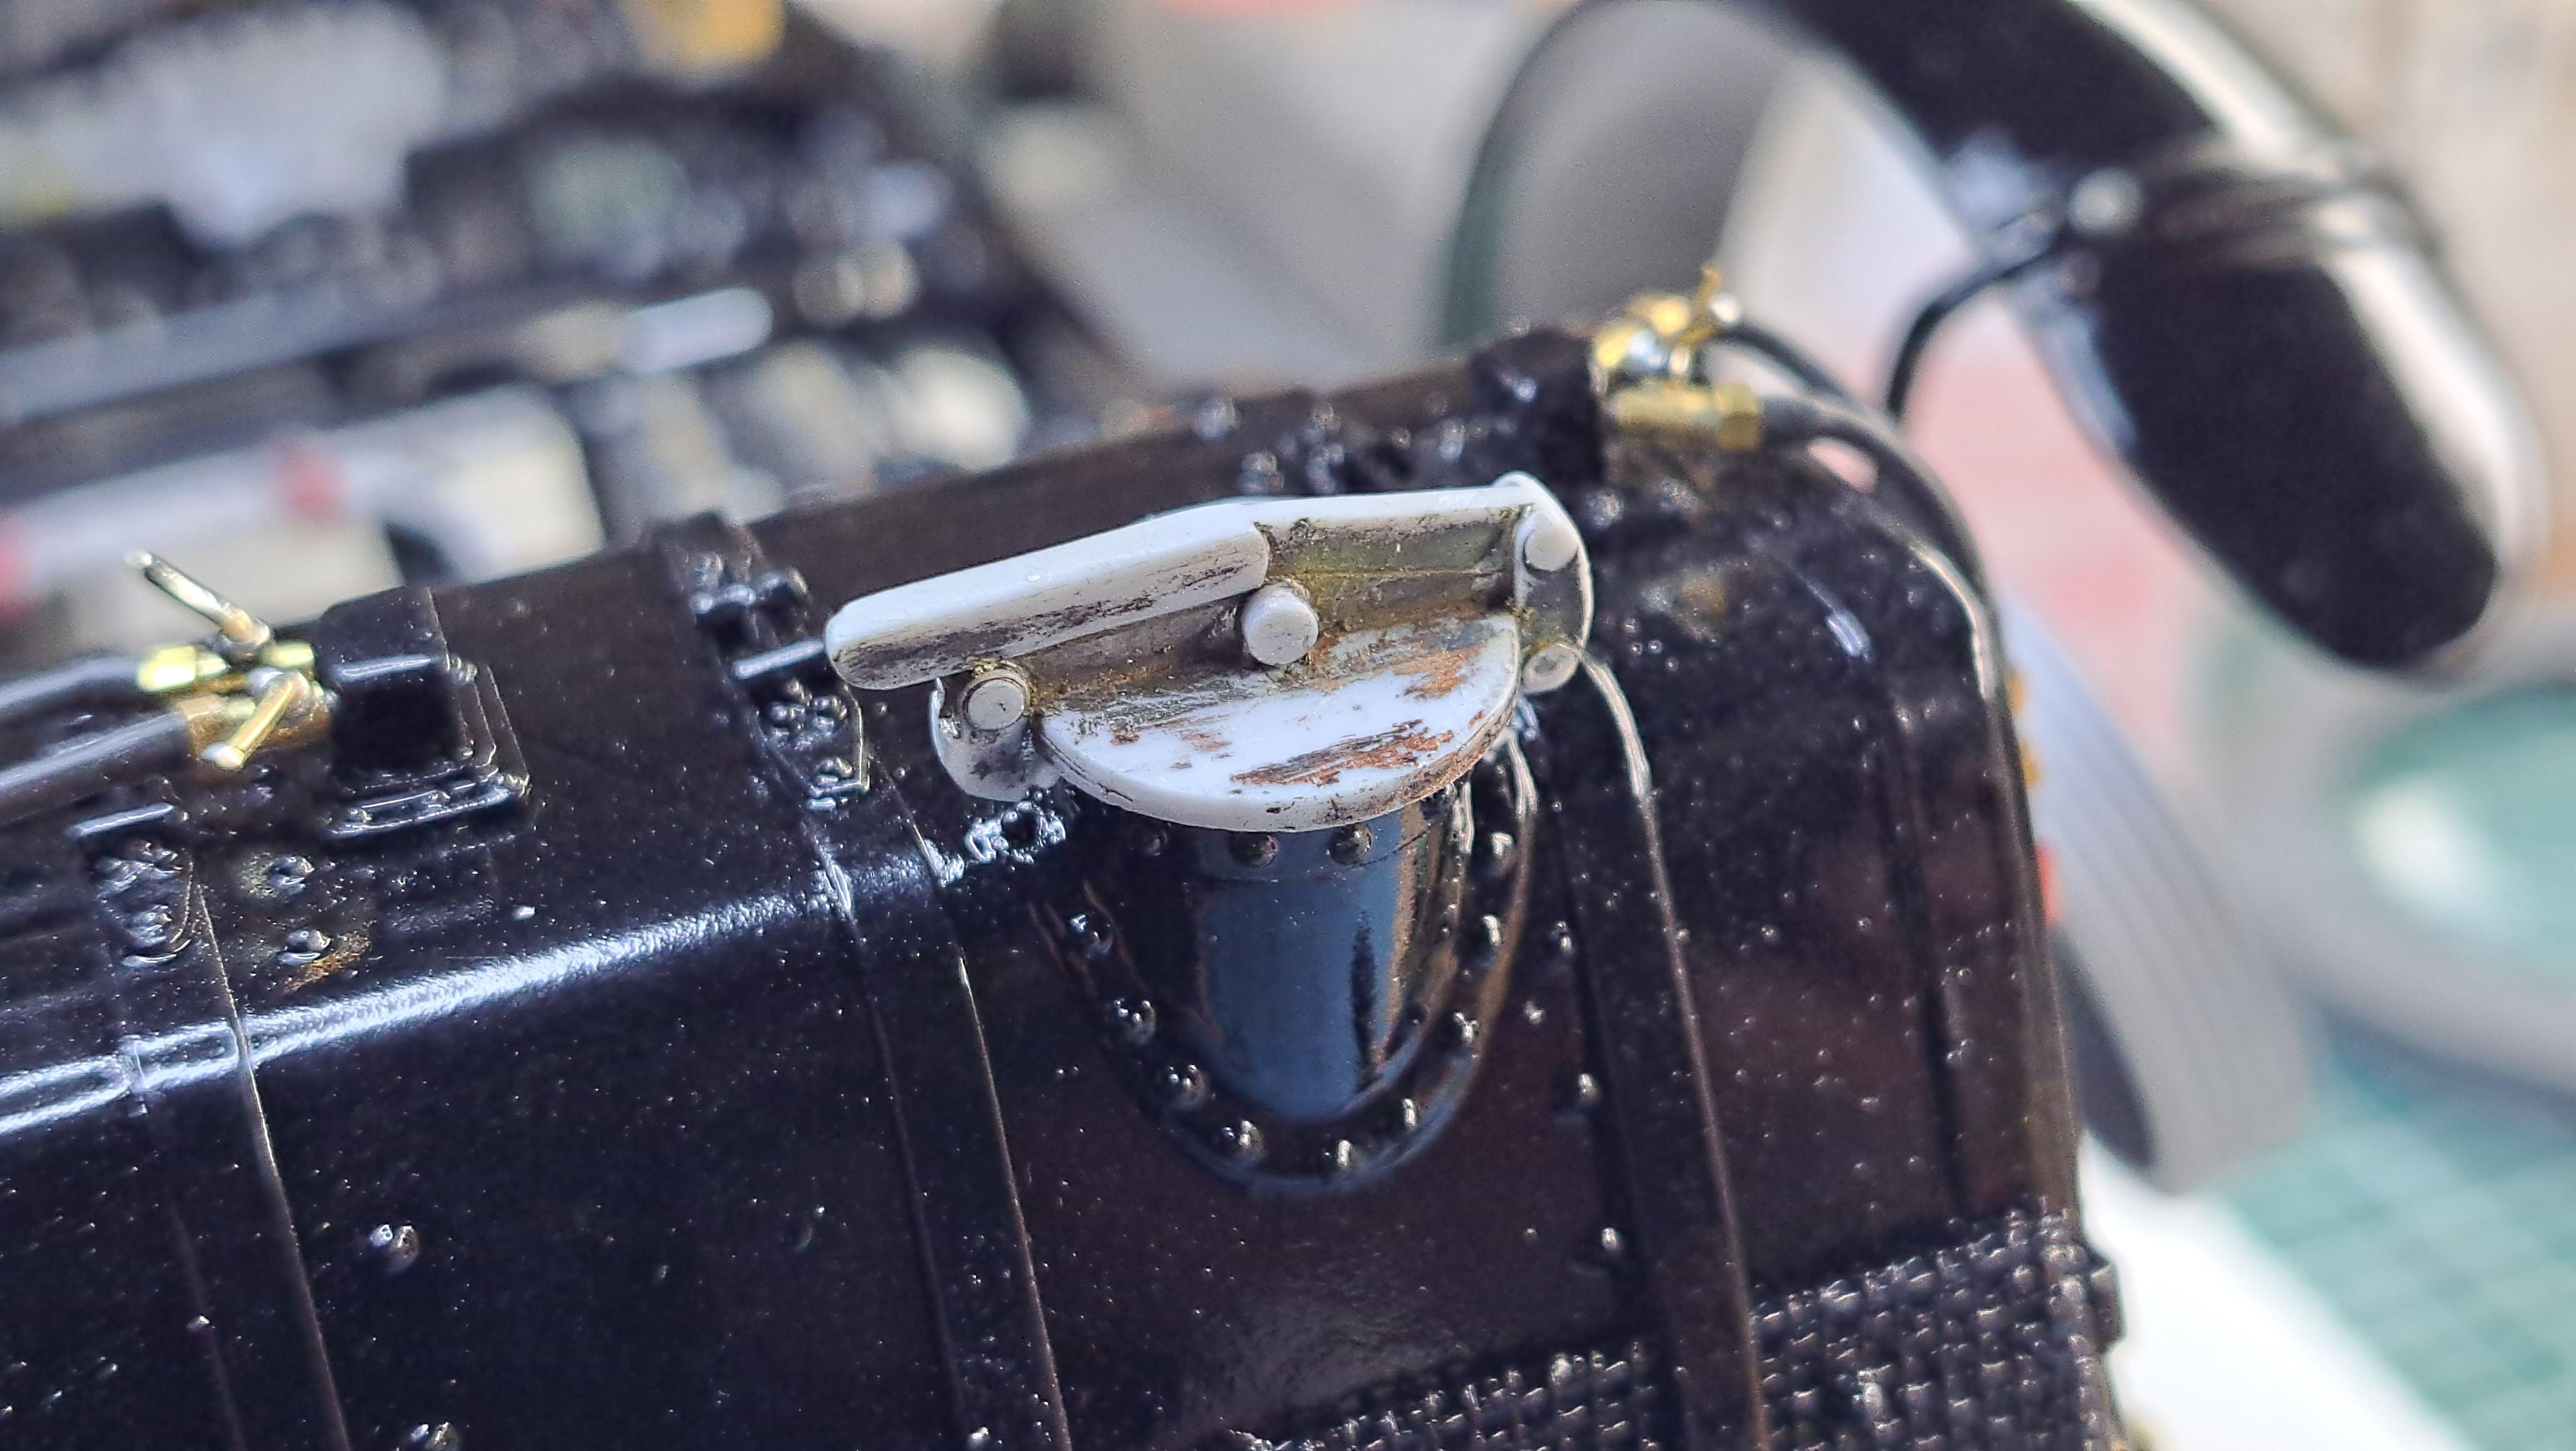
Finished the hood straps today. I'll let the radiator cover dry for a couple more days before handling it. So the front end should be pretty much done by the end of the weekend. I also installed the foot step. Next up will be the 4 fenders. I still have the wheels to finish but that can be done just about at any time.


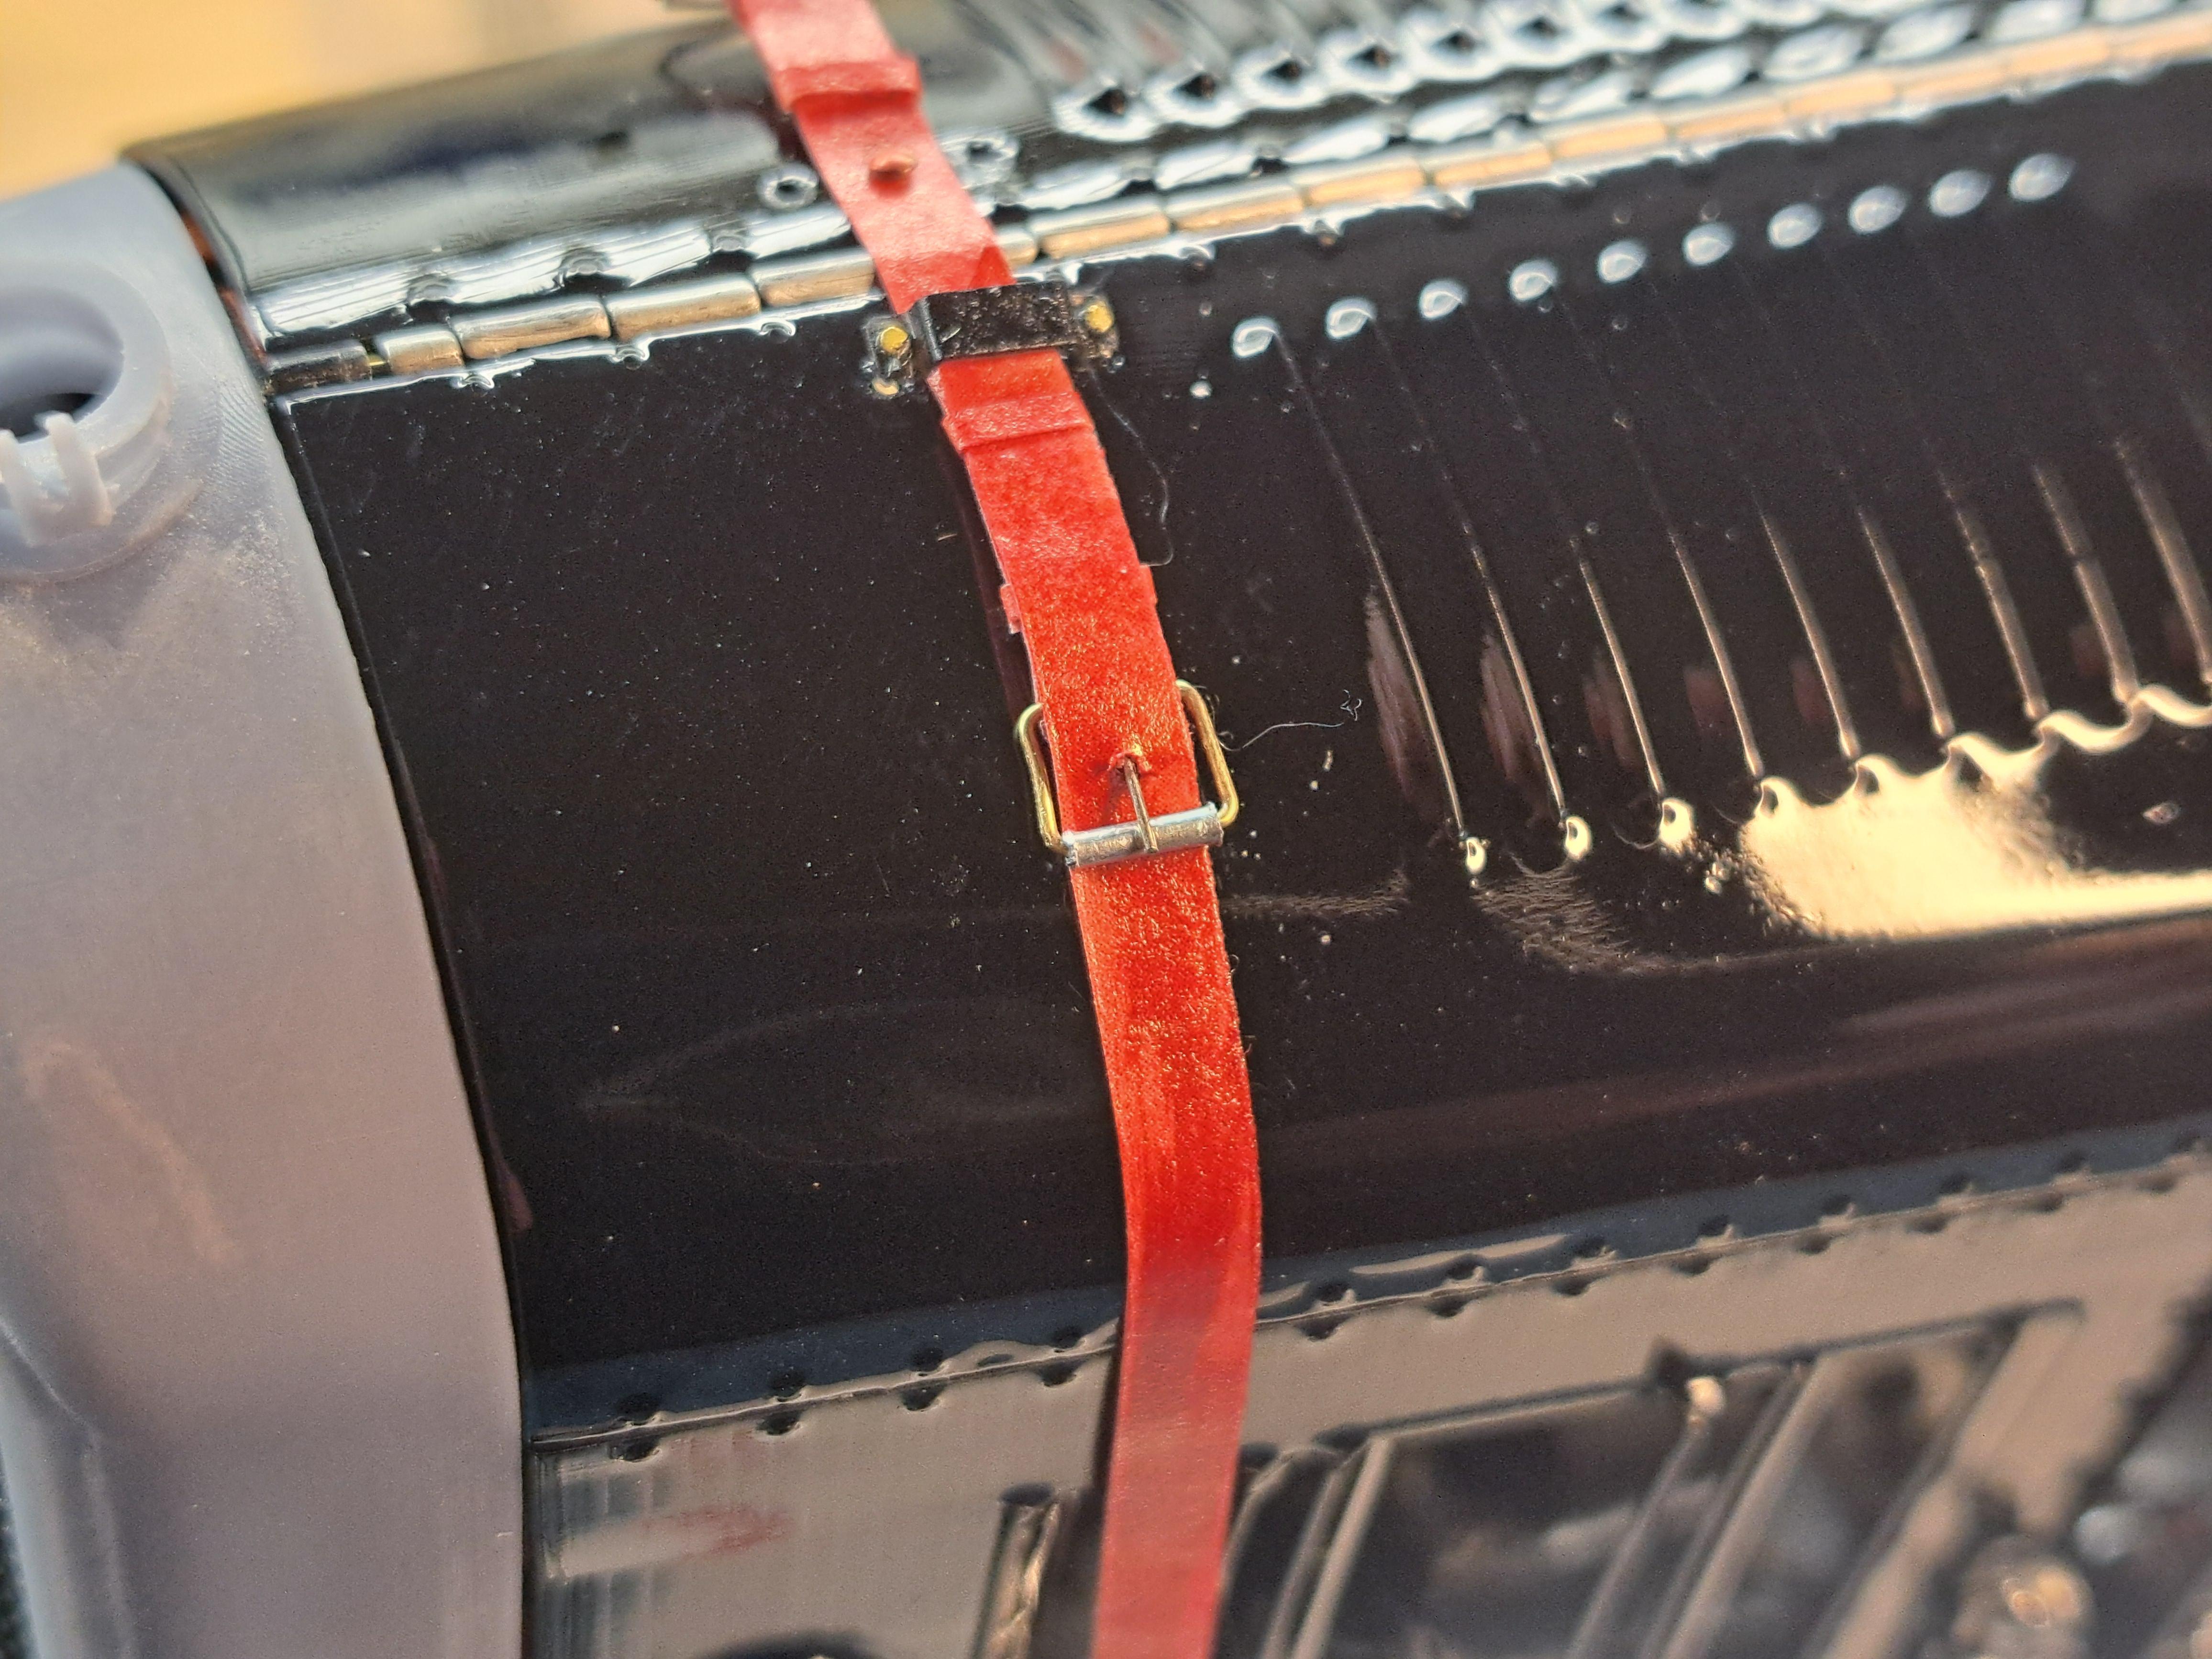

The buckle for your hood straps don't look right.
If the strap were under tension, the strap going through the buckle where the hole is would be close to the part with the roller on the outside rather than having so much of the center pin of the buckle visible. Maybe it's just the angle the photo is taken at.
You still continue to amaze me with your beautiful work on this !
You have a good eye! The difficulty is to find a thin enough material that will look ok at scale and has a little bit of strench to it. I have the thin part but not the strench part of it. I tried thin glove leather but like every other builds I see that uses leather, it just doesn't look right. So it's all a question of compromise between having a strap that looks ok at scale and having a buckel that is not quite right. Here is a picture of a 1/8 scale model from Amalgam models that is close to 23k$ and that has, to my eye, a much too thick strap.

maybe if you just doubled up on the material you are using around the center of the buckle? Yes, I agree that the kit with the leather looks too thick. Even if you don't change it, no one is going to say "The buckles on the hood ruin the look of the model".. LOL Your work is absolutely beautiful !!!You have a good eye! The difficulty is to find a thin enough material that will look ok at scale and has a little bit of strench to it. I have the thin part but not the strench part of it. I tried thin glove leather but like every other builds I see that uses leather, it just doesn't look right. So it's all a question of compromise between having a strap that looks ok at scale and having a buckel that is not quite right. Here is a picture of a 1/8 scale model from Amalgam models that is close to 23k$ and that has, to my eye, a much too thick strap.
View attachment 428026
I was able to skive a piece of leather l had from .05in to .02in. At that thickness, it's still 4 times thicker than the strap I made yesterday. But I would be able to tension the straps as should be. What do you think ?
Yesterday's strap at .005in thickness (1/16in scaled up, a bit too thin I think)

New strap at .02in (.24in scaled up, a bit much)


Yesterday's strap at .005in thickness (1/16in scaled up, a bit too thin I think)
New strap at .02in (.24in scaled up, a bit much)
I think it looks much better. But the important question is what do YOU think. ")
I too think It's better. I'm trying to get the leather down to .015in (3/16 scaled up which is ok ). So all in all, good move.
Finally finished the radiator and I'm very satisfied with the result. Even the angle ajuster mecanism I made worked great althougt I barely needed it. I'm redoing the hood straps one by one in real leather so once that's done, the front end will be complete. Here are a few shots of the finished radiator along with a fun picture of the model next to the ref car.


I also did a test print of a tire. But since I don't have any rubber resin yet, I had to make it in 2 halves. It came pretty good for a first try.
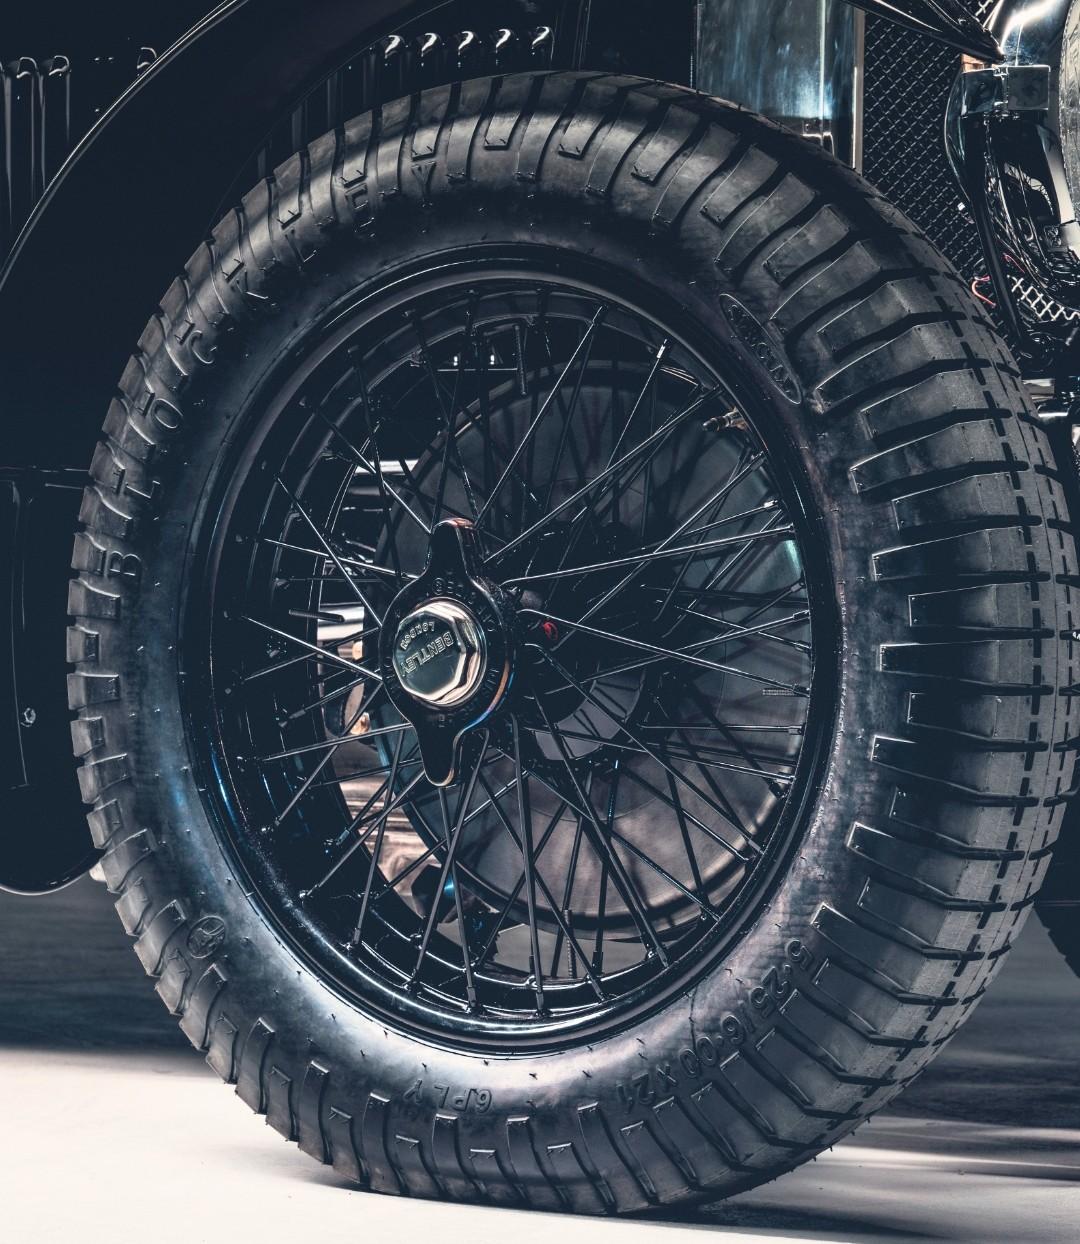
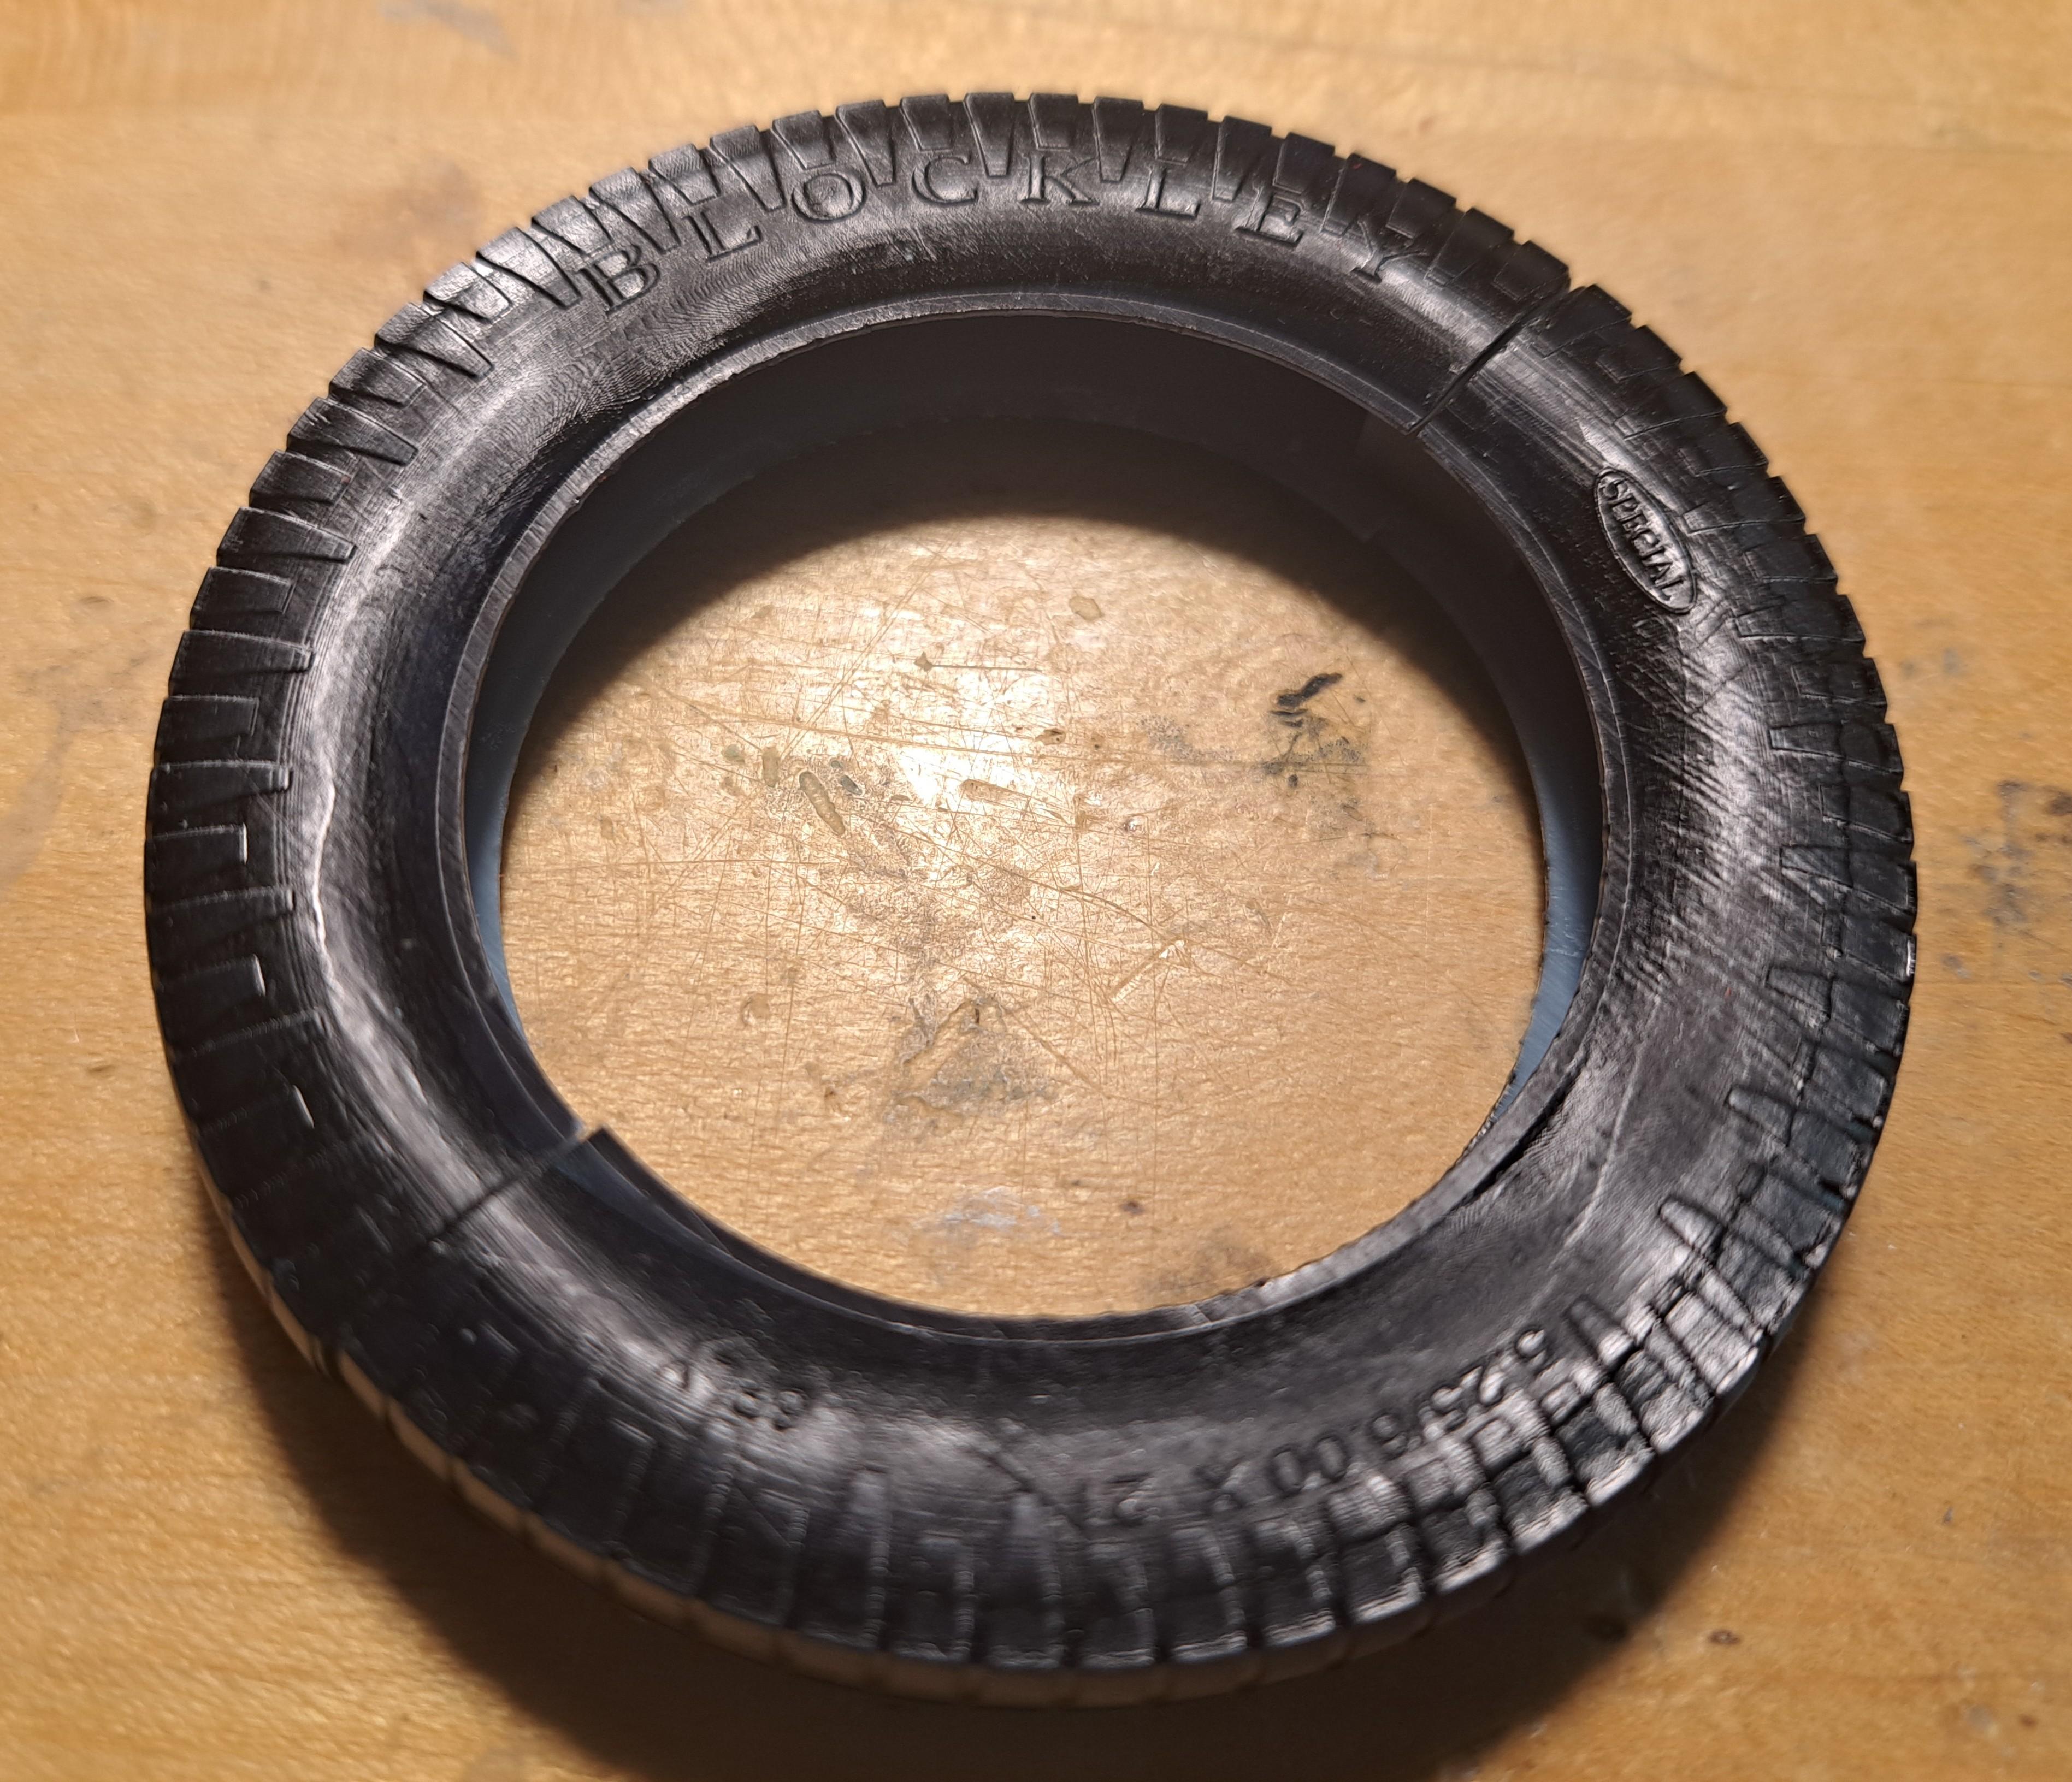
Here what the real tire looks like

And mine


I also did a test print of a tire. But since I don't have any rubber resin yet, I had to make it in 2 halves. It came pretty good for a first try.
Here what the real tire looks like
And mine


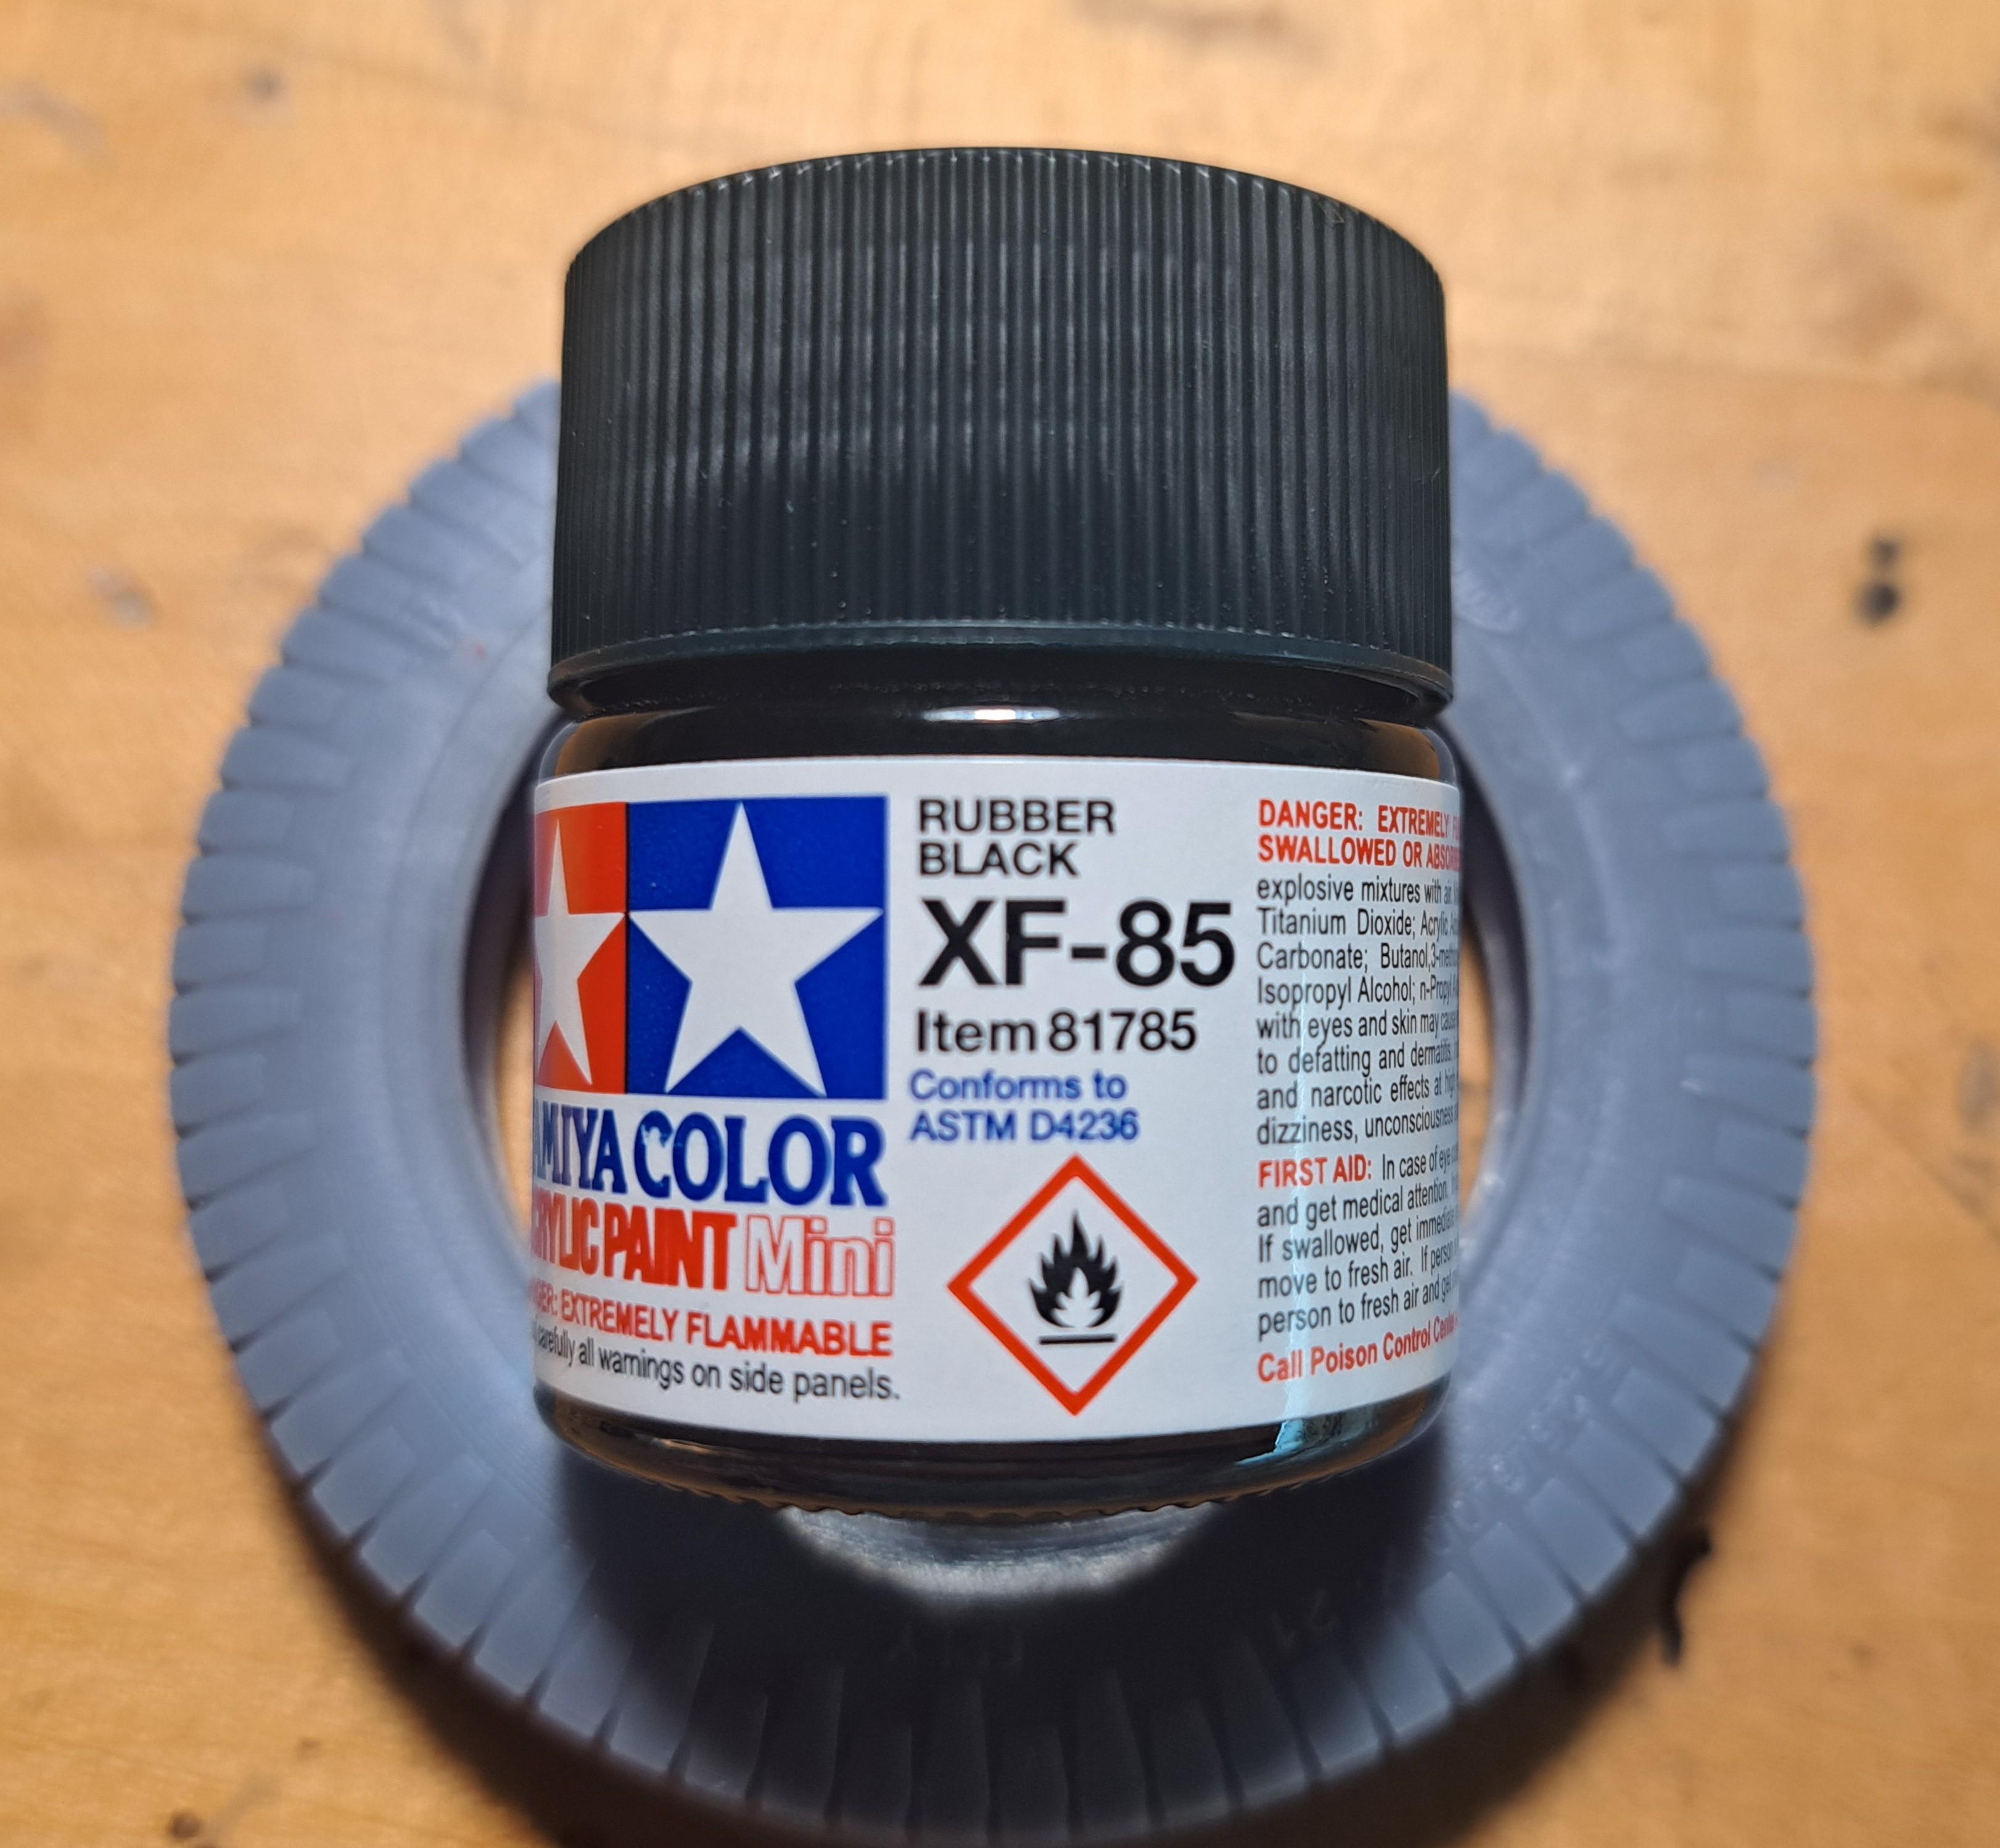
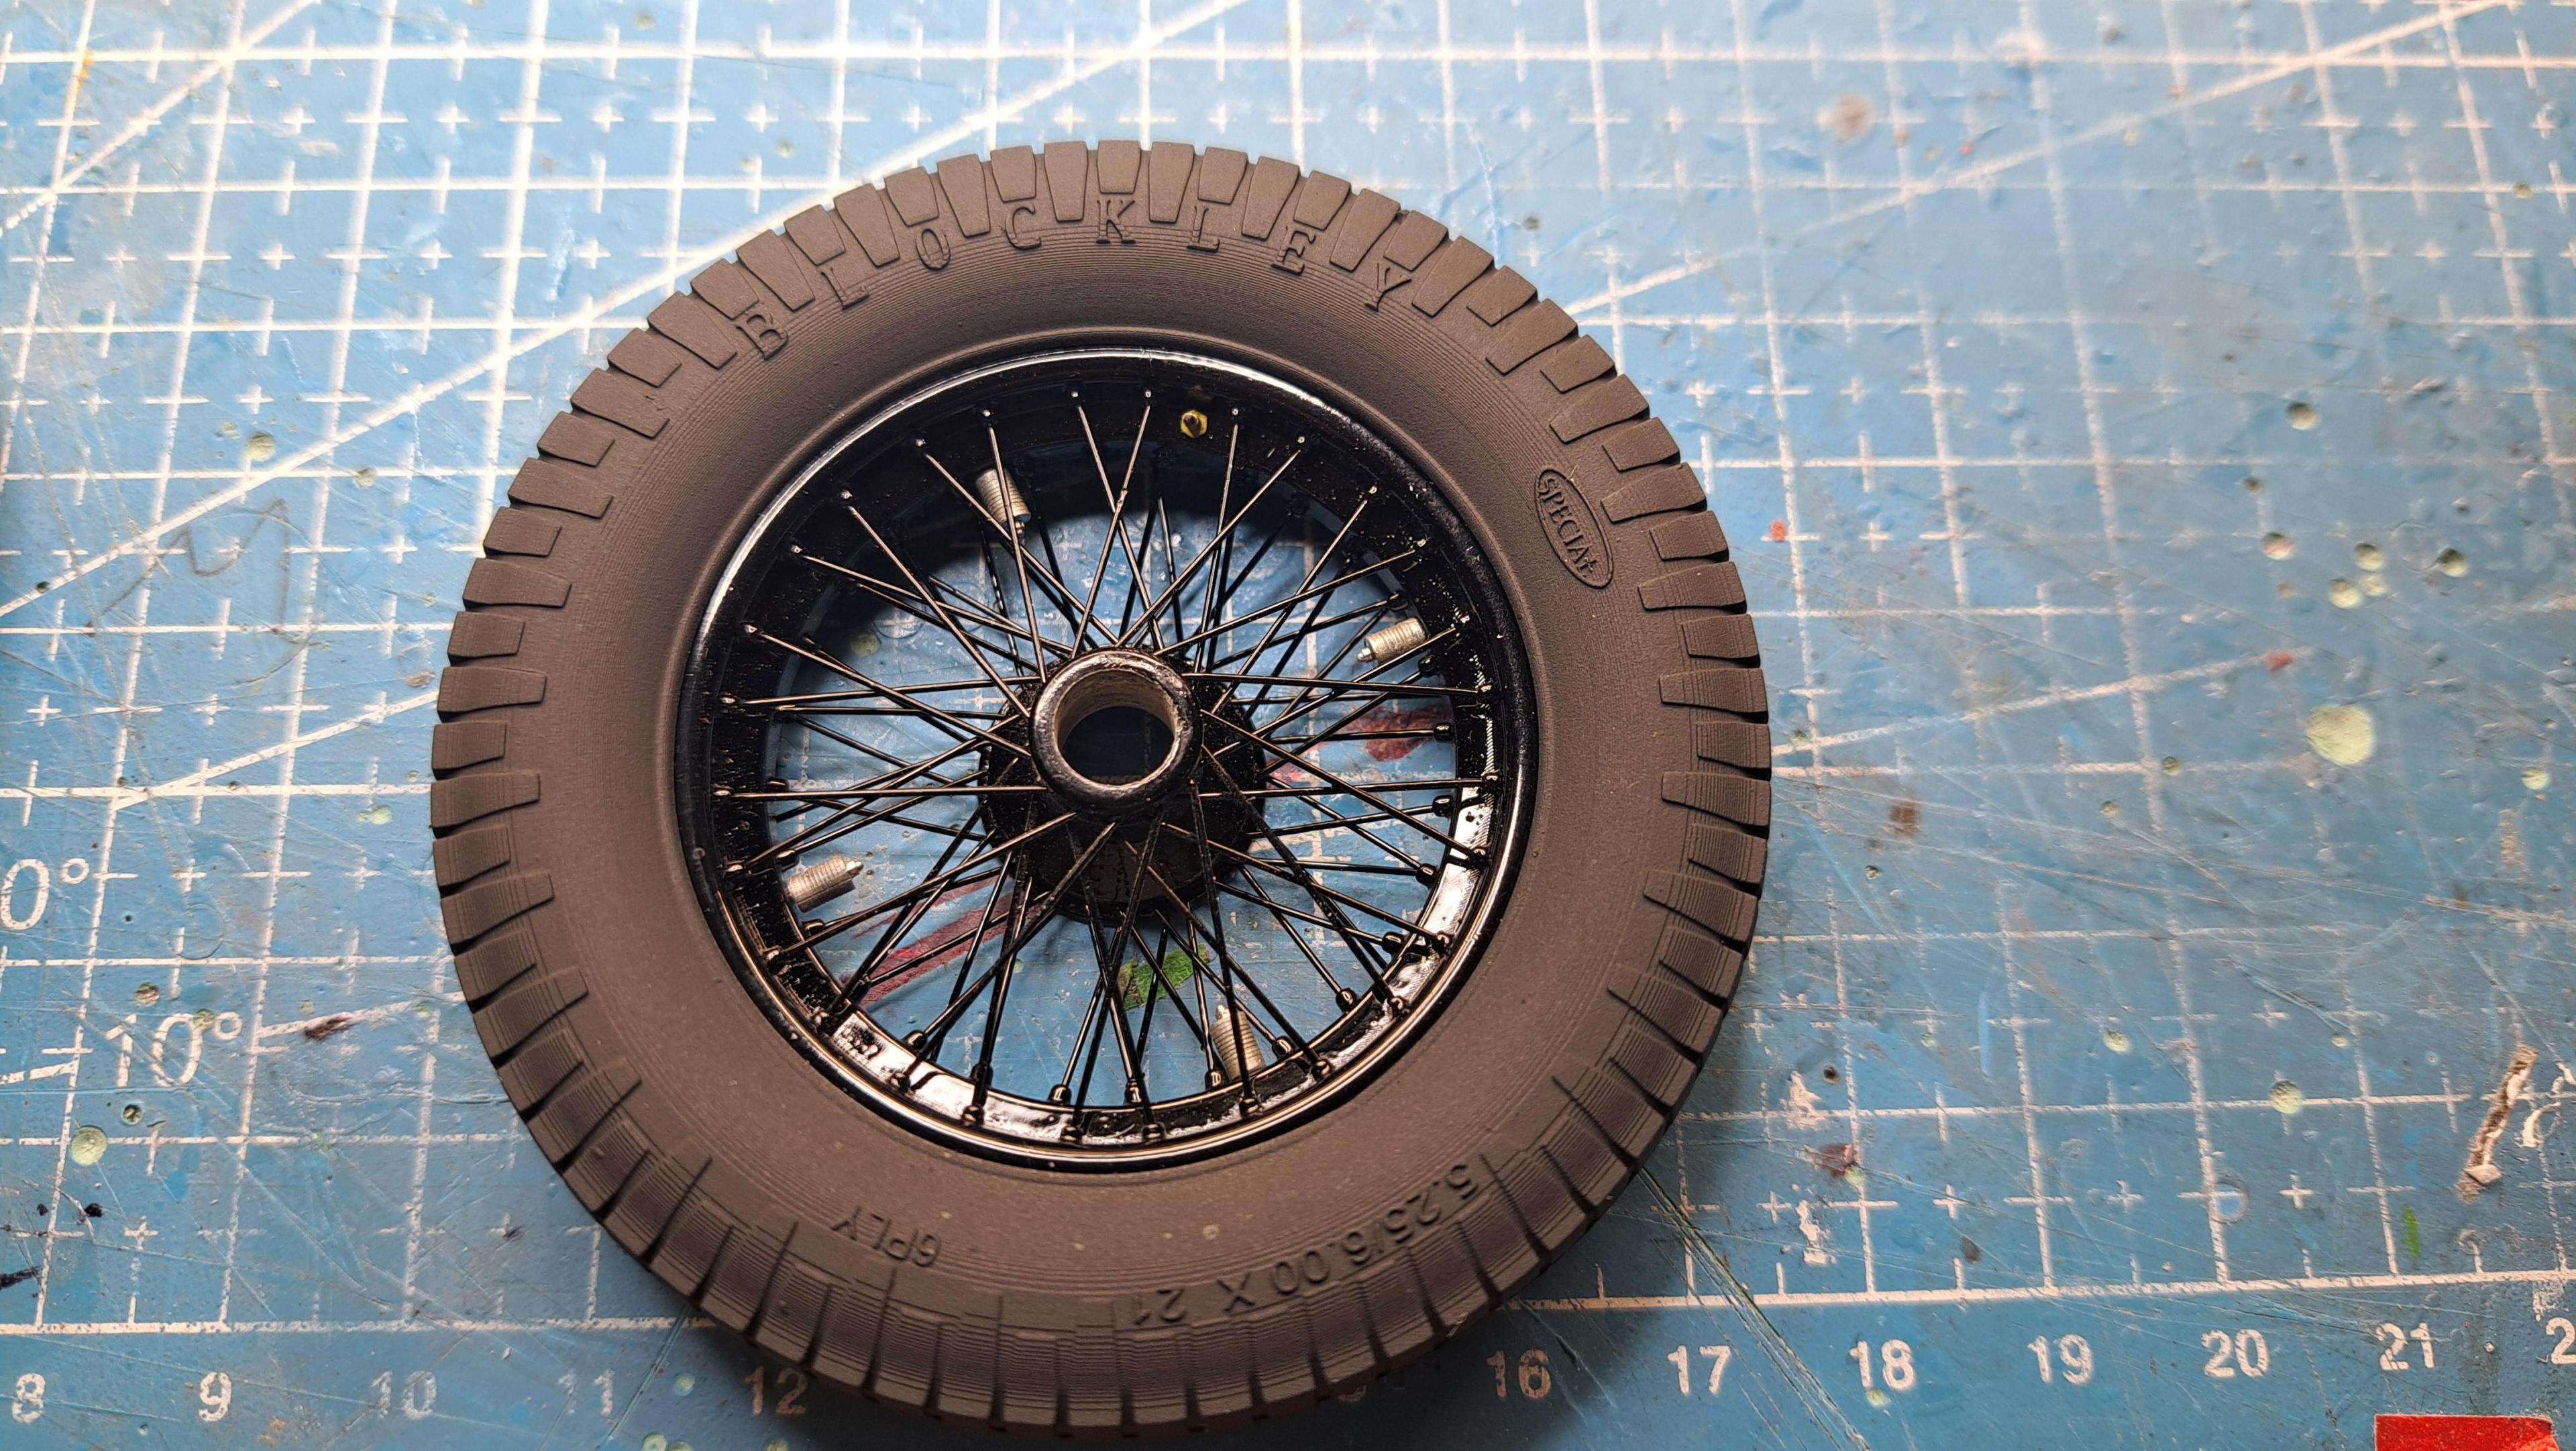
Ok, so I think I have a good tire print but I'll now for sure once I paint it. My 2 first test prints were blackened with a permanent marker, it looks a bit like an armoal coverded tire. I found a black rubber paint made by tamiya. If the paint gives a good enough rubber look, I'll print a 5 tires with regular resin to start and may print them again with rubber resin later on.
Here, in order, are pictures of
the kit's tire
my firts test print

my second test print

my third

a real Blockey tire
and the black rubber paint

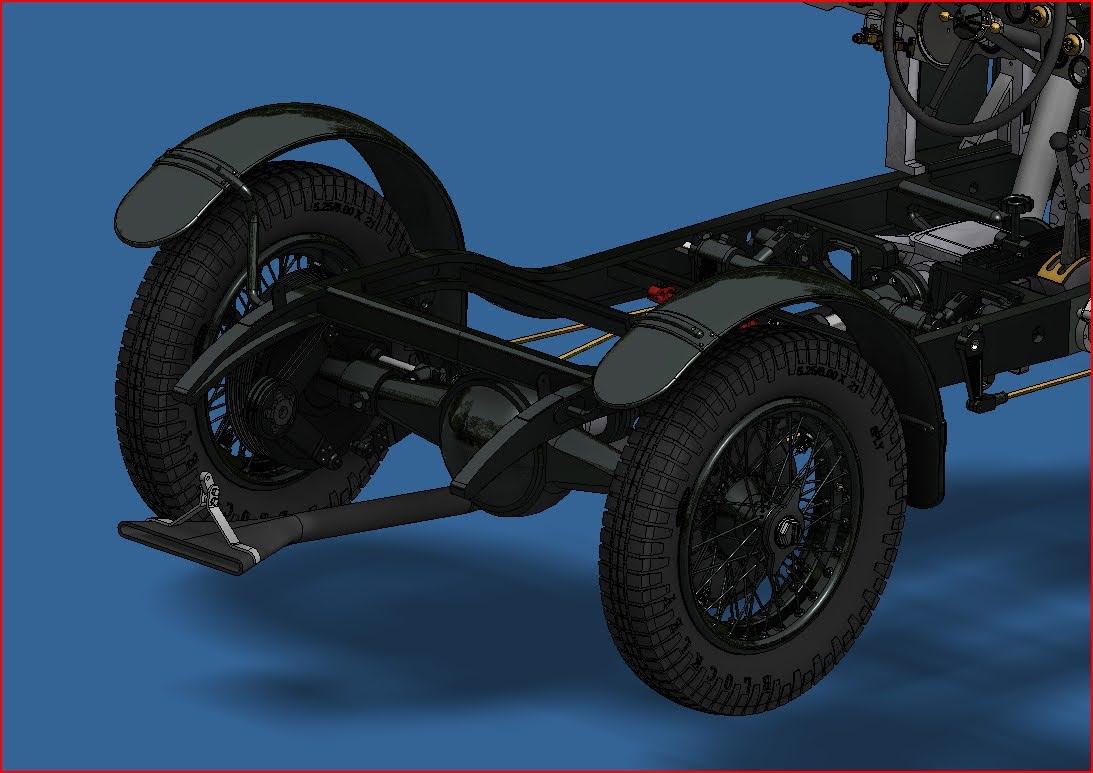
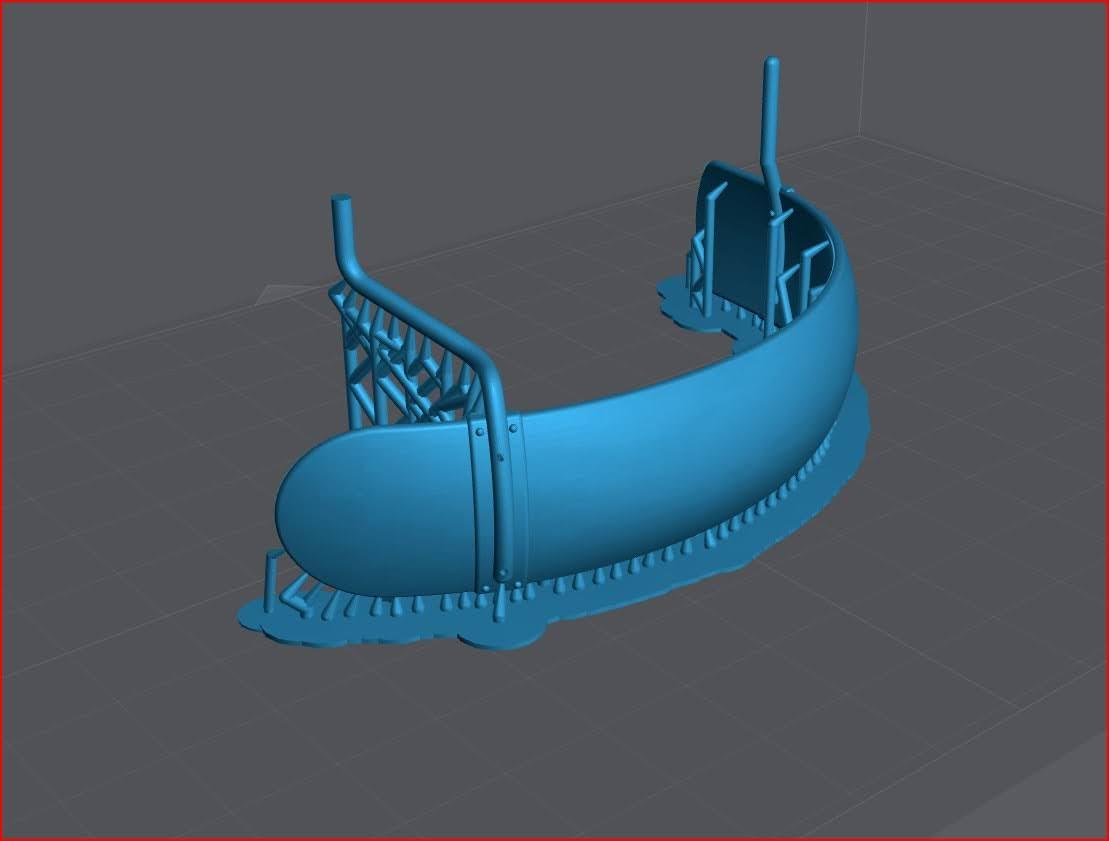
I've also started work on the fenders. The kit's parts are ok but no more. The mounting rods are very flimsy and don't fit good, especially at the front. So me being me, I 3d modeled them and will test print to see if I can do better. It will be print in 1 piece, the fender with the 2 mounting rods instead of 3 separate pieces. I might need to reprint a few times to get the rods in the correct location but by printing them it's easier to add missing details like rivets, bolt holes...
Kit's rear fender

Kit's front fender

The 3d model
A rear fender ready to print
I've completed the new leather hood straps. The are thin enough not to have the fuzzy back side like I've seen on other models.

Here, in order, are pictures of
the kit's tire

my firts test print
my second test print
my third

a real Blockey tire
and the black rubber paint
I've also started work on the fenders. The kit's parts are ok but no more. The mounting rods are very flimsy and don't fit good, especially at the front. So me being me, I 3d modeled them and will test print to see if I can do better. It will be print in 1 piece, the fender with the 2 mounting rods instead of 3 separate pieces. I might need to reprint a few times to get the rods in the correct location but by printing them it's easier to add missing details like rivets, bolt holes...
Kit's rear fender

Kit's front fender

The 3d model
A rear fender ready to print
I've completed the new leather hood straps. The are thin enough not to have the fuzzy back side like I've seen on other models.
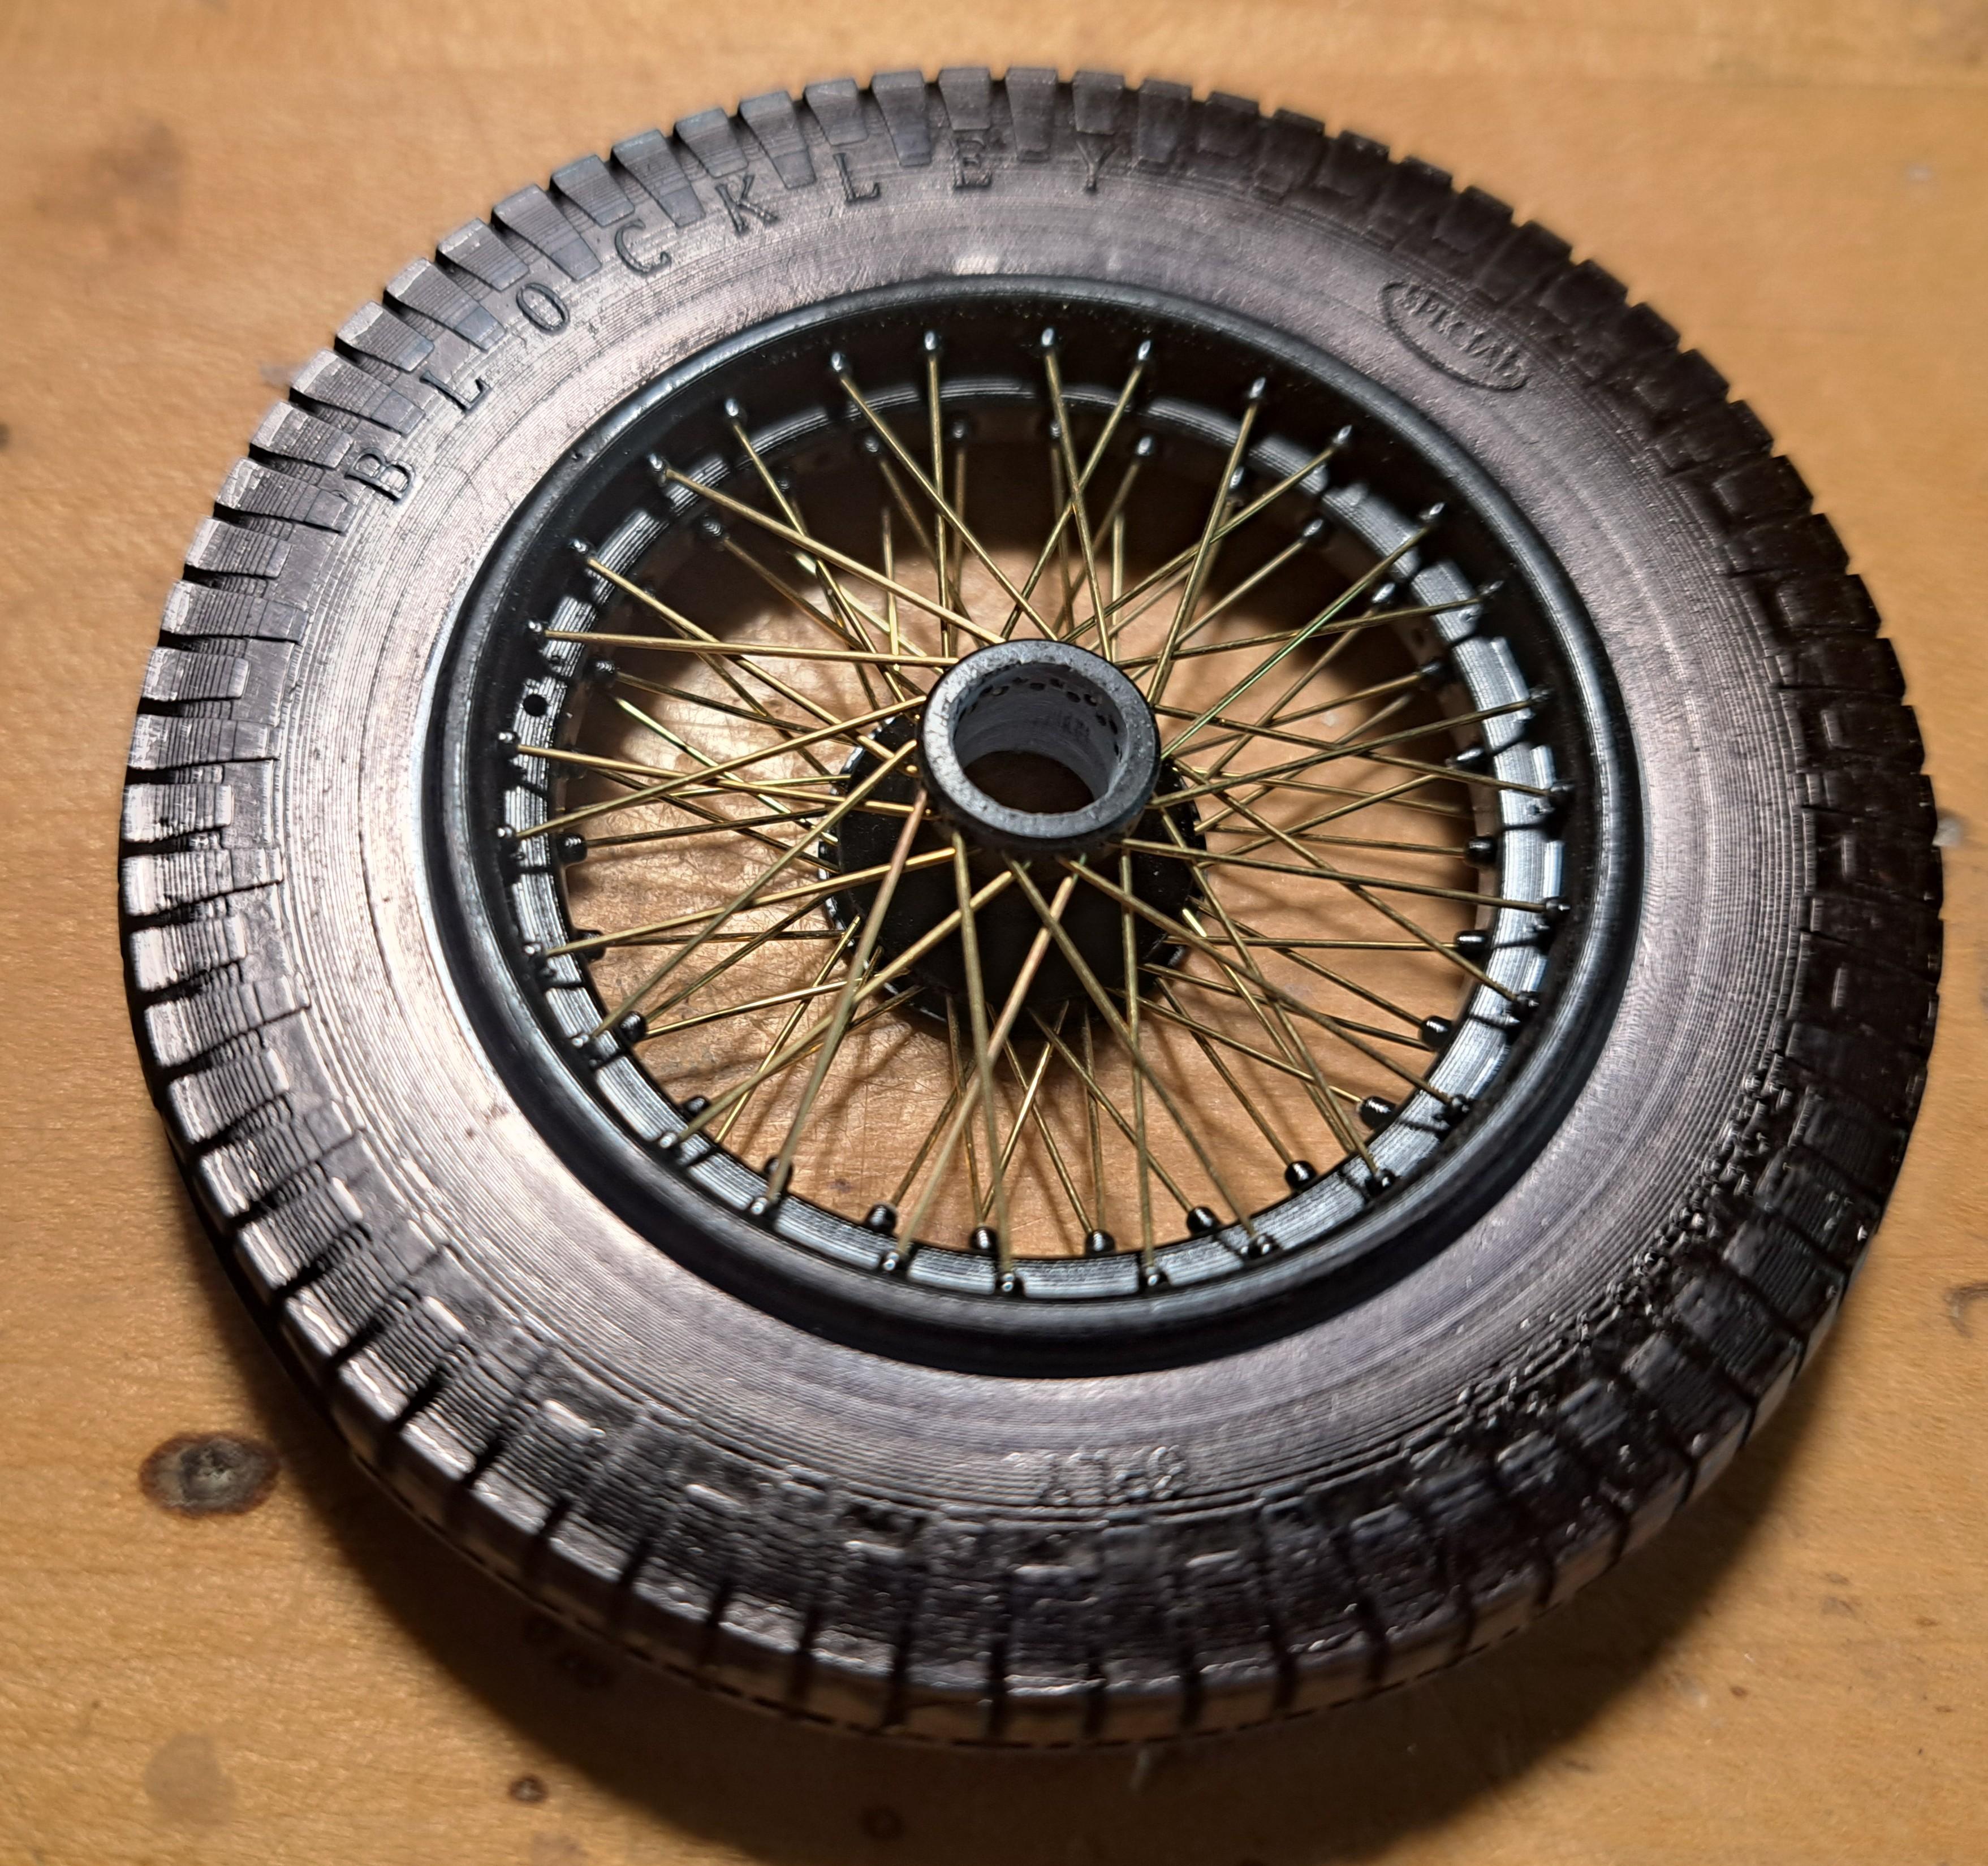
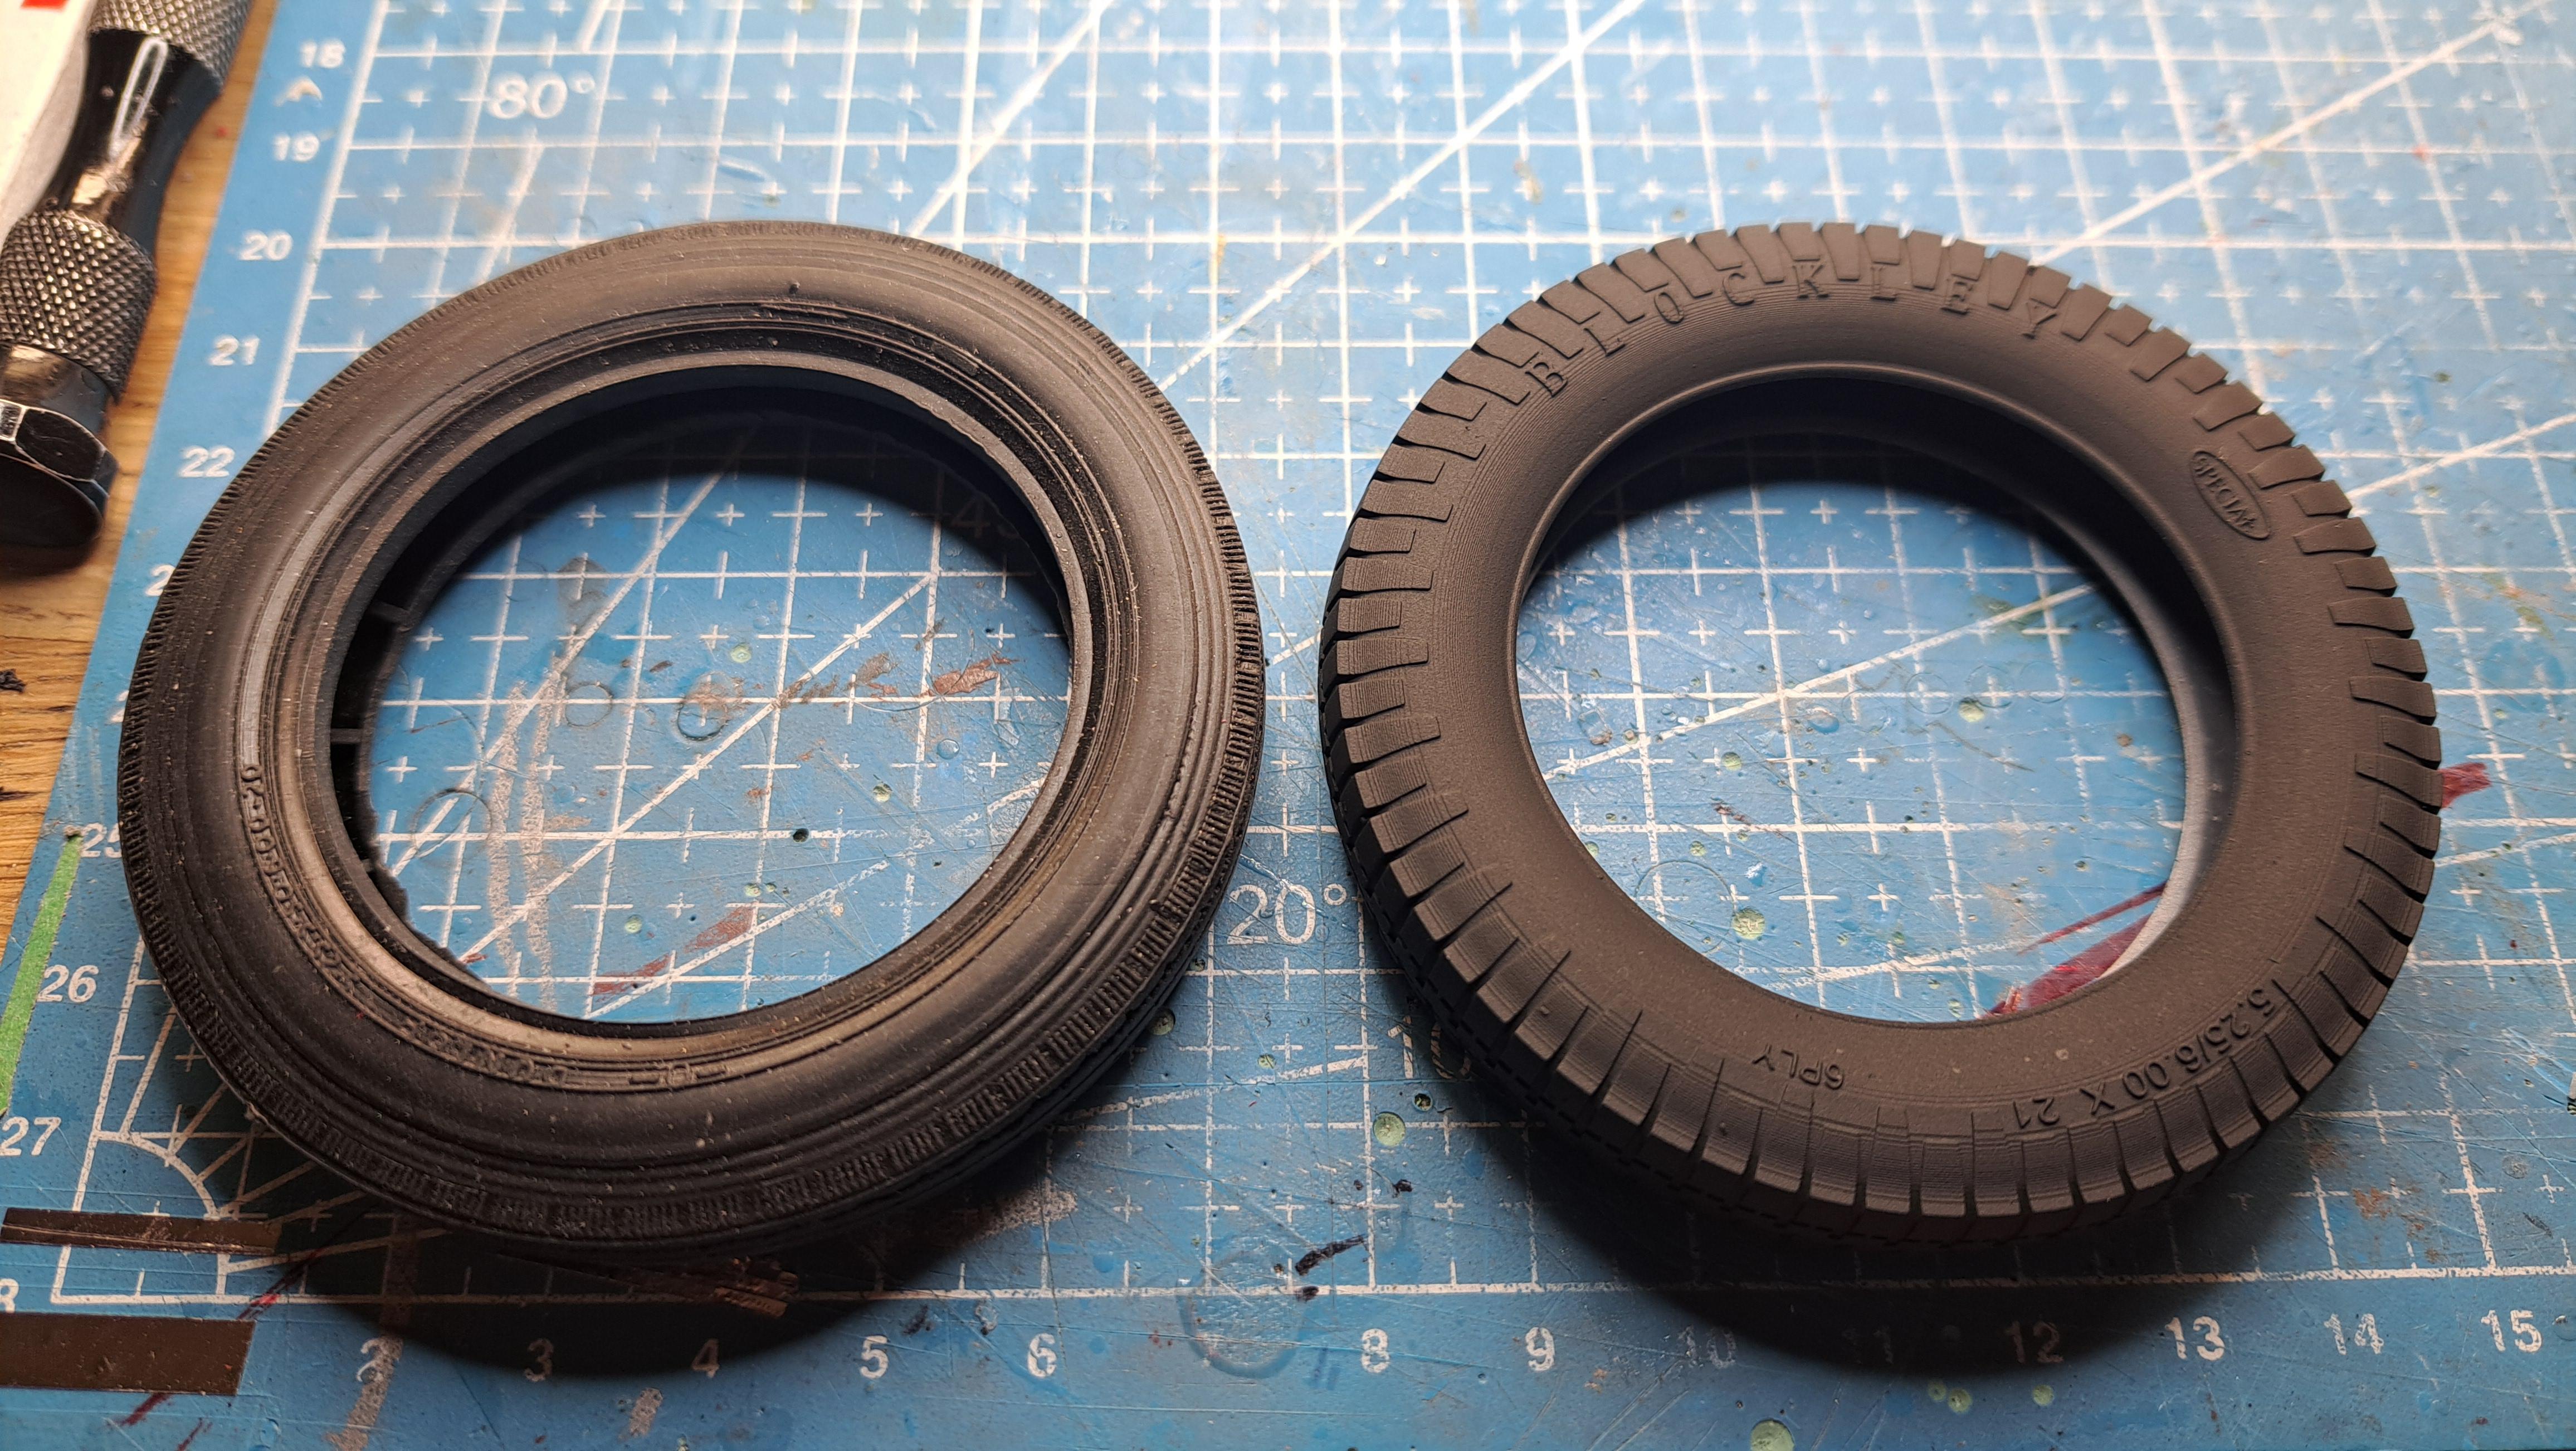
I think I'm getting pretty close to a good tire. For now, it's printed out of regular resin and painted with Tamiya's rubber black. I will eventualy print them will rubber resin.
Left side is kit's tire, right side mine

The finished fenders

And temporarily mounted on car

Left side is kit's tire, right side mine

The finished fenders
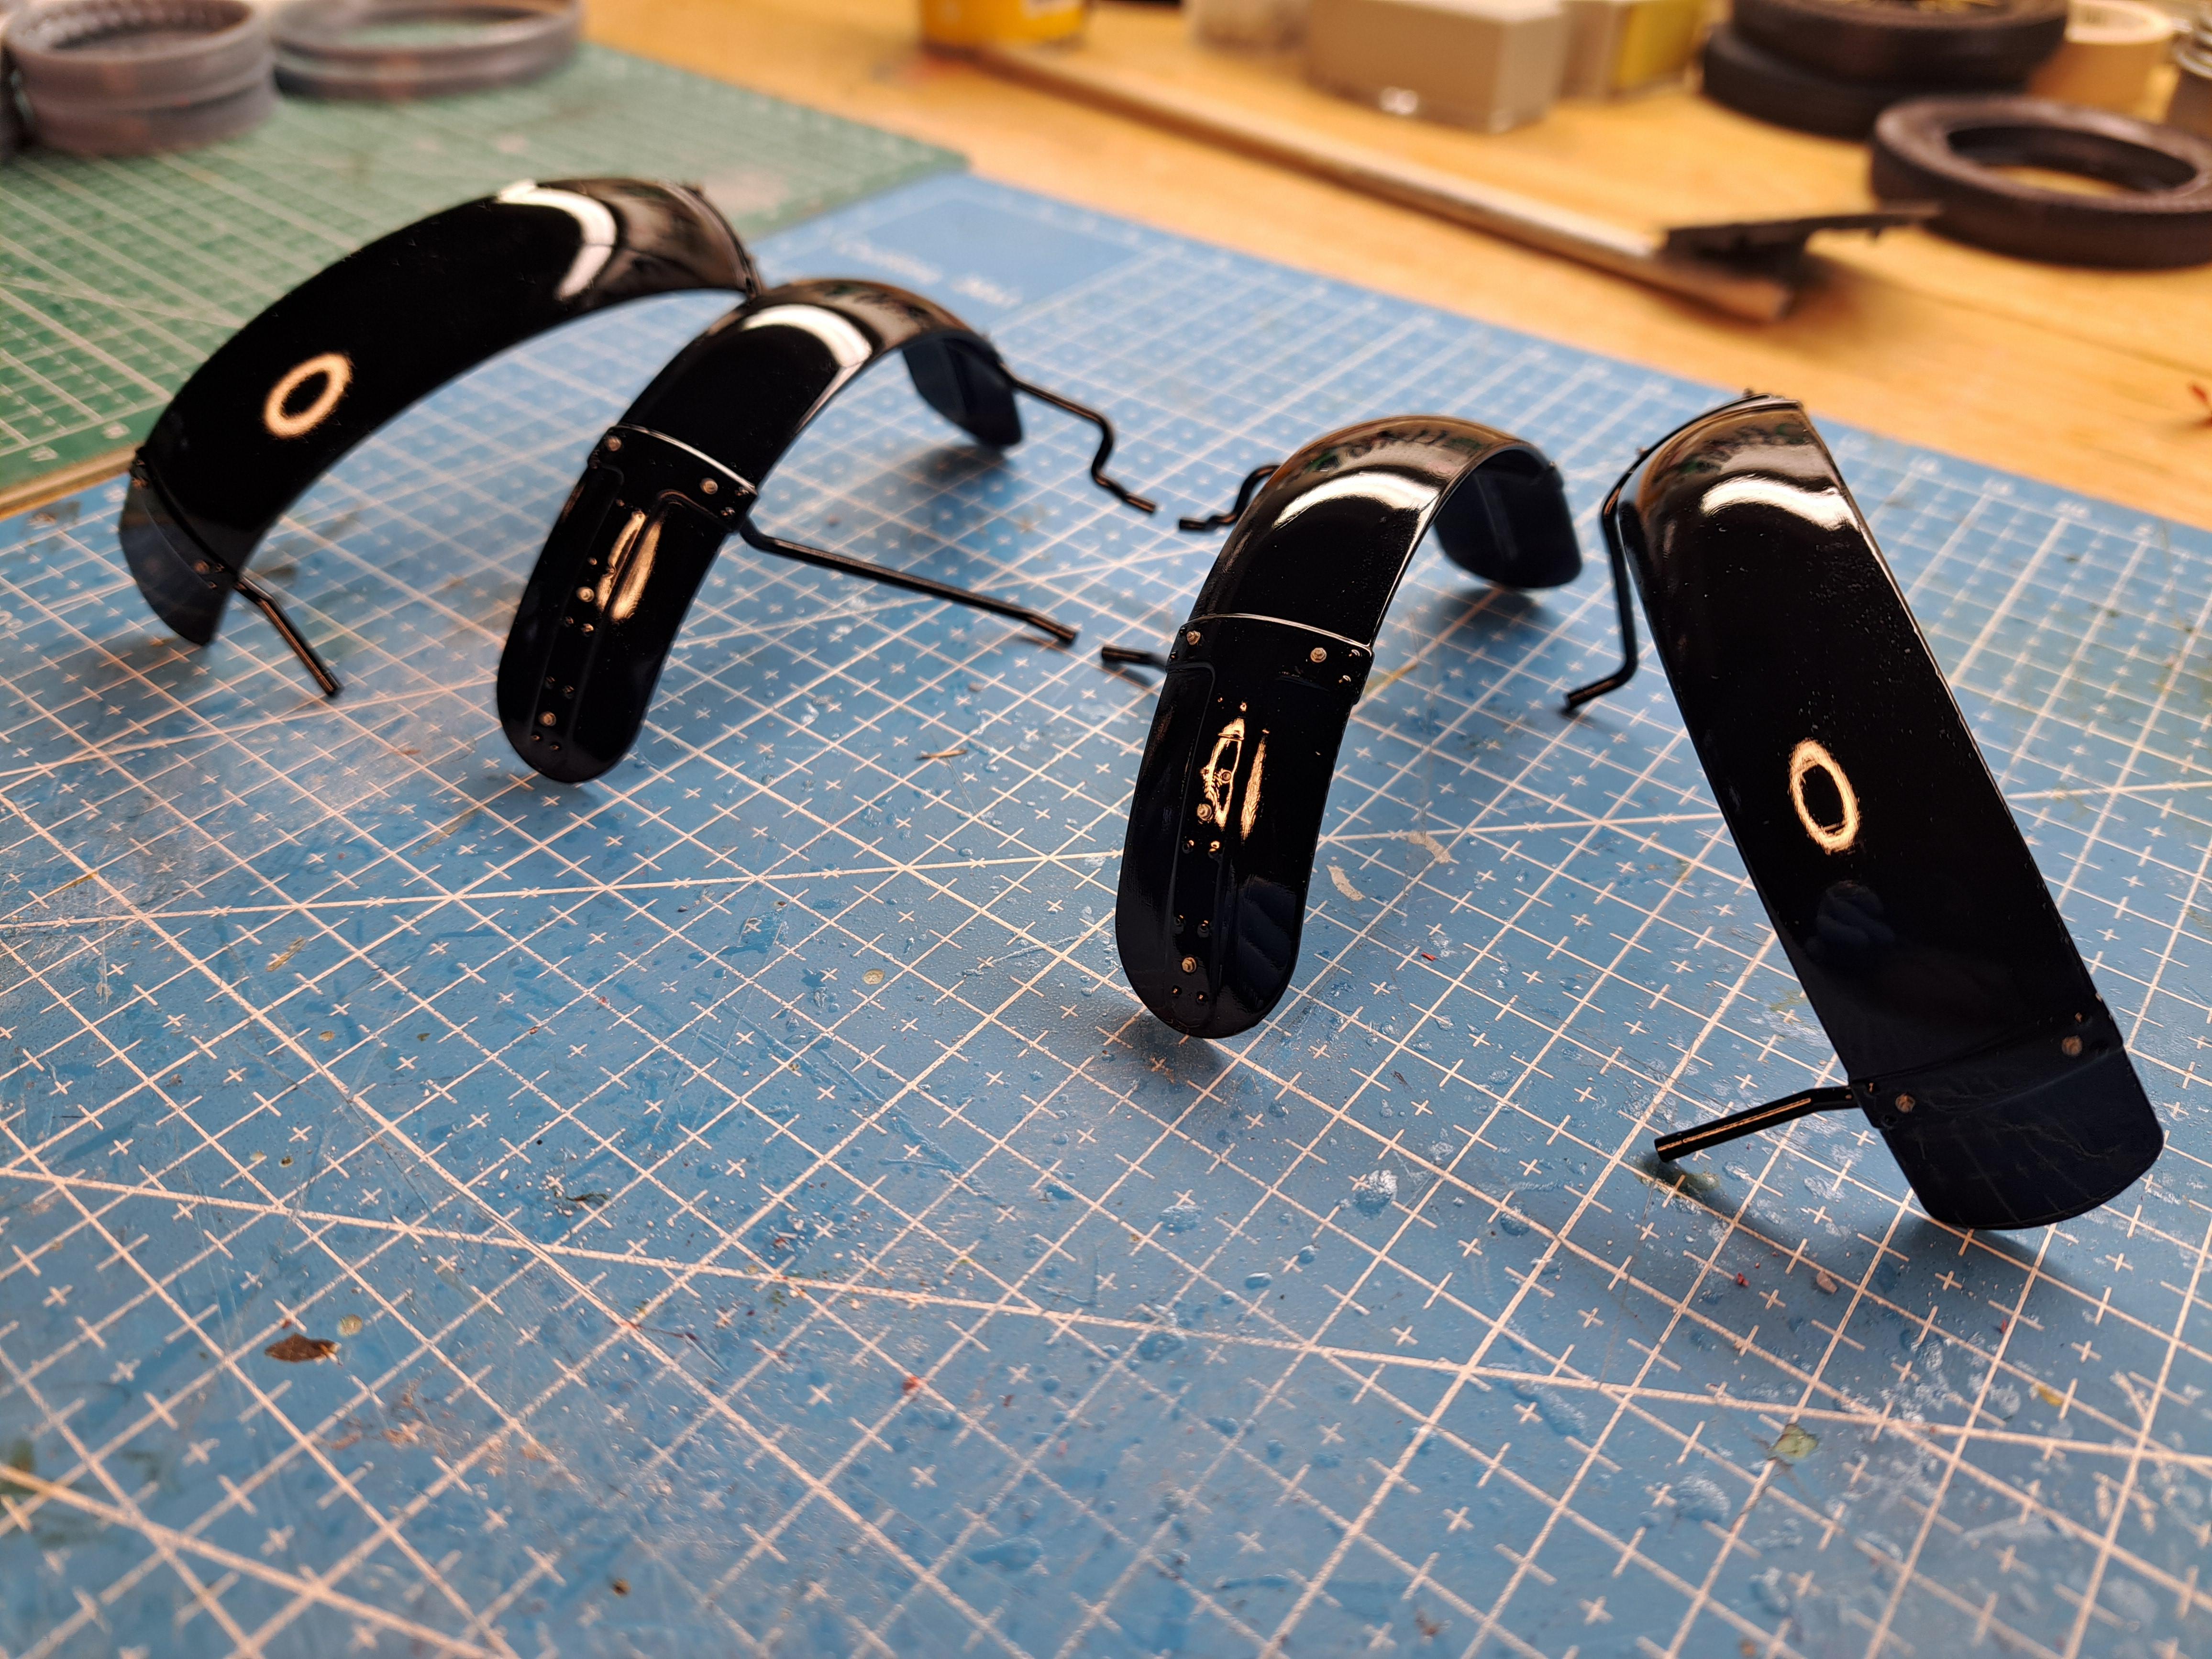
And temporarily mounted on car
- Joined
- Feb 20, 2024
- Messages
- 2
- Points
- 1
Finished the hood straps today. I'll let the radiator cover dry for a couple more days before handling it. So the front end should be pretty much done by the end of the weekend. I also installed the foot step. Next up will be the 4 fenders. I still have the wheels to finish but that can be done just about at any time.
- Joined
- Feb 20, 2024
- Messages
- 2
- Points
- 1
Hi
Have spent an enjoyable hour, reading from start your progress. Very talented and outstanding work. I found this site after googling “ Bentley Airfix” as I am embarking on this kit build and was looking for inspiration and ideas to up detail the kit.
Would you consider printing and selling some of the parts you have designed, eg shock absorbers, horns, etc
Have already made mesh and detailed my fuel tank,
Regards
David
Hello David, thank you for the kind words. You should start a post of your build so we can see your work. I sent you a PM.
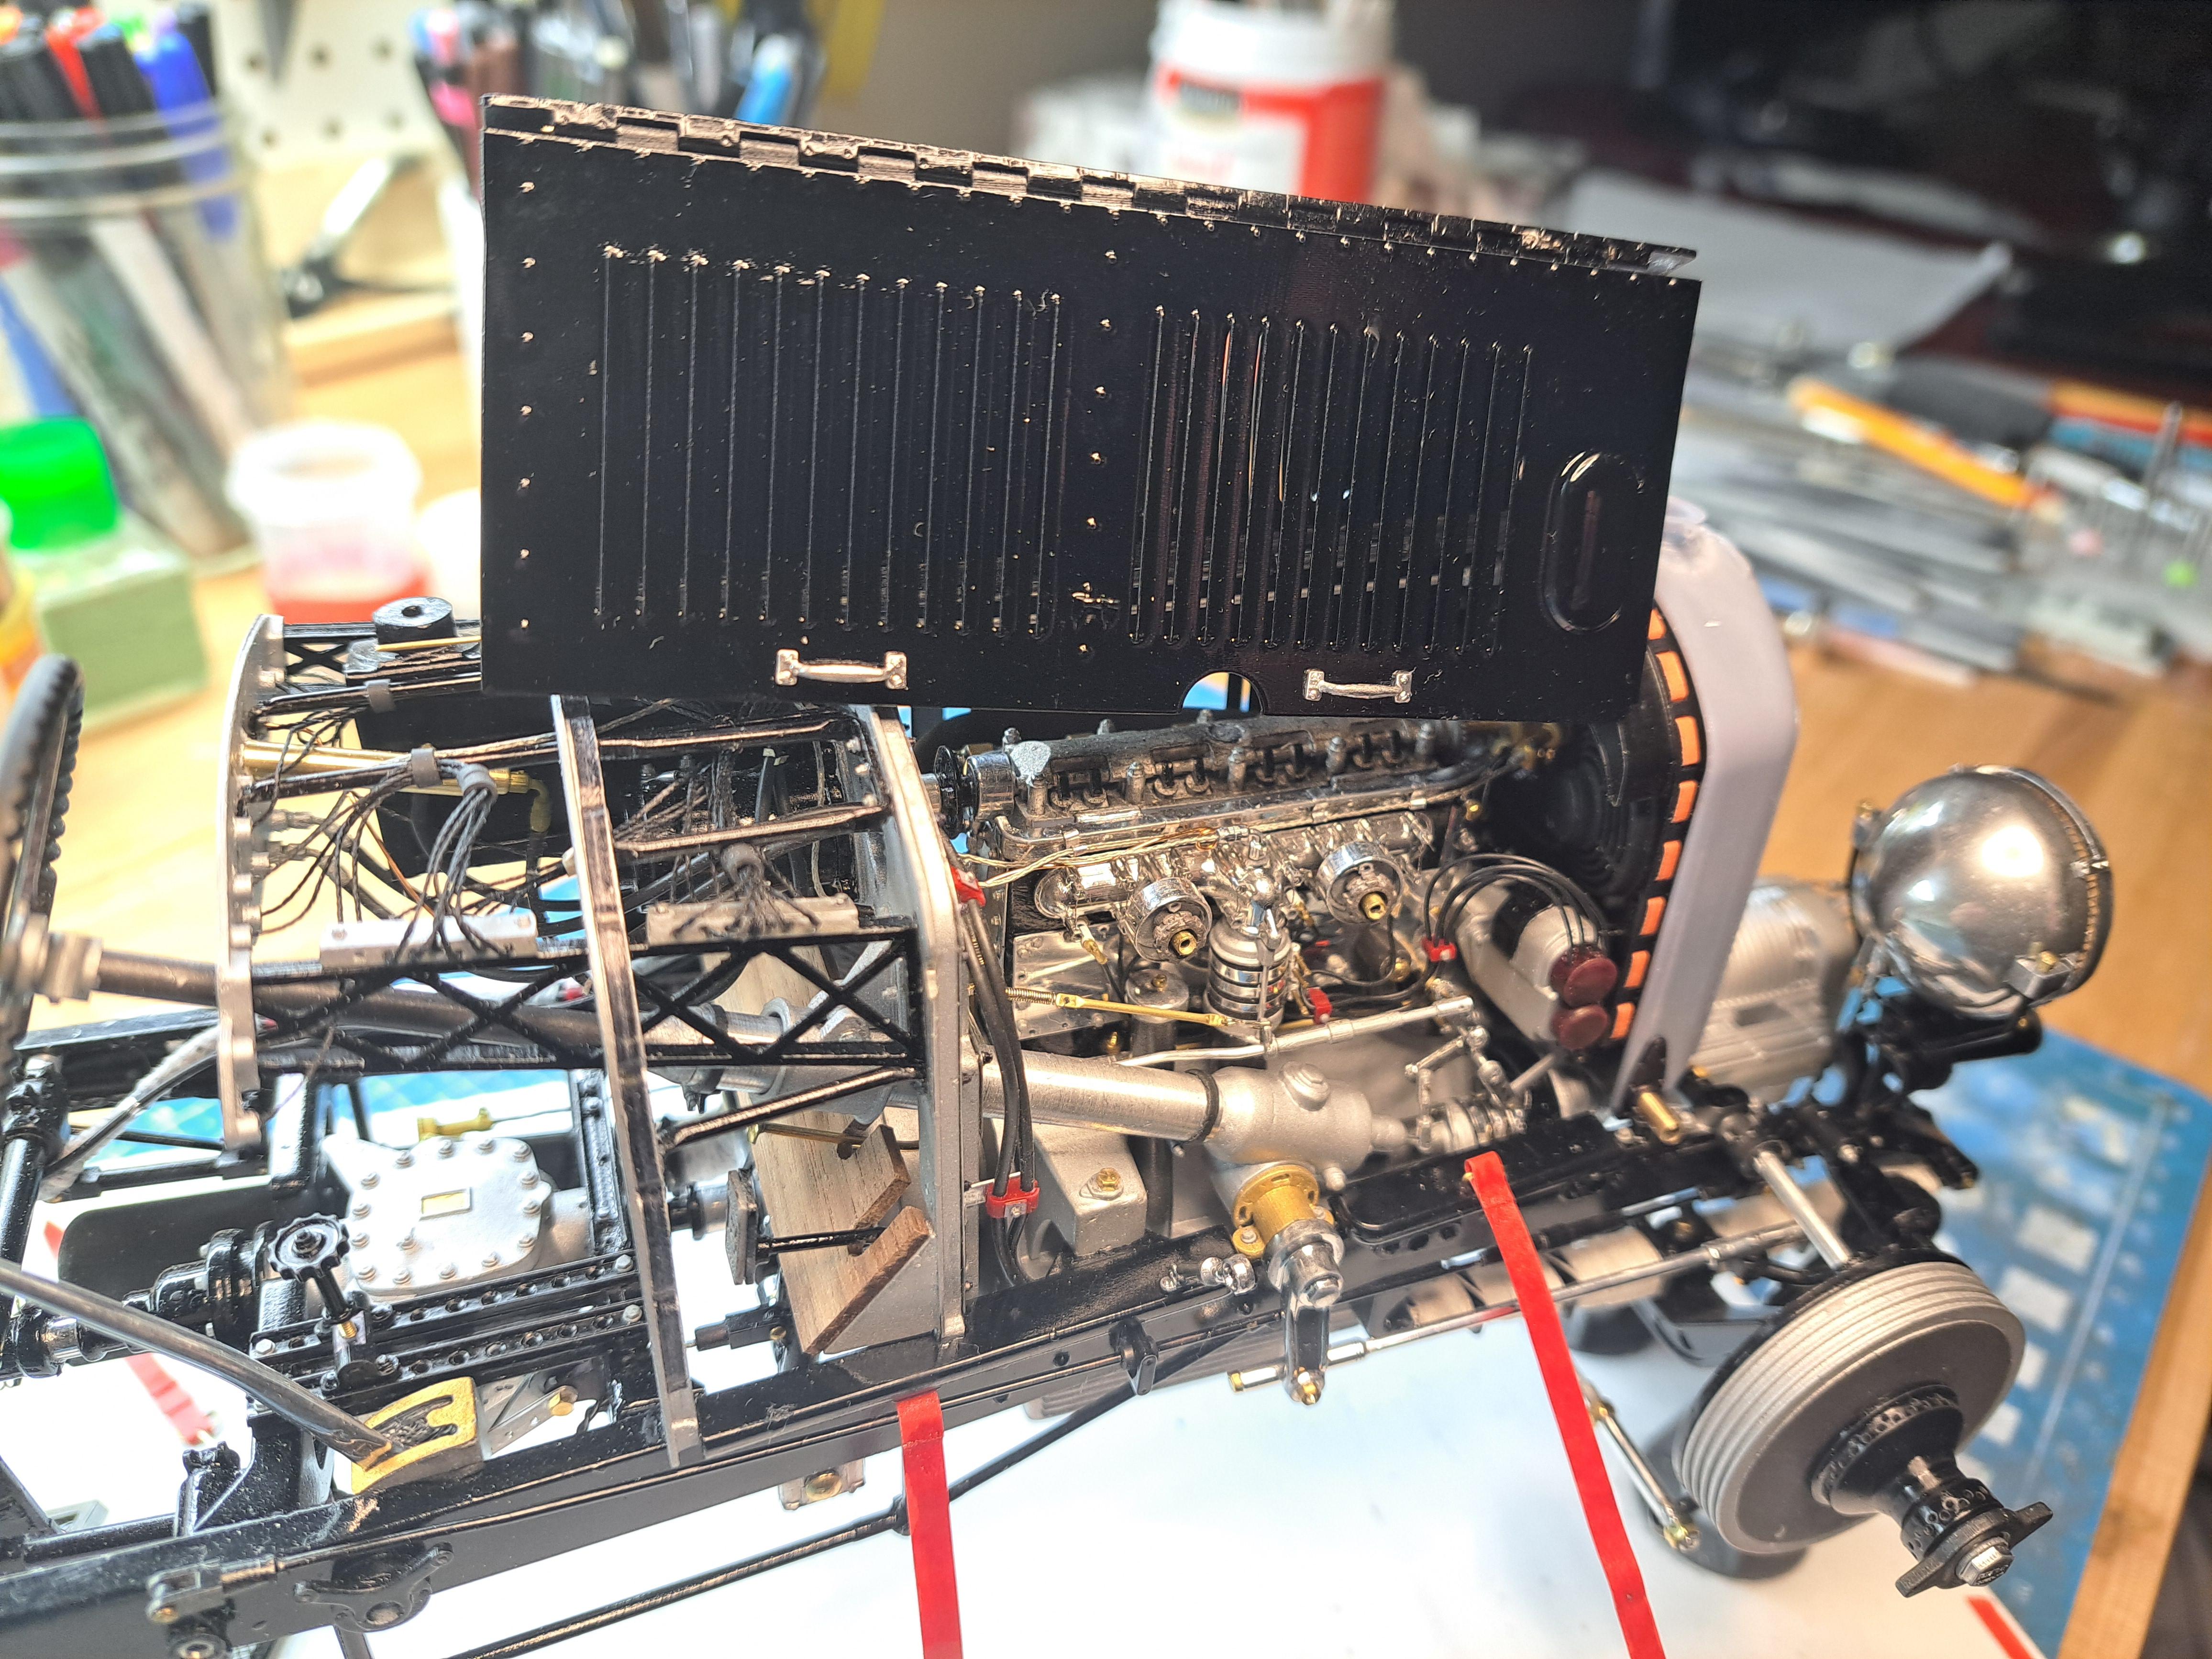
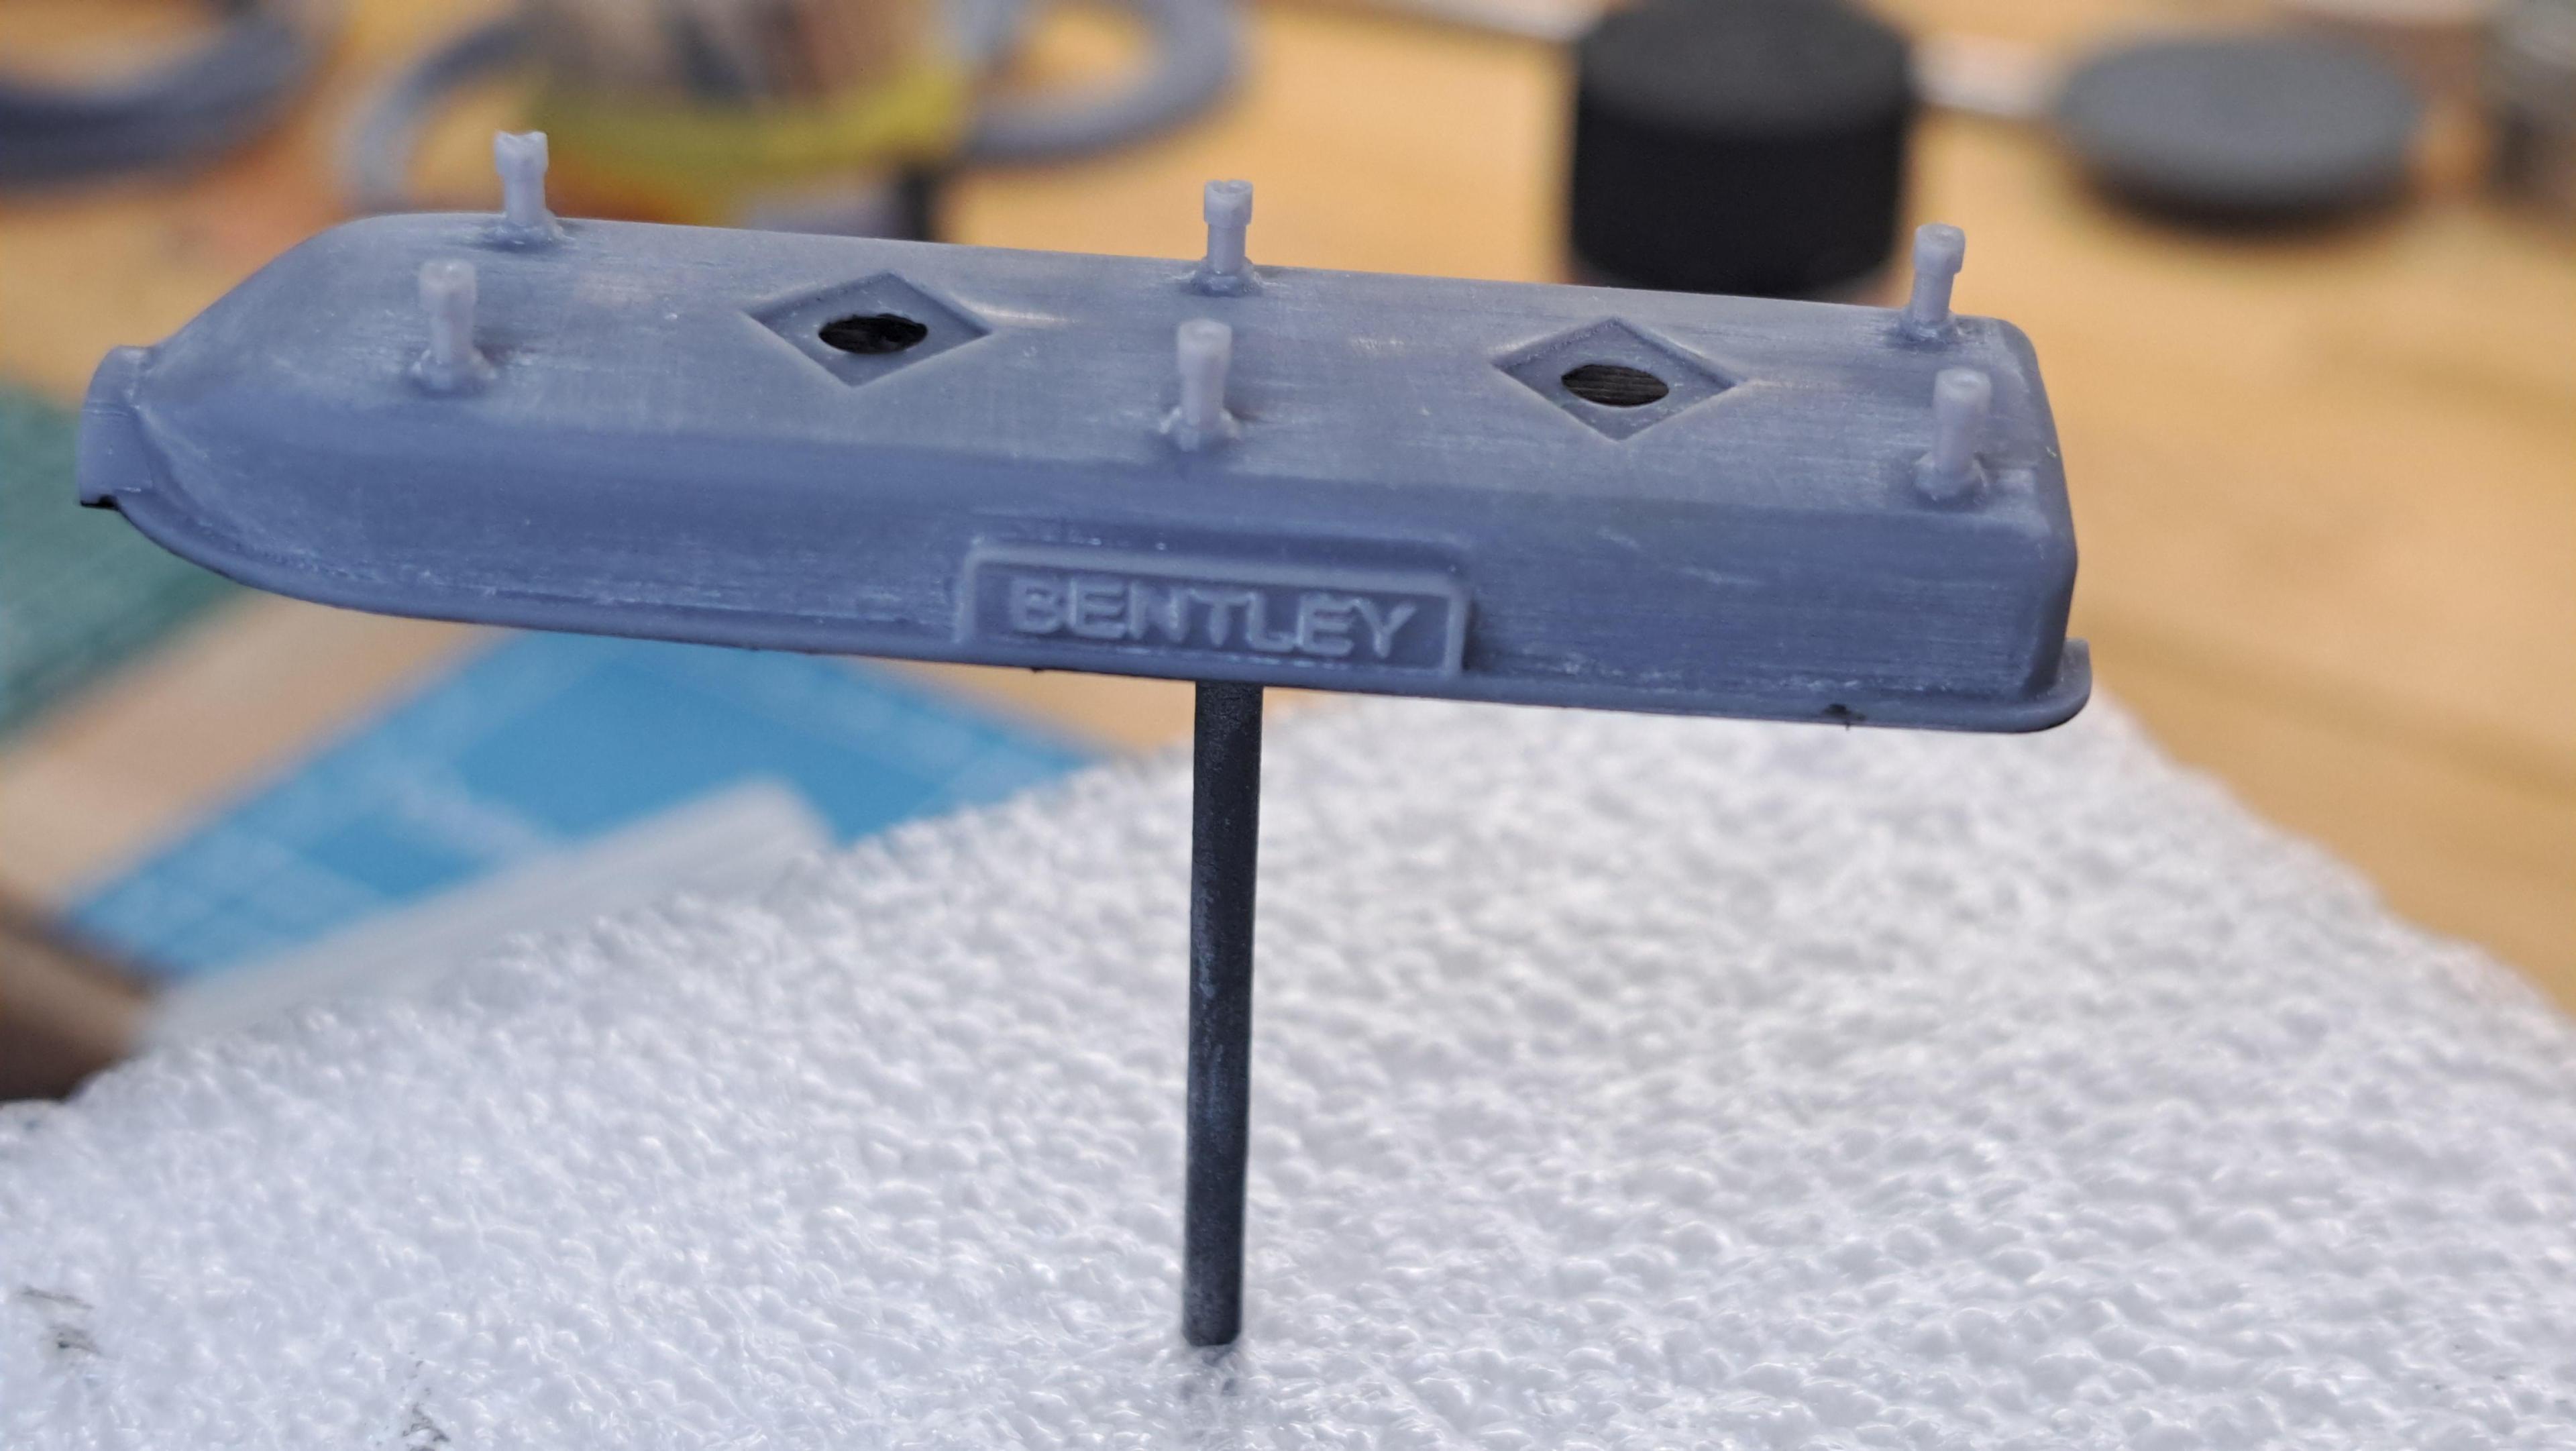
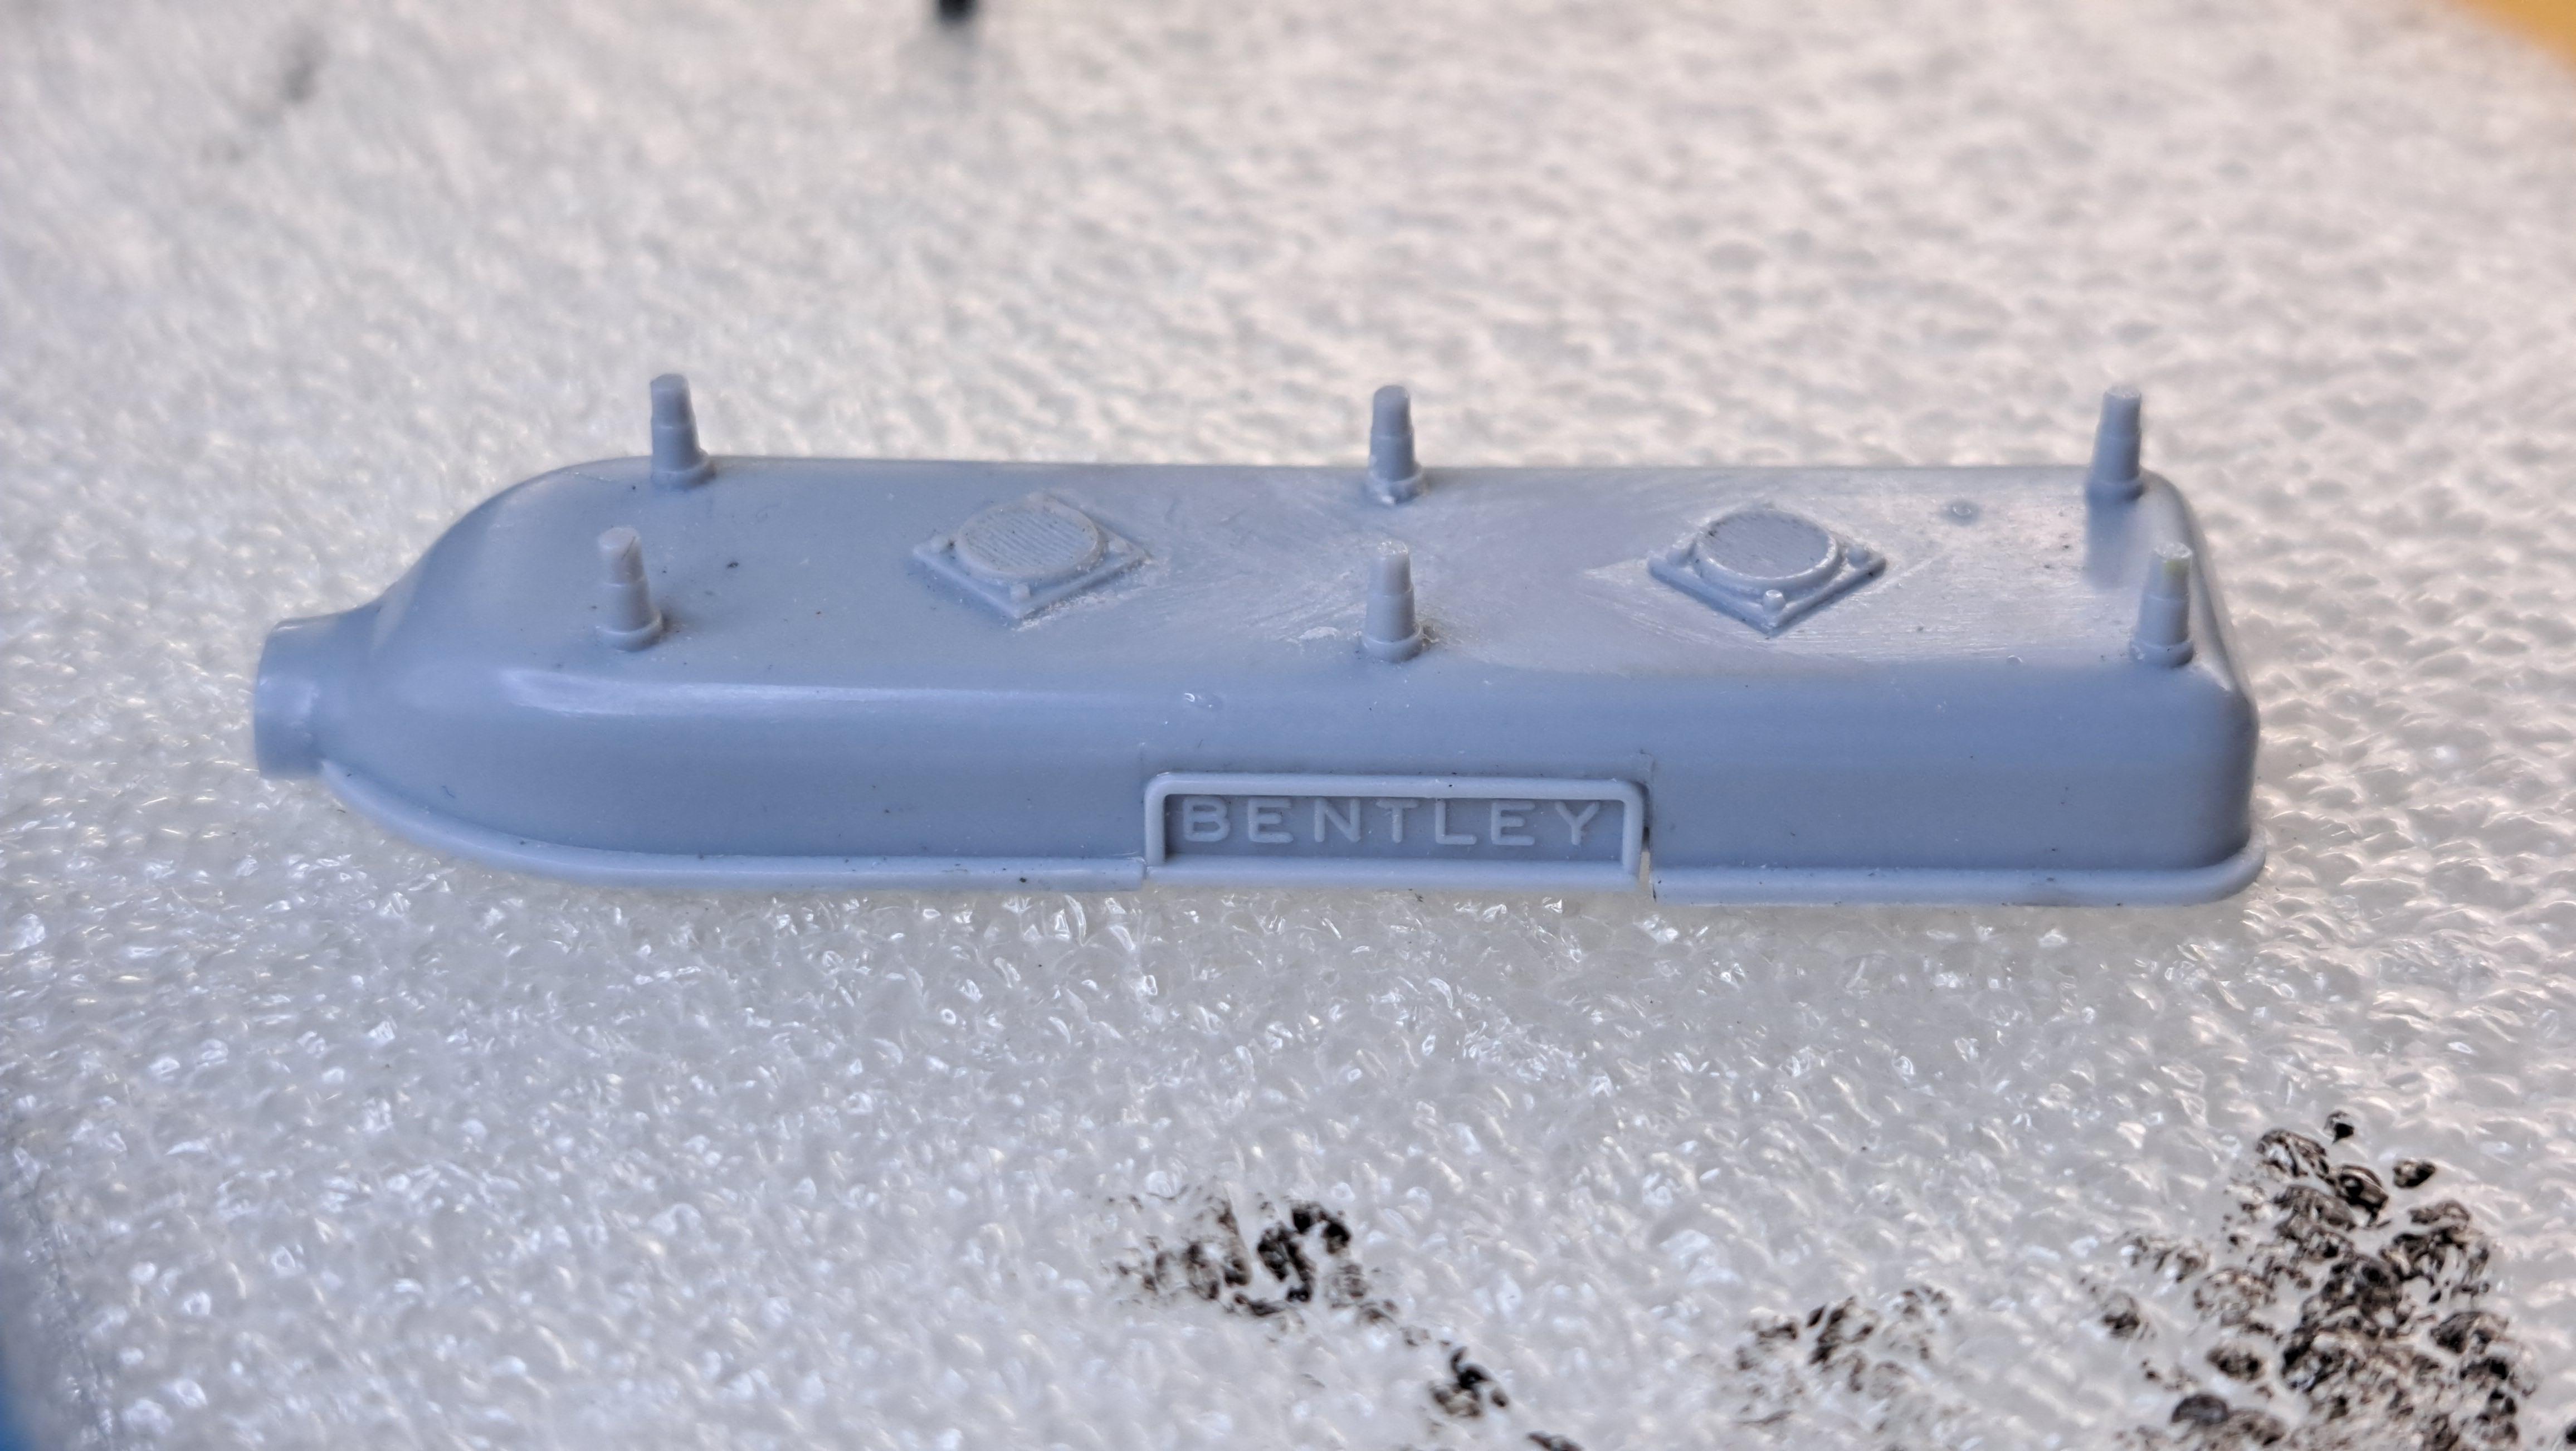
I still have many loose ends to tie up. One of these is the engine top cover. Again, the kit cover, while being ok, is not great. For one thing, the breather plates and mesh are moulded in and not well defined and the 6 mounting bolts don't have the correct shape nor do they have the lockwire holes in them. So I decided to model it and print it.
Here's the kit's cover with everything moulded in

Here's my print. It's hard to see but all 6 studs have a tiny hole on It's tip for the lockwire
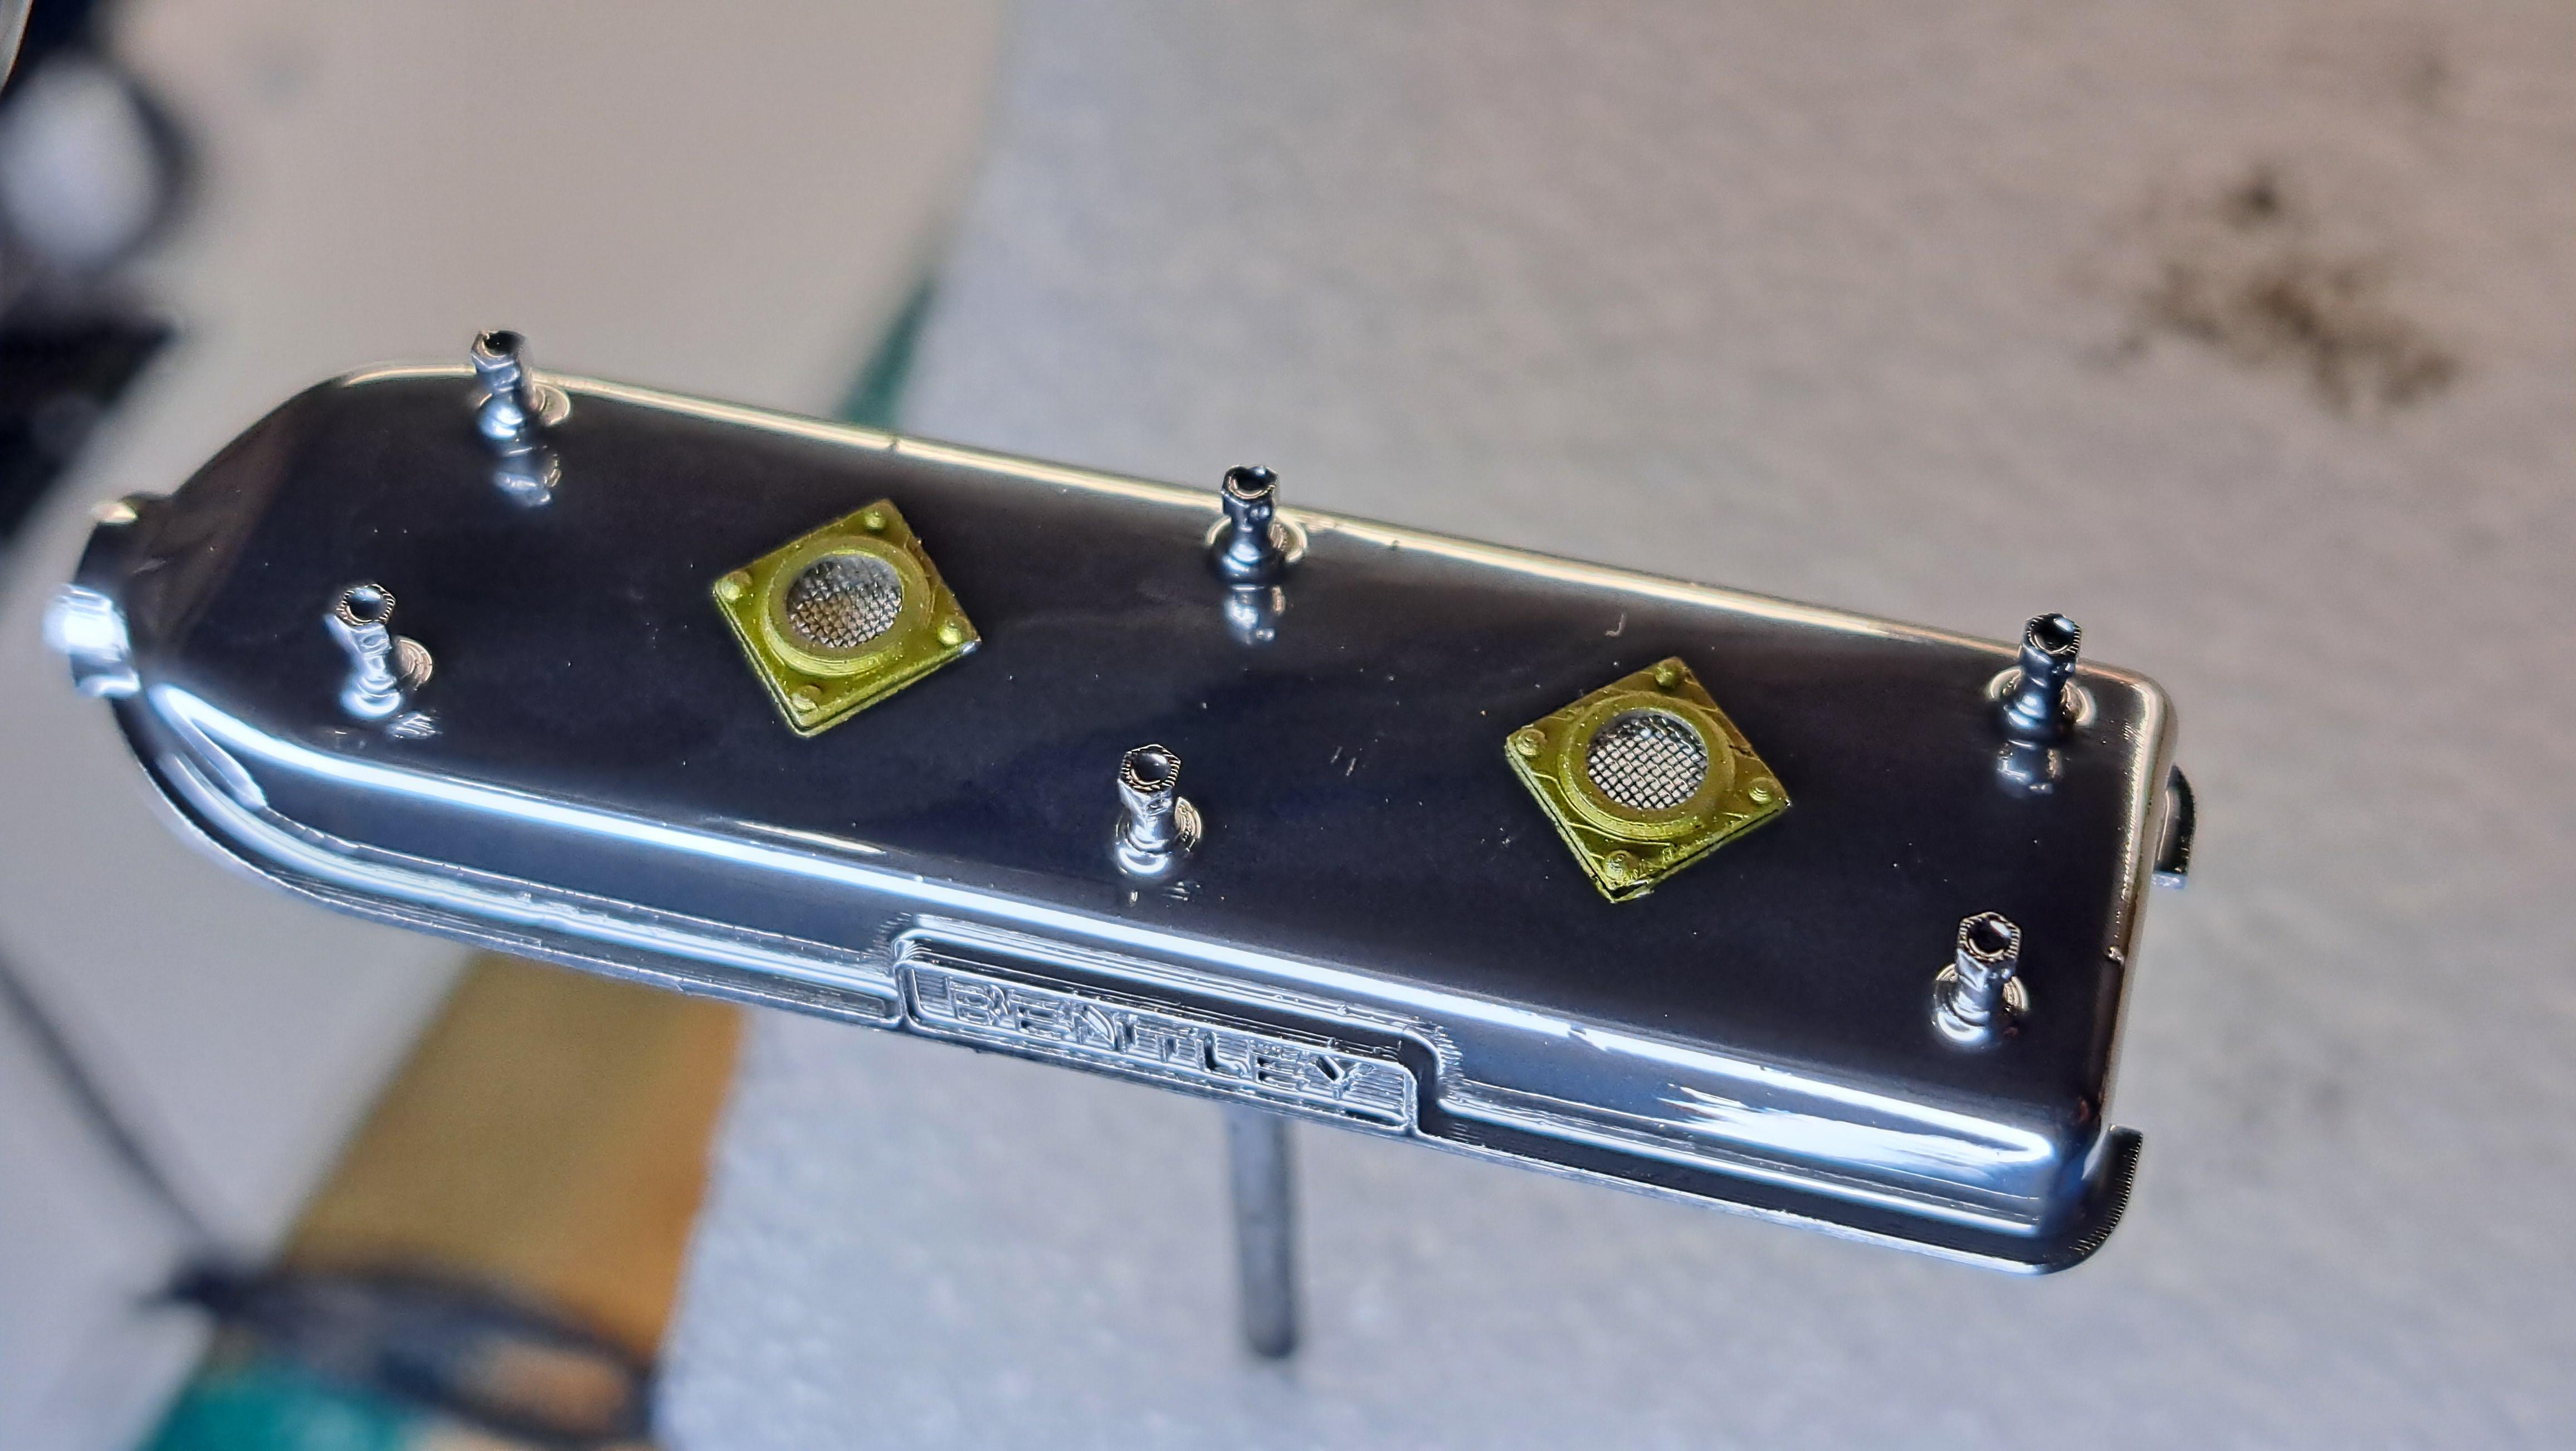
The kit's moulded breather plate next to mine which has a micro mesh

My cover chromed and with the vents installed, still need to paint the contour of the letters in black and to install the lockwire

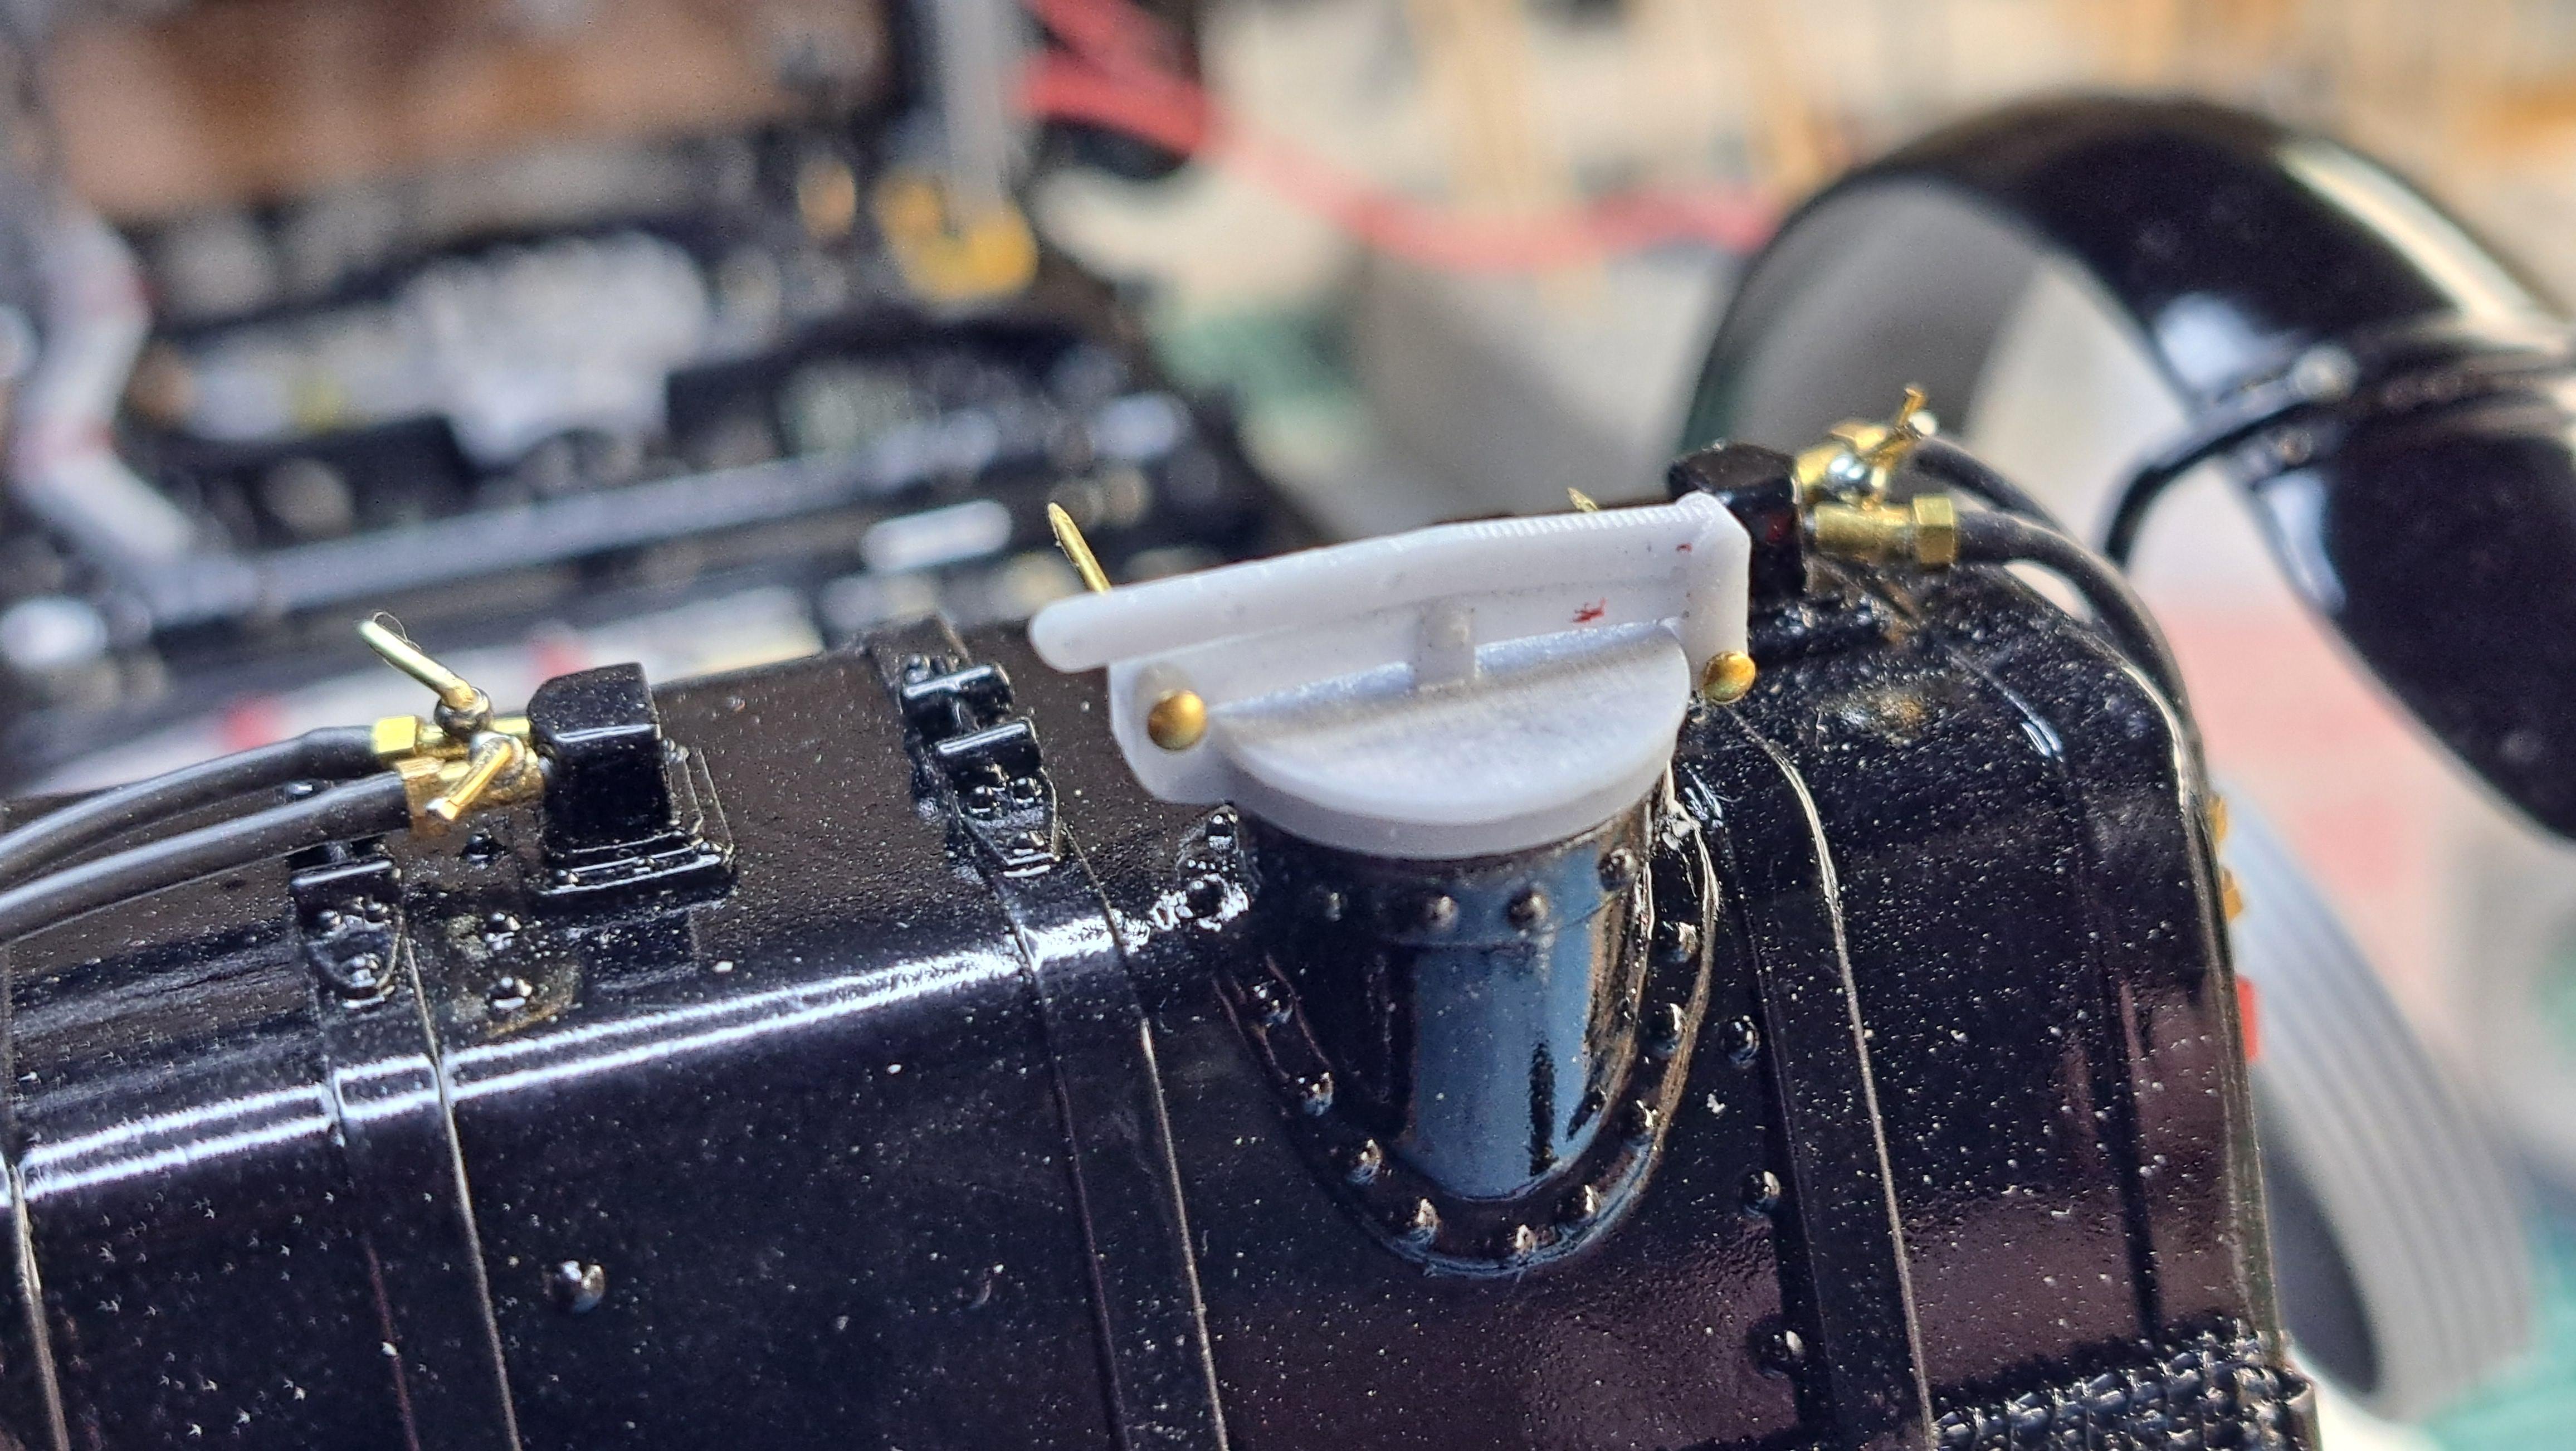
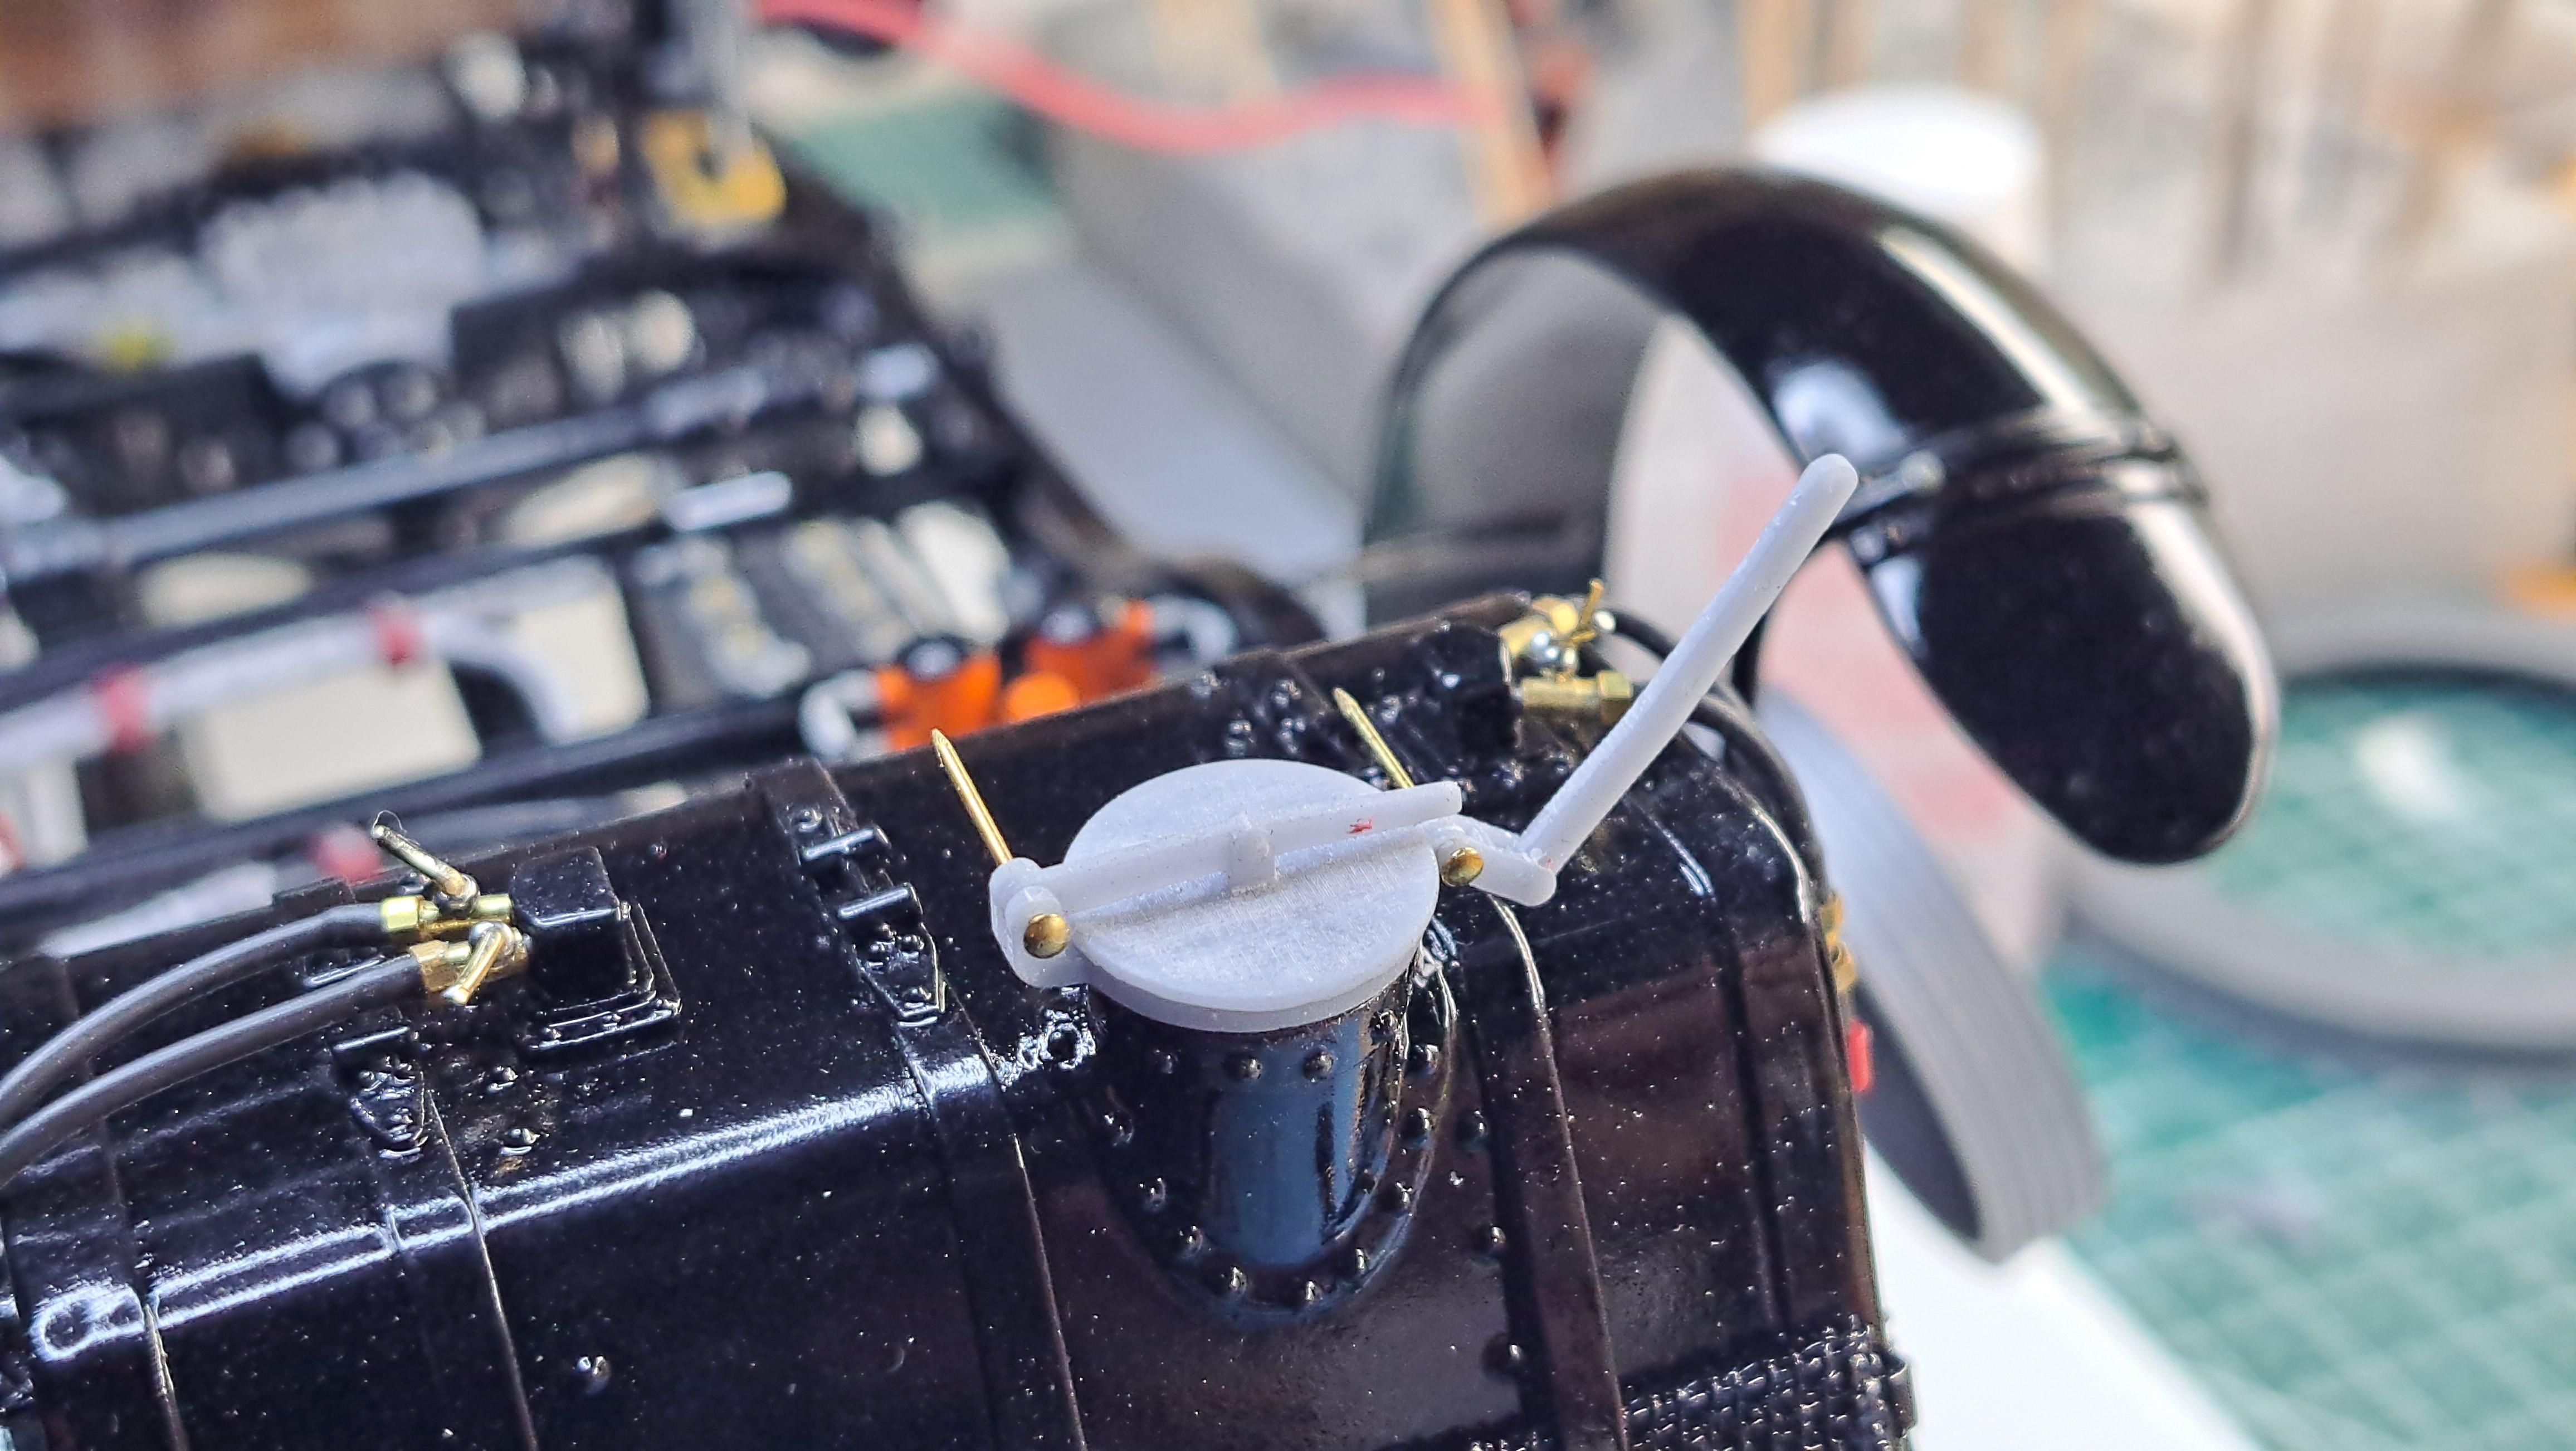
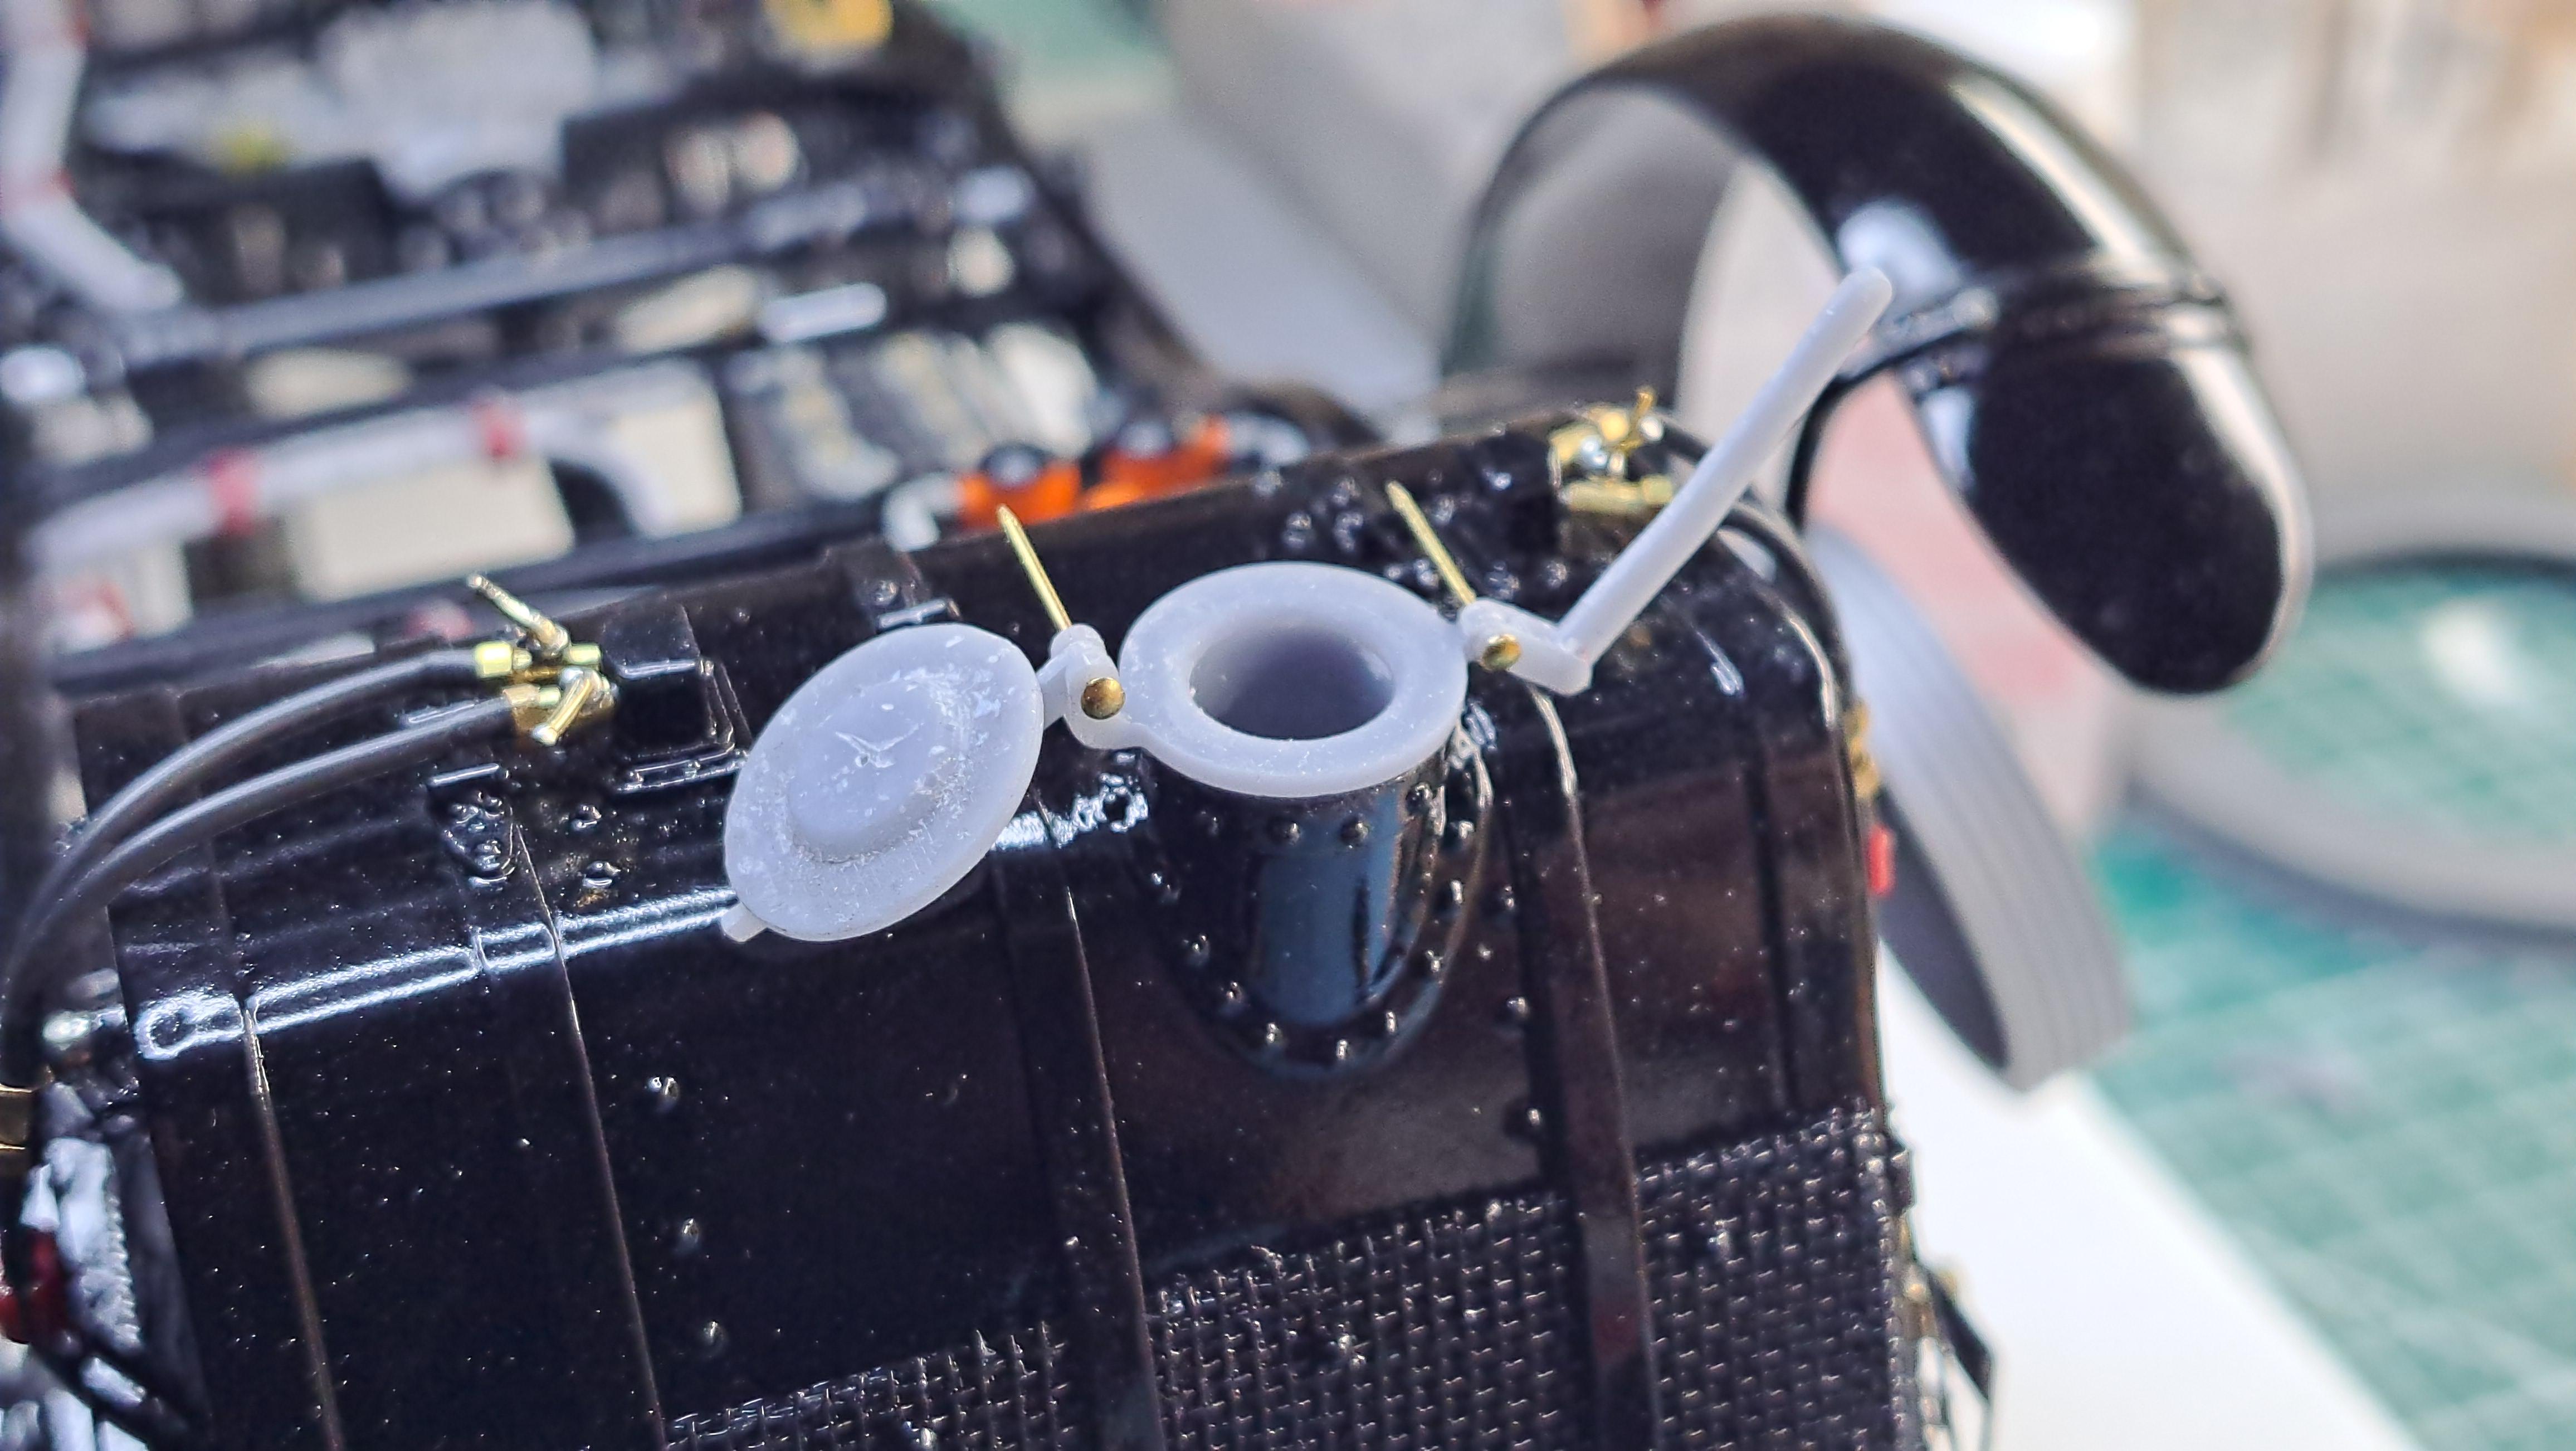
Another loose end was the gas cap. Having already done the radiator cap, it was easy to just modify the cad a bit to make it bigger and to print it.
The kit's cap

My cap closed

With handle opened

And lid opened

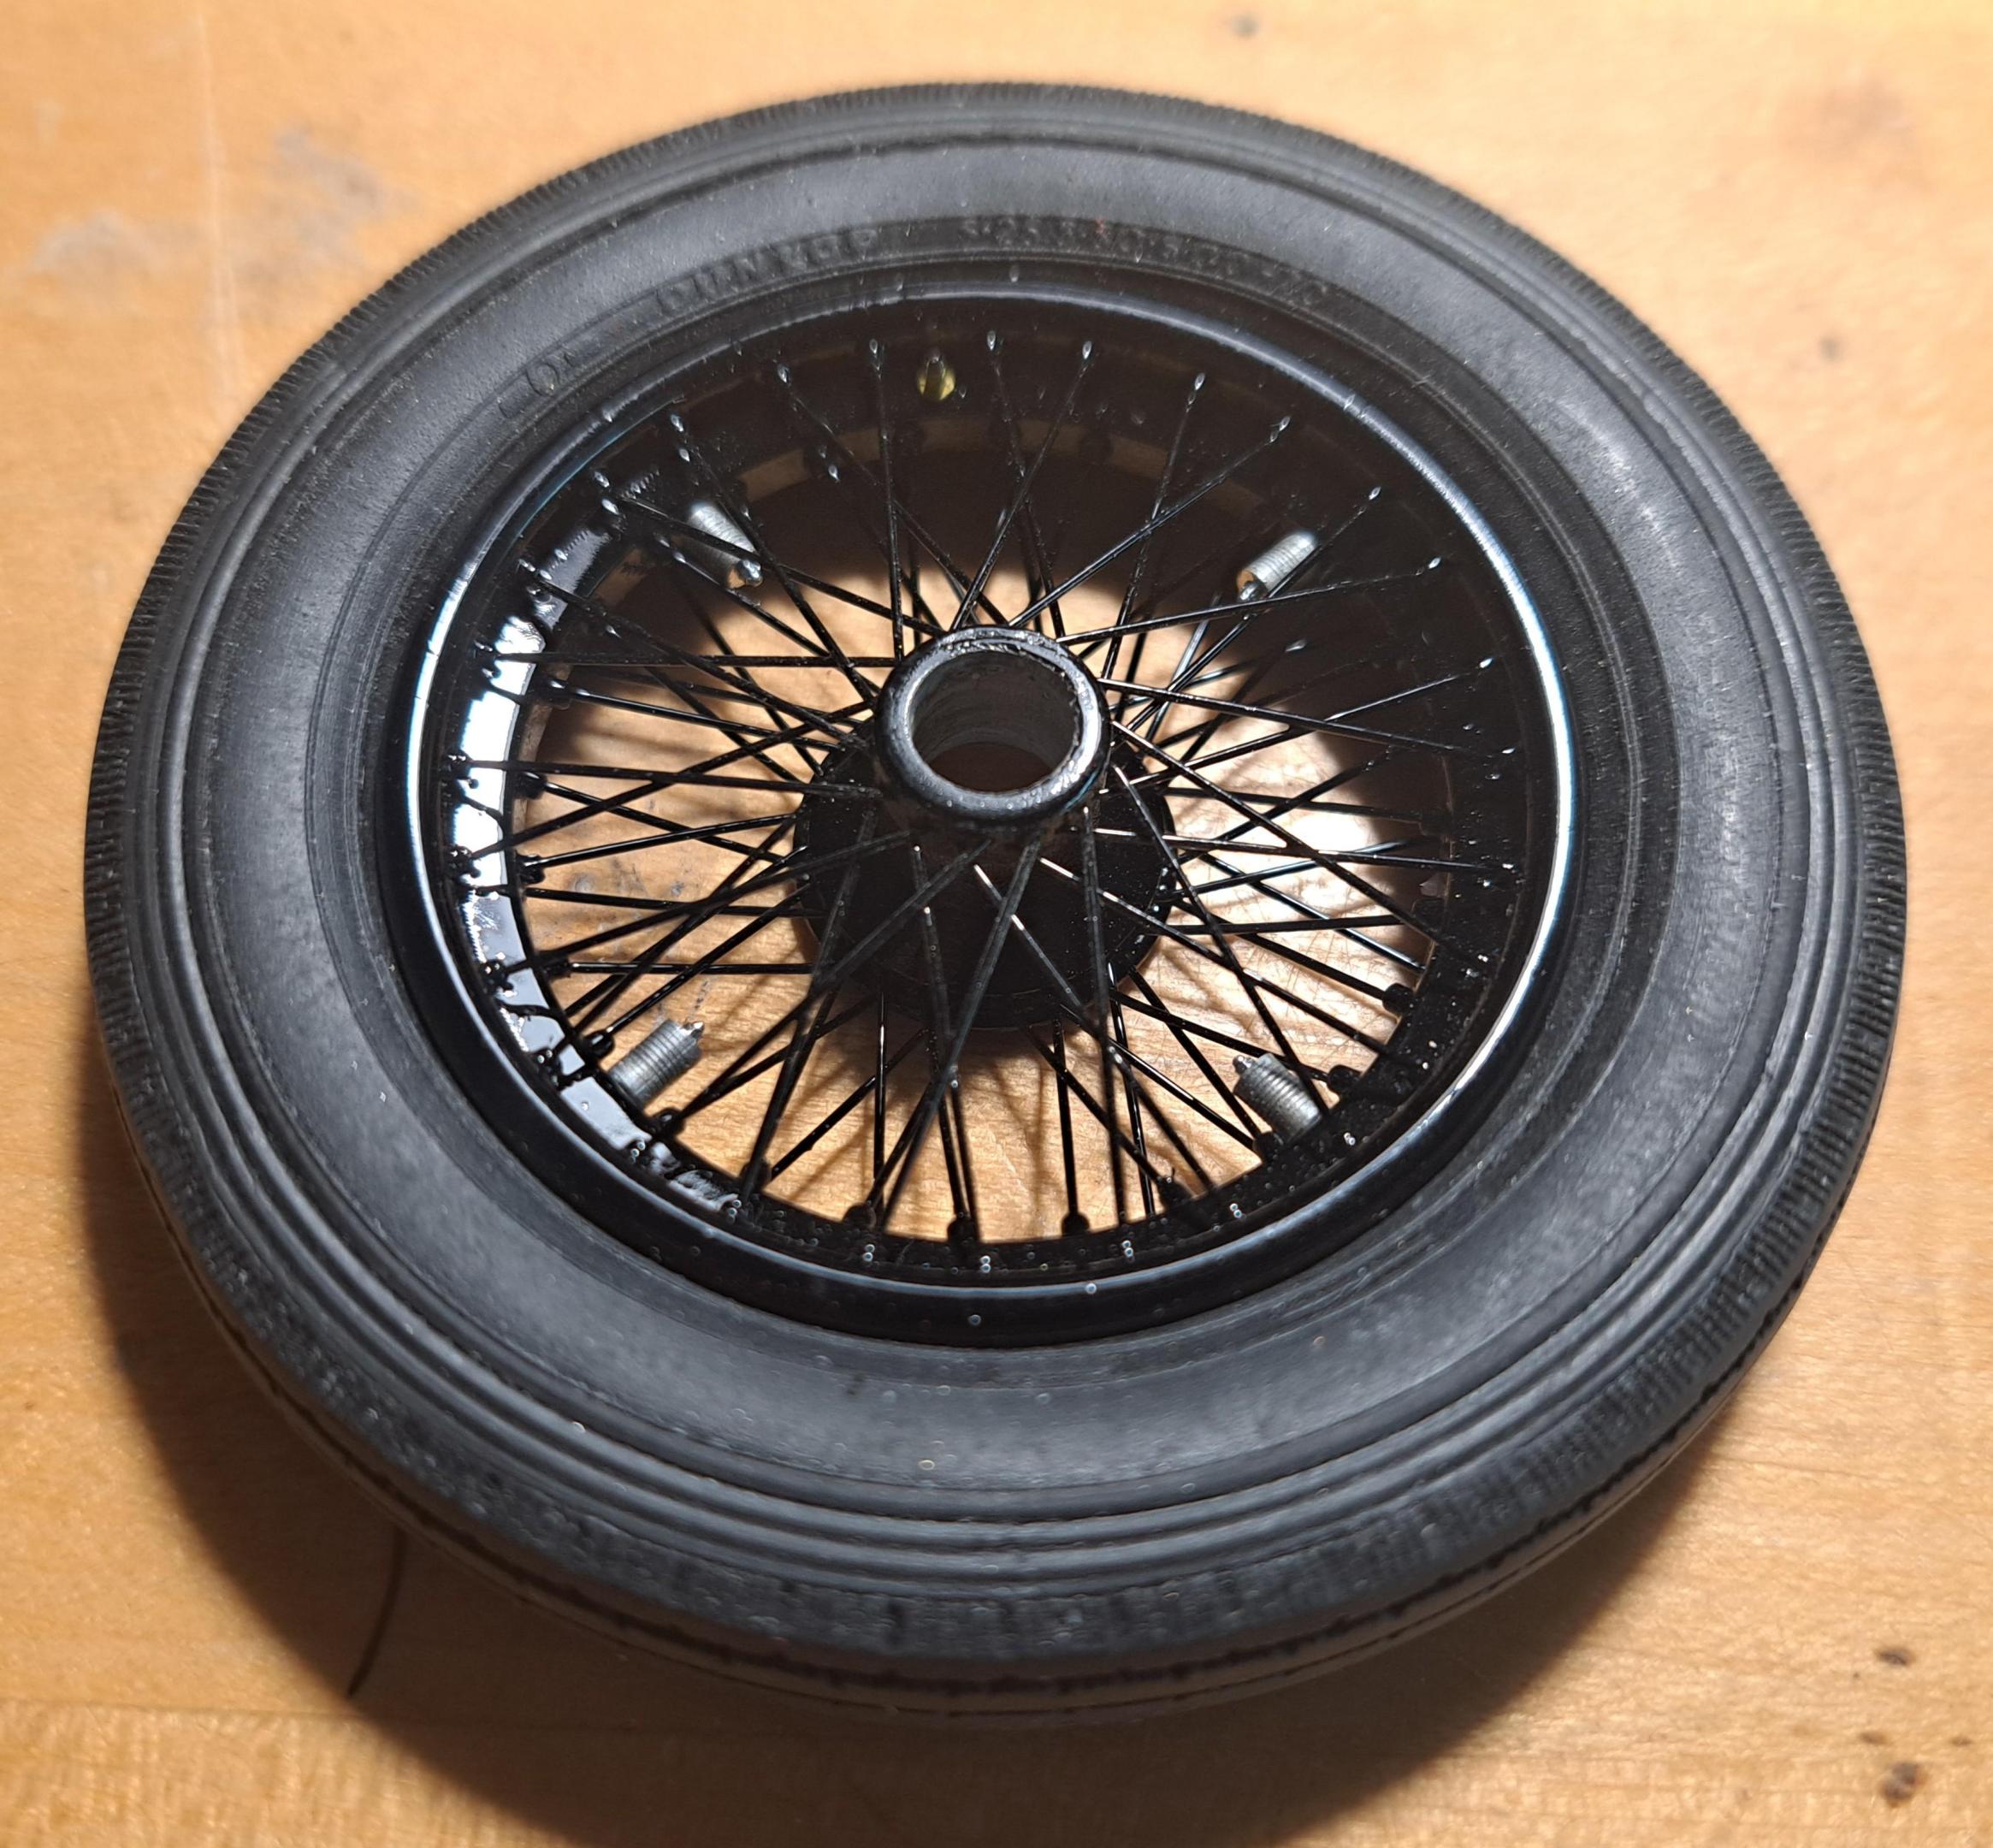
last thing I did today was to paint the tires and a new set of wheel rims. I should be ready to lace them tomorrow.

Here's the kit's cover with everything moulded in
Here's my print. It's hard to see but all 6 studs have a tiny hole on It's tip for the lockwire

The kit's moulded breather plate next to mine which has a micro mesh

My cover chromed and with the vents installed, still need to paint the contour of the letters in black and to install the lockwire
Another loose end was the gas cap. Having already done the radiator cap, it was easy to just modify the cad a bit to make it bigger and to print it.
The kit's cap
My cap closed
With handle opened
And lid opened
last thing I did today was to paint the tires and a new set of wheel rims. I should be ready to lace them tomorrow.


Fantastic work Francois, love all the tiny deyails and upgrades you do on this build.
Currently working on a restoration of the final drive and hydraulic system of my 1975 Rolls Royce so can imagine the workload you have to do it in miniature. Just love it.

Currently working on a restoration of the final drive and hydraulic system of my 1975 Rolls Royce so can imagine the workload you have to do it in miniature. Just love it.