Amati Riva Aquarama by Ken [COMPLETED BUILD]

Ken

Joined
Dec 16, 2016
Messages
968
Points
453

Hello. I am going to build the Amati Riva, Aquarama, an Italian runabout. Although it can be built for radio control I will be making it a static display model and will mostly just show my progress rather than do a very of detailed log of the build.

I’m just putting the final touches to my Amerigo Vespucci build so actual building won’t start for a week or so, this is just an introduction to the kit. For those that have been following my Amerigo Vespucci build you’ll know how this build has come about but for others let me explain. This is not my normal type of build, I’m the three masts, cannons and lots of rigging type, Victory, Royal William etc, however I usually take on a lesser build between major projects usually for friends and often plastic, see my Titanic. I have a good friend who has a small business making and fitting windows, he collects and displays models but he doesn’t make them, he wanted a model of this boat and has asked me if he supplied the kit would I make it up for him, in return as he had the facilities he would make me a glass display case for my Amerigo. Now that was too good an offer to turn down so I agreed and the kit arrived.

001.JPG


This Riva is a beautiful and iconic boat that evokes classic Italian style from the 60s it is a millionaire’s toy with two twelve cylinder Lamborghini engines, you can just imagine Sophia Loren and Cary Grant stepping off one of these as they pull onto a restaurant jetty for lunch.

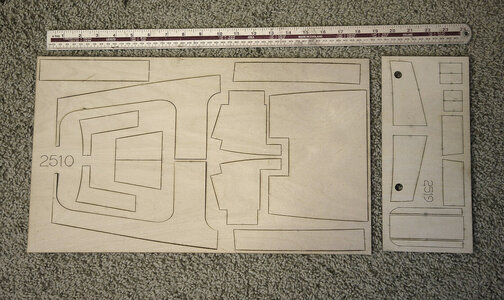
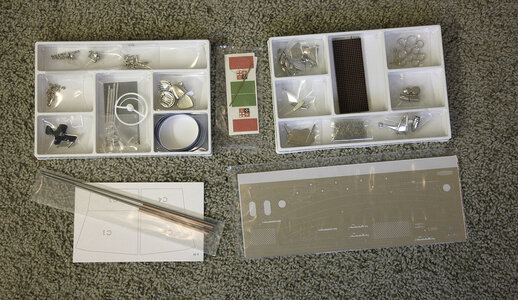
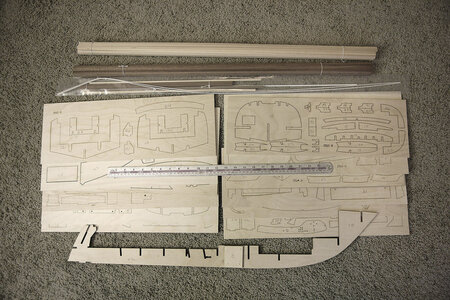
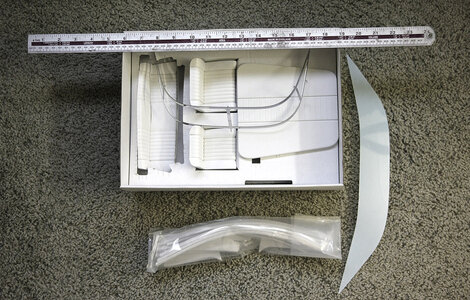
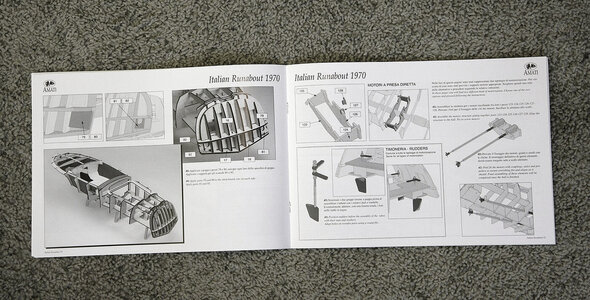
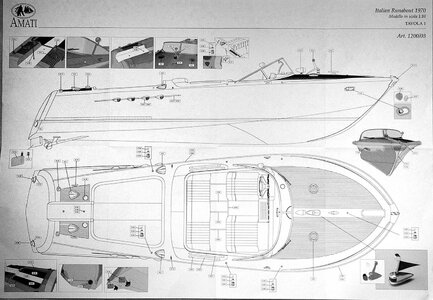
The kit comes with everything needed, it has five 1:1 plan sheets and a pictorial manual which gives very clear step by step instruction using excellent photographs, it misses nothing out even the most insignificant part is shown, it is easy to follow and seems to leave nothing in doubt. The wood is ply, lime and mahogany all of the very highest quality and beautifully cut, there is very little char to the laser cut ply, the holding tabs are only 1mm and are easy to cut away, this is I think the best wood offering that I have seen in any kit. There are a large amount of cast chromed fittings even an ignition key and nice sheet of photo etch silvered is included. The seats are a sort of rubbery molding, they used to be upholstered in fabric but when they got wet they were ruined so this type was introduced. There is also a sheet of textured vinyl for the cabin upholstery. All in all a well presented high quality kit that I can’t see how it could be improved upon.

This boat is all about style, with clean flowing lines and highly polished mahogany panels, it will be necessary for it to look good to have absolutely perfect planking, smooth well varnished with no seams visible, any flaw will be noticed and will spoil its appearance, so that will be my challenge.

ken

002.JPG003.JPG004.JPG005.JPG006.JPG007.JPG008.JPG009.JPG010.JPG
 
Last edited:
Hello and welcome to my new build. I’ve a feeling that most of you that are viewing this will already know me and I’m delighted to have you with me again for this project so sit back and hopefully enjoy.

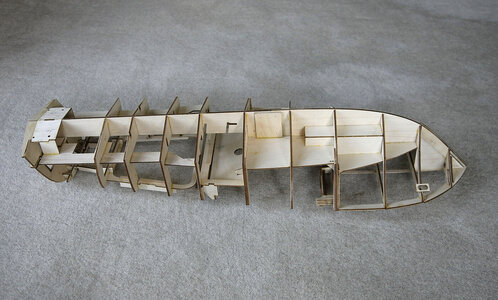
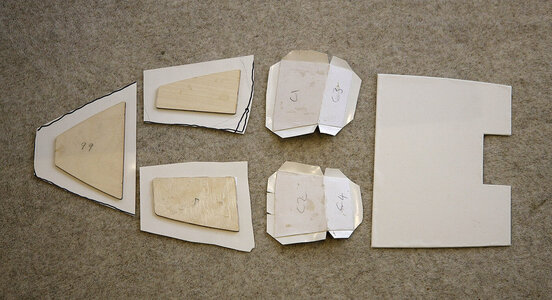
I’m afraid that I have already assembled most of the frame without showing detailed pictures. It went together so quick and easily that I just got carried away. I made up a simple holder for the keel out of scrap not very nice to look at but it did the job. I identified the ply parts from the 1:1 plans and numbered them before removing from the sheet, this was necessary as many of them were so similar with only such a slight difference between them that you could easily mistake them. The parts were very well cut with minimum char and they all matched the plan perfectly, it’s no good having nicely cut parts if they are not properly to shape as is often the case with kits. The ply used is very good, smooth close grain very hard and true. All but one of the bulkheads slotted in perfectly with no force needed but with just the right grip, one piece needed just a little sanding so as not to be too tight. Everything lined up and sat true and square without the need for any adjustment. I built it up putting in the gussets, bulkhead, edge pieces, floors, and reinforcements which there are quite a few of. It was like doing a three dimensional jigsaw, the fit of all the pieces was so good that I didn’t need to adjust any except where they needed to be angled. I was glad that I read through the very good instruction manual before I started as the cockpit area is not symmetrical and some of the parts would have fitted either way.

Well that’s the model under way, so far I’m very impressed with the kit and have confidence for the rest of the build. I can’t fault it so well done Amati.

Ken

018.jpg

017.jpg

011.JPG

013.JPG

014.JPG

015.JPG

016.JPG
 
Hello and welcome to my new build. I’ve a feeling that most of you that are viewing this will already know me and I’m delighted to have you with me again for this project so sit back and hopefully enjoy.

I’m afraid that I have already assembled most of the frame without showing detailed pictures. It went together so quick and easily that I just got carried away. I made up a simple holder for the keel out of scrap not very nice to look at but it did the job. I identified the ply parts from the 1:1 plans and numbered them before removing from the sheet, this was necessary as many of them were so similar with only such a slight difference between them that you could easily mistake them. The parts were very well cut with minimum char and they all matched the plan perfectly, it’s no good having nicely cut parts if they are not properly to shape as is often the case with kits. The ply used is very good, smooth close grain very hard and true. All but one of the bulkheads slotted in perfectly with no force needed but with just the right grip, one piece needed just a little sanding so as not to be too tight. Everything lined up and sat true and square without the need for any adjustment. I built it up putting in the gussets, bulkhead, edge pieces, floors, and reinforcements which there are quite a few of. It was like doing a three dimensional jigsaw, the fit of all the pieces was so good that I didn’t need to adjust any except where they needed to be angled. I was glad that I read through the very good instruction manual before I started as the cockpit area is not symmetrical and some of the parts would have fitted either way.

Well that’s the model under way, so far I’m very impressed with the kit and have confidence for the rest of the build. I can’t fault it so well done Amati.

Ken

View attachment 203567

View attachment 203566

View attachment 203561

View attachment 203562

View attachment 203563

View attachment 203564

View attachment 203565
Hi Don, I agree that it looks quite a lot but it really just fell together, that lot only took about five hours in total over a couple of days, the longest part was waiting for the glue to go off.
 
It is beautiful for me to see this construction. It was my first attempt over 50 years ago, the one that made me fall in love with this hobby. I am happy to follow your meticulous and thorough work, after I have seen your Amerigo log. Thank you for this.
 
Hello and welcome to my new build. I’ve a feeling that most of you that are viewing this will already know me and I’m delighted to have you with me again for this project so sit back and hopefully enjoy.

I’m afraid that I have already assembled most of the frame without showing detailed pictures. It went together so quick and easily that I just got carried away. I made up a simple holder for the keel out of scrap not very nice to look at but it did the job. I identified the ply parts from the 1:1 plans and numbered them before removing from the sheet, this was necessary as many of them were so similar with only such a slight difference between them that you could easily mistake them. The parts were very well cut with minimum char and they all matched the plan perfectly, it’s no good having nicely cut parts if they are not properly to shape as is often the case with kits. The ply used is very good, smooth close grain very hard and true. All but one of the bulkheads slotted in perfectly with no force needed but with just the right grip, one piece needed just a little sanding so as not to be too tight. Everything lined up and sat true and square without the need for any adjustment. I built it up putting in the gussets, bulkhead, edge pieces, floors, and reinforcements which there are quite a few of. It was like doing a three dimensional jigsaw, the fit of all the pieces was so good that I didn’t need to adjust any except where they needed to be angled. I was glad that I read through the very good instruction manual before I started as the cockpit area is not symmetrical and some of the parts would have fitted either way.

Well that’s the model under way, so far I’m very impressed with the kit and have confidence for the rest of the build. I can’t fault it so well done Amati.

Ken

View attachment 203567

View attachment 203566

View attachment 203561

View attachment 203562

View attachment 203563

View attachment 203564

View attachment 203565
Looking good! You're off to a fast start Ken. I look forward to the planking!
 
Looking good! You're off to a fast start Ken. I look forward to the planking!
Hi Dean, I think that will be sooner than I’d thought. There’s a lot of hull to plank, it’s a larger hull than the Amerigo and a quick look tells me it won’t follow the normal rules of bending in and tapering at the bow as it significantly splays out with quite a concave shape called a learning curve.

Ken
 
It is beautiful for me to see this construction. It was my first attempt over 50 years ago, the one that made me fall in love with this hobby. I am happy to follow your meticulous and thorough work, after I have seen your Amerigo log. Thank you for this.
Hi Enzo, Welcome to my build, I hope that you enjoy it. One thing that I’d like to know is why Italians have such a good eye to beautiful designs, when you see something like these boats, cars, bikes you just know that it is Italian
 
Last edited:
Hi Dean, I think that will be sooner than I’d thought. There’s a lot of hull to plank, it’s a larger hull than the Amerigo and a quick look tells me it won’t follow the normal rules of bending in and tapering at the bow as it significantly splays out with quite a concave shape called a learning curve.

Ken
If anyone can handle it, you can! But it appears it may be easier than you think, because the boards can be trimmed like at the stern of most ships. In addition, the concave shape may allow you to keep the board edges tight without tapering the edges, especially if its a double plank. It appears to have a nice dark wood veneer?
My guess is the dark piece around the edge of the transom will be most difficult.
 
Last edited:
Hello everyone. With being in lockdown and not being able to go out I’ve plenty of time on my hands with not a great deal of interest to do other than to build this kit, so I imagine it will progress fairly quickly.

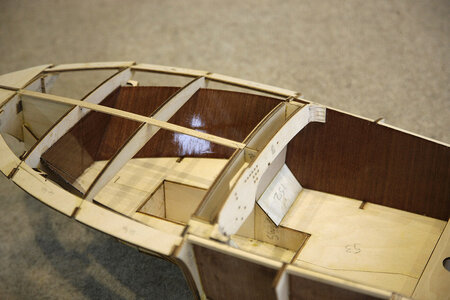
Although this kit is designed to take RC. I’m not going down that route but building it for static display. I’ll follow the plans for RC. though, putting in the motor/servo mounts and the three access hatches shown in the picture because they are in the plan. I’m using my favourite glue Titebond, not the waterproof stuff and I’m not sealing it so it will have to stay static and never see the water.

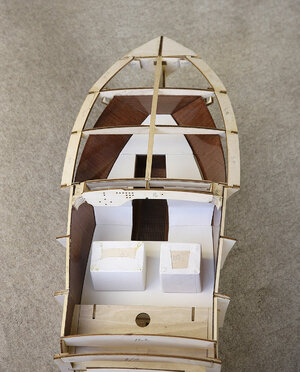
There is a day cabin with couches bellow the front deck, access is via the well in the floor, unless you’re determined you can’t really see into this cabin but there is the material to kit it out. The sides are lined in mahogany; the couches have cushions made from ply covered with the white vinyl supplied. I varnished the sides before fitting as once in it would have been difficult. I used this opportunity to try different varnishes and methods to see what finishes I could get, I found that after sealing them, yacht varnish was best, it gave the best depth look. It was a bit too hard and shiny a gloss for this scale so I found that by buffing it with TCUT, a buffing liquid for rubbing down car paint gave it just the amount of gloss that I wanted and at the same time removed dust marks from the surface.

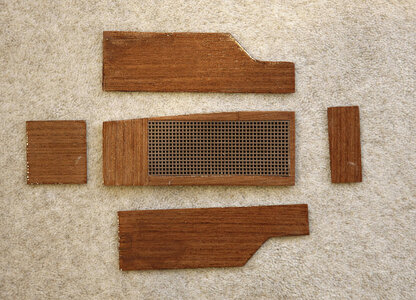
There is a ready made grating for the floor well, it was recommended that the well itself be stained, it didn’t look good so I made up from scrap mahogany a full lining.

I made up and fitted the rest of the floor pieces.

I made up and covered with vinyl the bases for the seats and all the fitted floor coverings.

The top outer edges of the bulkheads are not well supported; this is where the side planking will join the deck meaning that it would be just an edge to edge join, not good so I put lengths of balsa at their edge for good measure. Probably not needed but a belt and braces approach. I think that I’m now almost up to the start of the planking so watch this space and thanks for dropping in.

18a.jpg

020.jpg

021.jpg

024.jpg

022.jpg

023.jpg

025.jpg
 
Back
Top