-

Win a Free Custom Engraved Brass Coin!!!
As a way to introduce our brass coins to the community, we will raffle off a free coin during the month of August. Follow link ABOVE for instructions for entering.
-

PRE-ORDER SHIPS IN SCALE TODAY!
The beloved Ships in Scale Magazine is back and charting a new course for 2026!
Discover new skills, new techniques, and new inspirations in every issue.
NOTE THAT OUR FIRST ISSUE WILL BE JAN/FEB 2026
You are using an out of date browser. It may not display this or other websites correctly.
You should upgrade or use an alternative browser.
You should upgrade or use an alternative browser.
Definitely a big beautiful boat! It’s going together quick! Great work Ken!
- Joined
- Dec 16, 2016
- Messages
- 1,180
- Points
- 493

Hi Dean, Yes it’s coming along but it only seems quick, what you don’t know is the amount of midnight oil that I’ve been burning. When things are going well I just seem to not notice the late hour and keep going, I imagine that you are probably the same.Definitely a big beautiful boat! It’s going together quick! Great work Ken!
Ha ha, I hear ya Ken! I have started at 8pm and next thing I know it’s 2am!Hi Dean, Yes it’s coming along but it only seems quick, what you don’t know is the amount of midnight oil that I’ve been burning. When things are going well I just seem to not notice the late hour and keep going, I imagine that you are probably the same.
- Joined
- Dec 16, 2016
- Messages
- 1,180
- Points
- 493

Hello. I’ve been burning the midnight oil again and made good progress, so here goes.
I’ve made up and put the upper decks into place. The pieces are pre cut from ply and the initial fitting was reasonable, it only needed minor adjustments to get an ok fit. I was glad that I’d put in hardwood battens along the outer edges of the frames as there is quite a camber and all the pieces needed nailing down along the edges. I have made a start on the rear hatch cover as I now know the exact size that it needs to be. I put into place the ply lower section of the stern, the first layer of planking starts just above.
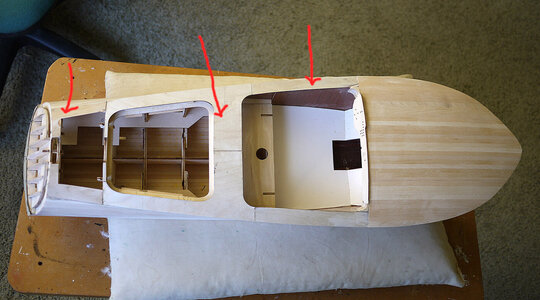
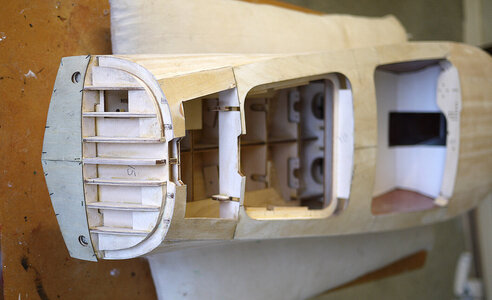
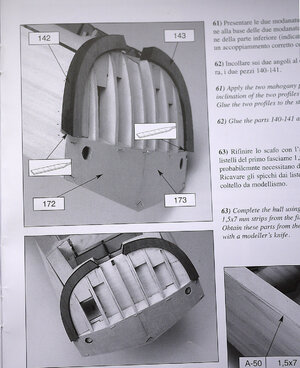
It is here that I differ from the instructions, they have been very good so far but the sequence that they tell me to continue I think is defiantly wrong. You will see that at the back there are two large curved mahogany pieces which will form the upper and outer sections of the stern which will later be carved to form a rounded rear. I am told to fit them now, if I do so it would make life much harder later. The second planking would need to butt tight up against it meaning that rather than leaving it slightly over length and sanding off to fit you would need to get the planks exact front and rear including any tapering if you wanted to avoid filler. The other issue would be getting an exact fit across the stern between the deep edge pieces, that planking needs to be tapered and curved with its edges champherd to get a close fit, then because of the deep recess you couldn’t get a sanding block in to sand level the first layer. I thought far better to get them to a good fit but add them later, I could then just concentrate on getting a good fit with tapering the front and cut off flush when dry at the rear. When I’d planked the stern I could offer up the outer edge pieces mark and cut the planks to shape. Does that make sense?
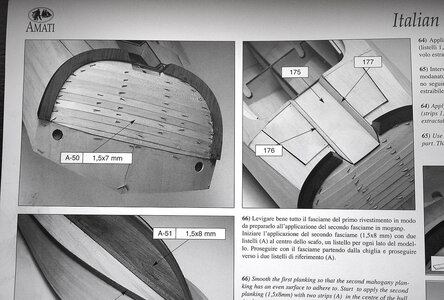
It all went smoothly, I was pleased. That is now all the first layers done so next will be the second, mahogany planking.
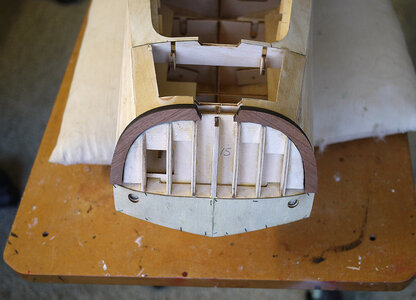
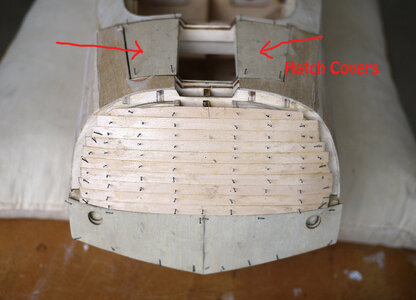
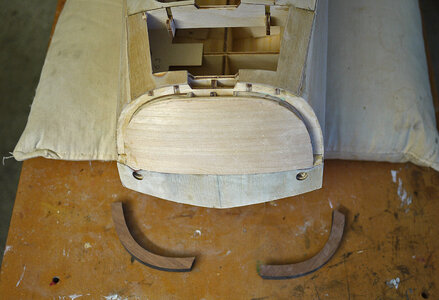
I’ve made up and put the upper decks into place. The pieces are pre cut from ply and the initial fitting was reasonable, it only needed minor adjustments to get an ok fit. I was glad that I’d put in hardwood battens along the outer edges of the frames as there is quite a camber and all the pieces needed nailing down along the edges. I have made a start on the rear hatch cover as I now know the exact size that it needs to be. I put into place the ply lower section of the stern, the first layer of planking starts just above.


It is here that I differ from the instructions, they have been very good so far but the sequence that they tell me to continue I think is defiantly wrong. You will see that at the back there are two large curved mahogany pieces which will form the upper and outer sections of the stern which will later be carved to form a rounded rear. I am told to fit them now, if I do so it would make life much harder later. The second planking would need to butt tight up against it meaning that rather than leaving it slightly over length and sanding off to fit you would need to get the planks exact front and rear including any tapering if you wanted to avoid filler. The other issue would be getting an exact fit across the stern between the deep edge pieces, that planking needs to be tapered and curved with its edges champherd to get a close fit, then because of the deep recess you couldn’t get a sanding block in to sand level the first layer. I thought far better to get them to a good fit but add them later, I could then just concentrate on getting a good fit with tapering the front and cut off flush when dry at the rear. When I’d planked the stern I could offer up the outer edge pieces mark and cut the planks to shape. Does that make sense?


It all went smoothly, I was pleased. That is now all the first layers done so next will be the second, mahogany planking.


Last edited:
I agree Ken, it makes absolute good sense to plank to the inner edge of the corner pieces, and trim and sand the planking flush, prior to installing them. That way you can match the profile easy, because now you can adjust either the planking or the corner piece, or both! You can now save those for last, after the second planking is done. Good call!Hello. I’ve been burning the midnight oil again and made good progress, so here goes.
I’ve made up and put the upper decks into place. The pieces are pre cut from ply and the initial fitting was reasonable, it only needed minor adjustments to get an ok fit. I was glad that I’d put in hardwood battens along the outer edges of the frames as there is quite a camber and all the pieces needed nailing down along the edges. I have made a start on the rear hatch cover as I now know the exact size that it needs to be. I put into place the ply lower section of the stern, the first layer of planking starts just above.
View attachment 206917
View attachment 206918
It is here that I differ from the instructions, they have been very good so far but the sequence that they tell me to continue I think is defiantly wrong. You will see that at the back there are two large curved mahogany pieces which will form the upper and outer sections of the stern which will later be carved to form a rounded rear. I am told to fit them now, if I do so it would make life much harder later. The second planking would need to butt tight up against it meaning that rather than leaving it slightly over length and sanding off to fit you would need to get the planks exact front and rear including any tapering if you wanted to avoid filler. The other issue would be getting an exact fit across the stern between the deep edge pieces, that planking needs to be tapered and curved with its edges champherd to get a close fit, then because of the deep recess you couldn’t get a sanding block in to sand level the first layer. I thought far better to get them to a good fit but add them later, I could then just concentrate on getting a good fit with tapering the front and cut off flush when dry at the rear. When I’d planked the stern I could offer up the outer edge pieces mark and cut the planks to shape. Does that make sense?
View attachment 206951
View attachment 206929
It all went smoothly, I was pleased. That is now all the first layers done so next will be the second, mahogany planking.
View attachment 206930
View attachment 206931
View attachment 206932
- Joined
- Dec 16, 2016
- Messages
- 1,180
- Points
- 493

Hello. Well here goes with the second planking. The strips are pretty good quality mahogany 1.5mm thick, not the normal second planking which is usually 1mm. It’s fairly stiff but the lines are such that I can get away with just using my Amati plank nipper. I was happy with the pattern of the first planking so I just followed that with only a slight adjustment. I use cyno for my second planking putting a bead of no more than 2 inches along the hull then holding down firmly in place until it sets, I then move along to the next section. If you try and do longer sections to do it faster it is easy to not get a tight fit, it’s a fairly quick method. I’ve done this on all my recent models and I find that I always get very good results. This model will stand or fall on the quality of this planking, on most planked hulls it doesn’t matter if the seams are visible but with the high gloss finish that I hope to achieve any seam visible will spoil the appearance.
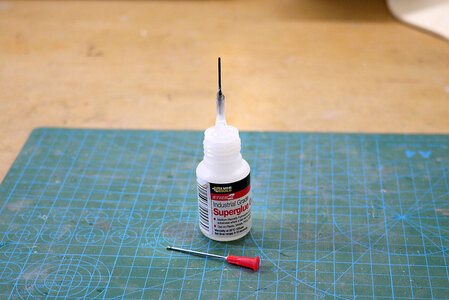
Here’s how I use my cyno, I’ve been using it this way for years and I can’t think of a better way. No mess, no clogged nozzles or stuck fingers, and less fumes.
I put into the nozzle a hypodermic syringe, ( cheap on Ebay ) this gives you great control over the flow, from the smallest blob to a nice even line, you can get into the tightest areas like under the planks or a small blob into the rigging. The tip rarely clogs but when it does put a flame to it and being flammable it quickly burns off and it flows again. You don’t waste the stuff, you’ll find that a tub lasts much longer, when finished leave the syringe in and just swap the top over to the next tub, I find that it lasts well over a year before it needs replacing, trust me on this you’ll never use another method
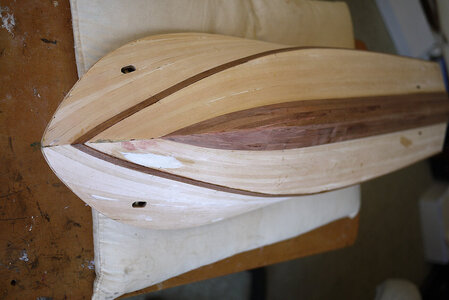
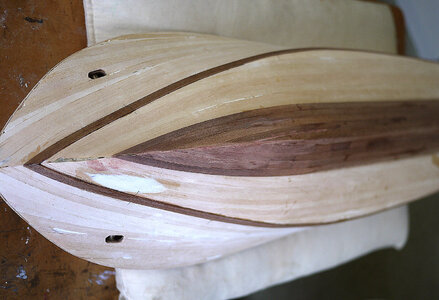
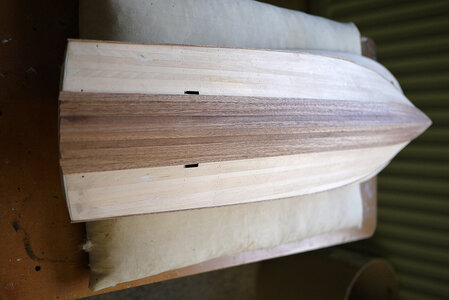
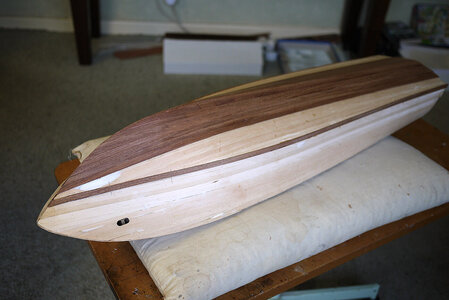


Looking better all the time! Thanks for the CA glue tip!Hello. Well here goes with the second planking. The strips are pretty good quality mahogany 1.5mm thick, not the normal second planking which is usually 1mm. It’s fairly stiff but the lines are such that I can get away with just using my Amati plank nipper. I was happy with the pattern of the first planking so I just followed that with only a slight adjustment. I use cyno for my second planking putting a bead of no more than 2 inches along the hull then holding down firmly in place until it sets, I then move along to the next section. If you try and do longer sections to do it faster it is easy to not get a tight fit, it’s a fairly quick method. I’ve done this on all my recent models and I find that I always get very good results. This model will stand or fall on the quality of this planking, on most planked hulls it doesn’t matter if the seams are visible but with the high gloss finish that I hope to achieve any seam visible will spoil the appearance.
Here’s how I use my cyno, I’ve been using it this way for years and I can’t think of a better way. No mess, no clogged nozzles or stuck fingers, and less fumes.
I put into the nozzle a hypodermic syringe, ( cheap on Ebay ) this gives you great control over the flow, from the smallest blob to a nice even line, you can get into the tightest areas like under the planks or a small blob into the rigging. The tip rarely clogs but when it does put a flame to it and being flammable it quickly burns off and it flows again. You don’t waste the stuff, you’ll find that a tub lasts much longer, when finished leave the syringe in and just swap the top over to the next tub, I find that it lasts well over a year before it needs replacing, trust me on this you’ll never use another method
View attachment 207167
View attachment 207168
View attachment 207169
View attachment 207170
View attachment 207171
View attachment 207172
Hi Ken,
Nice progress with your Italian beauty! The mahogany looks fine.
Regards, Peter
Nice progress with your Italian beauty! The mahogany looks fine.
Regards, Peter
- Joined
- Dec 16, 2016
- Messages
- 1,180
- Points
- 493

Hello again. I’m making quite rapid progress, no issues so far and going to plan. I’ve completed the planking on the bottom of the hull, I’m happy with how it’s going so far.
I like how these came out, a nice touch of detail. They are the windscreen wipers, they were made up from photo etch and to finish them off I used a small piece of black card as the wiper blades, my wife
thinks that they’re cute.
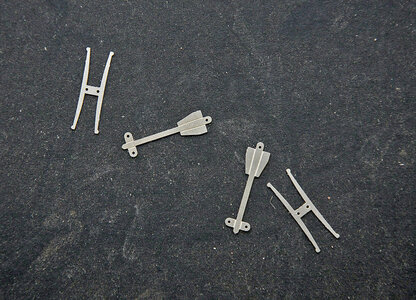
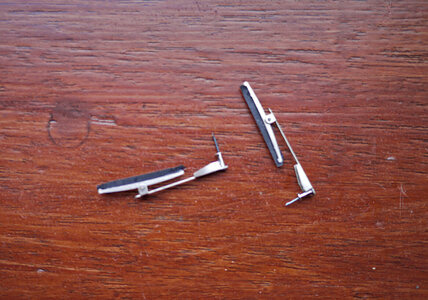
I like how these came out, a nice touch of detail. They are the windscreen wipers, they were made up from photo etch and to finish them off I used a small piece of black card as the wiper blades, my wife
thinks that they’re cute.


- Joined
- Dec 16, 2016
- Messages
- 1,180
- Points
- 493

Hello. Thanks again to those that are following my build and for being generous with your likes.
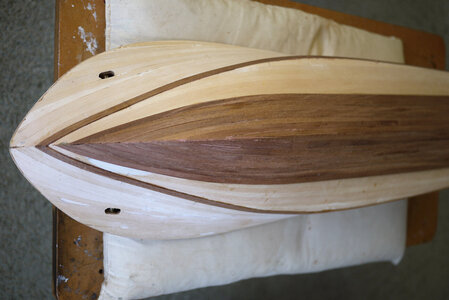
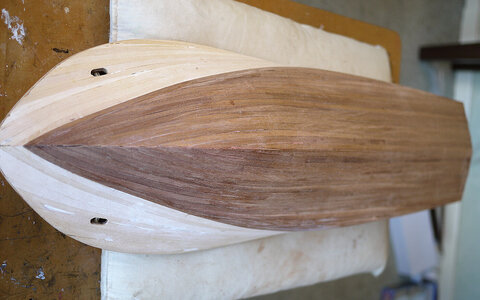
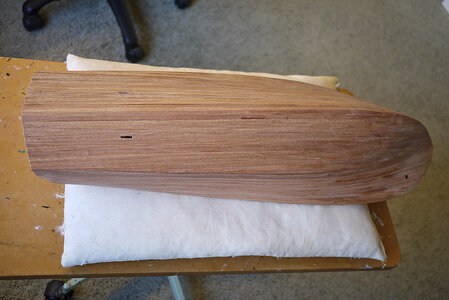
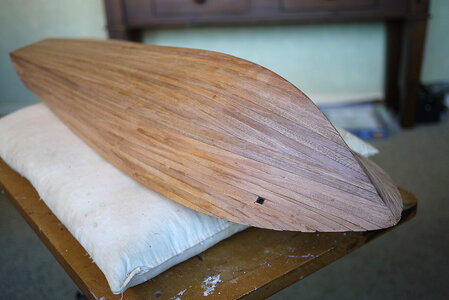
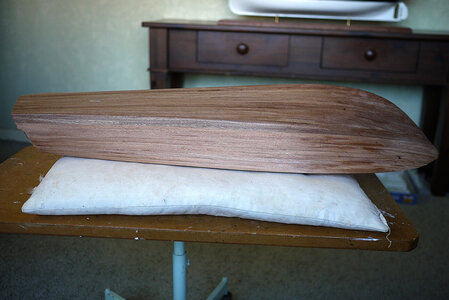
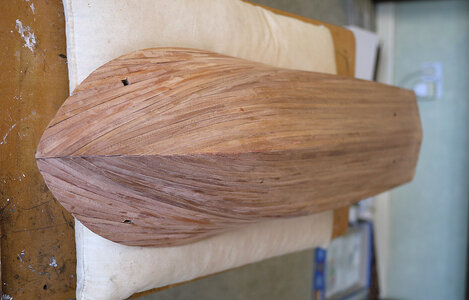
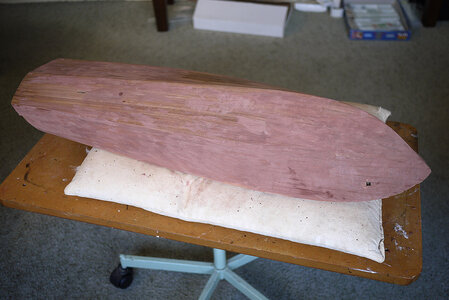
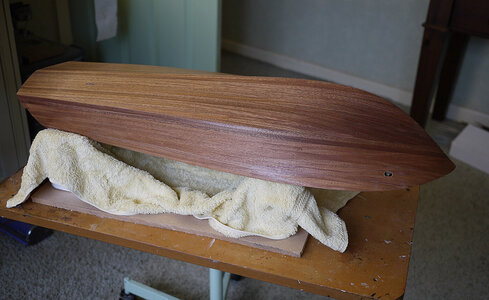
Due to the lockdown I haven’t a great deal to do except busy myself in the shipyard, you can only clean and tidy the house so much so progress is pretty rapid. I’ve completed the second planking and I’m very pleased with how it went. All the seams ended up nice and tight, any that did show I ran some white glue along them then sanded over it with coarse sandpaper, the sawdust impregnated the glue and the sanding removed any surface glue. I find that even the slightest glue on the surface leaves a discoloured finish when varnished, I check as I go along and if I see any I either sand or wipe it away immediately, remember I’m going for a clear high gloss finish. The pictures show the newly done planking, I’ve yet to clean it up, first by scraping then a good sanding reducing the grade of paper as I go along, I will apply at least two coats of sanding sealer and see how I’ve done
What I hadn’t mentioned earlier is that the mahogany planks were two different shades, if done at random it would have spoiled the look of the hull. I separated them, there were about half of each, I put the darker ones which I didn’t like the shade of at the bottom and the redder ones at the top, the lower ones will be painted white anyway so issue solved. you can see the difference in the third picture, quite a contrast.


Last edited:
- Joined
- Dec 16, 2016
- Messages
- 1,180
- Points
- 493

Hello again. The hull is coming along and I feel good about it. I scrapped it down using the blade from a Stanley knife to level the planks. I then gave it a coat of filler, a water based one which I thinned out to a thin creamy consistency. I spread this thinly over the whole hull and rub it in well with wet hands into the grain and seams so that there will be no grain texture when sanded. I’ve shown the two makes of filler that I use, they are both easy to apply and dry very hard quite quickly, they sand very easily almost like chalk and there are lots of shades to choose from.
I then gave the hull a good sanding, first 120 grit then 180, next will be 240. I gave it a liberal coat of sanding sealer to further close the wood grain, I just pour some on the hull and spread it out with a piece of rag. I use cellulose sealer as it dries quickly and you can sand after about 30 minutes so no waiting, I just love the smell but my wife doesn’t she says the whole house stinks for days. I have tried a spirit sealer that I once bought by mistake and really didn’t like it, it took days to dry and left a slightly waxy surface that wouldn’t take glue well. The pictures show the hull before the sealer has been sanded off so starting to look good but will look much better when varnished.
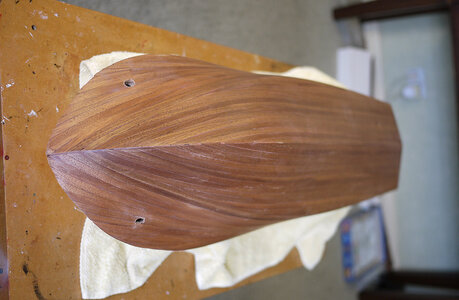
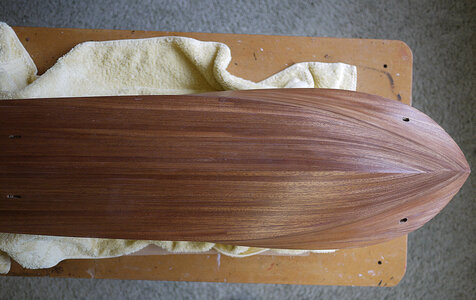
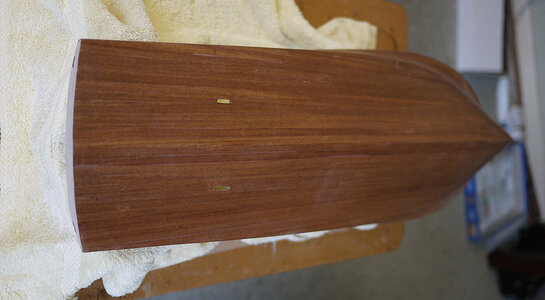
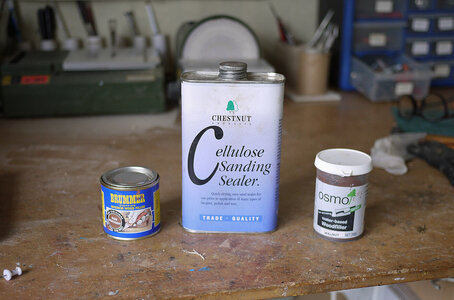
I then gave the hull a good sanding, first 120 grit then 180, next will be 240. I gave it a liberal coat of sanding sealer to further close the wood grain, I just pour some on the hull and spread it out with a piece of rag. I use cellulose sealer as it dries quickly and you can sand after about 30 minutes so no waiting, I just love the smell but my wife doesn’t she says the whole house stinks for days. I have tried a spirit sealer that I once bought by mistake and really didn’t like it, it took days to dry and left a slightly waxy surface that wouldn’t take glue well. The pictures show the hull before the sealer has been sanded off so starting to look good but will look much better when varnished.


- Joined
- Dec 16, 2016
- Messages
- 1,180
- Points
- 493

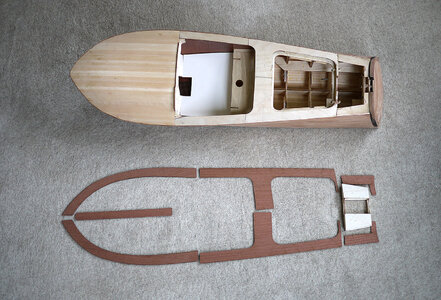
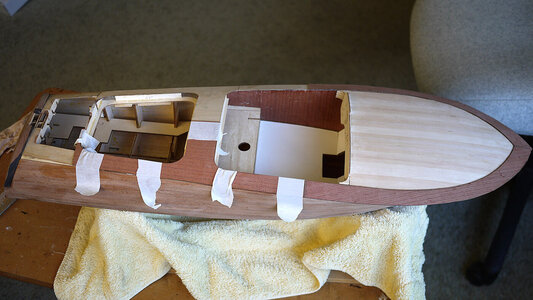
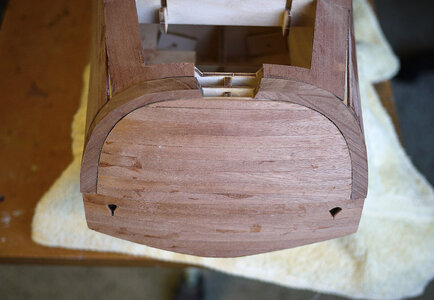
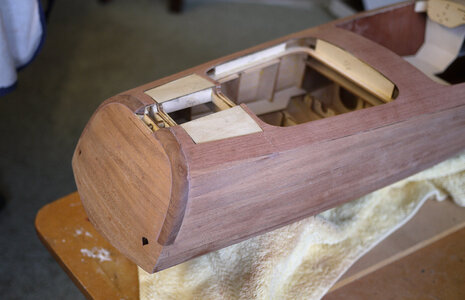
Hello, Things are moving forward onto the more interesting part of the build, the detail that will bring out it’s character. I’ve been burning the midnight oil again. I’ve given it another sanding, attached the dashboard support, planked the stern, fitted and shaped the stern edge blocks. The mahogany deck pieces needed just a small amount of correcting to fit except the rear part which was too far out, I made up a new section out of scrap to fit properly, I fitted and glued down these deck pieces, completed the making of the hatch then filled the gap between the side planking and deck with fillets of planks, it’s really taking shape now.
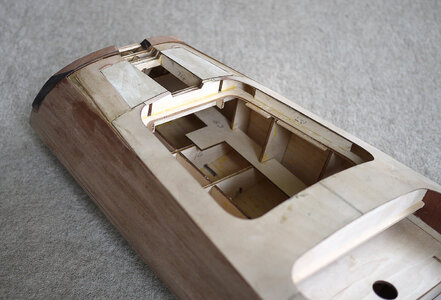
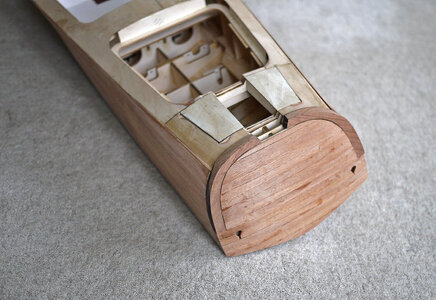
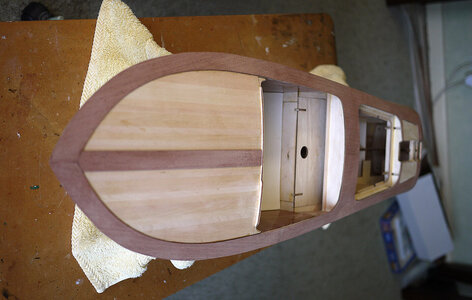


Looking good Ken, really taking shape!Hello, Things are moving forward onto the more interesting part of the build, the detail that will bring out it’s character. I’ve been burning the midnight oil again. I’ve given it another sanding, attached the dashboard support, planked the stern, fitted and shaped the stern edge blocks. The mahogany deck pieces needed just a small amount of correcting to fit except the rear part which was too far out, I made up a new section out of scrap to fit properly, I fitted and glued down these deck pieces, completed the making of the hatch then filled the gap between the side planking and deck with fillets of planks, it’s really taking shape now.
View attachment 208704
View attachment 208705
View attachment 208706
View attachment 208707
View attachment 208708View attachment 208709
View attachment 208710
Looks like you have a good tight clean fit up going there Ken. I can't wait to see how the varnish coats bring out the brilliance of the wood!
What a nice project Ken, now you just need an Versace pair of sun glasses and you are ready for the summer. 
- Joined
- Dec 16, 2016
- Messages
- 1,180
- Points
- 493

Hi Daniel, Me too. I'm doing a little side project, I'm going to push on with the small rear hatch and varnish that just to see how looks, I can't wait until I varnish the whole hull.Looks like you have a good tight clean fit up going there Ken. I can't wait to see how the varnish coats bring out the brilliance of the wood!
- Joined
- Dec 16, 2016
- Messages
- 1,180
- Points
- 493

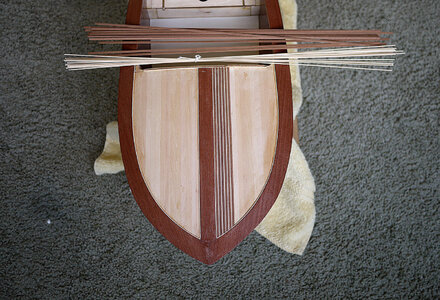
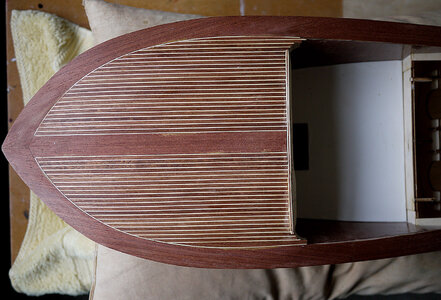
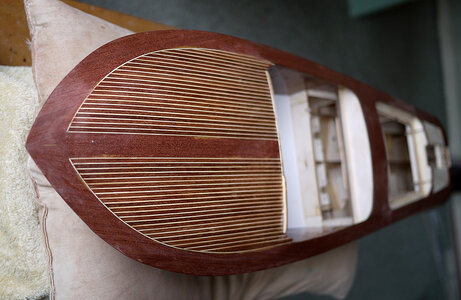
Hello again. Thanks for those likes and kind comments. I’m having great fun with the build now that I’m into the interesting detailing. The latest sessions have seen the front deck planked with that distinctive pattern. I needed to be extra careful because with such a design any fault would stand out, I was very selective with the strips and carefully dressed the edges of each one, this looked like it would be difficult and time consuming work but I enjoyed doing it especially given the results. Can’t wait for the varnishing sessions.


- Joined
- Apr 10, 2020
- Messages
- 654
- Points
- 353

Looking very neat !
Kind regards,Daniel
Kind regards,Daniel


