Very beautifull
-

Win a Free Custom Engraved Brass Coin!!!
As a way to introduce our brass coins to the community, we will raffle off a free coin during the month of August. Follow link ABOVE for instructions for entering.
-

PRE-ORDER SHIPS IN SCALE TODAY!
The beloved Ships in Scale Magazine is back and charting a new course for 2026!
Discover new skills, new techniques, and new inspirations in every issue.
NOTE THAT OUR FIRST ISSUE WILL BE JAN/FEB 2026
You are using an out of date browser. It may not display this or other websites correctly.
You should upgrade or use an alternative browser.
You should upgrade or use an alternative browser.
That is so awesome, this is something I've always wanted to try. Great work Ken
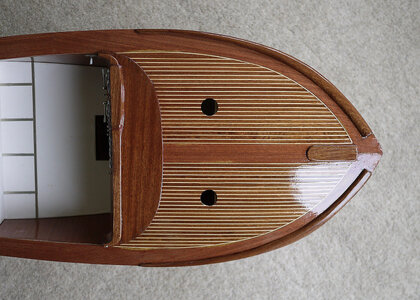
Love that part of the boat, and you did a great job on it!Hello again. Thanks for those likes and kind comments. I’m having great fun with the build now that I’m into the interesting detailing. The latest sessions have seen the front deck planked with that distinctive pattern. I needed to be extra careful because with such a design any fault would stand out, I was very selective with the strips and carefully dressed the edges of each one, this looked like it would be difficult and time consuming work but I enjoyed doing it especially given the results. Can’t wait for the varnishing sessions.
View attachment 209172
View attachment 209173
View attachment 209174
Beautifull deck - well done with the "white" strips -> I love this boat -> the original and your model
WOW, those deck planking! She is as gorgeous, Ken. Actually, you make here beauty!
Very impressive work- well done.
- Joined
- Dec 16, 2016
- Messages
- 1,178
- Points
- 493

Hello. First I must give everyone a big thank you for your kind and very complimentary comments that you left after my last post, I was pleasantly taken aback by them. Daniel, Enzo, Don, Dean, Uwek, Jimsky, and John again thanks, now I’ve got to live up to expectations.
This session I attached the dashboard and made up and fitted its surround. The surround was just a little tricky getting the curves to flow and look natural where the two pieces joined, especially the underneath. I mentioned earlier that I had made up pieces from scrap, now I find that the pieces that I used weren’t scrap after all just pieces that I hadn’t numbered, it was the apron on the front deck, quite a large piece about 6” x 2”. Searching my stash I found a piece of mahogany ply that would do, I cut it to shape and fitted it. It was much darker but when done I liked the contrast, the windscreen will sit against the ply edge so that won’t be seen. Next were the raised mouldings on the front outer edges of the deck. These were each made up from pre shaped pieces glued together to give them height then carved to shape, a left and a right. I kept telling myself as I was making them, remember they must be a left and a right so concentrate, you’ve guessed, when I came to fit them I’d made two left ones!!! I don’t know how but I did. I eventually made them up to be a pair but with great difficulty as I had very little scrap left. They were fitted and shaped so all ended up ok. Another coat of sealer was applied and given a light sand, even without varnish the wood is starting to get a shine.
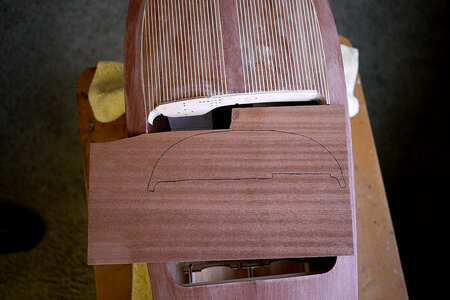
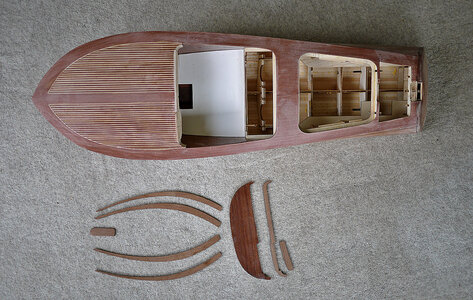
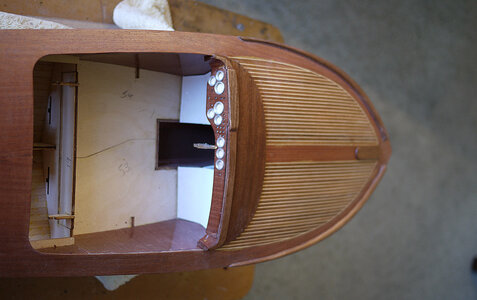
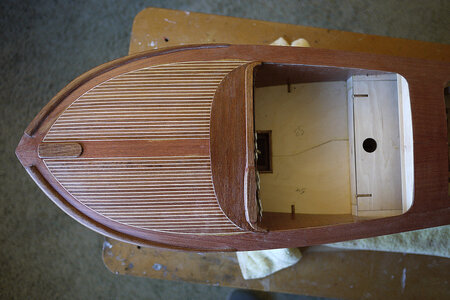
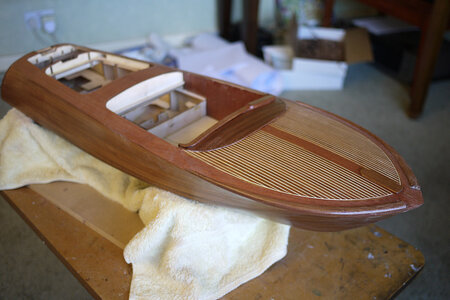
This session I attached the dashboard and made up and fitted its surround. The surround was just a little tricky getting the curves to flow and look natural where the two pieces joined, especially the underneath. I mentioned earlier that I had made up pieces from scrap, now I find that the pieces that I used weren’t scrap after all just pieces that I hadn’t numbered, it was the apron on the front deck, quite a large piece about 6” x 2”. Searching my stash I found a piece of mahogany ply that would do, I cut it to shape and fitted it. It was much darker but when done I liked the contrast, the windscreen will sit against the ply edge so that won’t be seen. Next were the raised mouldings on the front outer edges of the deck. These were each made up from pre shaped pieces glued together to give them height then carved to shape, a left and a right. I kept telling myself as I was making them, remember they must be a left and a right so concentrate, you’ve guessed, when I came to fit them I’d made two left ones!!! I don’t know how but I did. I eventually made them up to be a pair but with great difficulty as I had very little scrap left. They were fitted and shaped so all ended up ok. Another coat of sealer was applied and given a light sand, even without varnish the wood is starting to get a shine.


- Joined
- Dec 16, 2016
- Messages
- 1,178
- Points
- 493

Hello All. Thank you again for your likes, I do appreciate them.
Today’s update is the completion of the rear hatch. I mentioned earlier that I was pushing ahead with the intention of finishing something that I could varnish, I’ve been itching to get an idea of what the boats finish will look like. The pictures show the making up of the hatch, and its fittings, the white chute connects to the sunbed deck and is for the bikini clad ladies to slip into the water to cool down gracefully
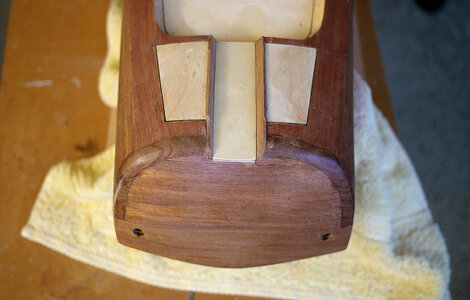
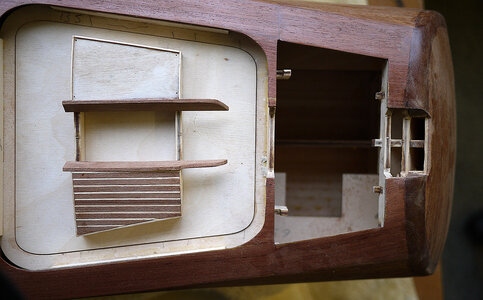
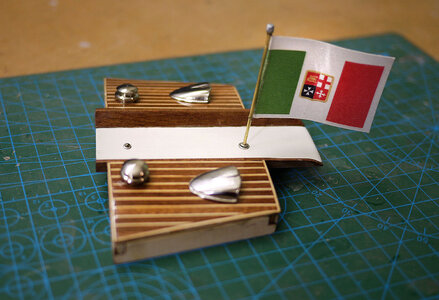
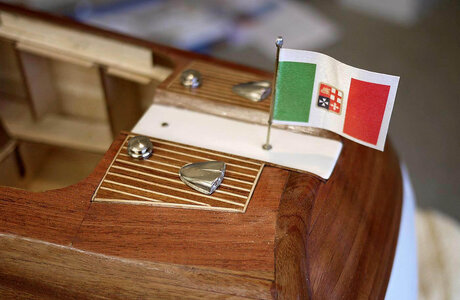
Today’s update is the completion of the rear hatch. I mentioned earlier that I was pushing ahead with the intention of finishing something that I could varnish, I’ve been itching to get an idea of what the boats finish will look like. The pictures show the making up of the hatch, and its fittings, the white chute connects to the sunbed deck and is for the bikini clad ladies to slip into the water to cool down gracefully


- Joined
- Dec 16, 2016
- Messages
- 1,178
- Points
- 493

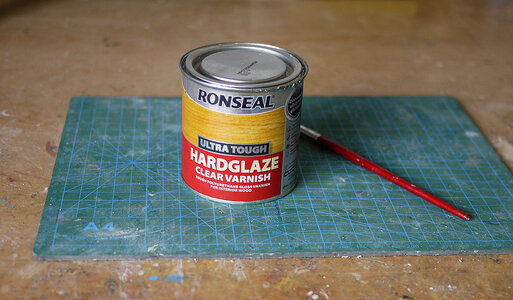
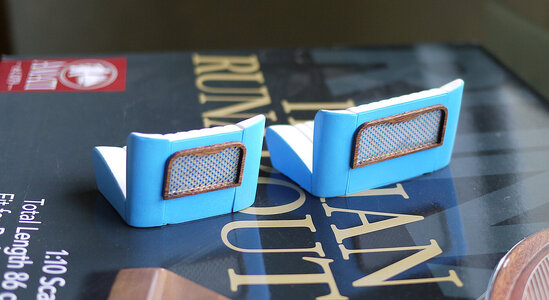
Hello Everyone. More progress. I have finished the dashboard, making and fitting curved edge pieces which blend the dashboard to the cockpit sides. I completed the instruments, switches and dials, there’s even an ignition key. I fitted the vinyl covered floor, putting in the metal kick plates, prepared the deck vents but not glued yet as I’ll wait until the final varnish. I made up the seat trays at the back of the front seats so they’re now ready to fit. The moment that I’d been waiting for came, that first coat of varnish, I also gave the inner walls of the cockpit a final coat. I’m varnishing in stages, the top first, the hull later. I’m pleased with the result and I’m hoping for a greater depth of shine when I give it a second coat. I had initially intended to use yacht varnish but in tests I found that for use on a model it was too thick so I bought a tin of Ronseal Poly Hard Gloss. This was lovely stuff to use, a nice consistency, it flowed well and was easy to put on, ending up with a beautiful finish with no brush strokes visible. Recommended.
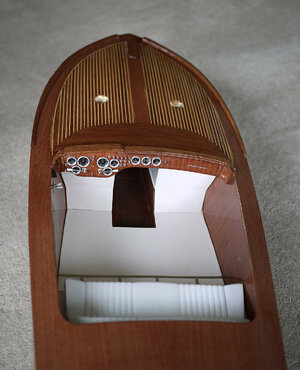
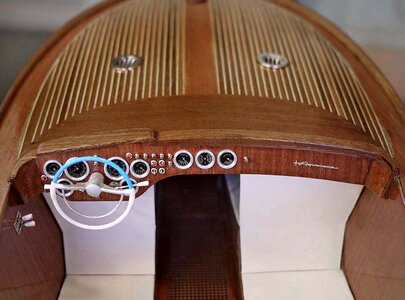


Wow! She is beautiful!!
- Joined
- Sep 28, 2020
- Messages
- 287
- Points
- 168

Beautiful!
In summer of 2019 i spent my holidays at Lago d`Iseo in Italy. A nice small Hotel on island Montisola with a very fine restaurant directly at the lake.
One evening a superb restored Riva yacht came with two older men (my age ) and two very young, bored ladies (not their doughters!).
I could not take my eyes off.............the yacht!
If you have the right boat, everything goes

In summer of 2019 i spent my holidays at Lago d`Iseo in Italy. A nice small Hotel on island Montisola with a very fine restaurant directly at the lake.
One evening a superb restored Riva yacht came with two older men (my age
I could not take my eyes off.............the yacht!
If you have the right boat, everything goes
- Joined
- Dec 16, 2016
- Messages
- 1,178
- Points
- 493

Thanks, Yes the Riva is beautiful, in my eyes the boat would have been much sexier, the women wouldn’t have stood a chance, not at my age anyway.Beautiful!
In summer of 2019 i spent my holidays at Lago d`Iseo in Italy. A nice small Hotel on island Montisola with a very fine restaurant directly at the lake.
One evening a superb restored Riva yacht came with two older men (my age) and two very young, bored ladies (not their doughters!).
I could not take my eyes off.............the yacht!
If you have the right boat, everything goes
Wow! This is stunning Ken! You’ve been busy!Hello Everyone. More progress. I have finished the dashboard, making and fitting curved edge pieces which blend the dashboard to the cockpit sides. I completed the instruments, switches and dials, there’s even an ignition key. I fitted the vinyl covered floor, putting in the metal kick plates, prepared the deck vents but not glued yet as I’ll wait until the final varnish. I made up the seat trays at the back of the front seats so they’re now ready to fit. The moment that I’d been waiting for came, that first coat of varnish, I also gave the inner walls of the cockpit a final coat. I’m varnishing in stages, the top first, the hull later. I’m pleased with the result and I’m hoping for a greater depth of shine when I give it a second coat. I had initially intended to use yacht varnish but in tests I found that for use on a model it was too thick so I bought a tin of Ronseal Poly Hard Gloss. This was lovely stuff to use, a nice consistency, it flowed well and was easy to put on, ending up with a beautiful finish with no brush strokes visible. Recommended.
View attachment 209885
View attachment 209890
View attachment 209887
View attachment 209889
View attachment 209888
I’m so close to buying this kit!
Last edited:
- Joined
- Dec 16, 2016
- Messages
- 1,178
- Points
- 493

Hello everyone watching. Again thanks for your likes and very kind comments.
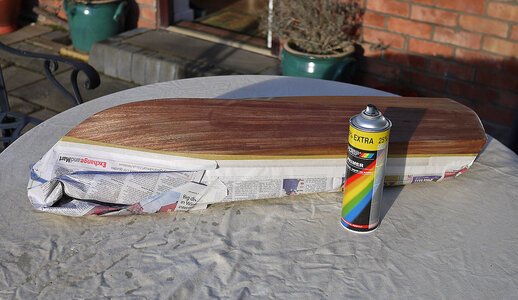
It’s about time to start the painting process so I’ll take advantage of today’s fine still weather and spray outside. I’ve cleaned off the hull and marked off the waterline, this wasn’t easy to determine as the keel doesn’t lay flat. I used the plan to give me points along the hull then put on my masking tape by eye, it was quite easy to look along the hull and adjust the tape to run in a straight line. I use Tamiya fine line masking tape, pressed down firmly along its edge. I paint along the edge with thinned down acrylic varnish, this seals the edge and you then get no seepage, when you peel back the masking tape don’t pull it upwards as this can sometimes lift the edge of the paint but pull it straight back on itself, this will cut through the paint without lifting it. Doing it this way you will get a clean very sharp edge. I covered the boat with newspaper taped to the Tamiya tape using ordinary cheap masking tape. For the primer I use ordinary acrylic car primer, the first coat is a very light one, hardly visible, then two more but heavier coats. For the white I’m going to brush on Humbrol enamel, I like this paint when I want depth of colour, it also flows well and you don’t get brush marks. I have some left over from my Amerigo Vespucci but it is satin so I’ll varnish over it to get a gloss finish. I’ll give it two coats of white, remove all masking then one coat of varnish over the entire hull. I’ll then put on some blue fine line vinyl tape over the white near the upper edge, then a second coat of varnish which should seal the tape edges so that it doesn’t lift. I think that you’ll realize that with all the drying time between coats there won’t be any updates or pictures for short while, but hold your breath along with me for when I peel everything off and see how it comes out.
Meanwhile I’m going to play with my recently acquired Euromodel Ajax, just dry fitting for now, HONEST.
On another happy note I’m about to get my vaccination on Thursday so I’ll be able to play out again.

Last edited:
One last look at that beautiful wood!! 
- Joined
- Dec 16, 2016
- Messages
- 1,178
- Points
- 493

Hi Don, Yes it seems a shame to cover it after all my work, but at least it’s mostly the underside, plenty of wood left on show and I think that the contrast will enhance it, just keep my fingers crossed that when I lift the masking it will be what I had hoped.One last look at that beautiful wood!!
Ken
Just found a video about a renovation of a RIVA
Look to the end, at appr. at 17:28 you can hear the sound of the Lambo engines - What a sound !!!!
and several other videos of this restauration company - so when ever you need them for your RIVA:
Look to the end, at appr. at 17:28 you can hear the sound of the Lambo engines - What a sound !!!!
and several other videos of this restauration company - so when ever you need them for your RIVA:
- Joined
- Dec 16, 2016
- Messages
- 1,178
- Points
- 493

Hi Uwek. What can I say, a truly great video, watching it made my day. It really is a thing beauty, more than just the sum of its parts and when I heard the engine open up my pulse quickened, it sounded better than a host of angels singing. Thanks for posting.Just found a video about a renovation of a RIVA
Look to the end, at appr. at 17:28 you can hear the sound of the Lambo engines - What a sound !!!!
and several other videos of this restauration company - so when ever you need them for your RIVA:
Ken
An awesome video, Uwe! Many thanks for sharing!


