Tutorial An easy introduction to making wood ornaments by Stephan Kertész (Steef66)

@Masters Mate @Kilo66 @MunroIII @frankieg thanks for your visit and kind words of appreciation. They're more then welcome.
Thanks all for you visit and likes.

Hi, Stephan. Thanks for amazing and very inspiring tutorial. Special thanks for links to purchasing the tools. I immediately got cravings to buy all that stuff straightaway. I have some questions, inquiries on technics you are using. First I am still not quite sure of the method to transferring a picture to the wood. Could you please elaborate? Secondly I noticed you hold the wood workpieces in your hands while milling them. Would not it be more practical to have them somehow connected to some surface for stability and to avoid possible breakages?
Thanks YT, your welcome to.
There are several methods for transferring a drawing to wood. I like the method with carbon paper the most and therefore use that one, call me old-fashioned. Of course, there are other methods and you are of course free to use them. Especially if you want to be very precise. In fact, I usually only use it for the outer lines. But like I said, find a way you like.
As for securing your wood or workpiece, you may of course use a bench clamp, hand clamp, or something along those lines as secured to a larger piece of wood. Then it all depends on your workpiece, how big it is and what the intention is. You will have to find this out by experience, but I can tell you that most of it is just done freehand. Partly due to the fact that the method I discussed, with the nail studio equipment, you get very little force on the wood. But also the handyness you then have, you can approach your workpiece from all angles in an easier way and there is more feeling in what you do. With a fixed workpiece, you don't have that freedom. I do make use of my worktable, which I sometimes put the workpiece against and can then hold it in place better with my hand and have more control. Sometimes a small wooden box underneath to keep it more at eye level. These are not written rules, but more guidelines on how to proceed.
Hopefully this answers your questions.
 
Last edited:
A little tutorial to get you started. Which router for which job you should use is quite a thing that you sometimes ask yourself. With the following simple example I want to make this clear. Of course you can do this job with a custom made scraper, examples enough here on the forum. But I want to show you that this can also be done with a router, out of hand. I made this example a bit fast. More to show how to do it. The quality can always be better.

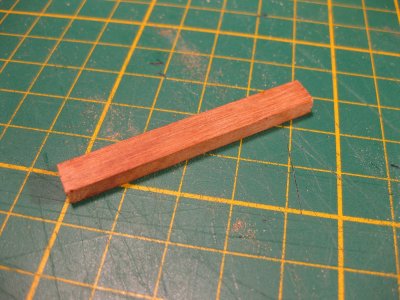
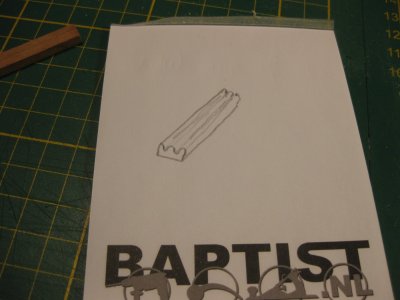
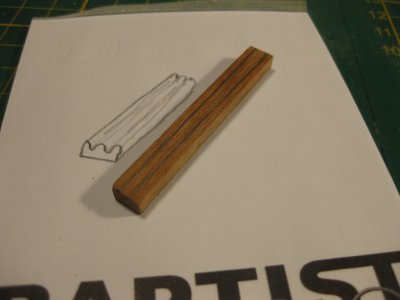
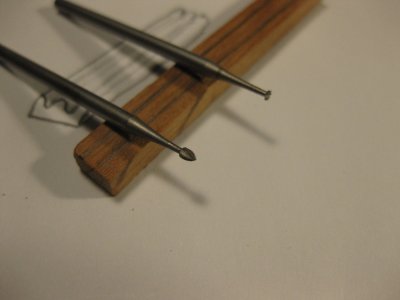
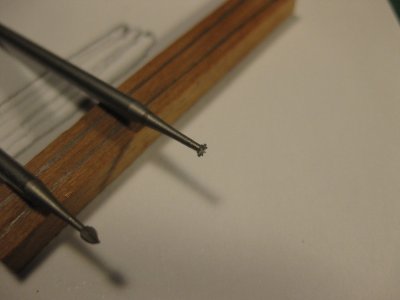
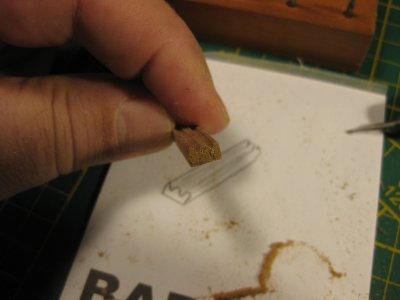
This is what I want to make and I am using a piece of walnut for that. First I draw the 2 lines on the piece of wood where the deepest point will be and I use 2 types of cutters for that and a piece of sandpaper. A round needle file could also be used if you have this. Especially useful if you want to make a longer piece. The cutters I use are the drop shape and the flat T shape.

IMG_4913.JPGIMG_4914.JPGIMG_4915.JPGIMG_4916.JPGIMG_4917.JPG

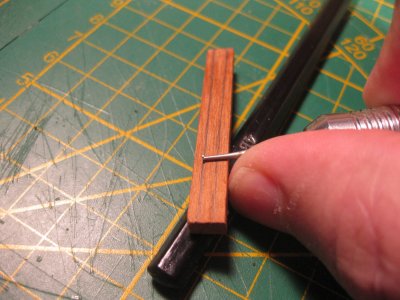
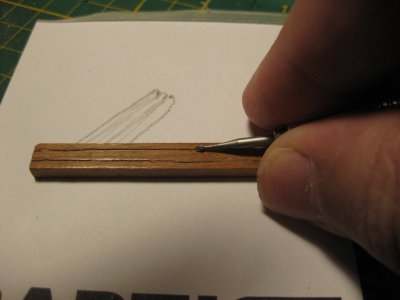
Because the handpiece of the nail studio end cutter is quite handy and you can hold it in your hand at the front end, it's possible to use the flat T-shaped cutter to pass it over the wood like you do with a mark-off pencil. This will give you a very small slot, notch to have your drop router guided into.

IMG_4918.JPG

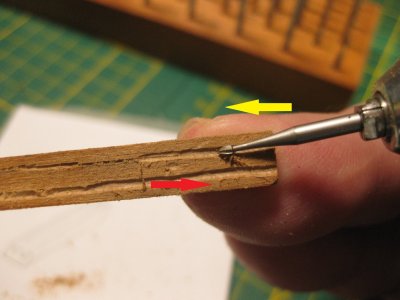
Then you can then use the drop shaped cutter to enlarge the notch and make it round. Again, this is using your fingers coming up the side of the wood to move your handpiece across the wood. See example. Start gently with the tip of the cutter first and then let it go flatter and flatter. You can let the router go 2 ways, but my finding is that a retreating motion (red arrow) gives more control. Do not use pressure but sweep across the wood as it were. To avoid catching.

IMG_4920.JPGIMG_4921a.jpg

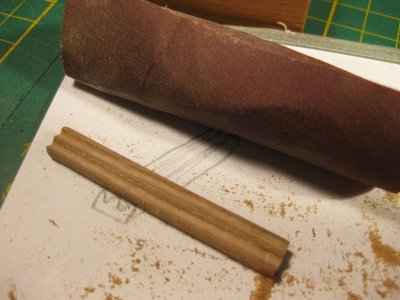
Actually, this is a great exercise to get a good feel for your tool. You will have to practice this a few times to feel how much pressure you can apply and how fast the cutter should be spinning. Also how to handle the handpiece. By the way, I use 1.4 mm. cutters in the first stage and finish with a 1.8 mm. drop shape cutter in the last stage. I have the speed of the machine at about 70%. A little bit faster for the 1.8 mm. Then when you have reached the rounding at the deepest point of the wood, I finish the rest with sanding linen that you can hold nicely double, creating a round section. I used grid 400.

IMG_4922.JPGIMG_4923.JPG

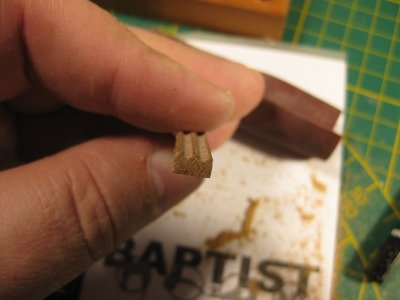
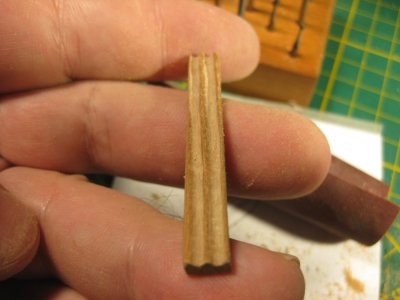
The final result (I'm not proud of it, but wanted to show a quick example).

IMG_4924.JPGIMG_4925.JPG

Of course, to get a nice result, you can also grind a scraper to size and use that. But to make a scraper for a small part? This goes too and it's actually quite fun to do. You also learn a little handling of your cutters and handpiece. Something you have to if you are going to make ornaments. Practice and practice and that is best done with simple designs and parts. An earlier part I made this way is the wing transom of my Hohenzoller model.

IMG_4429.JPG

Good luck. Maybe more examples will follow. And secretly I hope there will be some tips and tricks from other artists.
 
On SOS there are a few topics I like to link to. They helped me in the past to understand the way how to carve.

https://shipsofscale.com/sosforums/threads/rotary-carving-and-its-tools.1225/

https://shipsofscale.com/sosforums/threads/english-lion-figureheads.3479/

https://shipsofscale.com/sosforums/threads/carving-videos.3299/

today I discovered this one, interesting reading material.

https://shipsofscale.com/sosforums/threads/carving-article-by-harold-hahn.7593/

Off course there are more parts in this forum where you can find how others members show their carvings and sometimes explain how they did it. You have to search for it in the building logs here. If you you know some just put the link in this topic of the post where it is start.

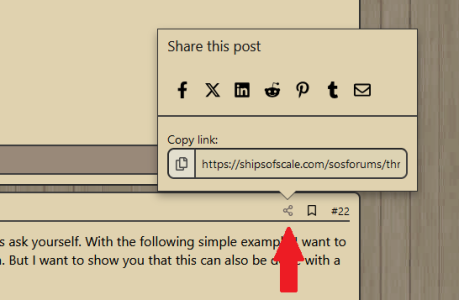
Just select the button in the post where the interesting part of the carving starts and copy/paste the link here in the topic.
In that way we get an topic where it is easy to find more info about this subject. It is also for me interesting to see how it is done by other members and to learn from them. Thanks.

copy.png
 
A little tutorial to get you started. Which router for which job you should use is quite a thing that you sometimes ask yourself. With the following simple example I want to make this clear. Of course you can do this job with a custom made scraper, examples enough here on the forum. But I want to show you that this can also be done with a router, out of hand. I made this example a bit fast. More to show how to do it. The quality can always be better.

This is what I want to make and I am using a piece of walnut for that. First I draw the 2 lines on the piece of wood where the deepest point will be and I use 2 types of cutters for that and a piece of sandpaper. A round needle file could also be used if you have this. Especially useful if you want to make a longer piece. The cutters I use are the drop shape and the flat T shape.

View attachment 494981View attachment 494982View attachment 494983View attachment 494984View attachment 494985

Because the handpiece of the nail studio end cutter is quite handy and you can hold it in your hand at the front end, it's possible to use the flat T-shaped cutter to pass it over the wood like you do with a mark-off pencil. This will give you a very small slot, notch to have your drop router guided into.

View attachment 494986

Then you can then use the drop shaped cutter to enlarge the notch and make it round. Again, this is using your fingers coming up the side of the wood to move your handpiece across the wood. See example. Start gently with the tip of the cutter first and then let it go flatter and flatter. You can let the router go 2 ways, but my finding is that a retreating motion (red arrow) gives more control. Do not use pressure but sweep across the wood as it were. To avoid catching.

View attachment 494987View attachment 494989

Actually, this is a great exercise to get a good feel for your tool. You will have to practice this a few times to feel how much pressure you can apply and how fast the cutter should be spinning. Also how to handle the handpiece. By the way, I use 1.4 mm. cutters in the first stage and finish with a 1.8 mm. drop shape cutter in the last stage. I have the speed of the machine at about 70%. A little bit faster for the 1.8 mm. Then when you have reached the rounding at the deepest point of the wood, I finish the rest with sanding linen that you can hold nicely double, creating a round section. I used grid 400.

View attachment 494990View attachment 494991

The final result (I'm not proud of it, but wanted to show a quick example).

View attachment 494992View attachment 494993

Of course, to get a nice result, you can also grind a scraper to size and use that. But to make a scraper for a small part? This goes too and it's actually quite fun to do. You also learn a little handling of your cutters and handpiece. Something you have to if you are going to make ornaments. Practice and practice and that is best done with simple designs and parts. An earlier part I made this way is the wing transom of my Hohenzoller model.

View attachment 495003

Good luck. Maybe more examples will follow. And secretly I hope there will be some tips and tricks from other artists.
Hi Stephan,

Thx again for the great tutorial.
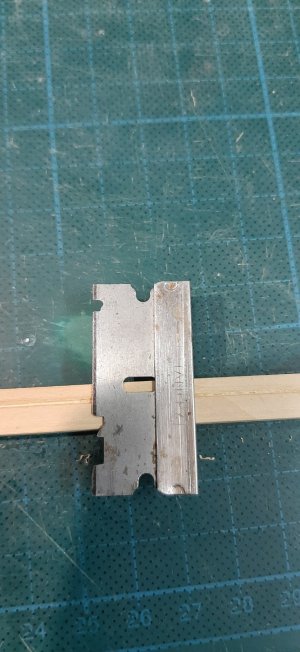
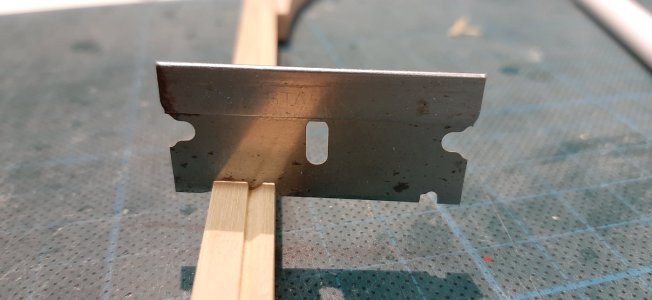
I would like to add to the last post that these kind of profiles are far easier to create by making a razor blade scraper.
Just grind the mirror image of the profile you need in a razor blade and scrape it into the wood. You will get a very crisp result this way and it works easy and quick.
20230505_150920.jpg20230505_152902.jpg
 
Hi Stephan,

Thx again for the great tutorial.
I would like to add to the last post that these kind of profiles are far easier to create by making a razor blade scraper.
Just grind the mirror image of the profile you need in a razor blade and scrape it into the wood. You will get a very crisp result this way and it works easy and quick.
View attachment 495338View attachment 495339
Yes I mentioning that. But when you want to learn handling the mill you have to practise. Simple design are the best way to start with.
 
For those who are like the carving and the way to do it, I started this week the carving of a lion in my buildlog of a Dutch 2-decker

 
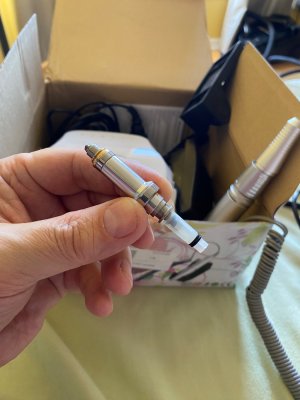
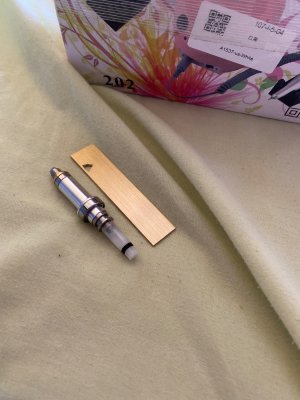
Hi, Stephan. I bought this wonderful rotary drill machine. I was able to disassemble the handpiece but now have no idea how to extract the collet without breaking it. Please help. The wrenches they sell doesn’t seem to help. I made up a triangular wrench from piece of metal.

IMG_0311.jpeg

image.jpg
 
Hi, Stephan. I bought this wonderful rotary drill machine. I was able to disassemble the handpiece but now have no idea how to extract the collet without breaking it. Please help. The wrenches they sell doesn’t seem to help. I made up a triangular wrench from piece of metal.

View attachment 497612

View attachment 497613
Hi Y.T. you need the handpiece completely assemble incl. the metal stift in place. That metal stift should always be in the handpiece, never let the handpiece without. The stift is the same thing as a cutter but only the thicknes and no head to cut with. When the handpiece is assembled you can turn the top loose with that beautifull key what you made edit. Make sure the bur is not tighten. The first time you need some force. Thats why the stift also should in the head and locked. Hope this info will help. I was the first time also afraid to do it, looks fragile but it is strong and can widstand some force.
 
Last edited:
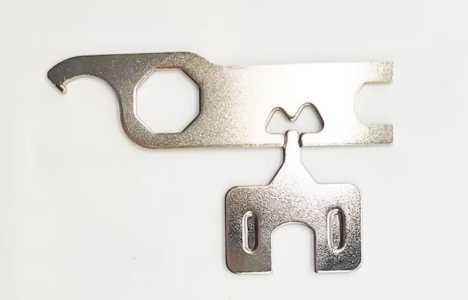
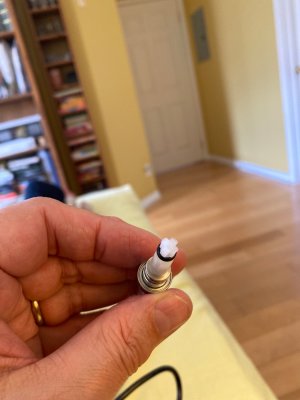
There is nothing I can hold the cross shape plastic side. I guess will have to make some special wrench for this as their standard supply wrench has no corresponding hole.

View attachment 497655

View attachment 497656
You have to assemble the handpiece again. When it is assembled and the fake bur is also placed and LOOSE you can unscrew the shaft with the triangel key. I'm gonna make a picture what to do. I found an video that is the same way to do.
 
When fake shaft is tightened it is free rotating as it couples straight with the motor. When it is untightened this does not unscrew the collet either.
 
No, this does not work. I span it 20 times. Collet is not getting unscrewed. Just getting rotated. Tried in UNLOCKED (as long as in LOCKED) positions. I need to hold that plastic cross section end while rotating triangular wrench.
 
When you put another Chuck in the handpiece like a 3,175. Make sure to also insert a bur of 3,175 before you tuigen the chuck with the triangel key.

For everybody, never leave a handpiece lie around with an empty chuck. Always put in a bur that fit. Because you can damage the chuck without.
 
No, this does not work. I span it 20 times. Collet is not getting unscrewed. Just getting rotated. Tried in UNLOCKED (as long as in LOCKED) positions.
Did you assembled in the right way. All the little parts. Test him in the machine if it works. When it works you assembled it right.
 
Here you can see when I loosen the chuck the bur can move but the chuck is fixed. When the handpiece, I got that once, isn't assembled in the right way. It will keep moving.
Yes. I fully understand. The collet gets somehow immobilized, I can rotate it with some minimal effort with a triangular wrench but collet does not get unscrewed. I can rotate it endlessly.
 
Back
Top