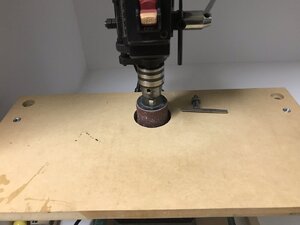
I converted my drill press to function as a spindle sander. You can but a spindle sander kit from harbor freight. It comes w three different sizes cylinder rubber type disk that fits into the chuck of the drill press arbor chuck. Then it comes w three different sizes of cylinders sanding disk. I also fixed a table onto drill press as to keep the part 90 degrees to sanding drum. I will see if I have a picture of press.
-

Win a Free Custom Engraved Brass Coin!!!
As a way to introduce our brass coins to the community, we will raffle off a free coin during the month of August. Follow link ABOVE for instructions for entering.
-

PRE-ORDER SHIPS IN SCALE TODAY!
The beloved Ships in Scale Magazine is back and charting a new course for 2026!
Discover new skills, new techniques, and new inspirations in every issue.
NOTE THAT OUR FIRST ISSUE WILL BE JAN/FEB 2026
- Home
- Forums
- Ships of Scale Group Builds and Projects
- Group Build Archives
- Blandford Cross Section PoF Group Build
You are using an out of date browser. It may not display this or other websites correctly.
You should upgrade or use an alternative browser.
You should upgrade or use an alternative browser.
Anthony's 1/48th scale HMS Blandford [COMPLETED BUILD]
An oscillating spindle sander is ideal. but if you don't have one, chucking a sanding drum into a drill press can get the job done. You can even rig up a hand held electric sander to work like a drill press with drum sander in place.i wanted to see if i was able to cut out the frame parts so as a test i cut the first one , it didn't take too long and i think it came out ok , my next hurdle is going to be sanding the inside of the frame , any suggestions on what to use?View attachment 167289View attachment 167290
Failing the above, a Dremel with a sanding drum will work. It's best to use a Dremel with variable speed, and set it as low as you can so you don't remove too much stock!
- Joined
- Aug 10, 2017
- Messages
- 1,706
- Points
- 538

The frame is fine, you do not need to remake it. The frames in the midsection of a ship doesn’t require much sanding to fare the frames, as you proceed toward the bow and stern more beveling is required and it is a good idea to leave a little white space around the frames.
i have been getting some tools and things together for my HMS blandford build , i had the plans printed at my local kinko's and i am trying to source some wood , looking at the plans , and reading some of the build logs i know that i need to check the measurements of the prints, so my first question is , how?
i had the base printed on 11 x 17 paper and i found some measurements in a build log but mine aren't the same , how do i know what is right?
Hallo Antony,
we wish you all the BEST and a HAPPY BIRTHDAY

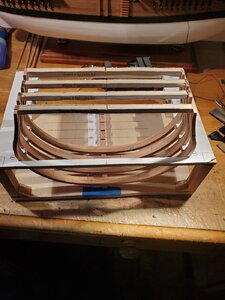
sorry been away visiting my son , thank you , i have 2 done now , its not my main project so i do it when i'm waiting for glue to dry or can find the time , i would like to spend more time on it but i should really finish my first project, The Endeavour , so that i can go full time on the x section , but i will keep you informedHi Anthony, happy birthday. How are your frames coming along?
Mike
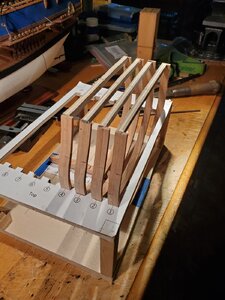
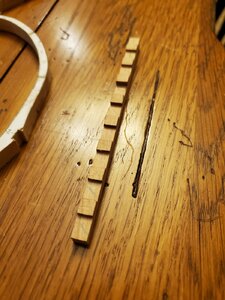
so i'm home now , here's number 2 frame and the keel, i had to make a second keel as the first one was a bit sloppy, this one is tight , tere's also a pic of the building jig , i am going to have to fit each frame to the jig which means filling out the holes to fit , is this right or is my jig too small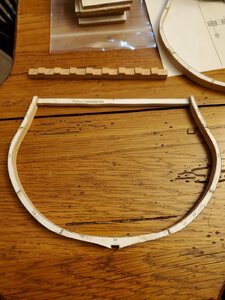
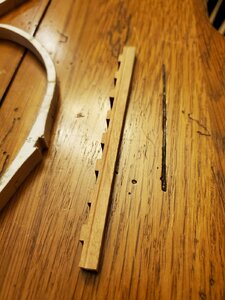
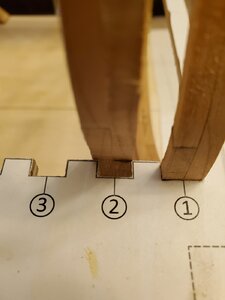


The jig’s too small. Use a file to enlarge the notch on both sides to fit the frame. In general, you need to “remove the line” in the notches so the frames fit.
- Joined
- Apr 20, 2020
- Messages
- 6,255
- Points
- 738

Hallo Antony,
Although I'm late for a few days it's important for me to wish you you all the BEST and a HAPPY BIRTHDAY And that you will continue to build many models of ships while enjoying the process and the beautiful result as can be seen in your blog
Although I'm late for a few days it's important for me to wish you you all the BEST and a HAPPY BIRTHDAY
 And that you will continue to build many models of ships while enjoying the process and the beautiful result as can be seen in your blog
There is always a little “wiggle room” in the plans. There is also something called “tolerance creep” as the model construction proceeds. It is the accumulation of sequential small errors that can result in a part not fitting too well. As you move along, you’ll build more to the model, with the plans more a guide than gospel.



![20200726_143142[1].jpg 20200726_143142[1].jpg](https://shipsofscale.com/sosforums/data/attachments/152/152139-62bcfaec4d79e095886cc9570a74bef6.jpg?hash=Yrz67E154J)
