Black Pearl 1:50 ZHL All-Scenario version

I feel that I honed my rudimentary skills on the Pearl. Now I know when I make mistakes; before, I didn't. I understand the basic structures of the ship , its sails, and its rigging much better now. I don't think I'll ever go as fast as I did on the Pearl or the first part of the Connie build, but I will spend time on my new builds and enjoy them as much or more.
Vic, I really understand what you mean! When I first opened up the two boxes of the Pearl, I thought no way am I going to be able to do this! Yet, because of this forum and so many good folks that were willing to share their experiences with their own models, I was able to see a path that could give me the confidence to do this ship!

Heck, I just placed an order for some fiber optics because Jodie mentioned it to me. Gave me another wild ass idea! Ha! I figure at this point, might as well put the time into it and make it my own show piece. What the heck, I’m retired so I have the time! However, I will have learned a lot from the Pearl, as I’m already aware of things that I’ll do differently with my San Felipe!
 
Captain's Log ~~~ June 25, 2021
Build time today: 1 hour(s)
Total build time: 219 hours

Construction for the Black Pearl (All-Scenario version)

Build guidelines: We logged twenty hours during the past 6 days, primarily working on sidewall paneling for the inside hull plywood and laying Part #28 on the fore, main and aft decks. Also, applying some stain, touching up with some black acrylic paint and prepping materials for the Captain's Quarters. We experimented with making a few furniture pieces and a spotting scope. Additionally, we ordered some fiber optics to see if there is any way we can expand on some ideas and incentive that Jodie @MystRacing has supplied this Captain.

1.jpg

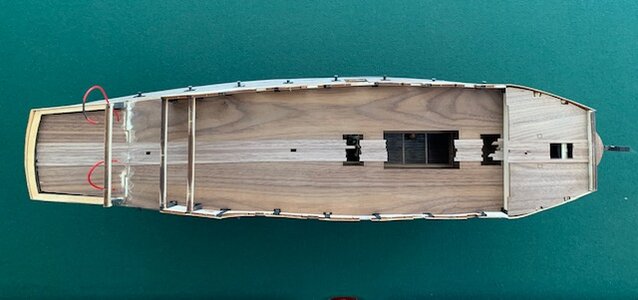
I worked off aligning the first deck plank through the center of each of the three mast holes and laid planks alternating side to side. Here, the first 7 planks Part #28 are down.

2.jpg

Actually, being new to this type of work, I was pleased with how well the planks were laying down. I had to modify a bit where the rear deck of the Captain's Quarters met the main deck. I imagine I was a mm or so off because of my earlier mistake of laying the deck to the Captain's Quarters and the alignment was a bit off...I sanded a bit and filled in with some saw dust and Titebond....figuring the stain would cover up most of my errors here.

3.jpg

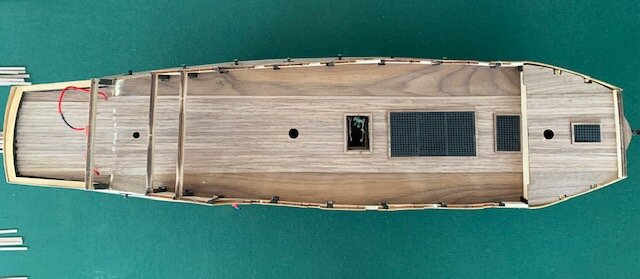
Here we are with some light sanding and final prep to apply the Minwax Golden Oak stain.

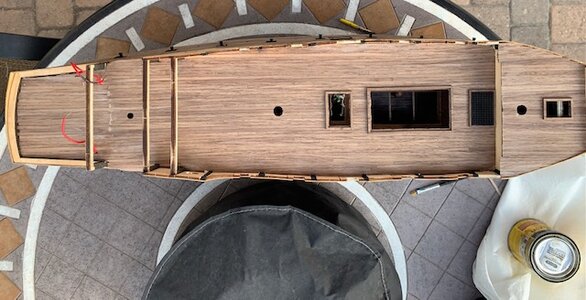
This pic was taken after staining.This is with two coats.....I may apply a coat or two of satin varnish????

5.JPG

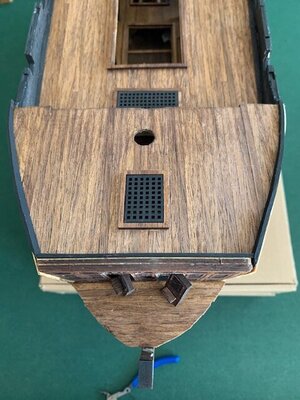
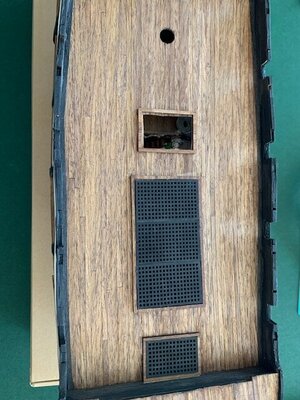
Now, under indoor lighting, this is a more accurate look of the deck. Here, Part #29 was cut to form three pieces to finish off part of the fore deck side are where the railing will be mounted later. I used my heat gun to bend the two side planks to approximate the curve of the bow. This completed Steps 142-144.

6.JPG

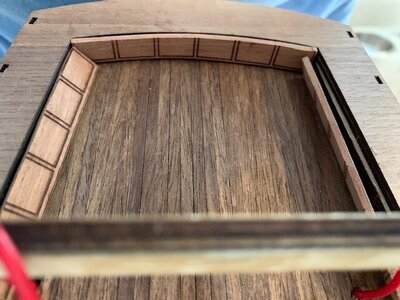
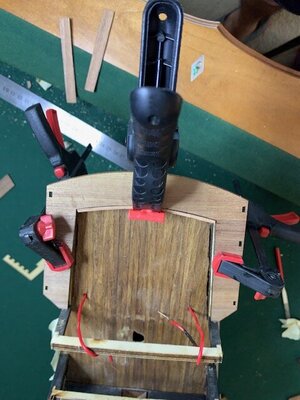
Step #145 was to attach planks #28 to the inside hull plywood. I stained these planks Ebony to contrast the Golden Oak deck. Also, I laid a border deck plank in Ebony for two reasons. 1) Throws off a strong contrast against the Golden Oak for cosmetics and also 2) to cover up a few areas of the deck where I filed a bit too much of the deck to fit it against the bulkheads. Step #146 and #145 should be in reverse order. Parts N1-N13 are to be glued in on each side to strengthen the sidewall panels like in the gun deck below. These parts are what is then paneled in Step 145 with #28 planks.

7.JPG

8.JPG
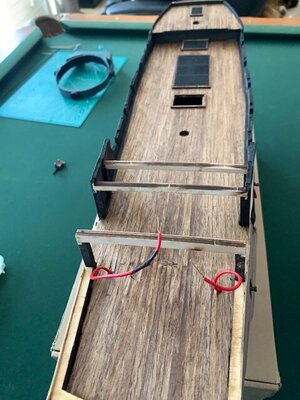
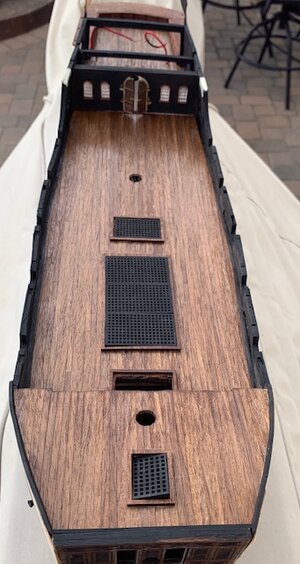
Here's a cleaner look down the main deck.

9.JPG
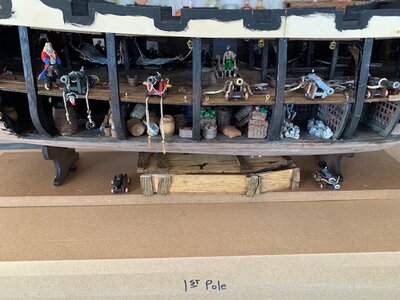
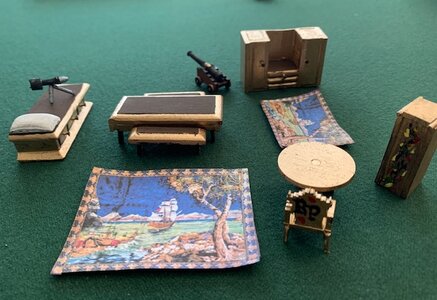
Just a rough visual from the Starboard open side view. Which leads us into next weeks voyage. We will start with Steps #157-162 which is the main entrance panel (doors and windows) into the Captains's Quarters. I spent several hours this past week to design a few pieces of furniture for the Captain's Quarters. The original kit was limited to 1 round table, 1 chair, and 1 tall locker. I designed a trundle type bed as suggested by Vic @Vfordyce. I couldn't imagine a Captain's Quarters without a bed, considering their Pirate exploits. Also, I imagine there should be a bigger table for the Captain, Quartermaster, 1st Officer, Cook and other key mates to meet and confer in private to discuss strategy in all their drunken rum splendor. So, I designed a larger table with picnic benches...Also, made a spotting scope....painted the tall locker but designed a full armoire too. Found an image that I could use as carpets depicting a sailing ship amidst the islands. I'll place the bigger one under the large table....and the smaller one inside the door entrance.

10.jpg

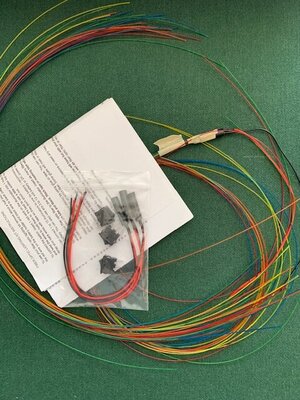
Jodie @MystRacing mentioned an idea for fiber optics, possible placing candles on the table etc...I spent $20 for various colors of fiber with 4 illuminators and a few switches....see below.

11.JPG

These illuminators are pretty nifty. The ones I purchased have a white LED pre wired and the light gets transmitted through the fiber and shows up to whatever color you have selected. I have .75mm fibers and up to 15 will work with each illuminator. I really had no experience to what size I would need to do a candle for instance. So, not sure what else I can use them for but will be put to use somewhere and place in time. :)
Any ideas welcome!

So concludes another week. We have now completed the first three months of the Black Pearl's construction. 219 hours, about 75% of the 1st pole completed and a little more than 9 (24) hour days of work. Not sure this means anything, is good or bad in regard to time....its just a marker for me.

I think its time for some rum as we are all off for weekend shore leave!

Be safe mates and until the next Captain's Log....signing off for now. Hopefully, we can get out another edition of Pirates Lore, Myths and Legends this week.

Ahoy all,
Rick
 
Last edited:
Captain's Log ~~~ June 25, 2021
Build time today: 1 hour(s)
Total build time: 219 hours

Construction for the Black Pearl (All-Scenario version)

Build guidelines: We logged twenty hours during the past 6 days, primarily working on sidewall paneling for the inside hull plywood and laying Part #28 on the fore, main and aft decks. Also, applying some stain, touching up with some black acrylic paint and prepping materials for the Captain's Quarters. We experimented with making a few furniture pieces and a spotting scope. Additionally, we ordered some fiber optics to see if there is any way we can expand on some ideas and incentive that Jodie @MystRacing has supplied this Captain.

View attachment 240806

I worked off aligning the first deck plank through the center of each of the three mast holes and laid planks alternating side to side. Here, the first 7 planks Part #28 are down.

View attachment 240807

Actually, being new to this type of work, I was pleased with how well the planks were laying down. I had to modify a bit where the rear deck of the Captain's Quarters met the main deck. I imagine I was a mm or so off because of my earlier mistake of laying the deck to the Captain's Quarters and the alignment was a bit off...I sanded a bit and filled in with some saw dust and Titebond....figuring the stain would cover up most of my errors here.

View attachment 240808

Here we are with some light sanding and final prep to apply the Minwax Golden Oak stain.

View attachment 240809

This pic was taken after staining but with poor lighting. The orange tint is not correct as you will see the more natural look in later pictures.

View attachment 240810

Now, under indoor lighting, this is a more accurate look of the deck. Here, Part #29 was cut to form three pieces to finish off part of the fore deck side are where the railing will be mounted later. I used my heat gun to bend the two side planks to approximate the curve of the bow. This completed Steps 142-144.View attachment 240811

Step #145 was to attach planks #28 to the inside hull plywood. I stained these planks Ebony to contrast the Golden Oak deck. Also, I laid a border deck plank in Ebony for two reasons. 1) Throws off a strong contrast against the Golden Oak for cosmetics and also 2) to cover up a few areas of the deck where I filed a bit too much of the deck to fit it against the bulkheads. Step #146 and #145 should be in reverse order. Parts N1-N13 are to be glued in on each side to strengthen the sidewall panels like in the gun deck below. These parts are what is then paneled in Step 145 with #28 planks.

View attachment 240812

View attachment 240813
Here's a cleaner look down the main deck.

View attachment 240814
Just a rough visual from the Starboard open side view. Which leads us into next weeks voyage. We will start with Steps #157-162 which is the main entrance panel (doors and windows) into the Captains's Quarters. I spent several hours this past week to design a few pieces of furniture for the Captain's Quarters. The original kit was limited to 1 round table, 1 chair, and 1 tall locker. I designed a trundle type bed as suggested by Vic @Vfordyce. I couldn't imagine a Captain's Quarters without a bed, considering their Pirate exploits. Also, I imagine there should be a bigger table for the Captain, Quartermaster, 1st Officer, Cook and other key mates to meet and confer in private to discuss strategy in all their drunken rum splendor. So, I designed a larger table with picnic benches...Also, made a spotting scope....painted the tall locker but designed a full armoire too. Found an image that I could use as carpets depicting a sailing ship amidst the islands. I'll place the bigger one under the large table....and the smaller one inside the door entrance.

View attachment 240815

Jodie @MystRacing mentioned an idea for fiber optics, possible placing candles on the table etc...I spent $20 for various colors of fiber with 4 illuminators and a few switches....see below.

View attachment 240816

These illuminators are pretty nifty. The ones I purchased have a white LED pre wired and the light gets transmitted through the fiber and shows up to whatever color you have selected. I have .75mm fibers and up to 15 will work with each illuminator. I really had no experience to what size I would need to do a candle for instance. So, not sure what else I can use them for but will be put to use somewhere and place in time. :)
Any ideas welcome!

So concludes another week. We have now completed the first three months of the Black Pearl's construction. 219 hours, about 75% of the 1st pole completed and a little more than 9 (24) hour days of work. Not sure this means anything, is good or bad in regard to time....its just a marker for me.

I think its time for some rum as we are all off for weekend shore leave!

Be safe mates and until the next Captain's Log....signing off for now. Hopefully, we can get out another edition of Pirates Lore, Myths and Legends this week.

Ahoy all,
Rick
Awesome job on the deck had a bit of a shock when I first saw the orange photo but really like the golden oak. The captain getting the 5 star treatment. I toyed with using fiber optics in the lanterns but with the lockdown at the time, it was going to take too long and I wasn't sure what I needed. I'll be taking notes for the future.
 
Awesome job on the deck had a bit of a shock when I first saw the orange photo but really like the golden oak. The captain getting the 5 star treatment. I toyed with using fiber optics in the lanterns but with the lockdown at the time, it was going to take too long and I wasn't sure what I needed. I'll be taking notes for the future.
I agree Tony....I deleted the orange deck pic....it was not indicative of the two coats of golden oak!
 
Captain's Log ~~~ July 02, 2021
Build time today: 2 hour(s)
Total build time: 227 hours

Construction for the Black Pearl (All-Scenario version)

Build guidelines: Steps 157-162, Steps 187-197, Steps 200-204, & Steps 224 & 225 were completed this week. Actual build time was 8 hours during the past week. A few more hours were dedicated to solving some issues as we will discuss below. I did not include these hours into the build time....

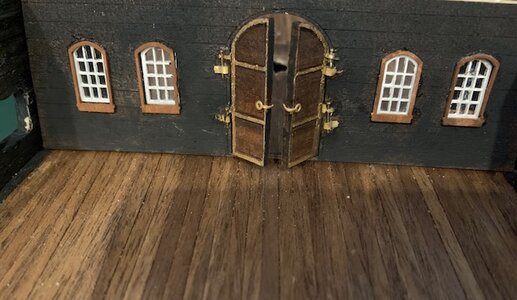
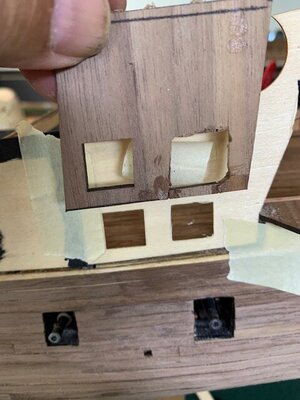
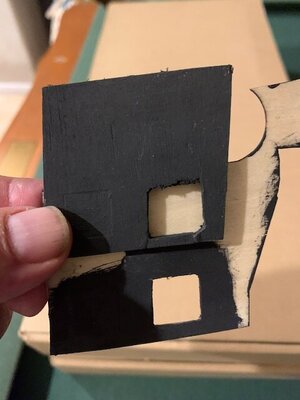
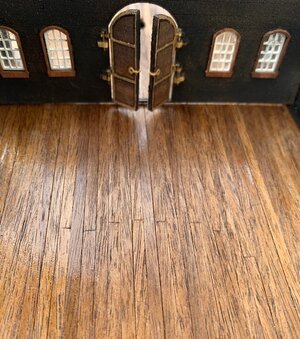
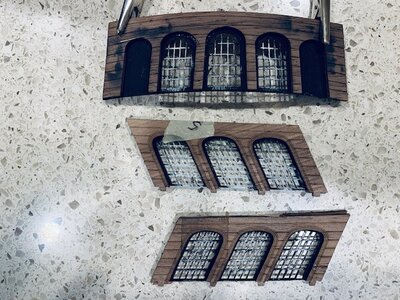
Things started off well with the completion of Steps 157-162. (Entrance wall into the Captain's Quarters.)

1.jpg

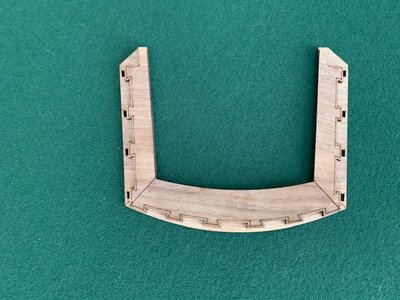
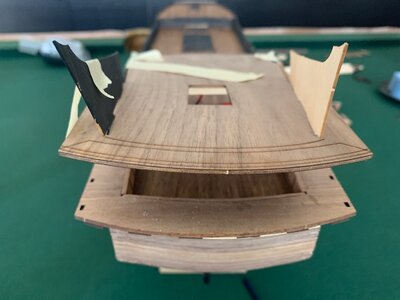
Steps 187-191 started the beginning process of building up the stern. Parts I9, I4, R8 were glued up to form the outer perimeter of the stern. I dry fitted the pieces before gluing them up to get a better understanding of how things would line up from this base. I had to sand some of the exterior plywood and wood to create a smooth, flat platform for this base.

2.jpg

After this point, my nightmares started and Ricky F. Up appeared at my drydock.

Ricky F. Up.jpeg

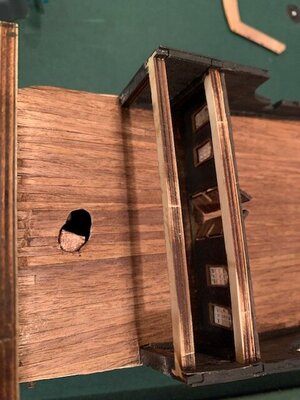
Reading Rowboat's thread on fitting the masts made me wonder. Now, that I had all three decks placed, I'm embarrassed to say that I just assumed that the mast holes would line up. (You know what they say about the word "assume" mates.) So, I located my three masts and the the fore and main masts lined up perfectly and I thought, "great job, Captain." The mizzenmast become my undoing. For some reason, I just totally stopped thinking and became caveman dumb. The mizzen went through the first two decks and stopped....I wiggled and jiggled and I couldn't get it to go down any further into the hull. So, looking at the Mizzenmast standing taller than the main mast seemed to tell me I probably needed to drill out the holes some.
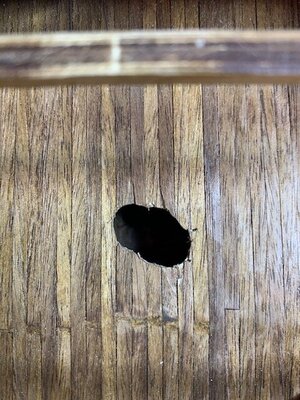
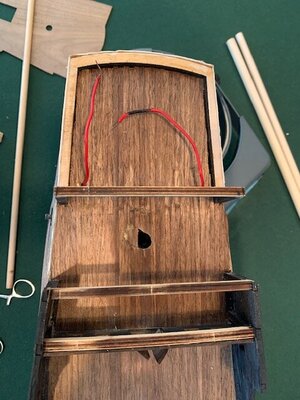
BIG FCKEN MISTAKE. Putting a drill into my hands to open up a hole on a $500 model ship is like playing Russian roulette. I totally tore up my beautiful deck and made a mess of things.

3.JPG

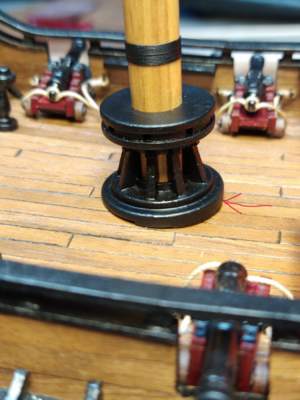
Even after this damage, I still couldn't get the mast to sit properly. I don't know what made me think it had to go all the way down to the bottom of the ship.....I think I was hitting the keel with the drill....I figured that if I kept this up, I would have drilled through the bottom of the ship and finally stopped....and figured it was time for Plan B. First, I wanted to try to close up the enlarged hole some....but I had nothing to support the planks so I cut a small piece of wood the same thickness of the main deck and glued it in...planked over it enough that the Capstan or whatever that table is at the base of the mizzen would hide my error.

4.JPG 5.JPG

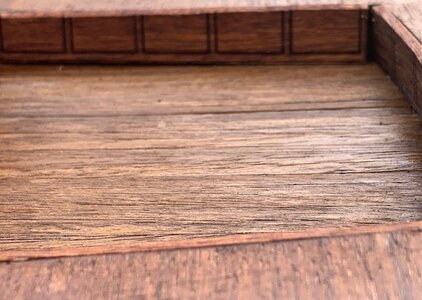
So, after dealing with this mess, I salvaged this part of the deck good enough that the average person will not really notice the mistake. After I coated the deck with the 3rd coat of stain, (last few pics) it really turned out OK. What I later discovered by looking at the full 1:1 Plan pics, is that I think the mizzenmast was only suppose to go down to the gun deck, not the lower deck??? Obviously, I drilled through that deck, but that part of the ship is not visible. Luck me.....HINT: You really need to study many steps ahead of these Chinese plans.....because they really are lacking on providing any common sense tips.

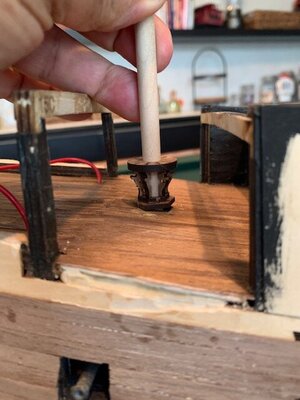
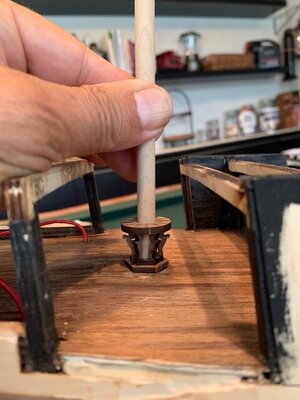
I noted that the Capstan ???? (or whatever that is at the base of the mizzenmast) was supposed to be assembled to consider the tilt of the deck....if the mast lines up straight, I have a gap...if the mast tilts forward...it works...the plans show all three mast totally vertical to each other with no tilt on any one. So, I will have to make a spacer for the half facing toward the bow.

9JPG.JPG 10JPG.JPG

By completing Steps 189-191, the base of the Captain's Quarters was completed.

6.JPG 7.JPG
8.JPG

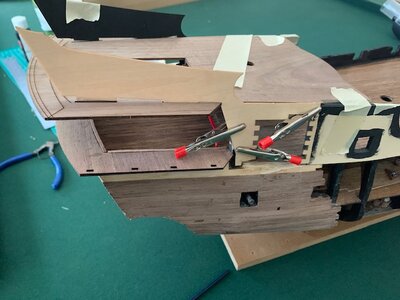
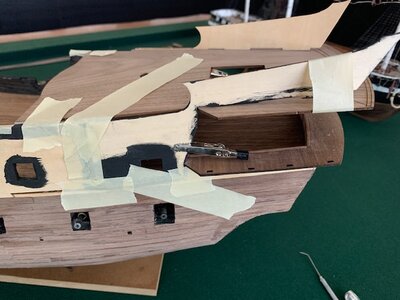
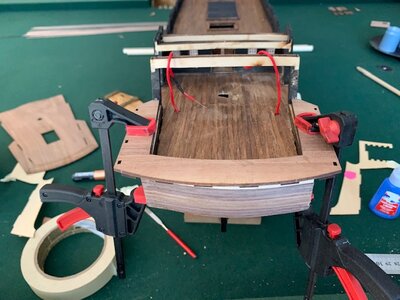
I dry fitted all the parts of the stern. I assembled the side and rear walls and windows just to see how they would line up to the upper deck Part #25 and to the side plywood panels....I used masking tape to keep things together and I really worried about if I was going to see my way through with how I could make things work...

11.JPG
12.JPG
13.JPG

Since I'm adding furniture to the Captain's Quarters that is not part of the original kit, I had to modify the location on the closed Port side of the cannon. The Captain's dresser would not fit properly if I kept the cannon in the forward position, so I moved it back and filled in the gap.
14.JPG
15.JPG
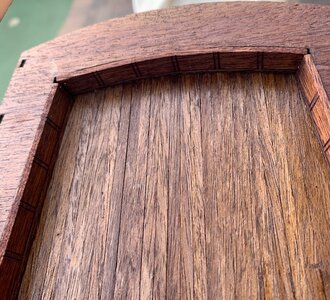
The top piece is Part #N14-L which is used to secure Part Q1 on its inner side. Additionally, The open Starboard side Part# R1 was placed into position..with Part N14-R. All four parts are now secured. At this point, I cleaned up with touch up and finished all sanding so I could apply my final coat of Golden Oak stain to the deck. I'm very happy with the main deck and its finish. Even though I made a huge mistake with the drill....I learned a lot and will understand the bone structure of my next ship a lot better.
Here's a look with the third coat of stain. I may apply two final coats of polyurethane satin finish to finish the main deck before calling it complete.

16.jpg 17.jpg
18.jpg 19.jpg

Next week will have us complete the placement of the Captain's Quarters walls and the ceiling beams and we will start on the next phase of lighting and soldering.

20.jpg

Signing out mates. Fireworks are back this year in San Diego.....the Big Bay Boom is the largest fireworks display on the West Coast...looking forward to our great July 4th!!!

Ahoy all,
Rick
 
Hi Rick great progress the deck looks really good. I had the same issue with the capstan ended up making a tapered spacer 0-2.5mm to go under it.
View attachment 241917
I think I just built it crooked so it would lie flush against the deck. First time I made something off kilter and it turned out okay. I did have some other issues with the capstan. I couldn't get the little hooks all in after gluing it down because I had forgot to drill the holes in and it was too tight a fit for my Dremel. So I decided to forgo the chains. I'm not sure why they would be there in the first place. Then I used the chains to hold my anchors in place.
 
Hi Rick great progress the deck looks really good. I had the same issue with the capstan ended up making a tapered spacer 0-2.5mm to go under it.
View attachment 241917
I think I am going to need to do something similar on my BP. Just finished the lower part of the main mast yesterday.

Rick - A quick note. In your pictures of the capstan it looks like you may be fitting it upside down.
 
I think I am going to need to do something similar on my BP. Just finished the lower part of the main mast yesterday.
Rick - A quick note. In your pictures of the capstan it looks like you may be fitting it upside down.
Isn't that just another round table? It doesn't have holes for the poles. And I think it is upside down.
 
I think I am going to need to do something similar on my BP. Just finished the lower part of the main mast yesterday.

Rick - A quick note. In your pictures of the capstan it looks like you may be fitting it upside down.
Yep Tony, it surely is upside down! Didn’t even notice that when I took the pic!
 
I think I just built it crooked so it would lie flush against the deck. First time I made something off kilter and it turned out okay. I did have some other issues with the capstan. I couldn't get the little hooks all in after gluing it down because I had forgot to drill the holes in and it was too tight a fit for my Dremel. So I decided to forgo the chains. I'm not sure why they would be there in the first place. Then I used the chains to hold my anchors in place.
Hey, it’s a Pirate ship, right Vic! Anything goes! Captain’s discretion…LOL!
 
Yep Tony, it surely is upside down! Didn’t even notice that when I took the pic!
I think I am going to need to do something similar on my BP. Just finished the lower part of the main mast yesterday.

Rick - A quick note. In your pictures of the capstan it looks like you may be fitting it upside down.
So Tony, excuse my ignorance! Is this a Capstan in the Captain’s Quarters? I know there is one on the main mast….but are there supposed to be holes so handles can be attached there in the mizzenmast?
 
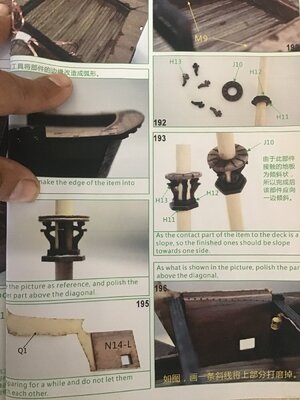
Capstan question? So I referred back to the manual and it shows the larger part to be in the upright position like I showed in my last Captain’s Log pic! Refer to the pic here! Is this correct position on the mizzenmast?
89DDACDC-3F96-43DB-9952-8190A7003FF4.jpeg
Thanks mates!
 
I'm pretty sure that is intended to be a table not a capstan, but both parts have the same issue of not fitting on an angled deck, I built that table with a tilted base after I broke all the original lower parts. My capstan got a direct hit from a massive canonball last weekend so it'll have to be rebuilt. I should be doing that instead of typing here. Happy 4th to you all.
 
I'm pretty sure that is intended to be a table not a capstan, but both parts have the same issue of not fitting on an angled deck, I built that table with a tilted base after I broke all the original lower parts. My capstan got a direct hit from a massive canonball last weekend so it'll have to be rebuilt. I should be doing that instead of typing here. Happy 4th to you all.
Happy 4th to you Jodie. I always look for your comments and appreciate you visiting and commenting on my build! I was thinking it was a table too!
 
I'm pretty sure that is intended to be a table not a capstan, but both parts have the same issue of not fitting on an angled deck, I built that table with a tilted base after I broke all the original lower parts. My capstan got a direct hit from a massive canonball last weekend so it'll have to be rebuilt. I should be doing that instead of typing here. Happy 4th to you all.
Thanks for the input Jodie. I always look forward to your comments and thanks for keeping an eye on my progress as well!
 
Back
Top