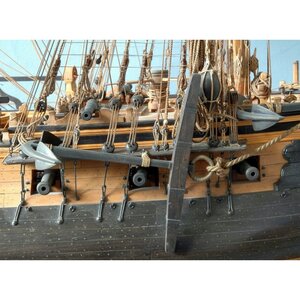
Bluenose 1/72 POF [COMPLETED BUILD]

I think I "borrowed" your method for the deadeyes and as you say it's near impossible to get it right and to maintain tension. It took me a lot of tweaking and starting anew a number of times, but the results are mediocre at best. For a next build I was contemplating to make a jig, covering a number of deadeyes (4 or so), then attaching the upper deadeyes and, while the jig is still in place, tensioning the shrouds. Still have to think on how to setup such a jig. Possibly you have to imposed requirements which are impossible to be met.
I also saw your picture for the ratlines somewhere (your log?), but I did not connect the sketch with your ratlines.
I have seen people use a board with small nails properly spaced to put the upper deadeyes on. But there are variations in the size of the deadeyes and the hole locations in them. Manufacturing tolerances on those parts are not usually very good.
But I think looking for perfection in the model kills some of the realism. A real ship was never perfect and had a lot of variance. I put treenails in the hull, and I decided not to make lines and make them perfectly spaced and in a perfect row because that is not how they were built. So I drilled holes by hand and just eyed everything. Sometimes I look at them and it bothers me. But then I remind myself the actual ship would have been that way.
Your comments that an actual ship would not have the precision I placement or alignment that is being attempted in models. I will readily agree with your variances thought as the life ring for my own work. Rich
 
But I think looking for perfection in the model kills some of the realism. A real ship was never perfect and had a lot of variance. I put treenails in the hull, and I decided not to make lines and make them perfectly spaced and in a perfect row because that is not how they were built. So I drilled holes by hand and just eyed everything. Sometimes I look at them and it bothers me. But then I remind myself the actual ship would have been that way.
I like your approach!
 
Onto shroud lines…there will be no lighthouse until I finish the ship…lol :p
First I stain the deadeyes, I just use a toothpick inserted in one of the holes to hold them, then dip in the can of stain and wipe them off.
View attachment 254191
next… I put the shroud line around the mast and serve where it comes together. Then put my metal spacers in the lower deadeyes.
View attachment 254192
Next…I glue the shroud around the upper deadeye while it’s on the upper part of the spacer. Then I trim the excess rope to a predetermined length, so they are all the same. ;) Then I serve that with 3 small ropes.
View attachment 254193
Next…I paint the rope white to simulate the wrapping around the upper deadeyes and rope.
View attachment 254194
Next…time to remove my spacer and tension the shrouds with waxed rope. Then tie the lanyards hitches and glue before cutting off excess.
View attachment 254195View attachment 254196
Next…the port pair of shroud lines will be added, then back to the starboard, etc. until I have 4 pairs finished. See you then! Happy modeling…
Hello Dean,

Beautiful and nice work!
If I may, I see various parts being painted in their appropriate colors, but I als see some fittings and other hardware (turnbuckles, belaying pins, hoisting eyes) still "bare". Do you intend to paint them at any stage or are you going to leave this as is? I'm asking, because I ran into the issue of "to paint or not to paint" and I found it hard to remain consistent (and I was not...)

Kind regards,

Johan

PS Just noticed you live in Texas. Back in 2004 I lived in Fort Worth, TX. Had a good time there and treasure a lot of good memories from those days.
Johan, thanks again for the compliments.
The fittings are normally supplied in brass, and a lot of people dye them black, or paint them. On a war ship, I would dye them black. But because this is a schooner, I chose to leave the fittings brass, unless it was in an area I painted white and chose to paint them white too. I like the white and brass combination on this ship, so I have chosen to go with that combination in most areas. So I used some artistic license. If you strive for historical accuracy, then you have to do your homework and see how the real ship was built, and the colors of everything. A lot of the original Bluenose images are black and white, so determining colors is not so easy. There is however a lot of documentation on how the ship was painted, the painting of the deck furnishings, etc. Also the Bluenose 2 has many color pictures for reference.

ps - Interesting you lived in Texas...and so you know how hot it gets here...lol. ;) I am close to the coast, in Missouri City, which is South of Houston.
 
ps - Interesting you lived in Texas...and so you know how hot it gets here...lol. ;) I am close to the coast, in Missouri City, which is South of Houston.
Oh, do I know how hot it gets in Texas! I once spend a week in Galveston, with the Admiral. Very hot and very humid. My profile picture was taken at Ft Worth Meacham Airport, some four years ago. Again very hot ánd very windy...
 
If you strive for historical accuracy, then you have to do your homework and see how the real ship was built, and the colors of everything. A lot of the original Bluenose images are black and white, so determining colors is not so easy. There is however a lot of documentation on how the ship was painted, the painting of the deck furnishings, etc. Also the Bluenose 2 has many color pictures for reference.
A while back I stumbled upon a very interesting document; Bluenose Practicum Standard. This document contains a letter, specifying the finish of the original Bluenose. I posted a copy of the first page of this letter in the BN Support Group, topic Masts.
Someone else argued that the paint scheme (amongst others) of the original BN might have been subject of change over time, which really doesn't help in selecting your colors.
I also experienced that there's no such thing as too much research; the information about the Bluenose is overwhelming and forces you to check, check again and then double check.
But, in the end of the day, it should be fun doing the research and the building and the result of all your hard work should please you.
 
Last edited:
Very nice presentation all around and keel to topmast head. It looks like you achieved your goal and only finishing touches that only you know about. First Place MetalRich
Thanks Rich! Once done with the foremast shrouds and rat lines, I will add the side stays. Then it’s time to make all the rope loops to put on the belaying pins. Then I should be finished! Then I can make the lighthouse and take pictures. ;)
 
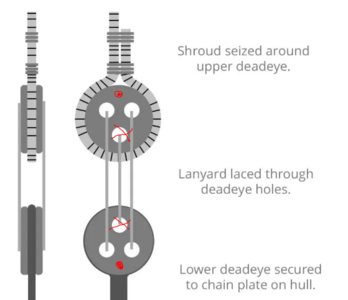
Hello, RDN1954, Please be aware that the deadeyes lashing diagram on the provided link is incorrect. The deadyes has to be turned 180 degrees. The red dosts are the correct placement of the deadeye's hole.

View attachment 255511

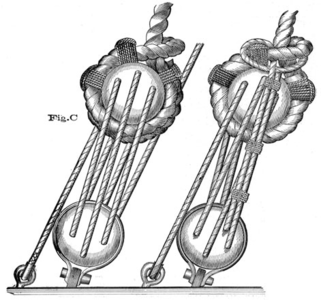
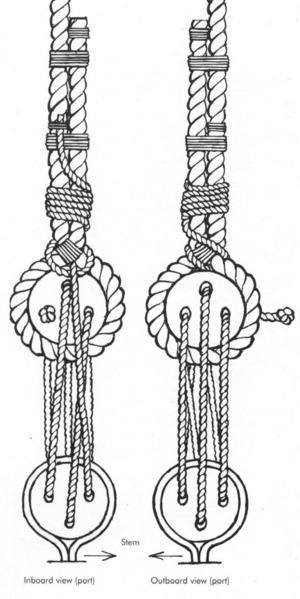
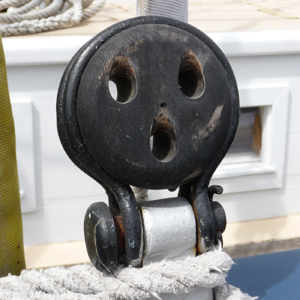
Here are the images of correct deadeye placement.

View attachment 255513 View attachment 255514

View attachment 255515

View attachment 255512
You're absolutely correct. Thanks for catching it; to be honest, I had to correct quite some deadeyes because of this. Apparently I "choose" to forget this blooper...
 
Hello, RDN1954, Please be aware that the deadeyes lashing diagram on the provided link is incorrect. The deadyes has to be turned 180 degrees. The red dosts are the correct placement of the deadeye's hole.

View attachment 255511

Here are the images of correct deadeye placement.

View attachment 255513 View attachment 255514

View attachment 255515

View attachment 255512
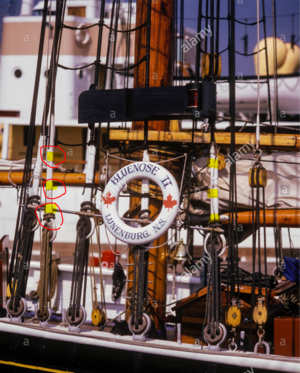
In addition, there are clearly 3 lashings around the shroud above the upper deadeye! ;)
See below...I highlighted and circled some...
1631301210113.png
 
You're absolutely correct. Thanks for catching it; to be honest, I had to correct quite some deadeyes because of this. Apparently I "choose" to forget this blooper...
carefully choose your reference material...the best way to find a piece of information is to pounder into books of trusted authors, IMHO. ;)
 
Back
Top