Bluenose II Build (Artesania Latina) 1:75 by Nomad [Completed Build]

Beautiful clean articulate work Mark - and obviously against that backdrop - stunning. If I have asked you this, please forgive me, but where in South Africa do you live? (My memory - or rather lack thereof - these days is scary!
Thanks for the compliment Heinrich! And yes I totally get the waning memory thing. Memory and eyesight it seems, both on a downward spiralling trajectory as the years pass by ROTF. I lived in Claremont in Cape Town for many years before leaving South Africa, but actually grew up in the Vrystaat of all places, nowhere near the sea, which doesn't explain my interest in ships at all. I loved living in Cape Town and climbed Table Mountain at least once a week, a truly unique part of the world. But then life happened and I have spent many years bouncing around the globe (hence the 'Nomad' sobriquet), most notably in America, England and Australia, where I currently reside :)

I'd love to hear what combination of circumstances landed you in China?
 
Last edited:
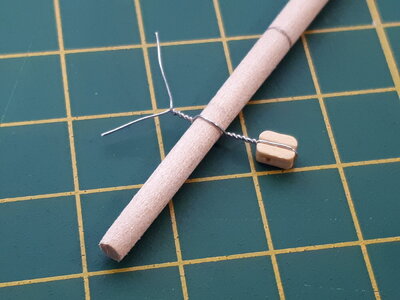
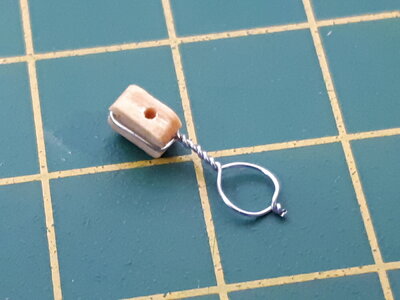
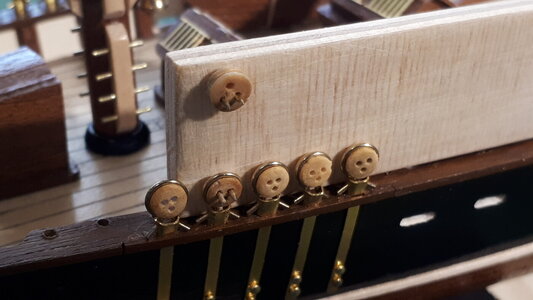
The rigging hardware for the masts come in the form of ringbolts, single- and double-holed blocks, and lengths of galvanised wire to hold them together. A spare dowel sanded to size proved useful to measure and construct the beckets for the mast-peak blocks.

0620_20211223_bluenose_II_build.jpg

0625_20211223_bluenose_II_build.jpg

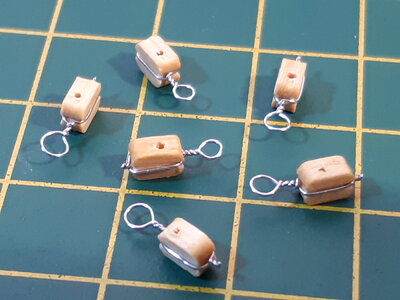
The remaining rigging blocks all have smaller beckets and attach to ringbolts situated on and around the trestletree frames. An awl is a handy tool to hold the shape of the becket while strapping the block.

0630_20211223_bluenose_II_build.jpg

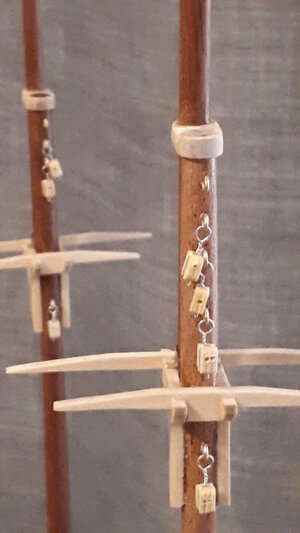
As the ringbolts were already attached to the masts I was obliged to prize open each eye a fraction in order to attach the block and becket. An awl was again the handy tool to prize open the ringbolt eye, and a long-nose pliers to seal it up again. With all the mast hardware now assembled, I can only hope that I have all the blocks in the correct position for whatever rigging is yet to come :p

0635_20211223_bluenose_II_build.jpg
 
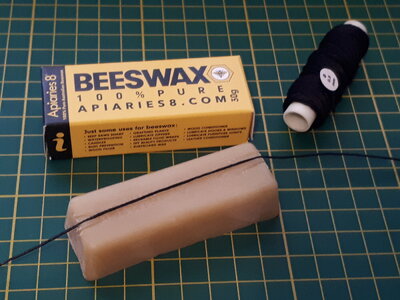
Artesania's instructions on rigging is a little sparse, so I thought I'd practice on a single rope to start with. Following advice on this forum and other similar builds I ran the thicker black rigging thread through a block of beeswax to give it a matted texture and stiffer shape.

0640_20211223_bluenose_II_build.jpg

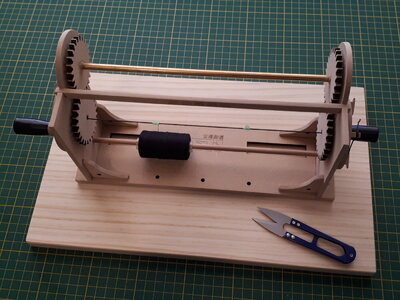
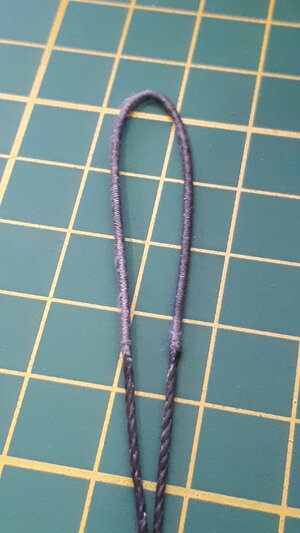
Then I viewed a series of YouTube videos by Donnie Driskell (who I understand is an administrator on this forum so I'd better behave myself) on serving the shroud lines that loop around the mast tops. This wasn't called for in AL's instructions but I liked the concept, and it gave me a chance to put to use the el cheapo rope serving machine I had bought a while back on AliExpress, which I understand to be the Chinese equivalent of Ebay.

0645_20211223_bluenose_II_build.jpg

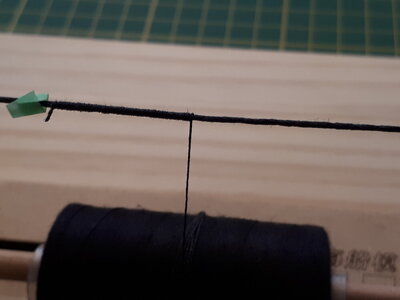
The serving machine was easy enough to assemble and easy enough to use as well. I cut the thicker black line to size, looped it around the mast top to estimate the length of serving required, and used the machine to serve it with a thinner, black polyester line (0.15 mm) which I also dragged through the beeswax block beforehand. The process is quick and easy, and must surely be a better option than doing it by hand Redface

0650_20211223_bluenose_II_build.jpg

The admiral was impressed with the rope serving machine itself, but less impressed with the result of my serving effort which is only really noticeable close-up, and she lost interest entirely when I tried to explain (all knowing like) the advantages of serving rope to counteract wear and tear ROTF
I on the other hand was quite happy with the outcome, and trust it will add a degree of authenticity to my model in the end :p

0655_20211223_bluenose_II_build.jpg
 
Last edited:
Artesania's instructions on rigging is a little sparse, so I thought I'd practice on a single rope to start with. Following advice on this forum and other similar builds I ran the thicker black rigging thread through a block of beeswax to give it a matted texture and stiffer shape.

View attachment 277668

Then I viewed a series of YouTube videos by Donnie Driskell (who I understand is an administrator on this forum so I'd better behave myself) on serving the shroud lines that loop around the mast tops. This wasn't called for in AL's instructions but I liked the concept, and it gave me a chance to put to use the el cheapo rope serving machine I had bought a while back on AliExpress, which I understand to be the Chinese equivalent of Ebay.

View attachment 277669

The serving machine was easy enough to assemble and easy enough to use as well. I cut the thicker black line to size, looped it around the mast top to estimate the length of serving required, and used the machine to serve it with a thinner, black polyester line (0.15 mm) which I also dragged through the beeswax block beforehand. The process is quick and easy, and must surely be a better option than doing it by hand Redface

View attachment 277670

The admiral was impressed with the rope serving machine itself, but less impressed with the result of my serving effort which is only really noticeable close-up, and she lost interest entirely when I tried to explain (all knowing like) the advantages of serving rope to counteract wear and tear ROTF
I on the other hand was quite happy with the outcome, and trust it will add a degree of authenticity to my model in the end :p

View attachment 277671
Good morning Mark

Those blocks and your serving came out brilliantly. I was debating doing my serving by hand, did some on my Bowsprit, however this post has motivated my to get a machine.

I also saw Donnies’ you tube on this topic - very good. Can you behave yourself....subject of debate I thinkROTF
Ha ha, thanks Grant. And yes, you're right, I can't behave myself. No debate necessary :p
 
Ha ha, thanks Grant. And yes, you're right, I can't behave myself. No debate necessary :p
Having completed my MS2130 Bluenose and watching some of the YQ builds, it is interesting to see the differences between the kits' models and how each builder approaches the same rigging fittings. I am not familiar with your kit or the plans but it looks like you are filling in any gaps and proceeding well . . . neat and tidy! Rich (PT-2)
 
I think the extra time and effort were very well spent on serving the shroud lines. They look great around your mast and is therefore a valuable add-on to your build.
Thanks Heinrich. Yes, I could see the value of serving as soon as I wrapped the line around the mast. The look and feel of having gone just that extra little mile :)
 
Having completed my MS2130 Bluenose and watching some of the YQ builds, it is interesting to see the differences between the kits' models and how each builder approaches the same rigging fittings. I am not familiar with your kit or the plans but it looks like you are filling in any gaps and proceeding well . . . neat and tidy! Rich (PT-2)
Thanks Rich. I agree. I have looked at innumerable other build logs and only found a handful that share the same version of the kit I am building from. Some parts of the same ship are quite different indeed, or at least built in a very different fashion. However, my priority with this first model is simply to see it through to the end without too many injuries, and learn what I can in the process. Hopefully authenticity and realism will be a studied feature in future builds :p
 
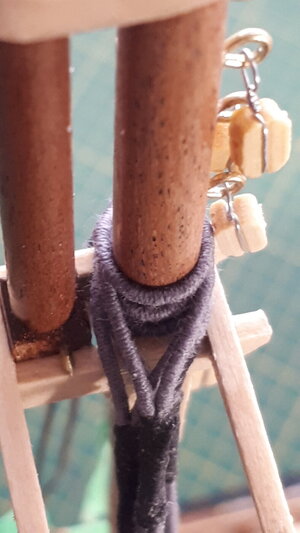
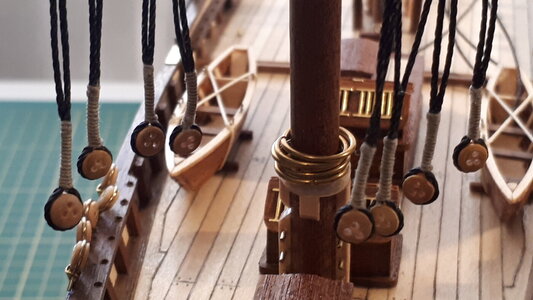
I picked up the threads (literally) where I'd left off last year and continued with the process of rigging of the lower shrouds. I served each shroud line in the centre with a thinner, dark grey cotton that would ulimately wrap around the mast top and lead two lines to the deadeye tackle below. The dark grey colour is unconventional, of course, but I wanted the serving effort to stand out a bit :p

0660_20220111_bluenose_II_build.jpg

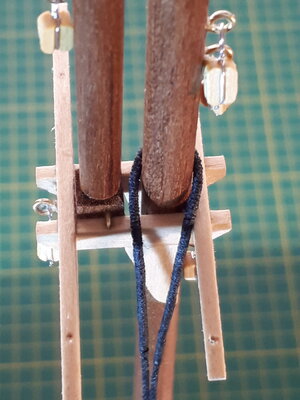
This version of the Bluenose II required four shroud lines for the foremast and five for the mainmast. Each shroud line loops about the mast top and both ends are seized together just below the trestletrees.

0665_20220111_bluenose_II_build.jpg

I constructed a very simple jig to maintain a constant spacing between the chainplate and shroud-line deadeyes. The jig is simply a thin piece of wood with two sets of planking nails approximately 15 mm apart. It holds two corresponding sets of deadeyes firmly in place while the shroud lines are measured and tied to the upper deadeye.

0670_20220111_bluenose_II_build.jpg

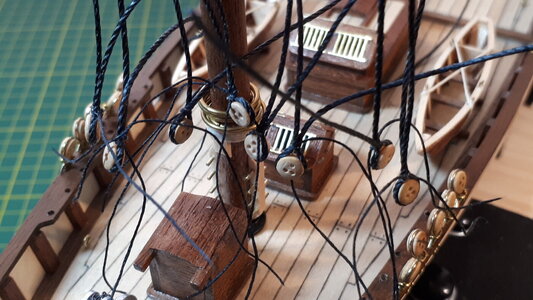
It was imperative to position both masts correctly and perpendicularly before using the jig to measure off the shroud lines. Lopsided masts would surely lead to uneven shrouds on the port and starboard sides. Each line was led around a deadeye and fastened in place, and the completion of the process effectively left a host of deadeyes dangling from the mast top shroud lines, waiting to be seized.

0675_20220111_bluenose_II_build.jpg

I removed the masts from the ship and secured them in a desktop vice to seize the shroud lines at the deadeye ends. With the stresses placed on the line during seizing it seemed preferable to perform the process away from the deck. I seized each shroud line with raw-coloured thread by hand, although I imagine you could hook it up just as easily to a serving machine as well. I must add that I ran all threads - shroud and seizing lines - through a block of beeswax. It stiffens the lines and makes them immeasurably easier to work with :)

0680_20220111_bluenose_II_build.jpg
 
Last edited:
Very good serving on those deadeyes Mark - my only question is whether the served portion is a bit on the long side?
 
Very good serving on those deadeyes Mark - my only question is whether the served portion is a bit on the long side?
Hello Heinrich. Yes, the deadeye serving does look a bit on the long side, although it is in keeping with Artesania's instructions. But I think my serving on the shroud lines are certainly too long. I'm putting it down to first build inexperience and will be more careful next time Thumbsup
 
Last edited:
I picked up the threads (literally) where I'd left off last year and continued with the process of rigging of the lower shrouds. I served each shroud line in the centre with a thinner, dark grey cotton that would ulimately wrap around the mast top and lead two lines to the deadeye tackle below. The dark grey colour is unconventional, of course, but I wanted the serving effort to stand out a bit :p

View attachment 281879

This version of the Bluenose II required four shroud lines for the foremast and six for the mainmast. Each shroud line loops about the mast top and both ends are seized together just below the trestletrees.

View attachment 281880

I constructed a very simple jig to maintain a constant spacing between the chainplate and shroud-line deadeyes. The jig is simply a thin piece of wood with two sets of planking nails approximately 15 mm apart. It holds two corresponding sets of deadeyes firmly in place while the shroud lines are measured and tied to the upper deadeye.

View attachment 281881

It was imperative to position both masts correctly and perpendicularly before using the jig to measure off the shroud lines. Lopsided masts would surely lead to uneven shrouds on the port and starboard sides. Each line was led around a deadeye and fastened in place, and the completion of the process effectively left a host of deadeyes dangling from the mast top shroud lines, waiting to be seized.

View attachment 281882

I removed the masts from the ship and secured them in a desktop vice to seize the shroud lines at the deadeye ends. With the stresses placed on the line during seizing it seemed preferable to perform the process away from the deck. I seized each shroud line with raw-coloured thread by hand, although I imagine you could hook it up just as easily to a serving machine as well. I must add that I ran all threads - shroud and seizing lines - through a block of beeswax. It stiffens the lines and makes them immeasurably easier to work with :)

View attachment 281883
Nice Mark- very Thumbsup
 
Good morning Mark

Those blocks and your serving came out brilliantly. I was debating doing my serving by hand, did some on my Bowsprit, however this post has motivated my to get a machine.

I also saw Donnies’ you tube on this topic - very good. Can you behave yourself....subject of debate I thinkROTF
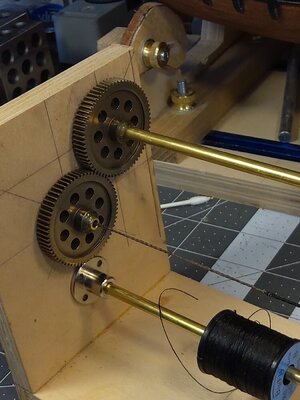
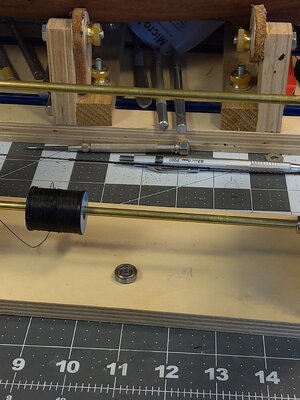
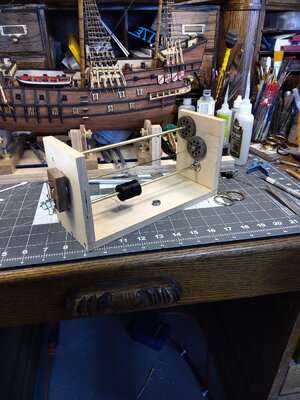
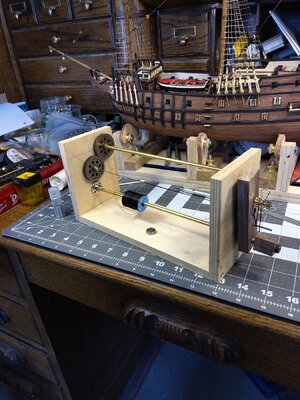
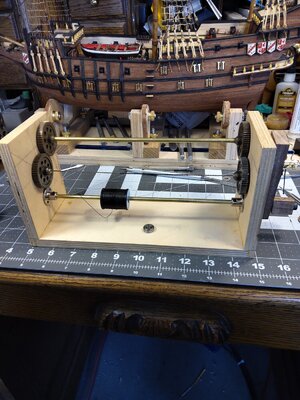
Build one! I bought the necessary gears tubing and collars from Amazon. I opted for metal gears instead of plastic or wood. They mesh really well. It sure makee serving alot easier and neater. 20210830_150422.jpg20210830_150357.jpg20210830_150328.jpg20210830_150322.jpg20210830_150313.jpg
 
Back
Top