Impressive. I’ve been thinking about taking this project on, down the road. This log will be s great help! Thanks for posting it and keep up the great work!
-

Win a Free Custom Engraved Brass Coin!!!
As a way to introduce our brass coins to the community, we will raffle off a free coin during the month of August. Follow link ABOVE for instructions for entering.
-

PRE-ORDER SHIPS IN SCALE TODAY!
The beloved Ships in Scale Magazine is back and charting a new course for 2026!
Discover new skills, new techniques, and new inspirations in every issue.
NOTE THAT OUR FIRST ISSUE WILL BE JAN/FEB 2026
You are using an out of date browser. It may not display this or other websites correctly.
You should upgrade or use an alternative browser.
You should upgrade or use an alternative browser.
Bluenose - Model Shipways - by David Lester
- Thread starter David Lester
- Start date
- Watchers 15
-
- Tags
- bluenose model shipways
- Joined
- Apr 5, 2020
- Messages
- 14
- Points
- 48

David I am impressed. Perhaps a little cheeky, but, would you be willing to share the publisher file you created with me? I am very keen to add this nomenclature and masonic badge, stern details to the model I am currently building. _From Ian Wilson, Inverkip Scotland.Happy Saturday Everyone,
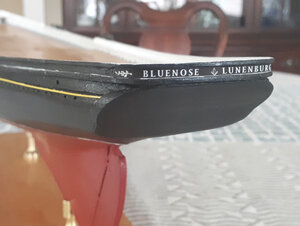
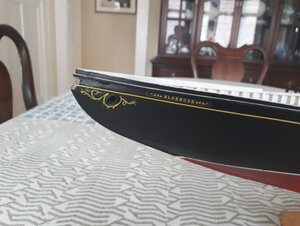
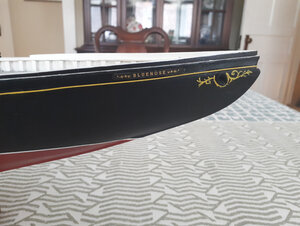
Today I've been working on the lettering. I usually cheat and make the lettering on the computer, but it still takes a long time sorting out the sizing, spacing etc. I drew the scroll work on the computer as well, copying as best I good from the pictures I have. The spacing looks uneven on the stern lettering, but that's how it appears according to my pictures. I'm pretty sure that the scroll work on the sides of the hull at the bow are maple leaves, so that's what I went with. I have an ancient version of Microsoft Publisher which gets the job done for me.
As you can see I've gone with the Masonic emblem rather than the Odd Fellows emblem. Not because I favour one over the other but the Masonic emblem was the one that was there when Bluenose was launched and it's the one that was there for most of its life.
So that was my morning's work, and now outside to cut the grass.
David
View attachment 151612
View attachment 151613
Masonic greetings from a new SOS member and Past Master of McKenzie River Lodge 195, Eugene, Oregon, USA and Honorary Past Master and Secretary of Eugene Lodge 11, Eugene, Oregon. Bluenose will be my second build after completing a pilot boat from Constructo started back in 1969 and set aside for other matters after being about 2/3 done but masting and rigging incomplete back then. This POB will be my first one and I am expecting, with my penchant for slow careful detail that it will stretch out to three years or so, God granting me that time at this stage of 79 years come November. Beautiful work on your part. I'll have to start a log as so far I have been reading the instructions, studying the plans and thinking ahead of what is needed for the project. Fraternally yours with Brotherly Love, Reliefe, and Truth.Some more details:
Nameplates, scroll work and rudder all added. The hull is essentially finished, so now on to the deck details.
Thank you for your comments and likes!
View attachment 153817
View attachment 153818
View attachment 153819
Hello PT-2 and welcome to SoS. Our old friend David Lester is no longer a member here at SoS. However, you can follow along with my old Bluenose build log from a few years ago right here. It is not as nice as David's but should be entertaining in any case...Masonic greetings from a new SOS member
Bluenose Build Log
I happen to have an archival copy of my original Bluenose build log from the old Lauck Street forum. Although I built this a few years ago, all the tips and techniques described in this log will still work on the current Bluenose kit from Model Expo along with Bob Hunt's excellent practicum. I...
shipsofscale.com
- Joined
- Jul 9, 2019
- Messages
- 497
- Points
- 323

Being a newbie to SOS I am not sure of the link for conversation threads so this is a blind try. I see your reference to a Practicum on Bluenose by Bob Hanks. Where is that available? I want to put as much as feasible before my bow before casting off before the tide is right. Probably in a typical manner while searching around I have found some items to be improvised after making an order which in hindsight was not necessary. All part of a relative newcomer stepping his game up and hopefully not to a Remagan in a bridge too far with Bluenose. I don't mind remaking things if they don't turn out right but that can lead to later blemishes which could be avoided.Hello PT-2 and welcome to SoS. Our old friend David Lester is no longer a member here at SoS. However, you can follow along with my old Bluenose build log from a few years ago right here. It is not as nice as David's but should be entertaining in any case...
Bluenose Build Log
I happen to have an archival copy of my original Bluenose build log from the old Lauck Street forum. Although I built this a few years ago, all the tips and techniques described in this log will still work on the current Bluenose kit from Model Expo along with Bob Hunt's excellent practicum. I...shipsofscale.com
Thanks for your practicum lead. I'll do some searching in the mean time as I typically don't "live" on social media or the computer but will make it a more frequent action to tune into SOS.
Rich (PT-2)
After a short search I found an downloaded a free PDF Practicum File for a 1/4" scale plank on frame model. Larger than ModelExpo 3/32" scale but useful resource for many details.
- Joined
- Jan 13, 2023
- Messages
- 30
- Points
- 48

David, can’t wait to watch your build. I am rather new to wooden shipbuilding and just purchased this kit. I am sure I will learn a lot from thisGood Morning,
Here is the beginning of my build log for my Model Shipways Bluenose.
I am finding some interesting things to consider for this model and a few decisions to be made with respect to its detailing.
First- good references are hard to come by and it's not always easy to make out details in the few old black and white photos that are available. It's complicated by the fact that there are so many good pictures of the Bluenose II available that it's tempting to rely too much on them. While the two schooners are very similar, they actually differ quite a bit in the details, so that's not always a good idea. I know it's not the only approach, by my decision is to rely heavily on the MS plans. I have found them to be very accurate in the past, so I'm going to put a high level of trust in them again this time. Plus some details can be confirmed from the old photos.
Second - how to model all the metal work on the ship. There are a lot of iron fittings on the Bluenose, most of which are not included in the kit, so the question is how best to represent them. I am not very skilled at detailed brass and solder work and not even all that interested in it, so I don't anticipate doing as much of it as I have seen on others' versions of the Bluenose. Even when skillfully done, it often seems to my eye to be a bit "heavy handed" and too big for the scale. So I anticipate not doing any more of it than is absolutely necessary and representing much of it with tiny eyebolts, strips of construction paper etc. We'll have to see how it goes.
Third - the blocks. All of the blocks on both the Bluenose and Bluenose II are internally stropped blocks, not rope stropped. But oddly, I haven't yet seen a model that incorporates that detail. Furthermore, I believe the blocks on the Bluenose were all painted white, not natural as they are on Bluenose II. They certainly appear to be white in the old photos and there are even some old colour photos which seem to confirm it. So, I have decided to include this detail and I have ordered a set of internally stropped blocks from Bluejacket. There seem to be two options for internally stropped blocks - Bluejacket and Syren. While the Syren blocks are very beautiful, I opted for Bluejacket for two reasons. The Syren blocks require a lot of assembly and fiddling around with, which the Bluejacket don't. Plus since the Bluejacket are cast metal, it's easy to paint them white, whereas it would be difficult to give them a natural finish, and it would seem a shame to paint the wooden Syren ones. So, Bluejacket it is. I'm just waiting for them to arrive along with some things from Cornwall, but international mail service is especially slow these days.
So those are my plans, we'll see how it all works out.
Here are some pictures of my progress to date. Nothing particularly interesting so far, just your standard keel, bulkhead and planking.
View attachment 143672
The waterways were clearly the place to start - they dictate the placement of the hull planks.
View attachment 143673
This is a fairly easy and quick hull to plank.
View attachment 143674
I am the world's worst hull planker. Since I always paint my hulls, I take a pragmatic approach which I know would make many builders pass out. I just can't seem to get too concerned about perfection in the planking. I manage to get a properly faired hull that's reasonably smooth and true, but I tend to apply the planks any which way. Once it's filled and painted anything else seems completely unnecessary to me. The picture below shows one application of filler and sanding. I'll give it a coat of watered down primer to better show up the imperfections and then apply some more filler.
View attachment 143675
Take care everyone.
David
- Joined
- Jan 13, 2023
- Messages
- 30
- Points
- 48

Good Evening Everyone,
A little progress to report -
I finished the bulwarks and stanchions, scuppers and decking
View attachment 149529
Here is the fashion piece. I may have it protruding slightly too much, but maybe not. I'm not sure. The only picture of the original that I have shows it protruding quite a bit, but it's hard to tell from the angle of the shot. The one on Bluenose II appears to be flush with the hull, but I don't think this one is supposed to be. Any opinions would be welcome.
View attachment 149531
Here are the many scuppers. A little easier to cut than I expected. If they look uneven, they aren't as bad as they seem. I painted the inside edges of them black before installing the plank and where the paint slops over the edge it looks like the hole is larger than it should be. (At least that's my story and I'm sticking to it - but I can only do so until I paint the hull!)
View attachment 149530
The decking went very smoothly without any problems.
View attachment 149533
View attachment 149534
Here I have the waterways, bulwarks and stanchions painted - and that's all freehand folks! No masking tape used between the stanchions and the waterways. I used tape between the deck and the waterway first, but after taping only two sections of waterway between stanchions, I realized that it would have taken me a month of Sundays to do it and no guarantee that I wouldn't have paint creeping out in any case, so I just free-handed it.
View attachment 149532
I have an odd phenomenon - even though I am right handed, I can paint equally well with both hands. If I'm painting windows in the house, I cut in on one side of the glass with my right hand and the other side of the glass with my left hand. This superpower proved to be quite useful here too
I am never totally satisfied with the finish I get on my decks. I was tempted to try a faded gray colour which I have used in the past and like, but I wanted more contrast with the waterways and thought it likely that the deck on the original looked something like this when it was new. The deck on the Bluenose II is a similar colour (probably the most beautifully maintained deck I've seen) and I thought this could at least be a nod to that. It's two coats of orange shellac.
I had some parts arrive today from Cornwall Model Boats. They had warned me that international shipping was very slow due to you know what and they weren't kidding. The package took just over five weeks to arrive. Things normally arrive here from the UK in a matter of days. So, if you're ordering internationally, be sure to leave lots of time.
David


