Bluenose - Model Shipways - by David Lester

Joined
Apr 30, 2019
Messages
98
Points
133

Location
Cobourg, ON
Good Morning,
Here is the beginning of my build log for my Model Shipways Bluenose.

I am finding some interesting things to consider for this model and a few decisions to be made with respect to its detailing.

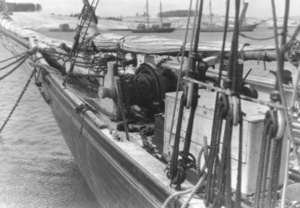
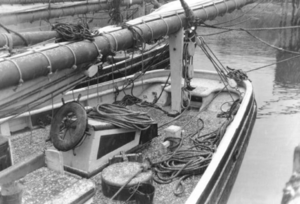
First- good references are hard to come by and it's not always easy to make out details in the few old black and white photos that are available. It's complicated by the fact that there are so many good pictures of the Bluenose II available that it's tempting to rely too much on them. While the two schooners are very similar, they actually differ quite a bit in the details, so that's not always a good idea. I know it's not the only approach, by my decision is to rely heavily on the MS plans. I have found them to be very accurate in the past, so I'm going to put a high level of trust in them again this time. Plus some details can be confirmed from the old photos.

Second - how to model all the metal work on the ship. There are a lot of iron fittings on the Bluenose, most of which are not included in the kit, so the question is how best to represent them. I am not very skilled at detailed brass and solder work and not even all that interested in it, so I don't anticipate doing as much of it as I have seen on others' versions of the Bluenose. Even when skillfully done, it often seems to my eye to be a bit "heavy handed" and too big for the scale. So I anticipate not doing any more of it than is absolutely necessary and representing much of it with tiny eyebolts, strips of construction paper etc. We'll have to see how it goes.

Third - the blocks. All of the blocks on both the Bluenose and Bluenose II are internally stropped blocks, not rope stropped. But oddly, I haven't yet seen a model that incorporates that detail. Furthermore, I believe the blocks on the Bluenose were all painted white, not natural as they are on Bluenose II. They certainly appear to be white in the old photos and there are even some old colour photos which seem to confirm it. So, I have decided to include this detail and I have ordered a set of internally stropped blocks from Bluejacket. There seem to be two options for internally stropped blocks - Bluejacket and Syren. While the Syren blocks are very beautiful, I opted for Bluejacket for two reasons. The Syren blocks require a lot of assembly and fiddling around with, which the Bluejacket don't. Plus since the Bluejacket are cast metal, it's easy to paint them white, whereas it would be difficult to give them a natural finish, and it would seem a shame to paint the wooden Syren ones. So, Bluejacket it is. I'm just waiting for them to arrive along with some things from Cornwall, but international mail service is especially slow these days.

So those are my plans, we'll see how it all works out.

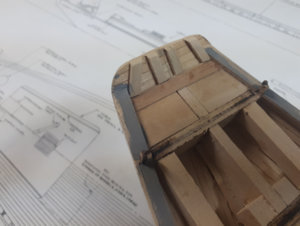
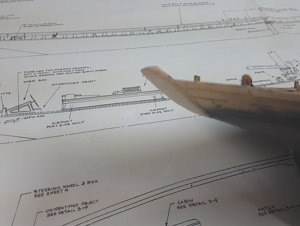
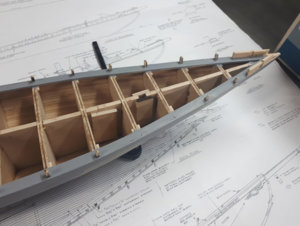
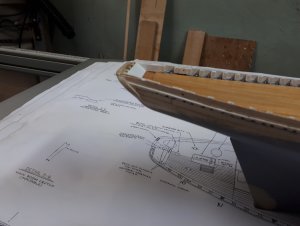
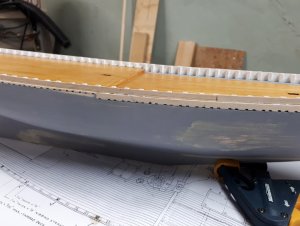
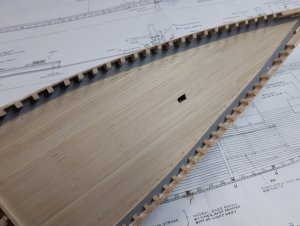
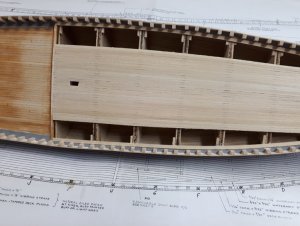
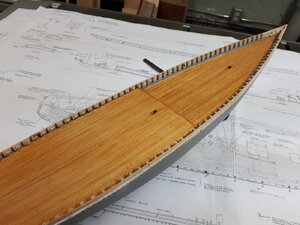
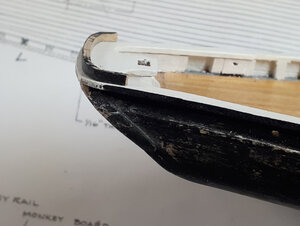
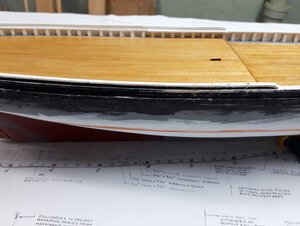
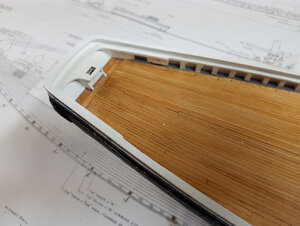
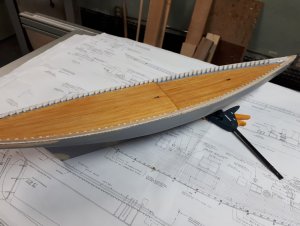
Here are some pictures of my progress to date. Nothing particularly interesting so far, just your standard keel, bulkhead and planking.
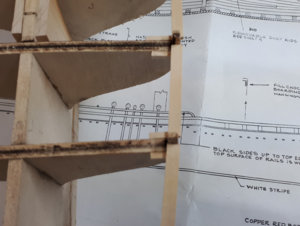
april13-1.jpg

The waterways were clearly the place to start - they dictate the placement of the hull planks.
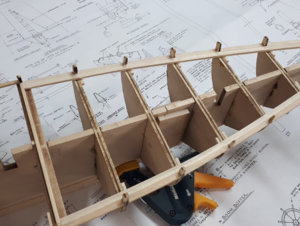
april13-2.jpg

This is a fairly easy and quick hull to plank.
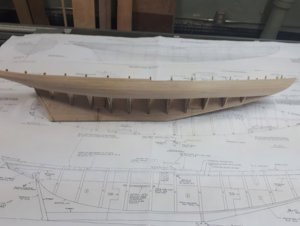
april13-3.jpg

I am the world's worst hull planker. Since I always paint my hulls, I take a pragmatic approach which I know would make many builders pass out. I just can't seem to get too concerned about perfection in the planking. I manage to get a properly faired hull that's reasonably smooth and true, but I tend to apply the planks any which way. Once it's filled and painted anything else seems completely unnecessary to me. The picture below shows one application of filler and sanding. I'll give it a coat of watered down primer to better show up the imperfections and then apply some more filler.
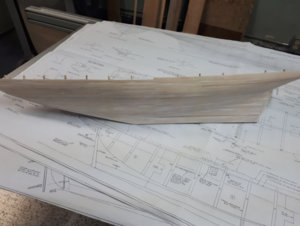
april13-4.jpg

Take care everyone.

David
 
Of course I have to be along for this voyage considering I built this kit several years ago and am a fan of your work in general!! When I built mine, I did zero historical research and simply used Bob Hunt's practicum. Interesting about the blocks, I can't wait to see them. I left my rigging very simplified and focused more on the finish and paint job. It is a great kit for sure!!
 
Mind if I pull up a chair. I love this ship and all the history associated with it. It is imo a great kit for producing a fairly good representation. Your hull looks splendid :)
 
Thanks for the votes of confidence guys!
I have in fact discovered suburbanshipmodeler.com and I agree that there is a lot of useful information there - especially with respect to the rigging. The website is a bit difficult to navigate, so I downloaded every page so I can have a quick reference.
Thanks again,
David
 
I found this the other day and posted it, I bought this video on VHS years ago, you may get a kick out of it.
 
Good Morning All,
An almost typical Sunday morning at our house. The picture below pretty much captures our usual Sunday morning (minus the kids of course) and this week it's not all that much different. My wife is on the ipad following a church service and I'm modeling.

il_794xN.720680776_gh7m.jpg

I always dread the transom; even a relatively easy one like the Bluenose. I'm always happy when it's more or less behind me. The plans indicate building a framework and then planking it on both sides. This seemed too daunting to me - getting the angle of all the frames just right and in the same plane and attaching them adequately to the filler blocks. Bob Hunt shows a different method. He recommends abandoning the framework and cutting a solid block to the shape of the transom, gluing it in place and then planking both sides of it. I didn't like that approach any better, so I came up with my own third method which seems easier to me and I think it works.

The two issues are the angle, which is steep and matches that of the filler blocks and how high it should be. The plans are not much help here. They show the stern straight on, but of course it's seriously foreshortened because of the steep angle which is not reflected in the diagram. So what I did was glue up a panel of planking slightly wider and taller than I needed. I used 3/64" x 1/8" planks. I then glued it as one piece onto the stern of the boat directly onto the filler blocks and extending quite tall. I then shaped it to match the hull and discovered its height by temporarily placing bulwarks planks on the sides of the hull. I glued four strengthening pieces on the fore side of it, which I will plank later. It think it's going to work.

april19-1.jpg

april19-2.jpg

This also seemed like a good time to paint the waterways.
april19-3.jpg

Also, here's a little heads up with the waterways if you're planning a Bluenose in the near future. I almost made this mistake, but avoided it thanks to one of my 3 am "brain storms." There is a large number of false stanchions that line the bulwarks. The plans would have you use the bulkhead extensions as some of them (every fourth one). However, they are 3/16" wide and the finished stanchions are all 1/8" wide, so they have to be cut down. I decided early one that once I had the bulwarks planking in place that I would cut out them out and replace them with new false stanchions because they tend to look pretty rough. There's always a bit of de-lamination of the plywood when fairing the hull.

So I thought, no need to trim them down to 1/8" since I'll be taking them out anyway. I almost went ahead and fitted all the waterway pieces between the bulkhead extensions. And then I realized that the waterway filler pieces would all be too short, leaving an unsightly bit when the new narrower false stanchions were installed. So it's important to cut them down to 1/8" even if you're planning to remove them completely later. Also there's not much information on whether to trim the fore or aft side of the bulkhead extensions, but there is one illustration in the instruction manual, showing the aft side trimmed, so I went with that.

Next up is the scuppers. I think there are 172 of them, if I've counted correctly!

Thanks for the comments and likes, and stay safe everyone.
David
 
I am very much enjoying this build and your solutions. I used fake stanchions and I can't believe you are gonna go for the 172 scuppers!!!
 
Good Evening Everyone,
A little progress to report -
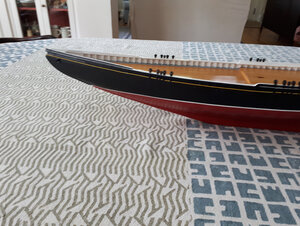
I finished the bulwarks and stanchions, scuppers and decking

may6-1.jpg

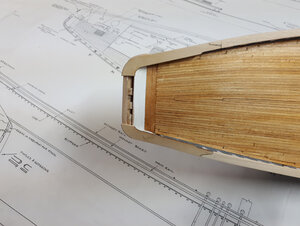
Here is the fashion piece. I may have it protruding slightly too much, but maybe not. I'm not sure. The only picture of the original that I have shows it protruding quite a bit, but it's hard to tell from the angle of the shot. The one on Bluenose II appears to be flush with the hull, but I don't think this one is supposed to be. Any opinions would be welcome.

may6-3.jpg

Here are the many scuppers. A little easier to cut than I expected. If they look uneven, they aren't as bad as they seem. I painted the inside edges of them black before installing the plank and where the paint slops over the edge it looks like the hole is larger than it should be. (At least that's my story and I'm sticking to it - but I can only do so until I paint the hull!)

may6-2.jpg

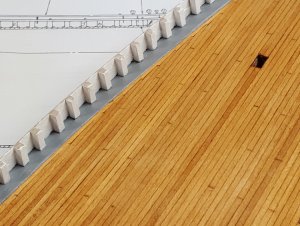
The decking went very smoothly without any problems.

may6-7.jpg

may6-8.jpg

Here I have the waterways, bulwarks and stanchions painted - and that's all freehand folks! No masking tape used between the stanchions and the waterways. I used tape between the deck and the waterway first, but after taping only two sections of waterway between stanchions, I realized that it would have taken me a month of Sundays to do it and no guarantee that I wouldn't have paint creeping out in any case, so I just free-handed it.

may6-6.jpg

I have an odd phenomenon - even though I am right handed, I can paint equally well with both hands. If I'm painting windows in the house, I cut in on one side of the glass with my right hand and the other side of the glass with my left hand. This superpower proved to be quite useful here too:)

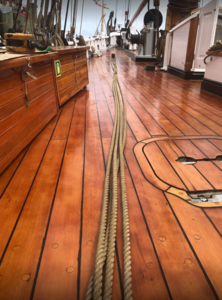
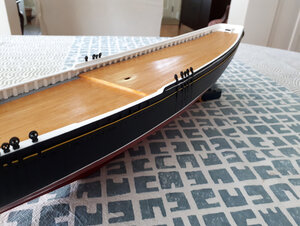
I am never totally satisfied with the finish I get on my decks. I was tempted to try a faded gray colour which I have used in the past and like, but I wanted more contrast with the waterways and thought it likely that the deck on the original looked something like this when it was new. The deck on the Bluenose II is a similar colour (probably the most beautifully maintained deck I've seen) and I thought this could at least be a nod to that. It's two coats of orange shellac.

I had some parts arrive today from Cornwall Model Boats. They had warned me that international shipping was very slow due to you know what and they weren't kidding. The package took just over five weeks to arrive. Things normally arrive here from the UK in a matter of days. So, if you're ordering internationally, be sure to leave lots of time.

David
 
Good Morning,
I'm working on the rails. Almost everyone who builds this kit finds that the stern rail piece that is provided doesn't actually fit their model. I don't know if that's because the piece is not sized correctly or if it's because minor differences between the plan and the actual model make it fail to fit. Most modelers seem to have to rebuild this part from scratch.

I anticipated this problem, so when I bought the kit, I ordered an extra sheet of 1/16" material and I'm glad I did. My stern piece didn't quite fit either. It was close, but no cigar.

What I did was cut the two sides off of it and use them to start the side rail on each side. I will later scratch build the piece the that spans them across the stern. I am also using the sheet material to cut the side rails and I'm doing them in relatively short lengths. Fitting the rails is a job that I usually hate doing, but it's going fairly smoothly so far.

(As an aside have you ever noticed that this hobby is just one difficult, aggravating, frustrating and next to impossible thing after another, yet overall the affect of the hobby is addictive, calming, satisfying and relaxing. How can this be? I haven't figured this one out yet.)

may10-3.jpg

may10-2.jpg

The lower deadeyes and chainplates are a bit of a challenge on this model. On the real boat, they're attached with a type of shackle-like hardware. (I'm not sure what the correct term would be.)

6.png

The decision was to either try to duplicate this detail or just leave it out altogether. The other modelers seem to split about 50-50 on this one. Those who try to duplicate it form two loops in a piece of wire, then wrap it around the deadeye and attach it to a brass strip with a loop in the end of it. There are widely varying degrees of success and even the well executed ones look far too large to me. I knew I would make a royal mess of it, so I was leaning toward leaving the detail out altogether which gives a very neat apperance. Then I came across these deadeyes at Bluejacket which I bought and I think they're going to work just fine.

may10-1.jpg

I know some builders will not like them because they look a bit fake and they might be considered a bit of a cheat, but I think they'll look good when painted flat black. They allow me to include this detail and they look a lot better than if I try to build my own articulating connections.

I also bought Bluejacket's upper deadeyes which are triangular or teardrop shaped. The ones provided in the kit are pretty crummy.

Have a great Sunday everyone and thanks for comments and likes.
David
 
Having built this model in a very simple fashion myself, I would say you are making very good choices on your build David. Looking good!!
 
Happy Saturday Everyone,
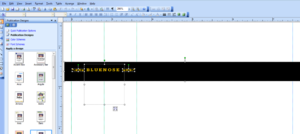
Today I've been working on the lettering. I usually cheat and make the lettering on the computer, but it still takes a long time sorting out the sizing, spacing etc. I drew the scroll work on the computer as well, copying as best I good from the pictures I have. The spacing looks uneven on the stern lettering, but that's how it appears according to my pictures. I'm pretty sure that the scroll work on the sides of the hull at the bow are maple leaves, so that's what I went with. I have an ancient version of Microsoft Publisher which gets the job done for me.

As you can see I've gone with the Masonic emblem rather than the Odd Fellows emblem. Not because I favour one over the other but the Masonic emblem was the one that was there when Bluenose was launched and it's the one that was there for most of its life.

So that was my morning's work, and now outside to cut the grass.
David
screenshot1.png

screenshot2.png
 
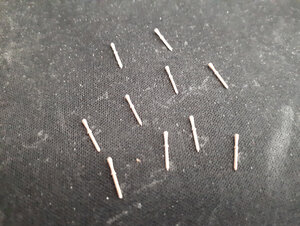
My belaying pins arrived today and they are amazing.

At the time I bought the Bluenose, Model Expo did not have the correct belaying pins available. They substituted some of those short fat ones, and offered the option ordering (no additional charge) the correct ones when they were back in stock. Using the substitutes was out of the question; they aren't even close to looking right for the Bluenose.

The correct ones seemed to be out of stock for a very long period of time, so I decided to order these Falkonet pins. I bought them from a relatively new supplier in Calgary, Alberta. I hadn't dealt there before, so I thought this was a good opportunity to give them a try. They have a pretty small range of products, but I imagine it's growing. It appears as though all their products are either Falkonet or Master Korabel.

These pins are absolutely beautiful. They're 9mm pear wood, but the picture doesn't really quite convey how small and finely detailed they are. These are a great little product and at a decent price too.

David

20200519_150305.jpg
 
Last edited:
Looking good so far. On the deck finish, are you going for "in use" or new look to the finish.

For in use, you can use steel wool to buff down wear areas and maybe dilute black ink down like 30:1 for a very light wash on the worn walkways. Then finish with satin oil to seal the wood.
 
The correct ones seemed to be out of stock for a very long period of time, so I decided to order these Falkonet pins. I bought them from a relatively new supplier in Calgary, Alberta. I hadn't dealt there before, so I thought this was a good opportunity to give them a try. They have a pretty small range of products, but I imagine it's growing. It appears as though all their products are either Falkonet or Master Korabel.
The supplier of those beautiful belaying pins is Crafty Sailor @craftysailor He is a member of our forum. His shop has most of the ship kits from Master Korabel and Falkonet (as mentioned by David). He also has fittings such as anchors, windlass binnacle, and blocks made from Pearwood. Check this out.

 
Jim, thank you! I can't believe I forgot to include the name of the company - the Crafty Sailor.

Kurt, finishing the deck almost always is a dilemma for me. I never know quite what to do; and I never seem to do the same thing twice.

On the Bluenose, the old pictures are always in black and white and everything including the deck appears to be in appalling condition but it's not clear exactly what colour the deck was. It's probably gray, but it may also have had a dark finish like you see on the Pride of Baltimore.

f.png

So, since I wasn't sure, I decided to go with a shiny new looking finish, which I though was the best option for my model. Also, it will look better to others who are only familiar with the Bluenose II which has a beautiful deck.
28.png

may6-5.jpg


David
 
According to the Crafty Sailor website, the 9mm pins are 1mm at the widest point near the top and .6mm at the bottom tip. When I measure mine I get .85mm at the top and .6 at the bottom, but it's hard to hold the calipers dead on square at the widest point. If I had them at a bit of an angle, it could easily skew the reading. In any case, they are very fine.
 
Hello All,
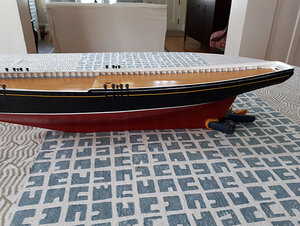
So here's where I'm at right now. It's starting to look like the Bluenose!

20200525_111707.jpg

20200525_111655.jpg

20200525_111724.jpg

Here are some of my steps since my last posting -

I had to rebuild the stern portion of the railing, as so many others have had to do too:

20200512_132604.jpg


The buffalo rail at the bow was a very easy detail to add:
20200517_100603(0).jpg

The monkey rail at the stern, not quite so much!

I laminated two thin pieces to make the curved part:
20200512_132442.jpg

20200515_101952.jpg20200517_100552.jpg

Finished railing:
20200517_100537.jpg


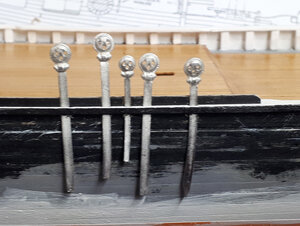
I mentioned in an earlier posting that I am using the deadeyes with integral chainplates from BlueJacket, because I think they represent the look of those on the real boat quite well.

20200515_102007.jpg

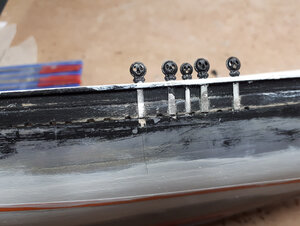
Here's how I installed them. On the real Bluenose the chainplates are inset into the hull. The outer surface of them is flush with the surface of the hull. The BlueJacket ones are not quite long enough to use as they are and I was quite worried about successfully inlaying all 20 of them, so I cut them all off short, just to the point where the hull planks thicken out.

20200517_105717.jpg

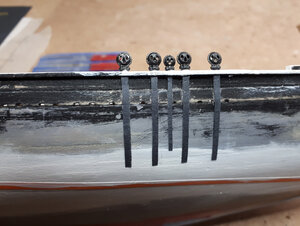
I then used black construction paper to simulate the chainplates all the way down. The result means they aren't laying quite flush, but at least they're not as proud of the surface as would be brass strips that weren't inlaid. I think it's a decent compromise.

20200517_113319.jpg

With the hull painted, I think it works not too badly.20200525_111724.jpg

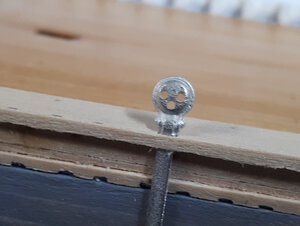
On one chainplate I experimented with adding nail heads or rivets, but they looked too big to me and seemed to unecessarily draw the eye so I abandoned that idea.

One negative I discovered about these particular deadeyes/chainplates is that they are a bit fragile. You can see in the picture above that I have broken one off on the starboard side which will need a repair. They cannot be bent back and forth!

For painting the white stripe, I followed Mike Shanks lead. I first painted the area white, then applied the masking tape. (I used 1/16" tape.) I then painted the black and red above and below. I had bought this red paint for some of the details on my Pride of Baltimore II and as luck would have it, it works well for the Bluenose hull.

The writer Stephen Leacock once said “Writing is no trouble: you just jot down ideas as they occur to you. The jotting is simplicity itself--it is the occurring which is difficult." Painting the hull is similar. The painting is simplicity itself; it is applying the masking tape which is difficult.

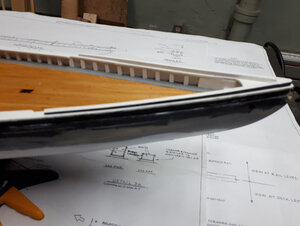
I was quite concerned about how to do the yellow stripe. On the real Bluenose, this stripe is actually a groove cut into the hull and if the plans are accurate, it's very narrow. I had almost no space above the row of scuppers to fit it as it's right at the edge of where the thick hull planks end and the thinner planks above begin. I knew I would never successfully cut in such a groove, nor would I successfully mask along that line.

My solution is a bit of a cheat, but it's one I can live with. I applied a styrene strip. I think it is .01" x .04". I painted it yellow first and then glued it on. It sits very close to flush with the hull and I believe the result is better than anything I could have done any other way.

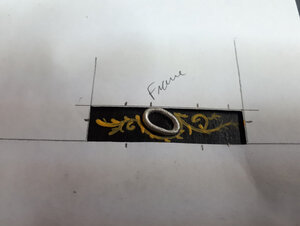
So next up is the scroll work decoration. I don't see any way around this except painting it by hand. I'm not quite ready to start, but I have been doing practice ones.

I cut out a rectangular box from a piece of paper that is the size of the finished decoration. I marked on the template roughly where key elements of the design fall, so that I don't get too far out of whack and placed it over the hawse port lip on a piece of black paper.

I have done quite a few of these and soon I will be brave enough to tape that template to the hull.

20200517_102250.jpg

So that's where I am at the moment, and now it's time to get outside. As I type I am looking through the window at the most glorious deep purple lilacs. Together with the bright sunshine, they are calling my name.
David
 
Back
Top