OK GETTING STARTED, HAVE QUESTIONS WILL POST PICTURES THEN REORGANIZE
-

Win a Free Custom Engraved Brass Coin!!!
As a way to introduce our brass coins to the community, we will raffle off a free coin during the month of August. Follow link ABOVE for instructions for entering.
- Home
- Forums
- Ships of Scale Group Builds and Projects
- Bluenose PoF Group Build
- Bluenose Group Build Logs
You are using an out of date browser. It may not display this or other websites correctly.
You should upgrade or use an alternative browser.
You should upgrade or use an alternative browser.
OK HERE GOES GUYS, AS I SAID I USE THE PINS BECAUSE OF STANDING AND EYE SIGHT PROBLEMS NOT THE BEST BUT SO FAR THIS OVERCOMES PHYSICAL PROBLEMS, MORE ON THIS LATTER THIS IS PRELIMINARY I WILL HAVE ANOTHER FRAME SHEET LESS CLUTERED AND LESS PINS ONCE QUESTIONS ARE ANSWERED,,, HERE GOES TOP OF FRAME WHY THE EXTENSION AM I WRONG FOOT OF FRONT FRAME IS THIS CORECT TRIED TO FOLLOW HENRICHS AND DON R LOGS ON PLACEMENT OF FRON FRAME FOR BEVEL LINES BUT THE CENTERS DO NOT LINE UP WITH THE FRAME DRAWINGS WHAT AM I DOING WRONG THEN I CAN REORGANIZE AND SHOW MY PROCEDURE,,, I DID HAVE A PROBLEM SEPERATING FRAMES FROM FRAME BOARD ON BOTH FRAME NO 8 AND 20 USED 3 EXACTO BLADES VERY CAREFULLY LONG TIME BUT THAT IS OK TOO HAS ANYONE ELSE HAVING THIS PROBLEM, I DO START WITH THE FRAMES ON MY BUILDS LABELING AND BAGGING THEM THEN PUTTING TOGETHER AND REBAGGING COMPLETED FRAMES THIS WAY I GET FAMILAR WITH THE MOST IMPORTANT TO ME PROCEDURE HERE ARE PICTURES HOPE YOU CAN SEE THEM. GOD BLESS ALL STAY SAFE DON


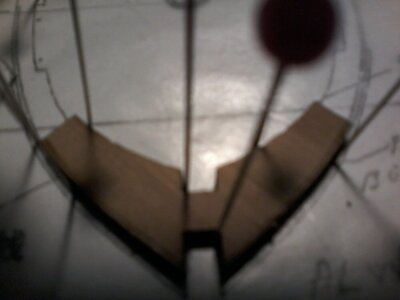
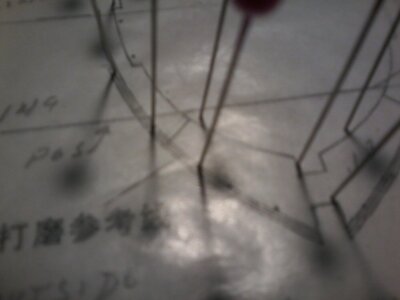


WAITING FOR COMMENTS SOMETHING IS NOT RIGHT, OK FURTHER I HAVE ORDERED 2 DIFFERENT MAMNIFYERS ONE A HEAD BAND ANOTHER A TABLE TOP OINE HOPEFULLY BOTH LIGHTED, HOPEFULLY THEY WILL HELP WILL POST WHEN ARRIEVES NEXT WEEK, COMENTS PLEASE. GOD BLESS STAY SAFE ALL DON
Hello Don,
Nice to see the starting of your build-log.
I am willing to help, but I am not working on the frames on this moment.
But what I see on your pictures, the pins must become always standing on the outside of the lines.
And the basic for outlining off the frames are the squares in the frames in the middle under and above. Where the keel comes.
But the others who are now busy with the frames can hopefully tell and help you more.
Regards, Peter
Kurt Konrath
Kurt Konrath
Great start to the project Don, have lighted magnifiers has helped me in my hobby work as well.
Keep up good work and stay healthy and safe.
Keep up good work and stay healthy and safe.
THANKS GUYS, PETER I HAVE TO REVIEW HEINRICHS AND DON Rs LOGS ON FRAMES, MAYBE MIS UNDERSTOOD THEM. GOD BLESS STAY SAFE ALL DON
OK SHIFTED THE FRAME NO 8 FITS MUCH BETTER DIFFERENCE IS THE PLACEMENT OF THE EXTERIOR OF THE FRONT FRAME THE FIRST SET WAS TO THE INSIDE OF LINE THIS IS ON THE LINE I THINK I MISUNDERSTOOD ONE OF HEINRICHS PICTURES NOT SURE YET BUT IF THIS IS CORRECT I WILL CLEAN UP THE FRAME DWG ANRE POSTION WITH LESS PINS PLEASE CK OUT TOP OF FRAME SLIGHTLY HIGER THE THE FRAME DWG. VERY SLIGHT, LET ME HERE GOD BLESS STAY SAFE ALL DON


Quick question Don. Are you marking the outline of the frames with the pins and then placing the frame parts in the outline?
Jan
Jan
Bravo Don. I admire your enthusiasm in building multiple kits at the same time. 
.
.
HI JAN, WHAT I DO IS I PICK KEY POINTS LIKE THE KEEL NOTCH THE OUTSIDE OF THE FRAME, ON THE BLUENOSE IT LOOKS LIKE THE MIDEL 2 PLACES ARE THE MAIN ONES ONCE THESE ARE SET I PUT PINS IN TO HOLD IT FIRM I TRY TO KEEP THE PINS TO A MIN. OTHERWISE IT GETS TO CONFUSING AND MISTAKES OCCUR WILL POST BETTER PICTURES AS SOON AS I DETERMINE WHAT IS CORRECT, THANKS FOR FOLLOWING. GOD BLESS STAY SAFE ALL DON
NO CHOICE BRIAN, NOT WHILE COVID IS HERE UNLESS I WANT TO GO COMPLETLY BATTY I AM GOING TO LIMIT THIS TO 3, THE LEUDO IS ALMOST FINISHED WAITING FOR REPLACEMENT BOARD FROM RUSSIA AT NEW YORK NOW SHOUL BE IN SOON THEN TO FINISH IT UP, WAITING FOR A SUPRISE SEMI-KIT UNIQUE KIT WILL SEND YOU EMAIL TONIGHT IT WILL NOT BE IN TILL THE END OF JANURARY. GOD BLESS STAY SAFE YOUV AND YOURS DON
JAN THIS PIN THING IS JUST MY WAY OF COPPING WITH PHYSICAL PROBLEMS EYESIGHT AND MAINLY CAN NOT STAND WITHOUT SUPPORT I WISH THERE WAS A BETTER WAY BUT SO FAR HAVE NOT FOUND ONE. GOD BLESS STAY SAFE ALL DON
Great to have another build to watch. Now I know what the pins reference was in Heinrich's build. Have fun.
Canoe21
Lawrence
Hello Don, In using pins as you are doing but you have to stay outside of the frame lines on both sides of the frames, do take your time and be consistent, this will work for you.
Regards Lawrence
Regards Lawrence
HI LAWRENCE IS MY SECOND ATTEMPT RIGHT I STAY ON THE OUTSIDE OF THE BEVEL LINES BUT ON THE LINE ITSELF AM I UNDERSTANDING CORRECTILY, ALSO ORDERED NEW HEADBAND MAGNIFYER WITH LED LIGHTS ALSO A DESK TYPE MAGNIFYER FROM AMOZON WILL BE IN NEXT WEEK SHOULD HELP, THE HEAD BANDS I HAVE ARE FINISHED UNUSABLE. GOD BLESS STAY SAFE YOU AND YOURS DON
- Joined
- Jan 9, 2020
- Messages
- 10,534
- Points
- 938

Hello Don - great to see that you have started. You have already received very good advice. Like @Peter Voogt Paeter and @Canoe21 Lawrence said, stay to the OUTSIDE of the line with the frame on the line. On Frame #8 the top of my frame was also ever-so-slightly higher than the markings. I do however, want to give you advice. I know you have made copies of the frame drawings - so throw the plastic sheeting away. Plastic invites movement of the frame - also the glare will make it more difficult for you. I work directly on the paper. After I have finished the gluing I just very carefully remove the frame from the paper - you will still have a piece of paper stuck to the wood exactly over the joint area - but so what. Then just turn the frame around and sand it lightly away. Paper is wood so if any is left it will do nothing to impede adhesion. Like Lawrence said - take your time. Tonight after work, I will build a frame with you on your log (if I may  ) and show you every little detail of what I do.
I have already built Frame #8, so let's choose a nice, big frame with no beveling as a starting point - such as Frame #31.
I have already built Frame #8, so let's choose a nice, big frame with no beveling as a starting point - such as Frame #31.
HI HEINRICH GOOD FRIEND, YOU CAN GIVE ME ALL THE ADVICE YOU CAN AND IT WILL BE GREATLY APPRECIATED, FRAM NO 31 IT IS WILL MAKE FRAME DWG COPIES ON MY NEW PRINTER/SCANNER cHRISTMAS PRESENT DAUGHTER/SON-IN-LAW) BIG SUPRISE, I WLL CUT 31 OUT OF THE BOARD BTW IS 31 THE MIDSHIP FRAME I CAN MARK IT ON THE DWG. BTW HAVE HAD OR KNOW ANY ONE DOING THIS HAVING PROBLEMS CTTING THE FRAME LOOSE FROM THE BOARD I HAD TO USE 2 XATO BLADES FOR 2 FRAMES VERY CARFUL ESPECIALLY WHEN THE LASSER DID NOT GO ALL THE WAY THROUGH,,, AND I WILL DEFINATLY GET RID OF THE WAX PAPPER IT DOES MAKE IT QUITE DIFICULT TO SEE, AS I SAID IN MY POST HAVE TO NEW MAGNYFIERS COMNG NEXT WEEK WITH LED LIGHTS THAT SHOULD HELP TOO, GIVE MY BEST TO ANNA TELL HER I SAID HELLO. GOD BLESS YOU AND HER STAY SAFE DON
- Joined
- Jan 9, 2020
- Messages
- 10,534
- Points
- 938

OK Let's start!
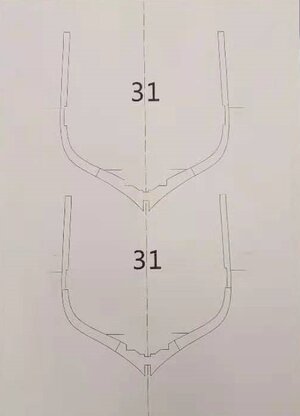
The drawing of Frame #31 directly from the book.
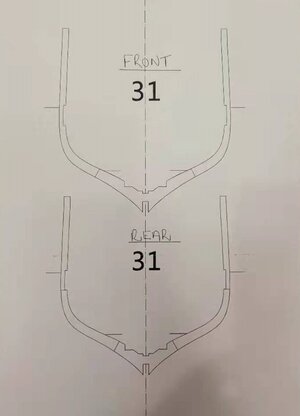
Before doing anything else mark your frames clearly "FRONT" and "REAR".
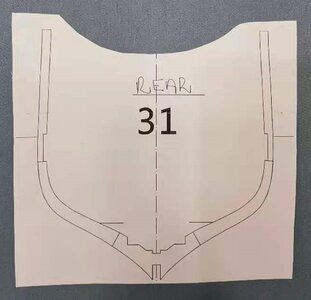
We will start with the REAR FRAME First. I cut out the frame so that I still have my cutting lines on my drawing, but especially at the bottom I try to get close to the edge of the frame notch. This is so that we can position that side as close as possible to the edge of our working surface.
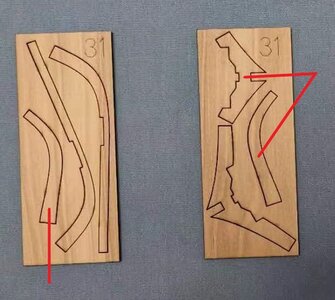
Here are the two sheets that make up the assembly of Frame #31. I have marked the three parts that will make up the rear frame with the red lines.
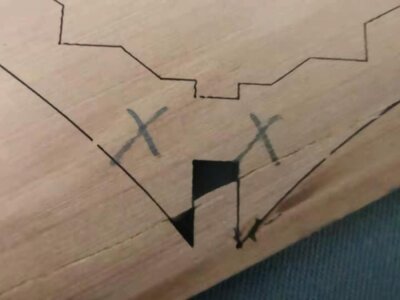
BEFORE cutting the frame parts from the sheet, mark the REVERSE Side of the parts that are to be cut, so that you know at all times which are BACK and which are FRONT! This is IMPORTANT!
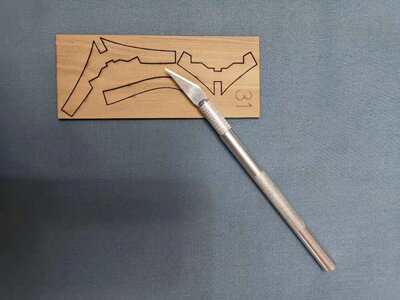
I use an ordinary X-Acto - type (Chinese brand) knife to remove the frame parts from the sheet. Yes, it does take time. Make sure that you cut from both sides and replace blades as soon as you see that you have lost sharpness.
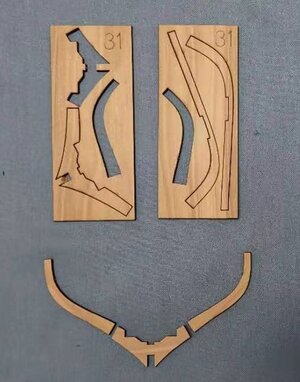
This is what we then have. Now just sand away the little nibs where the frames were attached to the sheeting - no more.
Which then brings us to the working surface. You say you will have to find a suitable table to use the clamps. I have the same issue, so I use an alternative - use a bread board or cheese-cutting board or any flat piece of wood that is larger than the frame. Even the Leudo's building jig will work for this!
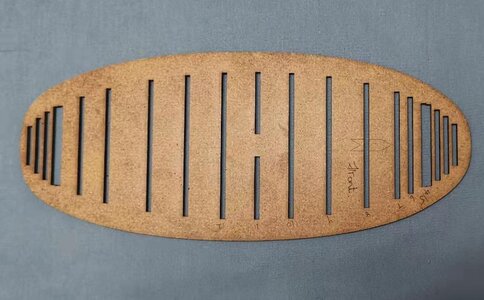
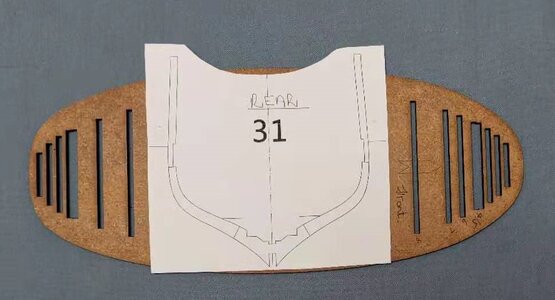
Now simply place your cut-out drawing on the working surface so that the bottom-end (frame-notch end) is closely positioned to the edge. You will see that the Leudo's jig is too small for the assembly of the FRONT frame, but for the REAR frame it is fine.
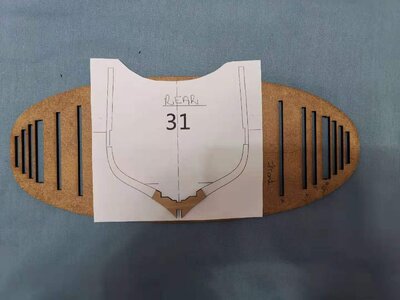
Now position your centre frame piece so that is it perfectly aligned with the drawing - and CLAMP the sucker!
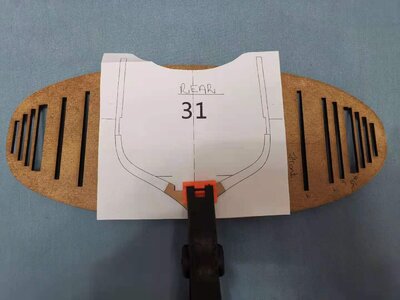
You will see that the clamp i slightly offset to right (as we look at it). That is done for a specific purpose.
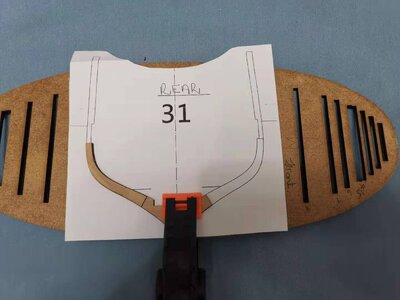
And now you will see that the one arm of the frame lines up perfectly with the centre piece!
Please don't glue anything yet. Maybe you can practice getting that centre notch aligned perfectly with the drawing and clamping it. Now there are no pins that get can get confusing or obscure the view.
Taking into account that you cannot stand unsupported, I forced myself this morning to do all of this while sitting down. It was no problem. (I only stood up to take the pictures).
Good luck and good practicing my friend!

The drawing of Frame #31 directly from the book.

Before doing anything else mark your frames clearly "FRONT" and "REAR".

We will start with the REAR FRAME First. I cut out the frame so that I still have my cutting lines on my drawing, but especially at the bottom I try to get close to the edge of the frame notch. This is so that we can position that side as close as possible to the edge of our working surface.

Here are the two sheets that make up the assembly of Frame #31. I have marked the three parts that will make up the rear frame with the red lines.

BEFORE cutting the frame parts from the sheet, mark the REVERSE Side of the parts that are to be cut, so that you know at all times which are BACK and which are FRONT! This is IMPORTANT!

I use an ordinary X-Acto - type (Chinese brand) knife to remove the frame parts from the sheet. Yes, it does take time. Make sure that you cut from both sides and replace blades as soon as you see that you have lost sharpness.

This is what we then have. Now just sand away the little nibs where the frames were attached to the sheeting - no more.
Which then brings us to the working surface. You say you will have to find a suitable table to use the clamps. I have the same issue, so I use an alternative - use a bread board or cheese-cutting board or any flat piece of wood that is larger than the frame. Even the Leudo's building jig will work for this!


Now simply place your cut-out drawing on the working surface so that the bottom-end (frame-notch end) is closely positioned to the edge. You will see that the Leudo's jig is too small for the assembly of the FRONT frame, but for the REAR frame it is fine.

Now position your centre frame piece so that is it perfectly aligned with the drawing - and CLAMP the sucker!

You will see that the clamp i slightly offset to right (as we look at it). That is done for a specific purpose.

And now you will see that the one arm of the frame lines up perfectly with the centre piece!
Please don't glue anything yet. Maybe you can practice getting that centre notch aligned perfectly with the drawing and clamping it. Now there are no pins that get can get confusing or obscure the view.
Taking into account that you cannot stand unsupported, I forced myself this morning to do all of this while sitting down. It was no problem. (I only stood up to take the pictures).
Good luck and good practicing my friend!
One small advice when you are using a copy of the sheet for making a frame: check carefully if the measure is excact the same with the original. Some copiers reduce 0,5% till 1,5%! Place them over each other and hold them against the light.
Regards, Peter
Regards, Peter


 (Just LOVE my Haarlem / Batavia)!