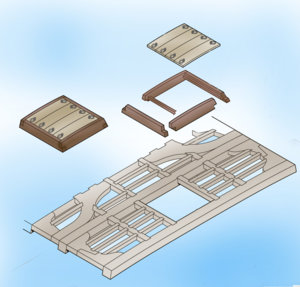
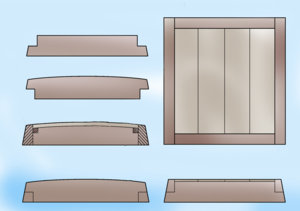
Bomb vessel cross section - scale 3/8 or 1:32

oh the zen of modeling a break from researching, time to focus and cut some wood

each and every step of model building requires some pre planning, you can fly by the seat of your pants and correct as you go, some plan every move every cut. I am someplace in between the two. This is what i needed to end up with
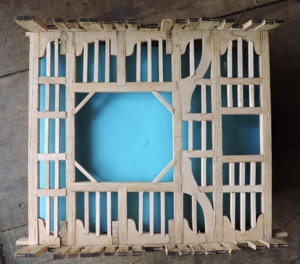
frame1.jpg


and here is how I planned it, first i found center on each side of the pit, the red X now i took a measurement from the drawings and from the centers measured out in each direction. This gave me the point of the corner braces and each one is exactly in the same place. If your going full build the ends are morticed into the main beams. Here you can see i took the short cut and butted the ends to the beams.
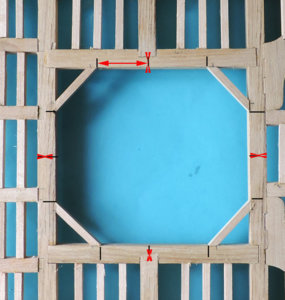
frame2.jpg

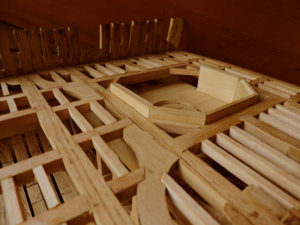
the two ends are flat on the top you will see why later in the build. I realized right from the start you can not place the sides into the pit because the ends are angled, so they have to slide down from the top. Keeping everything in place proved to be difficult so i glued these ends in place.frame3.jpg
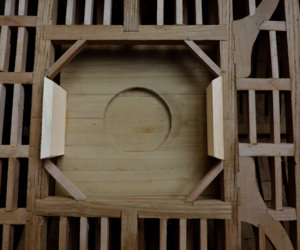
 
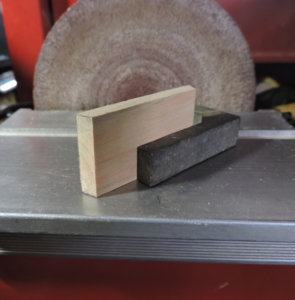
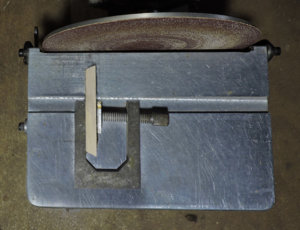
if the pit were square I could cut the ends of the side pieces at a 45 and slip them into place. But because of the angles braces in the corners I have to deal with a weird angle. I could not just set the angle of the table because each fit between the sides was ever so slightly different so I went free hand with the angle. One thing to remember is that angles still has to be level from top to bottom and at a 90 to the bottom and top. You can't hold the side piece free hand because it would wobble.
here was my solution the piece is clamped so everything is tight and square. Now all i have to do is ever to slightly touch the end to the disk and little by little adjust the angle.

N2191.jpg

N2190.jpg
 
Last edited:
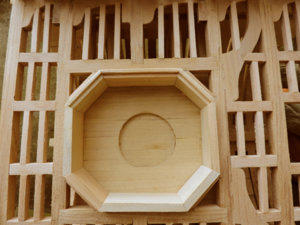
sides of the mortar pit form a coaming around the pit

sides4.jpg

here you can see all 8 sides cut and fit, this took a bit of tweaking to get all the angles right. i had to redo a couple sides.
There is a slot cut along the top for the planking. i finished the top 3 sides and the bottom 3 still need to be finished. This was not that easy to do and get everything lined up,even and fitting tight.

sides5.jpg
 
Last edited:
the actual model building is done mostly with hand tools and small hobby size power tools.

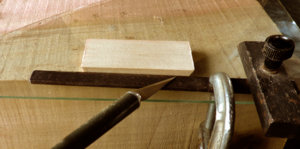
the slot was cut by first setting up a make shift jig. The T square just happened to be the right thickness for the slot so i clamped it to a piece of glass. By running a knife along the top i can score the wood. For this build I am using Poplar a wood harder than Basswood but much softer than Boxwood.

side10.jpg

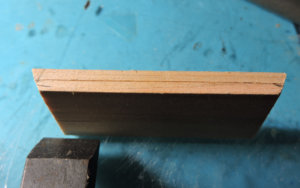
once I have a nice sharp line I go over it several times to deepen it. Here is where your choice of wood makes a difference very hard woods like Boxwood or Hard Maple make cutting with a knife difficult.

sides8.jpg

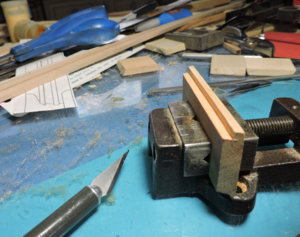
I like to clamp my work in a vice it help to grip the work in progress. Some say i would never use a soft wood because you can not get a clean sharp edge. Well i seem to be able to get a clean shape edge.

sides9.jpg
 
This is different and very interesting. The evolution and thought processes are very instructive. Would certainly be high on my wish list as a "kit"/semi scratch build. Thank you
 
Dave, kan du fortelle meg hvilke våpen jeg trenger for 1/32 Blandford og 1/48 Rattlesnake,
Jeg ser deg selge våpen på hjemmesiden til tømmerhagen, samme sted som jeg kjøpte Rattlesnake-planene.
Beklager å bryte inn denne tråden.
På forhånd takk, hilsen Knut

Dave, can you tell me what weapons I need for 1/32 Blandford and 1/48 Rattlesnake,
I see you selling guns on the lumberyard homepage, the same place I bought the Rattlesnake plans.
Sorry to break this thread.
Thanks in advance, greeting Knut
 
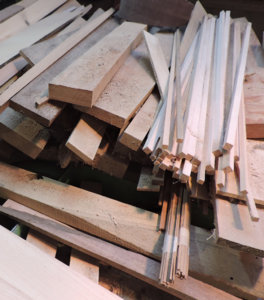
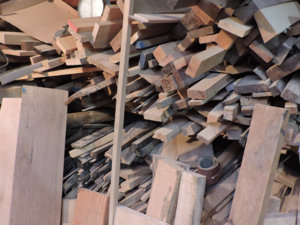
what you have seen so far was done with small hobby tools and hand tools. What you did not see is the lumber and tools the scale timbering came from. To scratch build a model you will either have to resaw you own stock or purchased it.

wood pile 1.jpg

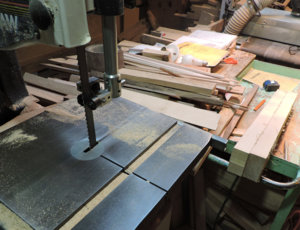
The tools are all 2 and 3 HP and plugged into heavy duty power lines. To cut down the small planking strips i use roller bearing guilds on the bandsaw and 3tpi 3/4 wide claw tooth blade. the trick is when you push a saw to it's max you put pressure on the blade and it will tend to flex and give you an uneven cut. Your cutting should have as little resistance as you can. Like a hot knife through butter.

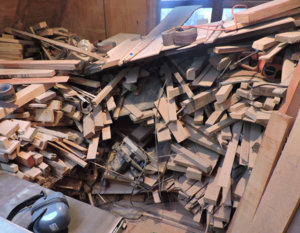
wood pile 2.jpg

looking around, this is behind the sander. If you look into the pile you can see tools being eaten by the wood, a small chain saw in the upper corner is almost gone.
What happens is i put tools on the pile and because the piles are in constant use i pull pieces out and tools sink into the voids and fall into the pile.

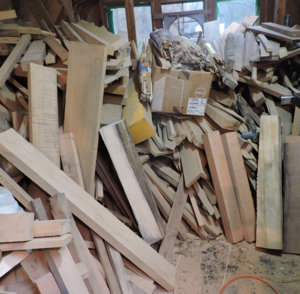
wood pile 3.jpg

behind the band saw is a pile of stock that the hobby size wood is cut from. Some of the wood starts out as 6X6 inch beams. Most are 2 and 3 inch boards.

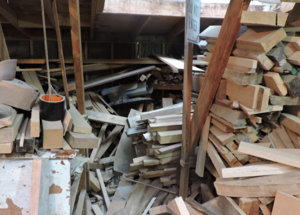
wood pile 4.jpg

back in the barn are piles of the size lumber i am working with, that is a roll of 3 inch duck tape

wood pile 5.jpg

pieces are starting to get smaller and this is the working stock for cutting scale timbering, still to big for hobby size tools. This is a good working size for table top tools like a 10 inch bandsaw.

wood pile 6.jpg

when the wood is finally on the modeling table it is close to the final size
 
Last edited:
Dave, seeing these 3-D pictures makes my mouth drool, a thought why some of our members who proficent in 3-D do not start a smaal sideline buisness for doing 3-D work like you are showing, JUST A THOUGHT. Don

There are many 3D artists out there and they do hired work. The problem is the high cost they have to charge. I say "they have to charge" is not because they are greedy it is the cost of renting the programs, it is not like it use to be when you purchased software and you got a CD, now you pay a ransom per year for the use of the program.
CAD, 3D drawing and modeling takes time to do i have a few projects on the drawing board and i believe i have as much time on the computer as i would actually have building the model.
 
Last edited:
Hello Dave, great job you are doing on your Bomb Vessel Cross Section. You sure do know how to make things look so easy. You sure do have a huge pile of different types of wood in your work shop, it must be a task to try and keep track of it all, and here I thought my Old Ship Yard was crowded.
Regards Lawrence
 
I am having a great time looking thru these build logs.

Things I see and read help clear up things I have wondered what different parts are and how they all went together on a real ship vs how kits often show things done the simple or easy way.
 
Back
Top