Bonhomme Richard - Pear Cross section kit (with scratch duplicate using alder) Unicorn Model

Joined
Jan 31, 2021
Messages
249
Points
243

Location
Loveland, CO
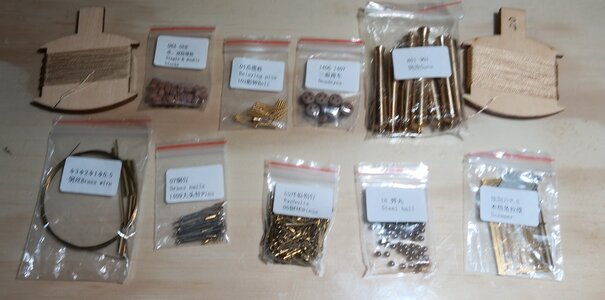
DHL delivery from China Today!!! I'll post a few pictures from the unboxing below. Next post, I'll discuss my thoughts on making a duplicate with a bunch of Alder I have from a recent project.

First impressions:
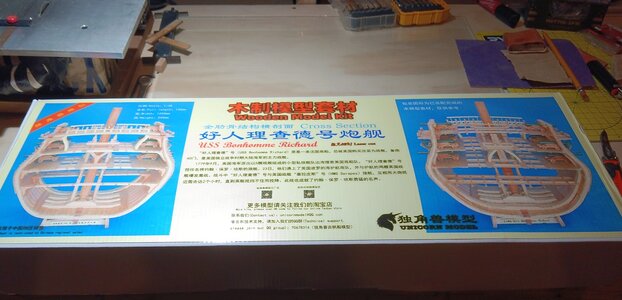
1. Kit arrived via DHL in Eight days! It was well packed and looked pristine when I removed the exterior wrapping (photo 1).
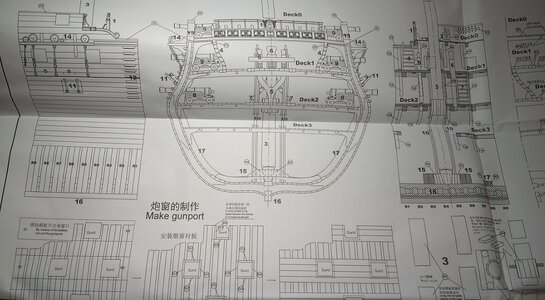
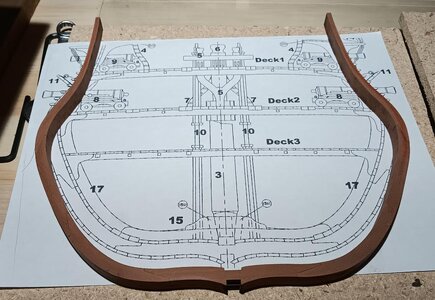
2. There is a very large plan sheet (photo 2) is just 1/4 of the sheet. Printing is clear and precise. Translations from Chinese to English look adequate.
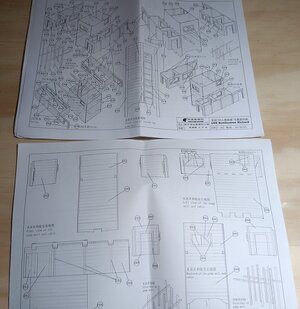
3. There is also a set of smaller drawings on a dozen or so sheets that show specific instructions and details (photo 3). Again, clear images and translations look adequate.
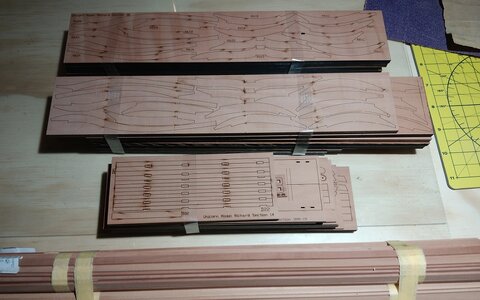
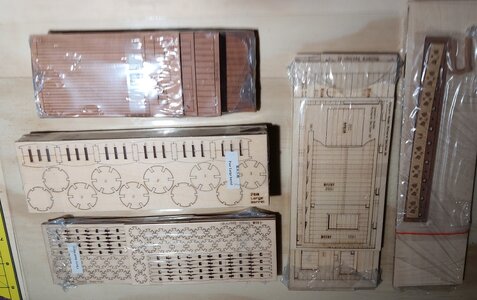
4. The wood (pictures 4 &5) looks like quality fine grain wood. It seems a slightly shade of pink than other pear wood I've worked with. We'll see how it sands and accepts stains/oils/etc. The laser etching is extremely fine and accurate and it doesn't look like the char extends too deep...more to follow as I begin detaching pieces.
5. The accessories look fine. Cannons, deadeyes and blocks look excellent (photo 6). Much of this may be substituted or swapped out (line, wire, etc) as I customize and fine tune things.

The construction cradle sheets look very accurate and substantial enough to keep things aligned.
Unboxing1.jpg

Unboxing2.jpg

Unboxing3.jpg

Unboxing4.jpg

unboxing5.jpg

unboxing6.jpg
 
I'm considering building a "scratch" duplicate using a bunch of alder I have leftover from making some shutters recently (see photo 1 and 2).

The leftover alder is .26" thick and the 1/2 frames in the kit are .236", so a few passes through the thickness sander will even them up. I plan on using the Harold Hahn method to make the duplicate frames. I used this method (see phot 3) on my scratch build of HMS Serapis, and it works awesome (with quite a bit of wasted wood but I've got plenty of alder planks).

Does anyone know if I can order from ZHL, a second jig for aligning the frames? Who would I contact?

Alder blank2.jpg

Alder blanks.jpg

Hahn section frame.jpg
 
Last edited:
Below is short description of how to get the frame sections out of the Pear Wood blanks.

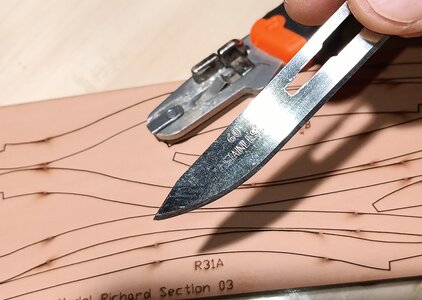
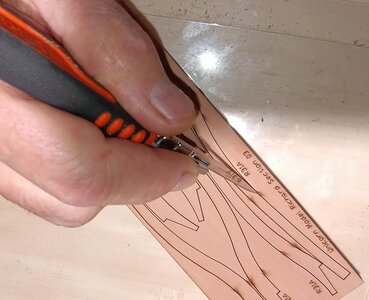
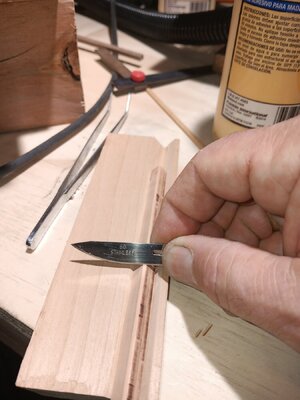
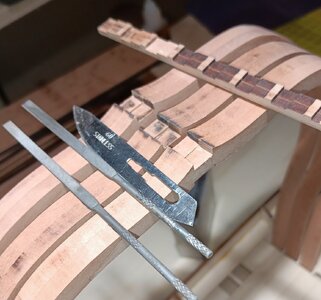
1. Use a surgical scalpels, which I buy in boxes of 100... see link: https://www.amazon.com/gp/product/B00D79EODK/ref=ppx_yo_dt_b_search_asin_title?ie=UTF8&psc=1 See phot 1.
2. In the second picture, you can see the blade slicing deeper in the two tiny areas where the laser did not cut the wood.
3. Next, a Japanese flush cut, pull saw, see link, (https://www.amazon.com/gp/product/B07T9K59D1/ref=ppx_yo_dt_b_search_asin_title?ie=UTF8&psc=1)
is used to cut the excess wood to a fraction of a mm of the frame.
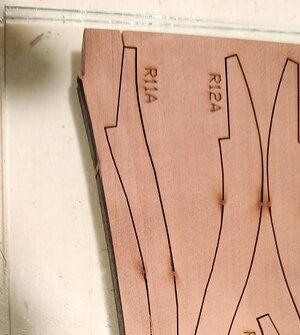
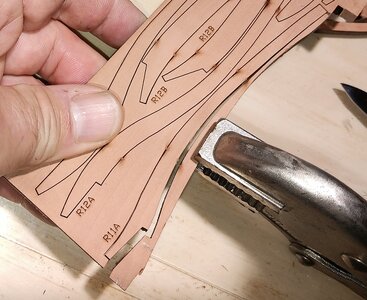
4. After using the surgical blade, to loosen the wood grain at the two tiny areas the lasers did not cut through, I use a pair of vice grips to gently rock the wood back and forth over the weakened joint (photo 4).
5. The two joints where the laser did not cut through leaves a slight bump or elevated area. They are the light-colored areas. I use a file or sandpaper to remove some of the black char and those elevated areas where the laser did not cut through (photo 5).
6. Finally, the joint is dry fitted, to ensure it is nearly invisible. (photo 6)

Next step is to do this to all the joints, then glue them over a paper copy of the frame structure. This will produce a 1/2 frame. Two of these 1/2 frames will be glued together on a glass plate to ensure it is perfectly flat.

cutting out frames surgical blade.jpg

utting out frames 3.jpg

cutting frames saw cut.jpg

cutting out frames2.jpg

cutting frames chaff.jpg

cutting frames char removal.jpg

cutting frames joint.jpg
 
Made the first frame. I'll narrate the process, using the pictures below for visual aids.
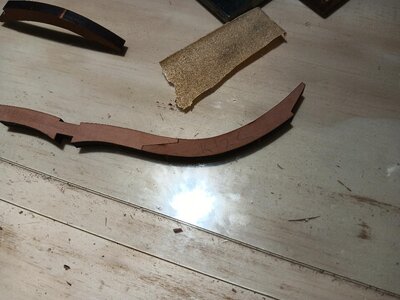
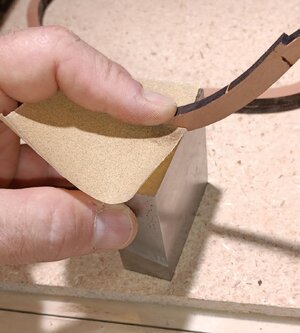
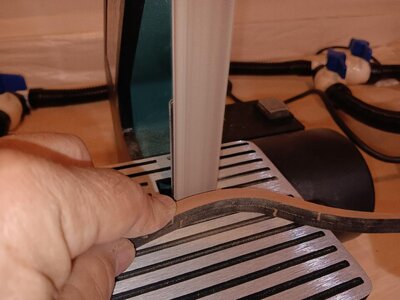
Pictures 1&2 below. I used the steel anvil/bench block ($15 on Amazon) to help sand the joints to remove the relatively thick black char left from the laser cutting process. I used 220 and 180 grit sandpaper (second photo).
glueing frames5.jpg
glueing frames6.jpg
Picture 3 shows the removal of the thick black char. One gripe is that ZHL frequently places the place where the laser "skips burning" on the joint. I'd say this happens 20% of the time and it leave an area that is difficult to sand completely even for the joint (see red arrow) below. I think ZHL/Unicorn could easily program the burn to not skip on the joints!
cutting frames char removal.jpg
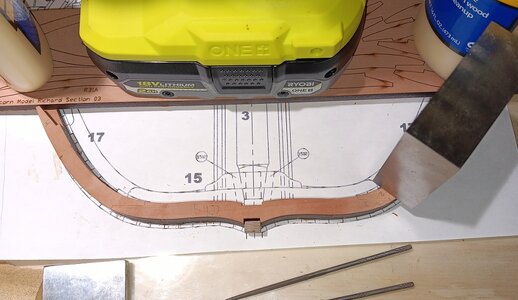
Picture 4 shows the two layers being glued on top of each other. I start at the keel and use a small "jig" of walnut that is cut to the width of the keel to ensure the two keel slots are perfectly aligned.
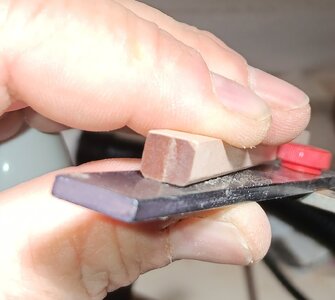
glueing frames.jpg
Picture 5&6 show the char on the outside of the frame being removed, after the two frame layers dry overnight. For the convex curves I use a $40 belt sander from Amazon, with 220 grit. For the interior concave curves, I use an oscillating drum sander I've had for year, with a 180 grit paper.
glueing frames2.jpg
glueing frames3.jpg
Picture 7 shows the first completed frame.
glueing frames4.jpg
One down and 8 to go!! Hope this is helpful to anyone doing this build in the future. Once these are complete, I'll do the same frames using the Harold Hahn method, using leftover alder.
 
Good work so far. I very much enjoyed building this model. However, I had the problem that the frames tended to spread at the top. They seemed easy enough to move to the right position, but when combined into a complete section, they become very strong and resistant. As a result, as you build higher, the laser-cut cross beams tend to be shorter and shorter, due to the top frames widening, and it was sometimes difficult to fit. Not sure what the best remedy is, but something to watch out for.

Also, all deck and gunport measurements are done down from the top of the frames, yet on my construction, the tops were irregular in length/height. I ended up measuring from the keel, but that was difficult too. Just something to look out for.

Good luck! I think this is a great looking model.
My frames do not seem to be spreading at the top.

However, as you said not all the tops seem to be even. I've got three more to finish and then I'll have to determine how do remedy these minor (1-2mm) differences in frame tops.

I'm hoping it turns out well, thanks for the hints and tips!
 
A few steps forward. 7 of 9 frames glued up plus: 1) I got a little start on the keel and 2) made a minor modification to the task light in my shop. Pics and detailed description below.
1. I made a jig to make the rabbet in the keel and used my thickness sander to take off tiny amounts. Photo below:
20240203_161145.jpg
2, I slowly increased the rabbet until I had the thickness of the planking and then I used a surgical blade as a scraper to smooth out and polish the rabbet edge.
20240203_161625.jpg20240203_161244.jpg
3. Process was repeated on the other side, with the result shown below.
20240203_161439.jpg
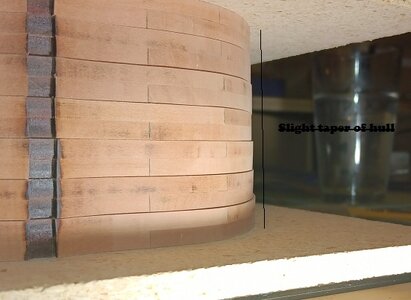
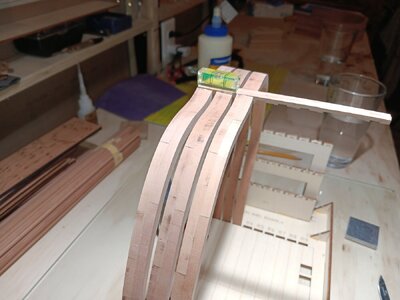
I took a photo of the 7 frames I completed. With the light and stacked the way they should lay, one can see the slight taper from the first frame as the hull slowly tapers toward the stern.
20240203_162504.jpg
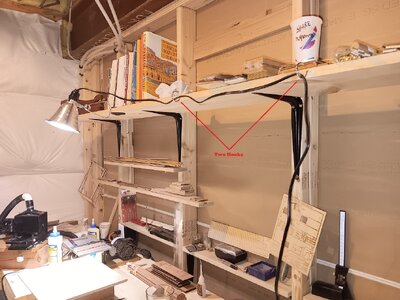
Finally, I added two small hooks on the shelf above the workbench. This allows me to move the $10 task light to any spot on the shelf, without the wire hanging down and getting in the way...simple, cheap and effective.
20240203_163154.jpg
I'm excited to finish the frames. Each one takes about 2-3 hours and I average one per day. This weekend I should be done and can start setting them in the supplied building jig and see how they line up. I'll also start building the second set of frames using the leftover alder.
 
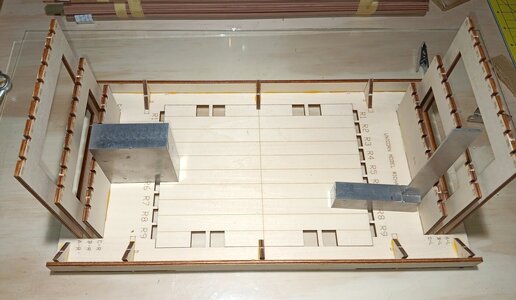
Constructed the frame jig and have begun fitting the frames into the jig provided. It takes a lot of minor adjusting and very detailed filing to remove the char. I also found the depth of each slot needs to be adjusted slightly, to ensure the taper of each frame ends flush with the rabbet on the keel.
1. Making the jig and ensuring all joints are 90 degrees. All joints and slots fit tight and snug.20240206_102848.jpg
20240206_111909.jpg
3. Some of the tools I used. The first three frames have the char removed.
20240206_143627.jpg
4. The next two show how they are fitting with respect to the keel, a bubble level and the rabbet. Nothing will be glued for a long time as I fiddle and fine tune each joint. So far, I'm impressed how tight the joints are. This should make everything very solid once the keel is glued and spacers are added. Then the job of sanding and fairing the frames will begin.
20240206_142848.jpg20240206_191950.jpg
 
Hi Brad. Unicorn makes great quality kits, and this is one of their best so I am sure you will enjoy building it. So far, your work is looking great- clean and accurate!
 
Please wait with the final char removal until you have installed and fixed all of the frames. they are slightly different, so when you have installed them you can snad a smooth hull form and remove in the same working step the char....... This is how I did it on my section
 
Please wait with the final char removal until you have installed and fixed all of the frames. they are slightly different, so when you have installed them you can snad a smooth hull form and remove in the same working step the char....... This is how I did it on my section
Uwe,
Too late, I have already removed the char:(. I'm working on aligning the depth of the slots for the keel and keelson so the thickness from bottom of keel to top of keelson is the same at all frames (tedious work). This should make it easier to fabricate Limber Strakes, since they are not provided in the kit.

I can see why leaving the char would help to visually fair the frames....so your method may be easier visually.

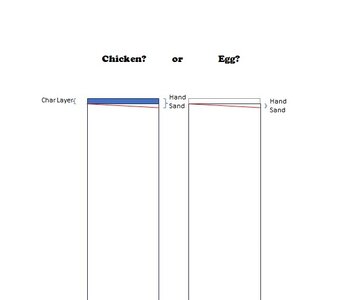
I don't think it is a mistake to remove the char first, is it? I believe your method has more control, with the delicate touch of the hand/eye but each will produce the same result. Is this a Chicken or Egg question? Please let me know if I'm missing something! See photo below:

sanding diagram.jpg
 
Everything will be fine, when you remove only the char on the single frames - and final sanding afterwards
It could be only problematic removing on single frames partly more ...... everything fine with your work - the result is looking very good
 
Test fit of the frames, keel and keelson in the jig provided with the kit. Everything fits snug. Only friction is holding the parts together in the photo and is feels very solid, without any glue!

As I did this test fit, I planned the sequence to glue the parts together. I anticipate several days of silence while I glue and then sand/fair the frames. Time consuming and critical part of the build!
frames in jig1.jpg

frames in jig2.jpg
 
step by step ..... very good preparation works - great that you have reached already this phase Thumbsup
 
I came up with a way to add stability while sanding, above the three levels of spacers (without glueing additional spacers toward the keel).

The long (not glued) spacers can be moved up and down as I sand different areas on the hull. It's working great, while I use 120 grit to start shaping and fairing the hull.

The three levels of spacers are all glued across all frames. The top half of the keel is held by friction only. I keep pressure on it while sanding as an additional way to help maintain the space between frames.

While waiting for glue to dry, I did the first (large size) barrel provided with the kit and stained with some WATCO Light Walnut. Next I'll have to look at other build logs to determine how to make the steel bands for the barrel.spacers for sanding.jpg
 
Shipyard made only VERY MINOR progress this week.

1 and 3-year-old grandkids have slowed progress, while my daughter and her husband take a vacation to Cancun, Mexico.

We'll be babysitting for 3 more days, so progress will be slow...but we love having the grandkids!

Below is the small progress made in fairing one side of the cross-section during naps! No power tools, only hand sanding sticks in 120 and 220 grit. Final sanding (a long way off) will be 400 grit.

fairing process.jpg
 
Back
Top