Bonhomme Richard - Pear Cross section kit (with scratch duplicate using alder) Unicorn Model

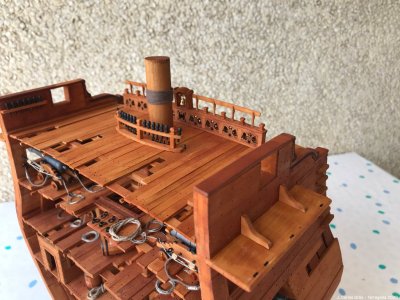
Cleaning up the decorative quarterdeck rail.

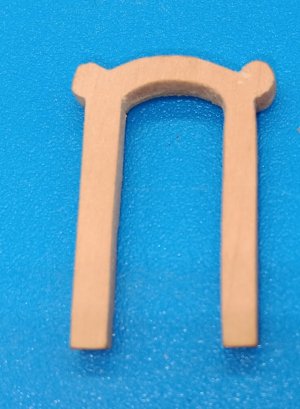
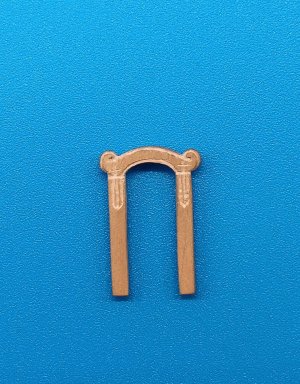
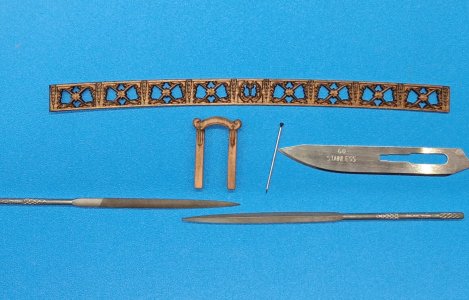
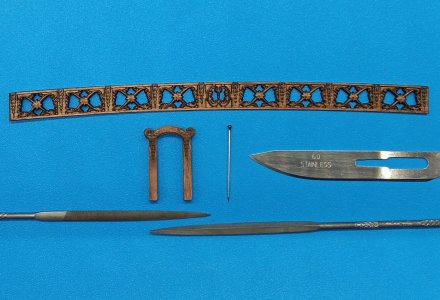
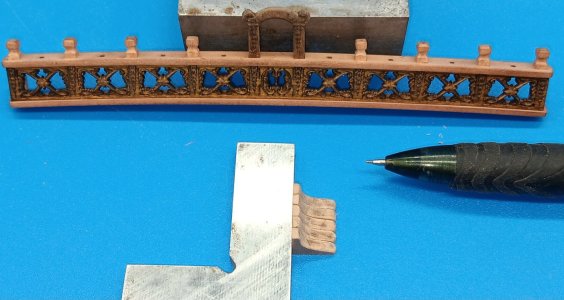
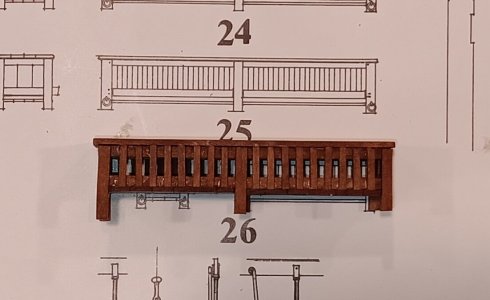
The kit comes with a very detailed CNC carved frieze/screen (for the front I assume) and a second of pearwood, with black lines (I assume, to sandwich the posts that hold the rail. I spent about two hours cleaning up the far-right block on each. Tedious and delicate work using a scalpel blade, two jeweler's files and a small brush.

I think the time and effort will be worth it, as these decorative screens are a centerpiece of the quarterdeck...14 more to go!!!

View attachment 499585
That is a nice improvement of the decoration, Brad. For sure a good time investment..
Regards, Peter
 
Paul,

I was confused on the two parts also. I don't know what the "correct" answer is, but I will show you examples of both. Also, in my opinion, Boudrot's drawings might support two screens/friezes. Let me know what you think?

If anyone has definitive answers, please let us know.

First, is the single screen example built by Signet. Beautifully executed and clearly shows only a single carved panel. The knees in Boudroits drawings would have trouble butting against the pillars, since the bottom rail would interfer.
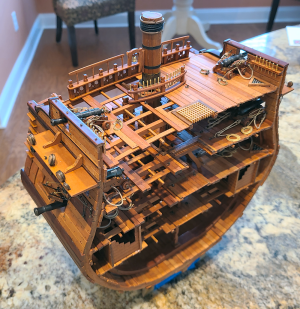
Signets quarterdeck rail.png

Second, is the double screen example from the build by Carlos. Again, beautifully executed and clearly two carved panels. Boudroit's supporting knees would sit flush with the rail and screen.
carlos quarterdeck rail2.jpgcarlos quarterdeck rail.jpg

Third, are the drawings by Boudroit. The first provides no information about the backside of the railing.
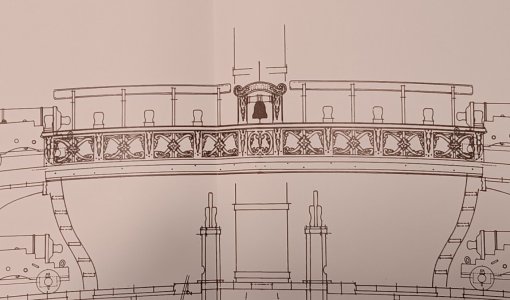
20250206_075022.jpg
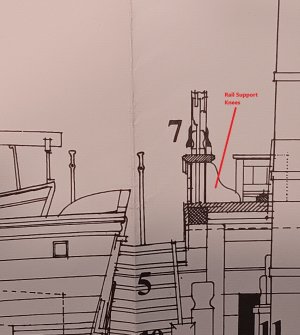
The second seems to show only one screen (red arrow), with knee's supporting the rail pillars. Might there be a carved screens between the knees and pillars (the thicker black line). This would provide a decorative surface for the watch officers on the quarterdeck to view?
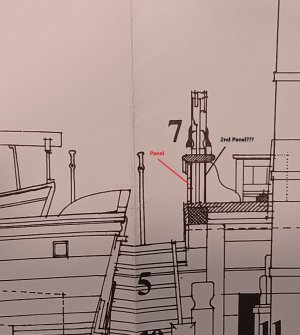
2nd panel.jpg


If I can get the coloring of the two friezes to look similar after I oil them, I may use two screens. I like the look and solid feel of the rail that Carlos produced, although it may not be accurate.

If they clash in color because of the different woods, or I cannot get the knees shown by Broudoit to fit correctly I may end up with a single screen, which seems to be most likely, from the drawings??
 
A final point of reference is Karl's incredible scratch cross-section of BHR on the NRG forum. His build does not have a screen on the back side of the rail (photo below). I think this is what Boudroit depicts in his drawing in my last post.

Karl's accurate (as drawn) build looks awesome but I wonder what it would look like with a screen behind the knees (which are not provided in the kit by Unicorn)? I've used his superb build as reference before, when I added the rope in the accommodation ladder (which can be seen in the bottom right corner below).
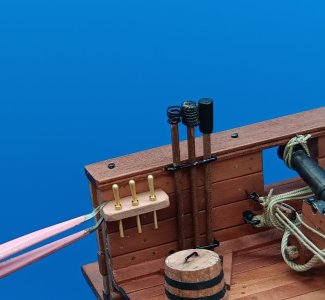
I intend to make the knees, as Karl has done, then do a "With/Without" visual of a second screen behind the knees.
karls quarterdeck rail.jpg
 
Good morning Brad,
here is a link to the French forum and the report from Al Arsenal. I hope you find answers to your questions here. It looks like there is only one frieze. Before I forget, great little details and very nice work.

 
Good morning Brad,
here is a link to the French forum and the report from Al Arsenal. I hope you find answers to your questions here. It looks like there is only one frieze. Before I forget, great little details and very nice work.

Tobias, thank you for the link to that wonderful build! It too agrees with almost everything I've found....only one screen. That will make it much easier/simpler to complete the rail!!!
 
A little work on the rail and arch for the ships bell.

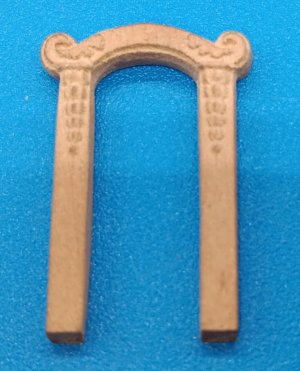
First, the arch had CNC carving on the front but nothing on the back (see below).
20250208_145012.jpg 20250208_145103.jpg

I couldn't duplicate the front, as it is raised, so I carved swords, with a cross for the hilt. Then tried to duplicate the edging and swirl. Carving tools included 2 jewelers files, a sewing pin, and scalpel.
20250208_204441.jpg

I then stained both the bell arch and the decorative rail screen.
20250208_215751.jpg20250208_215858.jpg

Over the next few days, I hope to fabricate the 10 knees that support the backside of the rail, then install the rail on the quarterdeck.
 
Shipyard found some scrap pear wood to fabricate the 10 knees, that were not supplied or mentioned in the Unicorn kit. They are clearly shown on the Boudroit drawings (see below):
knees.jpg

I've also seen them on some beautiful scratch BHR models (see below photo of Karl's BHR from NRG build log). The extra detail I feel is important and accurate, so I decided to include them.
karls quarterdeck rail.jpg

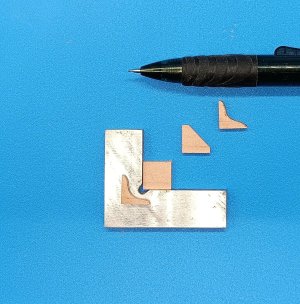
First step was to thickness sand some scrap pearwood to 3mm and then cut them into 11mm squares.
20250209_130413.jpg

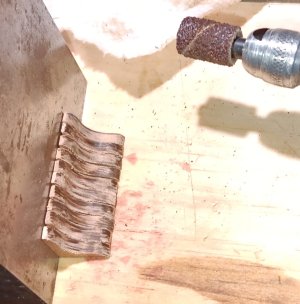
The corners were then cut off and a Dremel sanding drum shaped the rough curves of the knee.
20250209_130601.jpg20250209_132610.jpg

Finally, small files were used to get the final shape, as well as sand off the burned wood. Five knees were completed, while the shipyard smoked two large rib racks for a Super Bowl Party. The shipyard's team lost, but the ribs and knees were a success!!! 2 of 3 isn't bad....congrats to the Eagles.
20250209_230132.jpg
 
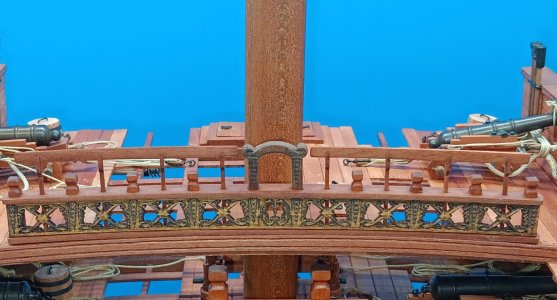
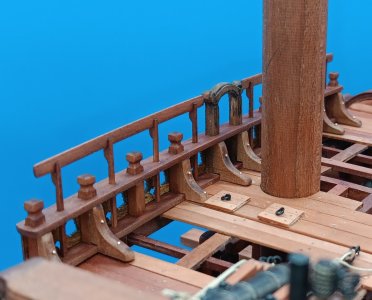
DRY FIT ONLY of quarterdeck rails and knees. The curvature of the rail required some minor sanding in the middle to mate perfectly with the curve of the deck. Front picture below:
20250210_204108.jpg

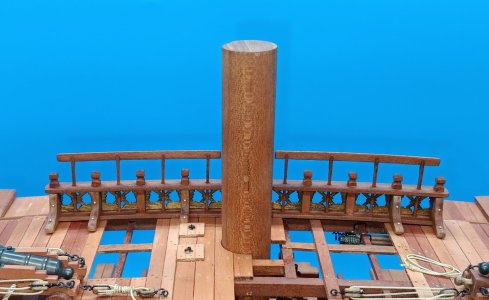
Backside pictures with the knees. Shipyard did have to shorten one knee, so it didn't cover the pump extraction lid. Workers also added two simulated bolts to each knee, made from 20ga brass wire.
20250210_210939.jpg20250210_211101.jpg

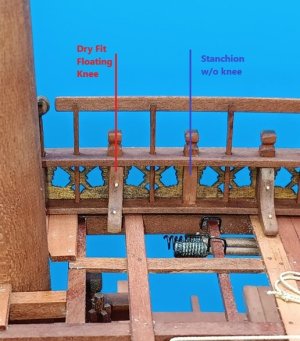
The final question/decision will be whether to put knees over the area where the decking is not present. Below shows a test knee floating over the missing decking. Next to it is a stanchion without a knee. There are only 3 of 10 stanchions w/o decking, so my first inclination is to put the knees over the open decking, for symmetry reasons.
floatin knee.jpg
 
DRY FIT ONLY of quarterdeck rails and knees. The curvature of the rail required some minor sanding in the middle to mate perfectly with the curve of the deck. Front picture below:
View attachment 500663

Backside pictures with the knees. Shipyard did have to shorten one knee, so it didn't cover the pump extraction lid. Workers also added two simulated bolts to each knee, made from 20ga brass wire.
View attachment 500664View attachment 500665

The final question/decision will be whether to put knees over the area where the decking is not present. Below shows a test knee floating over the missing decking. Next to it is a stanchion without a knee. There are only 3 of 10 stanchions w/o decking, so my first inclination is to put the knees over the open decking, for symmetry reasons.
View attachment 500671
That’s looking very nice, Brad. Perhaps some (nibble) parts of planks under the ‘flying’ knee.
Regards, Peter
 
Thanks for the concurrence on Peter's recommendation.

Enjoy the sunny beach (even though it isn't on your favorites list) and keep things in perspective:

Forecast here: 4-6 inches snow and high in the teens (monotonous snow shoveling)
Forecast there: no precipitation, Low - 75, High - 82 (boring, balmy, bikinis, beaches)

Enjoy!
 
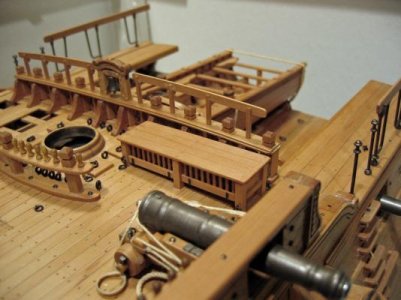
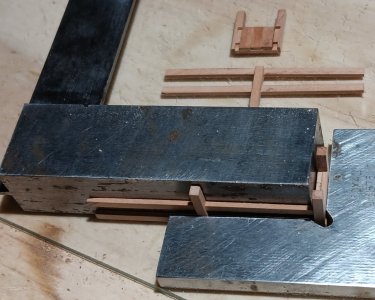
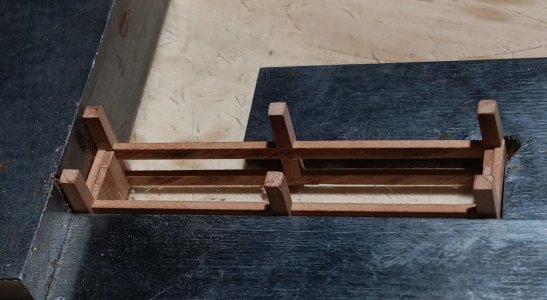
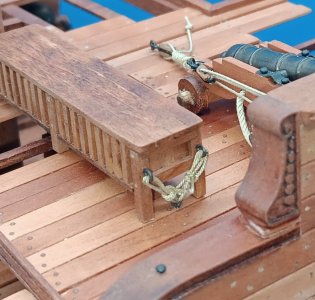
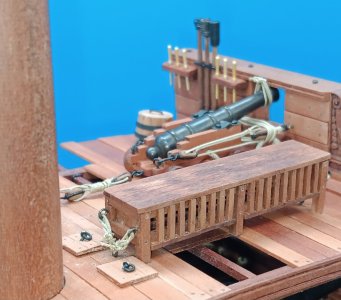
Shipwrights tried to create the "Chicken Coup", shown on the Boudroit drawings. These parts were not included in the kit.

Below documents the scratch built "Chicken Coup".

6 legs (2mm x 2mm) were cut, followed by the 4 long and 4 short cross members (1mm x 2mm). Then a jig was setup to cut the two recesses in the 6 legs and then the cross members were glued in.

NOTE: The legs are much longer than needed, so they can be cut to follow the camber of the deck (making the "Chicken Coup" level).
20250211_132242.jpg20250211_132402.jpg

Next step was making the "frame" of the "Chicken Coup" by glueing and squaring the four sides.
20250211_141512.jpg20250211_142455.jpg

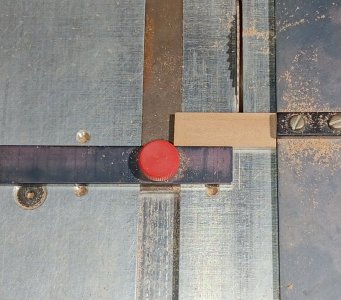
Shipwrights then set up a jig to cut 1mm x 1mm bars for the "Chicken Coup". These were then glued in, using a 1mm spacer to finish the cage.

Finally, workers cut the legs (short/med/long), so they follow the curve of the quarterdeck...thus the "Chicken Coup" ends up level.
20250211_214615.jpg20250211_211105 (1).jpg

NOTE: There are 3 of these "cages" on Boudroit's detailed drawings. This is the lowest in height, so I'm assuming it's for chickens. The others are taller and may have been used for pigs and goats, providing fresh meat for a week or two.

Shipyard is glad they spent the extra time constructing this additional scratch detail and the Superintendent is happy with the results. Tomorrow will be spent shoveling snow off the 80ft driveway, as well as adding eyebolts and tiedowns to the "Chicken Coup".
 
UNINTENDED CONSEQUENCES...

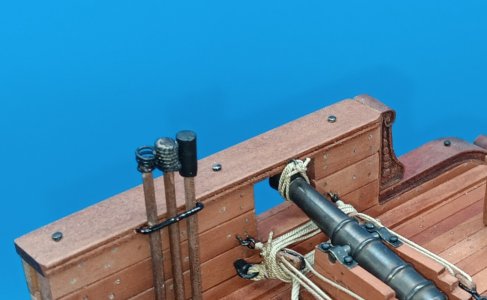
Today workers installed bolts on the caprails, see photo below. This photo also shows the two modifications made earlier:
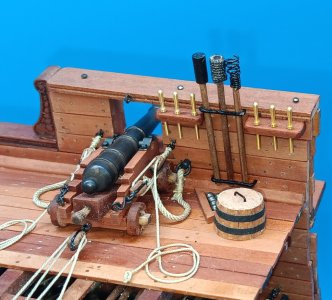
1) A scratch rack for cannon reloading tools was installed.
2) The caprail was made 4 inches wider.
20250212_152634.jpg

UNINTENDED CONSEQUENCES. The belaying pin rails (shown below) would no longer fit. The rack is in the way AND the wider rail made it so the pins would NOT fit in the holes.
20250212_152422.jpg

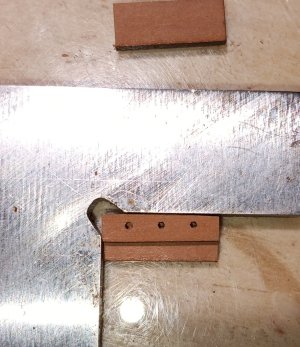
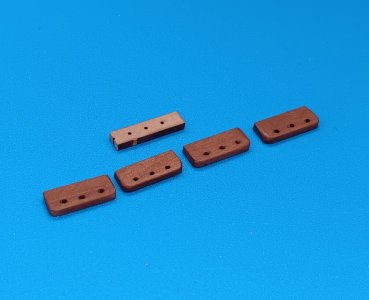
No worries. PO Brutis and ENS Newbee modified the pin rails. First, they found scrap pear wood and made two SHORTER but WIDER rails, using the old rails as a template to mark the holes.
20250212_154231.jpg

The new pinrails were sanded and stained. They now fit either side of the reloading rack and the wider rail does not interfere with the belay pins.

20250212_160431.jpg20250212_153256.jpg

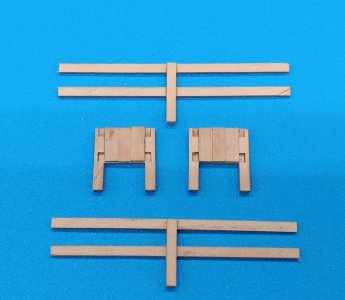
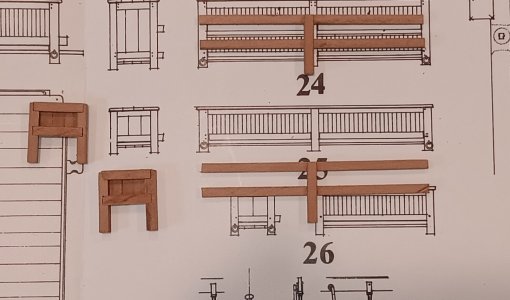
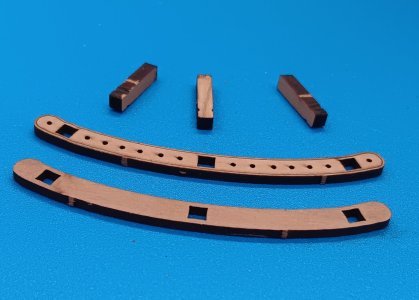
Next project for the little workers will be removing char and constructing the curved belay pin rack from the components below:
20250212_160609.jpg
 
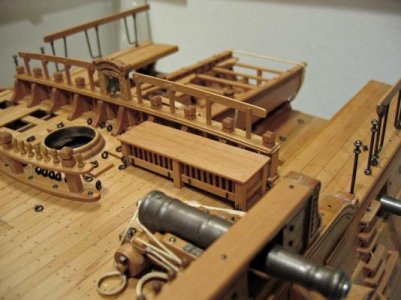
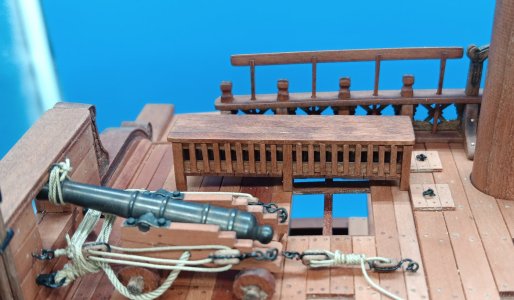
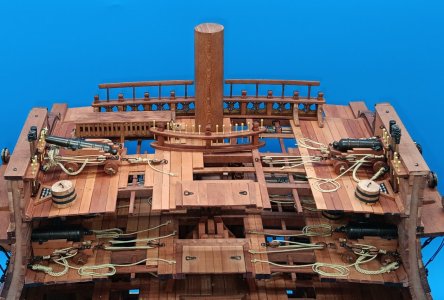
Workers made progress on many small quarterdeck projects.

1. The "Chicken Coup" was secured to the deck using eyebolts and rope.
20250213_115657.jpg20250213_115456.jpg

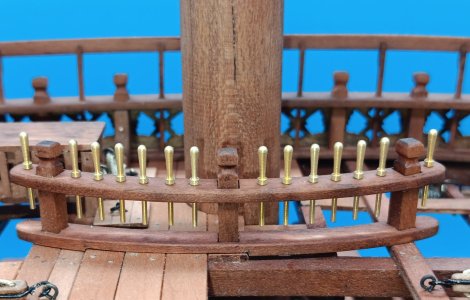
The belaying rail was glued in place. Note the small difference in height of the thicker central deck planking. Workers used the small table saw to shave off 0.5mm to ensure a good fit.
20250213_121017.jpg

The four side belay rails were installed.
20250213_115745.jpg

Finally, an overview of the details recently added. Deck is looking shipshape!
20250213_121140.jpg
 
Workers made progress on many small quarterdeck projects.

1. The "Chicken Coup" was secured to the deck using eyebolts and rope.
View attachment 501106View attachment 501107

The belaying rail was glued in place. Note the small difference in height of the thicker central deck planking. Workers used the small table saw to shave off 0.5mm to ensure a good fit.
View attachment 501108

The four side belay rails were installed.
View attachment 501109

Finally, an overview of the details recently added. Deck is looking shipshape!
View attachment 501110
Very nice little details on and under your belaying rail, Brad. I read it’s already glued in place. You haven't considered to make the cutout for the 3 other bigger centre planks also under the right side?
The split ones on the sides are a good option and ropes aside the ‘Chicken Coup’ are very realistic.
Regards, Peter
 
Back
Top