Build Log: CAF models' HMS Enterprise 1:48

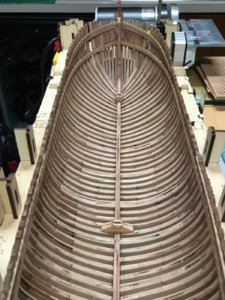
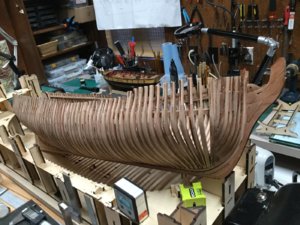
Build update: I started working on the deck beams and also sanding the inner and outer hulls. I tree-nailed the deck beam clamps (bamboo tree nails made on my Vanda-Lay tree-nail maker) on the inner hull to each frame for added strength (these treenails will not be visible). I decided not to finish the stern until later because it is so fragile and poorly supported. I will install the stern after all the hull sanding and fairing is done and the deck beams are in place so I do not have to manipulate the hull and break the stern in the process.
237E0496-07F4-43BB-9EDD-9DEB289E2C44.jpeg
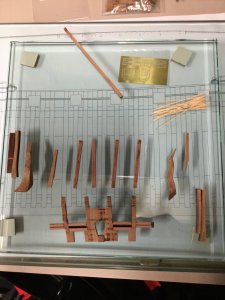
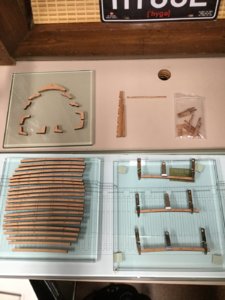
Deck beams 1-24 assembled. Each beam made up of two parts ( a & b) glued together. Each half beam has markings denoting the notches to be cut, 1 mm deep.
21FE3D28-EC49-4552-81CF-6218CEFE183D.jpeg
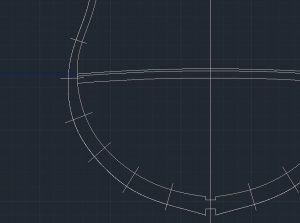
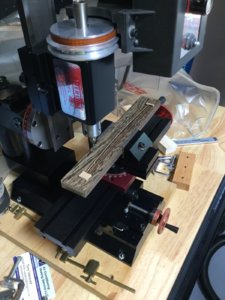
I am using my Sherline mill to notch the beams. I made a jig using the outline of the beam from the sheet containing the longest half-beams glued to a stiff board. Since all the beams have the same camber, I just fit each beam into the jig, clamp it, and mill the notch. All notches have same depth, so the Z axis is fixed for a 1 mm cut. All I have to do is move the X and Y axis to locate the notch. Takes about 5-7 min to notch both sides of a beam with this system.


D6FC7CF2-27D3-47B1-A7CD-3EF927B16C15.jpeg
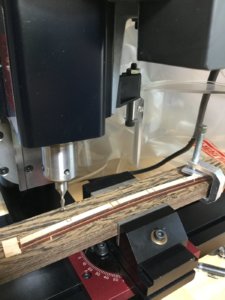
Beam positioned and clamped, (one clamp shown, others removed for clarity) ready to mill the notches

12D116B9-A725-4BD8-80F7-887743CEE49F.jpeg
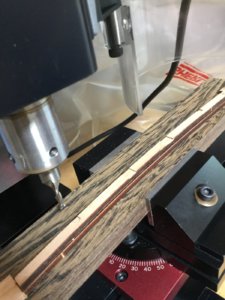
Beam notched. clamps removed for clarity
22A6598F-E84A-4C68-B10E-0592D92B5F7F.jpeg
Inner hull's first sanding. I tree-nailed the deck-clamps to each frame.
28784AC2-6107-44E7-AAA1-6930BB2FA05E.jpeg
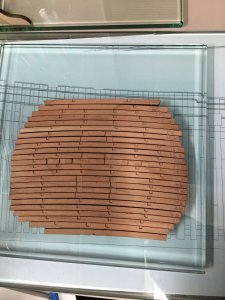
First sanding and fairing of the of the outer hull.
 
Very good looking hull structure - I am looking forward to see much more of your project
 
Thanks Uwe. This is a learning project for me, my first fully framed model. Also, I've been learning techniques to use equipment (bandsaw, mills, lathes etc.) which has been really fun, useful, and interesting...
Since the CXhinese instructions are so difficult to follow, my main difficulties with Enterprise have arisen from the build sequence and inside measuring of the frames for positioning of the deck clamps. I am making some notes to follow for my next ship ( I think Salamandre). I could post my notes if you think it would be of help.
Brian77's build log of Enterprise here in SOS has been a huge help, and I have also been reading and referring to Robert Hunt's "Guide to Scratch building Model ships", Bernard Frolich's " The art of Ship Modeling" and David Anscherl's "the Fully Framed Model., HMS Swan Class sloops 1767-1780".
 
Hi Alex,
I had the same issue with measuring out the deck heights from the plans. I ended up tracing the side profile plan onto tracing paper, and fixed it to the model to get the gunports aligned, and decking height..
 
Hi Guys
Brian and guys
I need your advice on my HMS Enterprise to build.
1) I have built most of the stern separately and I am planning on attaching it to the hull once the decks are built. Is this a good idea, any negatives?
2) I have finished making the 1mm notches on the main deck beams 1-24. Do the deck beams just sit on top of the longitudinal deck clamps, or are they notched in? It seems from the plans that they are just glued on top without notches on the beams or the deck clamps. How did you do it?
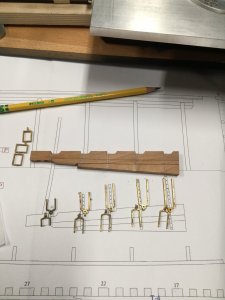
3) I have made the rudder, and I am ready to install the gudgeons and pintles. I am planning to mill a grove on both sides of the rudder to place them.
Did you clean-up the metal pieces by hand and then put them into your tumbler to shine them or did you just clean them up by hand? I have the same tumbler Brian077 has, but have not used it before. Do you put in several pieces of different types, say cannon mixed with anchors, etc, or just pieces of similar structure- such as cannon only, etc.

C8F7408F-CA31-4A36-BB8D-278391FAA9B9.jpegD2A893F5-7FA5-466A-91E6-A0DE1C3B8090.jpeg1D85B21A-9E2C-495D-BD0E-690F48AC6528.jpeg
 
Hello Alex

1.Its hard to tell as I do not have the build in my hand

2.The deck clamps should have notches to receive the deck beams ant the top should flush otherwise how the the horizontal knees will connect

3.Do not install shiny metal parts on your ship ,you need to use a blackening agent like Jax(I tell you which one later)
 
hi Alex,
with regards to the stern construction, I assembled mine in the framing cradle to ensure alignment.
The brass parts were all tumbled together, cannons and small photo etch, but I rinsed with water and cleaned them with isopropyl alcohol before using cash black solution to blacken the metal.
I cannot recall your other question about the deck beams, can you explain more clearly please ?

cheers Brian.
 
I am planning to blacken the parts after tumbling together with other parts.

2971FD9A-326E-4C77-96F3-E9B404233B0B.jpeg

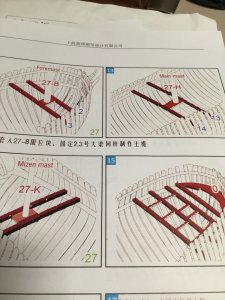
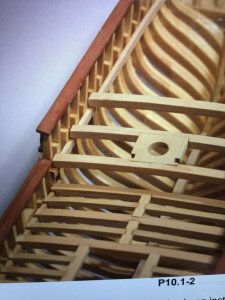
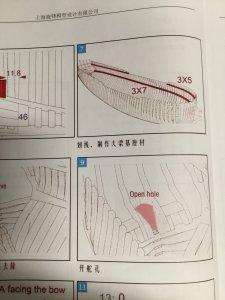
This is a page from the instructions. It shows the deck beams just resting on top of the deck clamps.

B729A576-06BC-442E-9C25-C9E0334B2449.jpeg
This is a picture from Bob Hunt's practicum on Hannah. Here he shows two styles of deck-beam placement. The lighter-color beams on the poop are just sitting on top of the deck clamps in contrast to the beams below which are notched into their deck clamps. What I do not know, is if the deck level/height indicated in the CAF plan refers to the clamp or to the finished deck. I'll measure and see if I can figure it out. I am also going to ask Tom from CAF.
 
Thanks Tom...I feel pretty stupid, I should have known that. One picture in my plans showed the deck clamp only, and it was easy to think the line on the plans referred to it. My plans did not include a drawing like the one above, which is very clear. I should have subtracted 7 mm at each frame station when measuring the location of the deck clamps !
What I will have to do to fix this is to replace the deck clamps, which will be difficult since they have been glued and tree-nailed ! Notching the beams will not work for various reasons (carlings, etc...) Houston...we have a problem ! What a bummer. Suggestions ?
 
it would have been helpful to have metric measurements on various deck levels. Considerable hours of head scratching and puzzling over this, finally had to do a best guesstimate.
 
Yeah ! I slept on it. I am less frustrated this AM after a good night's sleep, and have developed a plan. What I will do is to install a new deck beam below and immediately adjacent to the current one. This will place the deck level where it should be. The tricky part will be the removal of the old without damaging the frames/hull but I have a plan for this also. I'll send pictures.
 
Tom,
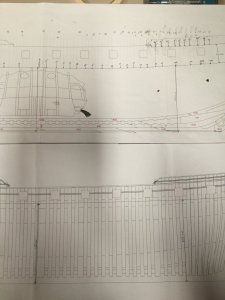
Before I start to do major surgery on my model to replace the deck beams, I measured the blue line on these two plans (below) and I find a 10mm difference in height taken from the keel bottom: At frame 27 in the upper plan, the blue"deck" line is at 115mm from the keel; at frame 8 it is 120mm. In the lower (less marked) plan, at the same frame 27 levels, the blue "deck" line is at 125mm from the bottom, and the one at frame 8 is at 130mm. Again, a 10mm difference between the lines as drawn in the two plans. It seems like the blue line on the upper plan refers to the height of the top of the deck clamp, and the blue line on the bottom plan indicates the deck level......
My question is: which of the lines is the deck line, and which is the top of the deck clamp line? If I lay the deck beams on top of my current deck clamp, the top of which is at the level marked on the top plan, then my deck level will correspond almost exactly to the line on the lower plan, and I can place the beams and deck on top of my current clamps as they are. Can you clarify this? It should be nice to have notations on the plans regarding the meaning of the lines... Alex R

A61F7433-93BD-4604-9341-783B78A849E3.jpeg

 
Thank you Zoly.
I'm sure now that I placed the deck clamp at the correct height. The blue longitudinal line in the upper plan refers to the top of the deck clamp, the line in the bottom plan refers to the deck level...The distance from bottom of the keel to the gunport is the same in both plans...I'm very happy that I don't have to replace the clamps !! I'll proceed with laying beams, carlings etc.
 
Tom,
Before I start to do major surgery on my model to replace the deck beams, I measured the blue line on these two plans (below) and I find a 10mm difference in height taken from the keel bottom: At frame 27 in the upper plan, the blue"deck" line is at 115mm from the keel; at frame 8 it is 120mm. In the lower (less marked) plan, at the same frame 27 levels, the blue "deck" line is at 125mm from the bottom, and the one at frame 8 is at 130mm. Again, a 10mm difference between the lines as drawn in the two plans. It seems like the blue line on the upper plan refers to the height of the top of the deck clamp, and the blue line on the bottom plan indicates the deck level......
My question is: which of the lines is the deck line, and which is the top of the deck clamp line? If I lay the deck beams on top of my current deck clamp, the top of which is at the level marked on the top plan, then my deck level will correspond almost exactly to the line on the lower plan, and I can place the beams and deck on top of my current clamps as they are. Can you clarify this? It should be nice to have notations on the plans regarding the meaning of the lines... Alex R

Nice work.
I have this model waiting to be built (next, I hope)
Thanks for this information- it will be very helpful when the time comes.
 
HI ALEX, I dislike giving advice to much more expeirenced modelers, but because of so many mistakes I HAVE BECOME AN EXPERT AT REMOVING GLUED PIECES BOT PVA AND CA, THIS METHOD HAS WORKED FOR ME OVER AND OVER AGAIN, what i do is use NAIL POLISH REMOVER AND IT HAS TO SAY 100% ACOTONE i BRUSH IT ON THE GLUED JOINTS SOME TIMES 3 or4 times or more and between applications use my EXACTO BLADE AND SLOWLY PRY IT LOOSE WHEN IT COMES APART THERE IS NO DAMAGE TO EITHER PIECES OF WOOD JUST LIGHTLY SAND IT DOWN READY TO REGLUE WORKS FINE JUST HAVE PATIENCE TRY it on a sample piece. GOD BLESS STAY SAFE. Don
 
Back
Top