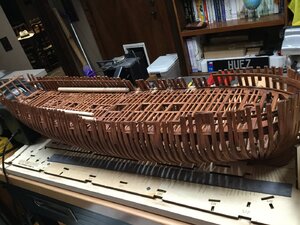
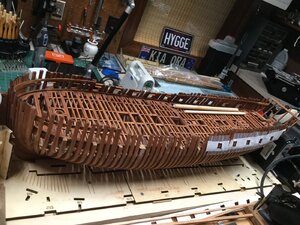
I don't remember the origin of this, but it may help youHi Brian
It is complicated, especially trying to decipher the instructions in Chinese....The kit itself is highly detailed and well executed with quality wood. In my opinion (and maybe because this is my first build of a fully framed model) the real weak link are the instructions. I seem to spend a lot of time in guess-work, and thinking about the building sequence...
I sometimes think I will never reach the build stage you are at. It seems to be in a galaxy far, far away....
Which did you instal first, the wales or the decks first after removing the model from the cradle ?
-

Win a Free Custom Engraved Brass Coin!!!
As a way to introduce our brass coins to the community, we will raffle off a free coin during the month of August. Follow link ABOVE for instructions for entering.
-

PRE-ORDER SHIPS IN SCALE TODAY!
The beloved Ships in Scale Magazine is back and charting a new course for 2026!
Discover new skills, new techniques, and new inspirations in every issue.
NOTE THAT OUR FIRST ISSUE WILL BE JAN/FEB 2026
You are using an out of date browser. It may not display this or other websites correctly.
You should upgrade or use an alternative browser.
You should upgrade or use an alternative browser.
Build Log: CAF models' HMS Enterprise 1:48
- Thread starter Alex R
- Start date
- Watchers 36
-
- Tags
- caf model enterprise
Thanks Stuglo. Gotta learn the terminology !
Hi Donnie. Thanks. I was really upset and disillusioned with the thought of having to re-do the deck clamps. Thankfully, I will not have to do this. I placed the deck clamps on the model at a height based on a line on one plan, and the line DOES correspond to the deck clamp. On another plan, the line corresponds to the deck level, 9.5mm higher. In both plans, the lower sill of the gunports are at the same height from the keel bottom, which clearly indicates that one line indicates the level of the deck level line, and on the other plan the deck beam. It was very confusing initially. The problem was that there were no labels or measurements on the plans. As we all know, the Chinese kits are superbly executed as far as quality of wood and pieces, but their weak point is the plans and instructions are NOT up to par at all, they certainly do not correspond to the quality of the kit itself. I could not build these kits without the help of all my SOS friends. Thanks again.
Hi Alex ,here is the link you can buy Jax blackeners
 jaxchemical.com
Metal Blackener Solutions - JAX Chemical Company
Fast acting, water-based metal blackener solutions easily darken aluminum, pewter, brass, bronze, copper, silver, iron, steel or nickel.
Thanks Zolly.
learning is easy- remembering is my problem!!Thanks Stuglo. Gotta learn the terminology !
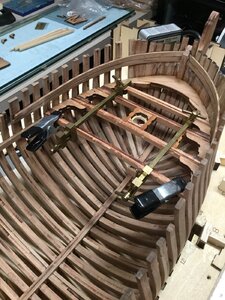
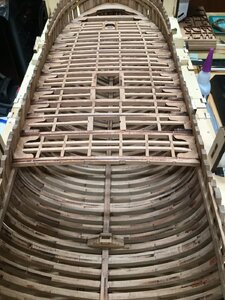
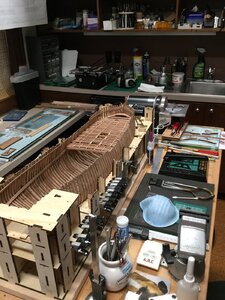
HMS ENTERPRISE Build update: The deck framework, stern, and rudder assembly are finished. I made a jig to hold the stern counter timbers together temporarily, since they are quite fragile.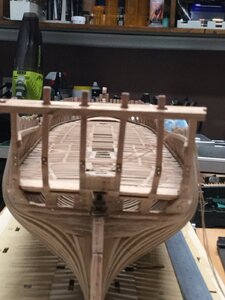
A jig to hold and protect the stern counter timbers is in place. The counter timbers have also been tree nailed with brass wire as well as the side counter timber. I also filled the spaces between the transoms for strength. All this will be planked over.
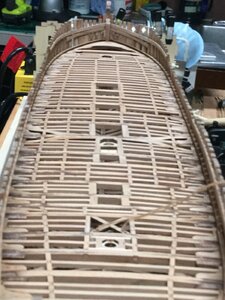
The ropes for the tiller mechanism. I decided to fix the mechanism in place. With a little better planning........
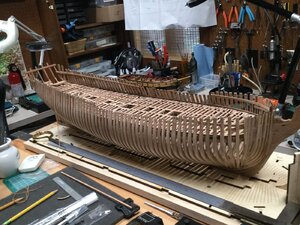
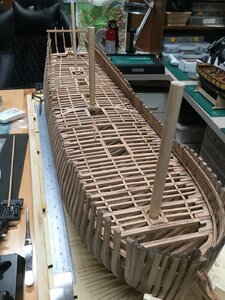
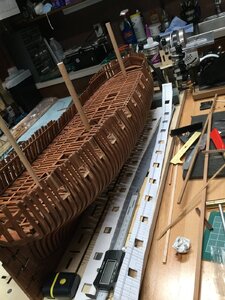
Next: transfer the gunport locations to the ship, cut them out, and insert re-enforcing futtocks. Lots of mistakes, but learning !!!!
Alex R

A jig to hold and protect the stern counter timbers is in place. The counter timbers have also been tree nailed with brass wire as well as the side counter timber. I also filled the spaces between the transoms for strength. All this will be planked over.

The ropes for the tiller mechanism. I decided to fix the mechanism in place. With a little better planning........


Next: transfer the gunport locations to the ship, cut them out, and insert re-enforcing futtocks. Lots of mistakes, but learning !!!!
Alex R
It's beautiful. The production of the steering wheel is very difficult and challenging
Tom
Tom
I seem to be late. Your construction speed is very fast, which really surprises me
Thanks. At times I work pretty consistently, but then paralysis sets in, usually before a new challenge. For example, I just could not get started on the rudder and tiller mechanism for some reason.....Hopefully I can get going on cutting out the gunports soon. I'll trace them out from the plans on to a pattern that I will attach to the ship, and then cut them out ( its going to be scary) Any suggestions on how to cut out gunports in this ship ? I know.......carefully !
Alex R
Alex R
Always good to see your progress Alex.
Carefully is a good startThanks. At times I work pretty consistently, but then paralysis sets in, usually before a new challenge. For example, I just could not get started on the rudder and tiller mechanism for some reason.....Hopefully I can get going on cutting out the gunports soon. I'll trace them out from the plans on to a pattern that I will attach to the ship, and then cut them out ( its going to be scary) Any suggestions on how to cut out gunports in this ship ? I know.......carefully !
Alex R
I love it....I love it...One Word.....wonderfull
Thank you Charlie.I love it....I love it...One Word.....wonderfull
Sometimes, I hate it.....I hate it......
Alex R


