- Joined
- Oct 15, 2017
- Messages
- 1,191
- Points
- 443

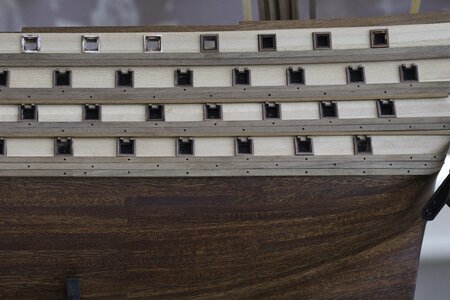
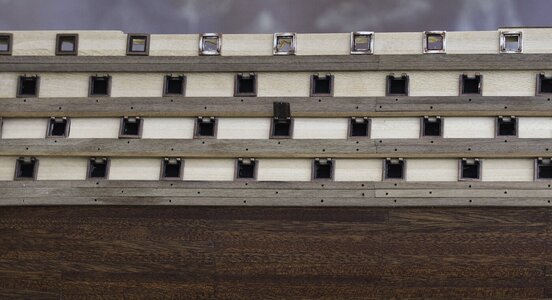
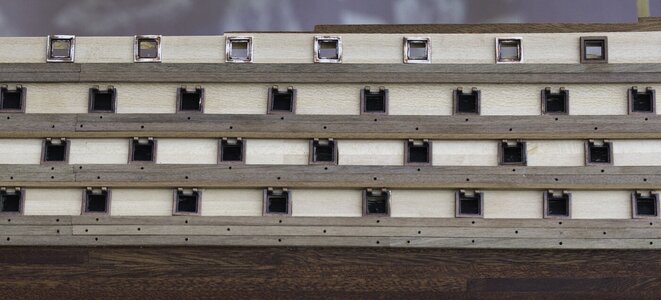
Hi Alan, for the most part, I think the quality of the material for the kits components, lumber, and fittings are ok. The central theme I noticed and could not ignore is "scale". Many of the fittings, when measured are too big for the 1/90 scale. The blocks for the top and royal masts are too large. Blocks and lines typically get smaller as you go from masts>top masts>topgallant>royal masts, etc. The kit uses the same size for all. Blocks for the canon rigging, too big. Belay pins and most of the eye bolts also too big. If the hatch gratings were to use the scale in the kit in real world seamen would have their feet falling through the grating holes and spraining their ankles or needing help to get unstuck. 
I can get a little OCD with some of this stuff, and after all, it is just my humble opinion. I chose to purchase smaller after market blocks, belay pins and rope/line, eye bolts, etc. I milled my own hatches/gratings.
In your response to my PM, I'm happy to share here, in your log, at your request the steps I took to fabricate the quarter galleries. I don't have any illustrations of the steps I took to build the stern galleries.
As the ST kit is PoB and not PoF, there is no true transom substructure to build off of. So I decided to create them in a modular way and then attach them to port and starboard hull and stern plate.
I did use the kit's illustrations and the actual model to note the correct angles of the rake for the window panes and angle of the balusters.
.
I mapped and then cut blocks for each quarter gallery (out of boxwood) . Yes, overkill, but I tried two other woods but they lacked the density and tight grain needed for the precision of the cuts I wanted. I quick coat of flat black to help my visualize a little better. (this was my 4th attempt at scratch building these things and I had one goal......not needing a 5th attempt )

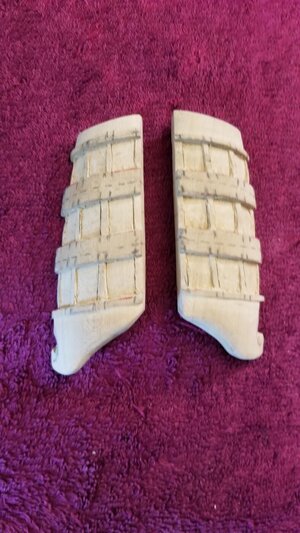
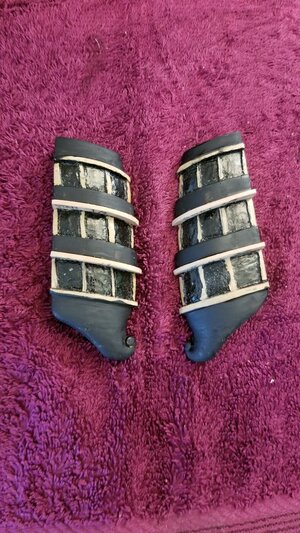
Next, cutting and fitting the bottom supports for the balusters, then dry test fit of the window panes I cut from the kit's electroplated window strips.
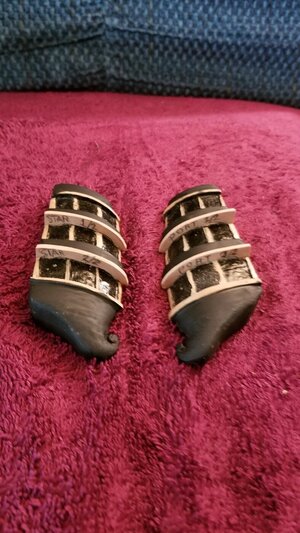
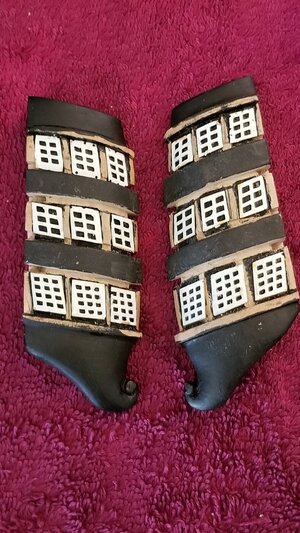
The fit on the windows was not exact, but I knew I would have some tolerance offered by the placement of the support posts between the windows in the next pic.
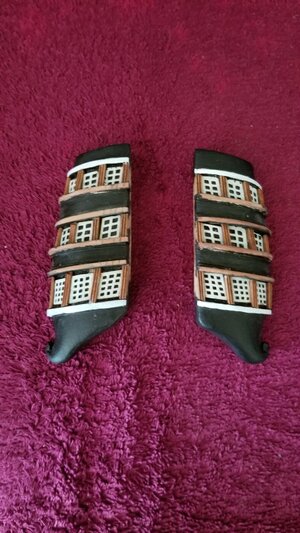
Sorry, but no photos of the fabrication of the balusters. But it was pretty straight forward. Once I was happy with the lower supports and upper balustrades, I took 1mm x 1mm boxwood strips and marked their placement with the same strip (the spacing was also 1mm between the balusters), then glued them in place. The next photos show them in place and expose from the green tape. I taped the rest of the structure to protect it from what I was about to do free handed. I needed to create profiles on the balusters. At 1/90 scale I decided they didn't need to be perfect, but offer the illusion and allow the viewer to use their imagination as everyone has seen railings, spindles and balusters before.
I simply drew 3 horizontal lines, equidistant from the lower support to upper balustrade. I then took a deep breath and removed material along those lines with small rotary tool with a fine pointed bit for a fine line, then followed with a .6mm round ball bit to create a more rounded indentation.
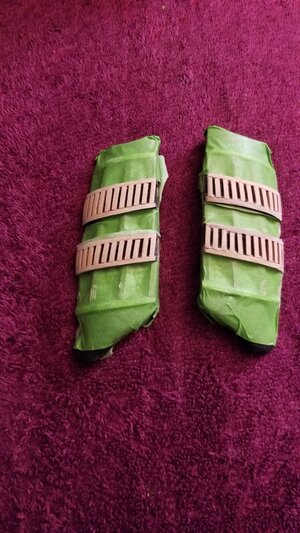
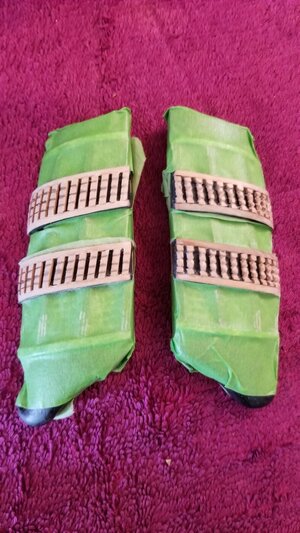
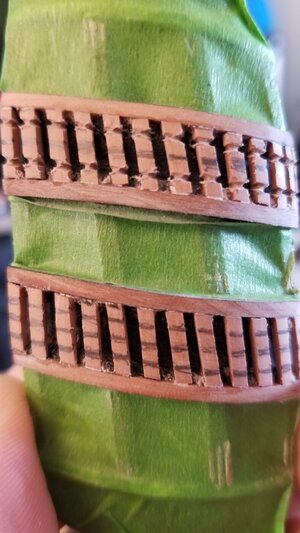
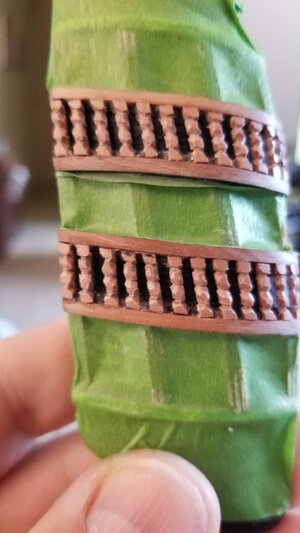
The final step was to paint lower supports and upper balustrades flat black and stain the balusters.
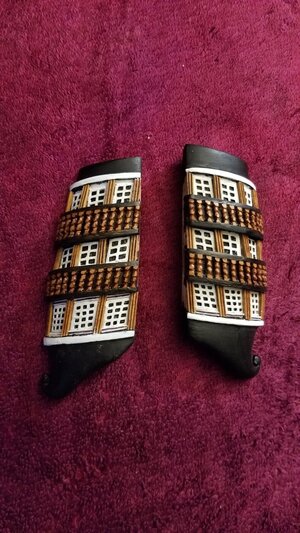
The only element missing is the decorative design I painted on the bottoms. The white paint bright on the quarter galleries as it has not been "washed" to match the "aged" white paint on the rest of the ship.
The solution to my quarter gallery problem was more of an artistic approach versus a true life engineering approach. I felt for me, it would provide the best outcome for the model and my own sanity. I'm sure there were many other ways this could have been tackled. That is the reason I love SoS. There are so many creative minds and talent. I've taken my share of knowledge from the work of others. I'm happy to share, finally, one humble approach to solving a problem. This one was really out of the box, literally, out of Occre kit's box!!
Cheers!

I can get a little OCD with some of this stuff, and after all, it is just my humble opinion. I chose to purchase smaller after market blocks, belay pins and rope/line, eye bolts, etc. I milled my own hatches/gratings.
In your response to my PM, I'm happy to share here, in your log, at your request the steps I took to fabricate the quarter galleries. I don't have any illustrations of the steps I took to build the stern galleries.
As the ST kit is PoB and not PoF, there is no true transom substructure to build off of. So I decided to create them in a modular way and then attach them to port and starboard hull and stern plate.
I did use the kit's illustrations and the actual model to note the correct angles of the rake for the window panes and angle of the balusters.
.
I mapped and then cut blocks for each quarter gallery (out of boxwood) . Yes, overkill, but I tried two other woods but they lacked the density and tight grain needed for the precision of the cuts I wanted. I quick coat of flat black to help my visualize a little better. (this was my 4th attempt at scratch building these things and I had one goal......not needing a 5th attempt )


Next, cutting and fitting the bottom supports for the balusters, then dry test fit of the window panes I cut from the kit's electroplated window strips.


The fit on the windows was not exact, but I knew I would have some tolerance offered by the placement of the support posts between the windows in the next pic.

Sorry, but no photos of the fabrication of the balusters. But it was pretty straight forward. Once I was happy with the lower supports and upper balustrades, I took 1mm x 1mm boxwood strips and marked their placement with the same strip (the spacing was also 1mm between the balusters), then glued them in place. The next photos show them in place and expose from the green tape. I taped the rest of the structure to protect it from what I was about to do free handed. I needed to create profiles on the balusters. At 1/90 scale I decided they didn't need to be perfect, but offer the illusion and allow the viewer to use their imagination as everyone has seen railings, spindles and balusters before.
I simply drew 3 horizontal lines, equidistant from the lower support to upper balustrade. I then took a deep breath


The final step was to paint lower supports and upper balustrades flat black and stain the balusters.

The only element missing is the decorative design I painted on the bottoms. The white paint bright on the quarter galleries as it has not been "washed" to match the "aged" white paint on the rest of the ship.
The solution to my quarter gallery problem was more of an artistic approach versus a true life engineering approach. I felt for me, it would provide the best outcome for the model and my own sanity. I'm sure there were many other ways this could have been tackled. That is the reason I love SoS. There are so many creative minds and talent. I've taken my share of knowledge from the work of others. I'm happy to share, finally, one humble approach to solving a problem. This one was really out of the box, literally, out of Occre kit's box!!
Cheers!
Last edited:


