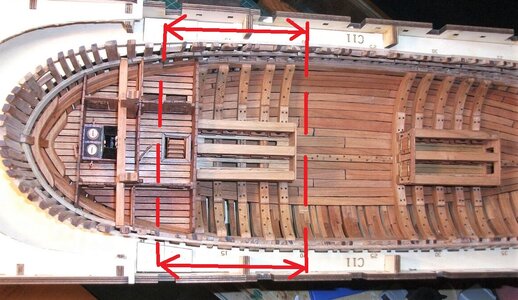
Thanks very much
-

Win a Free Custom Engraved Brass Coin!!!
As a way to introduce our brass coins to the community, we will raffle off a free coin during the month of August. Follow link ABOVE for instructions for entering.
-

PRE-ORDER SHIPS IN SCALE TODAY!
The beloved Ships in Scale Magazine is back and charting a new course for 2026!
Discover new skills, new techniques, and new inspirations in every issue.
NOTE THAT OUR FIRST ISSUE WILL BE JAN/FEB 2026
You are using an out of date browser. It may not display this or other websites correctly.
You should upgrade or use an alternative browser.
You should upgrade or use an alternative browser.
CAF HMS Granado 1:48 POF
- Thread starter Adiefenbach
- Start date
- Watchers 20
Looks very good, very impressive.
Uwe @Uwek , please use any of the photos that you want. Your build is fantastic. Daniel, still have the screws in the bow pieces. They aren't really needed, just haven't gotten around to unscrewing them. They really did a good job stabilizing all the little pieces early on
Last edited by a moderator:
Should be Uwe at the start of my earlier email. Hate the damn auto correct
Use, please use any of the photos that you want. Your build is fantastic. Daniel, still have the screws in the bow pieces. They aren't really needed, just haven't gotten around to unscrewing them. They really did a good job stabilizing all the little pieces early on
Ok, but let me understand this. If the screws are still there at the Bow, how will you separate that section?
Thank you !!
Daniel
I will have to remove them. Just haven't done it yet. Will get after it shortly
FixedShould be Uwe at the start of my earlier email. Hate the damn auto correct
Thanks very much
Have been plugging along on the Granado build. It really is enjoyable to build. Focus of effort is now in the stern where you put down some decking and then build a series of small compartments/bulkheads/ladder. Lots of small pieces but the quality of the materials is high so things go pretty smoothly. It is here in the stern where I saw the most impact from my alignment issue described in earlier posts. I have studied the plans quite closely and tried to determine where the impacts will be greatest down the road and think I have it sorted OK for now. Was very concerned about mast location but think it will just fit with what I have built so far. Time, and the receipt of Part 3 when it gets released, will definitely tell.
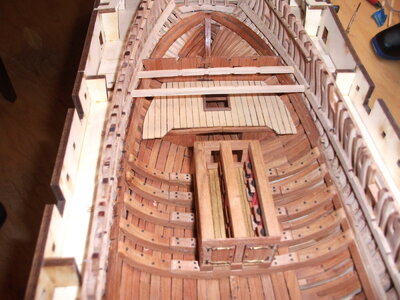
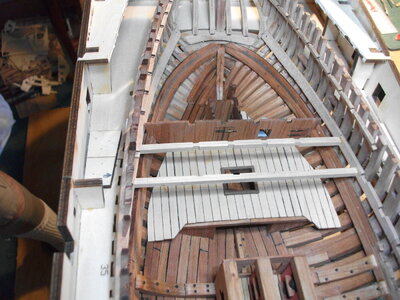
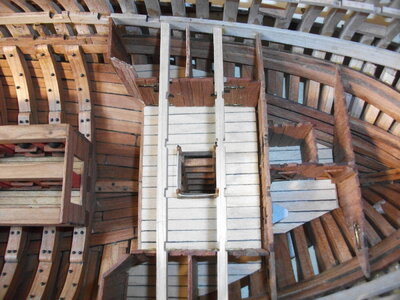
The below photos are a first look at the stern with the initial piece of decking down, one athwartships bulkhead in, and two overhead beams in place. Four more of those overhead beams get installed later, moving aft, and their elevation and fore/aft spacing is critical. My first real challenge given overall alignment issues. Also, those overhead beams are the first pieces installed that will lift off with the upper part of the hull. Got to be careful with the glue!!
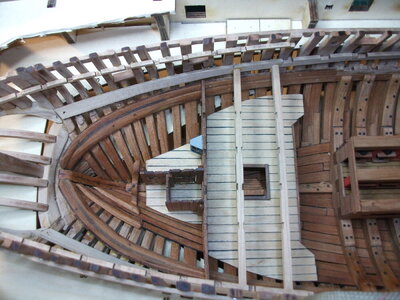
The below photo is an overhead of the stern area, showing the build out of more decking and some compartments. The kit provides a whole slew of templates to assist here, but my alignment adjustments really call for customization so most of the templates were of little use for me.
Below are some additional photos showing how it builds out.
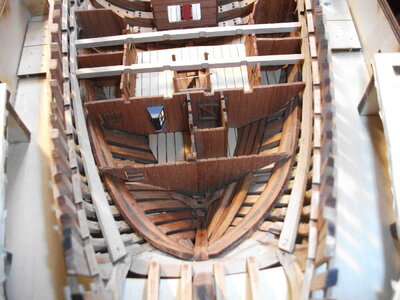
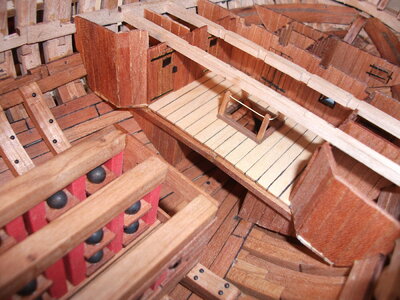
Still have some touch up sanding and tweaking to do but am overall happy with the result. Again, the overhead beams will/should lift away when the hull gets split. Fingers crossed.
At this point, you move back toward the bow to start installing the large athwartships beams over the ammo storage locker. I assume these become the foundation for the mortars. The quality of these beams in the kit is very good, CNC machined so no char removal, just lots of saw dust. These large beams will not be lifting out with the split of the hull as best as I can tell. The first two are dry fit in the photo below.
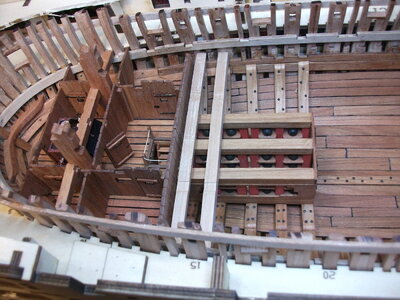
6 beams get installed over each ammo locker and then the remaining athwartships beams and some fore/aft connector pieces get installed in that aft framework. Nearing the end of Part 2 of this kit. Will be anxiously awaiting the release of Part 3.
Cheers!
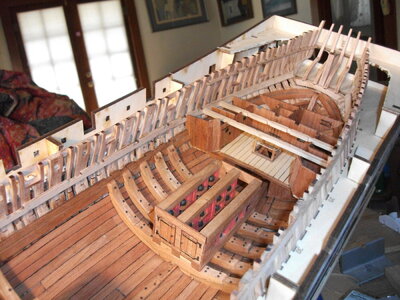
The below photos are a first look at the stern with the initial piece of decking down, one athwartships bulkhead in, and two overhead beams in place. Four more of those overhead beams get installed later, moving aft, and their elevation and fore/aft spacing is critical. My first real challenge given overall alignment issues. Also, those overhead beams are the first pieces installed that will lift off with the upper part of the hull. Got to be careful with the glue!!


The below photo is an overhead of the stern area, showing the build out of more decking and some compartments. The kit provides a whole slew of templates to assist here, but my alignment adjustments really call for customization so most of the templates were of little use for me.

Below are some additional photos showing how it builds out.


Still have some touch up sanding and tweaking to do but am overall happy with the result. Again, the overhead beams will/should lift away when the hull gets split. Fingers crossed.
At this point, you move back toward the bow to start installing the large athwartships beams over the ammo storage locker. I assume these become the foundation for the mortars. The quality of these beams in the kit is very good, CNC machined so no char removal, just lots of saw dust. These large beams will not be lifting out with the split of the hull as best as I can tell. The first two are dry fit in the photo below.

6 beams get installed over each ammo locker and then the remaining athwartships beams and some fore/aft connector pieces get installed in that aft framework. Nearing the end of Part 2 of this kit. Will be anxiously awaiting the release of Part 3.
Cheers!

Incroyable! (Pardon my French..)
you are building the complete ship faster, than I am able to do only the section model
Looking very good
Looking very good
Thanks all for the kind comments. Uwe, I am working to try and be ready for Part 3 when released. The quality of your build is so much better than mine that pace is not the issue. I am curious to see how this "hull splitting" turns out.
Cheers
Cheers
Thought I had posted this earlier in the week, have more updates to follow. Have made a little progress, got the forward set of beams supporting the mortar installed. The supplied CNC beams are well done, require only a little clean up, but also require some adjustment to get the heights correct.
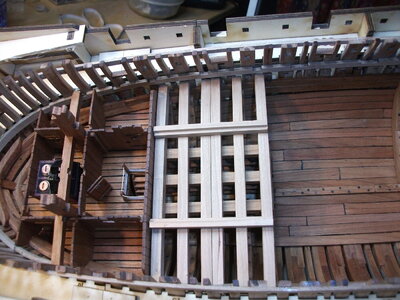
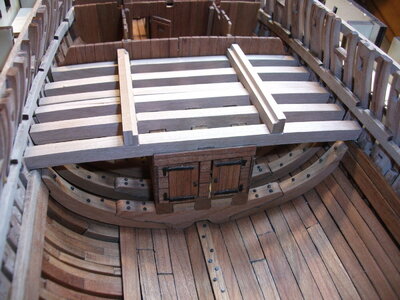
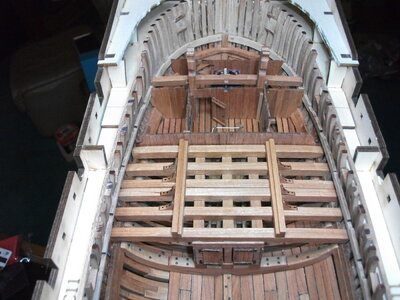
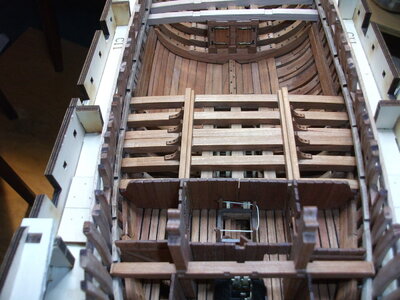
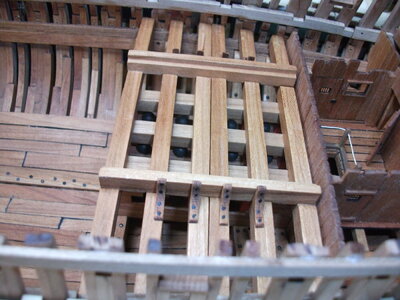
Cheers


Cheers
Last edited by a moderator:
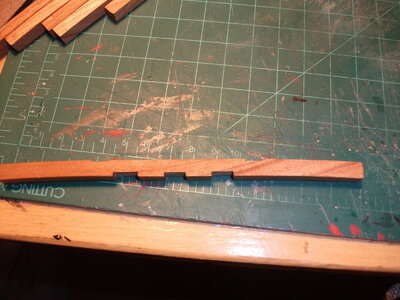
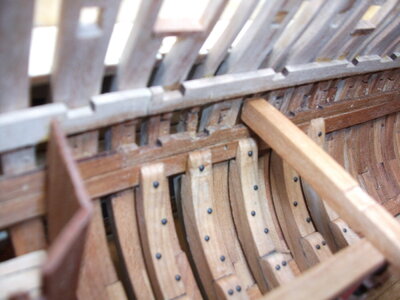
The earlier post above should have gone out on Tuesday. Have continued work on the Granado and am nearing the end of part 2. Have completed the aft set of mortar support beams and have worked and installed the main mast step. Also completed the pump well that gets mounted just aft of the main mast. Getting the elevation of the mortar support beams is tricky and I won't know how well I have done until I get part 3 in my hands. The height of these beams should be set by the longitudinal inner "wales" that get installed early, with the height of those set by the templates provided by CAF. I thought I had done well in setting them correctly but the wales appear to be low as the build comes together. The mortar support beams should fit into pre-cut notches in the wales but mine sit about 1 mm above the wale, not in the notch. It is possible to deepen the notches in the mortar support beams to have them ride lower and I did that a little, but not all the way, tried to split the difference. Time will tell. My fore and aft alignment issues discussed in earlier posts have not been a big problem to this point, using the main mast as a benchmark, I believe I am off by about 1cm, the mast is 1cm aft of where it should be. Below are photos of where I stand now.
This photo shows the notches in the mortar support beams, can deepen those to adjust the height.
This photo shows the fit in the longitudinal "wale"
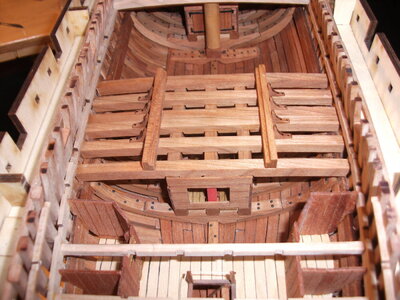
This photo shows the aft set of mortar support beams installed
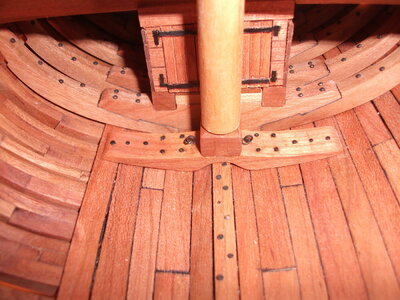
Here is the mast step installed
This photo shows the template that is provided to set the mast properly, I had to modify this due to my alignment issues.
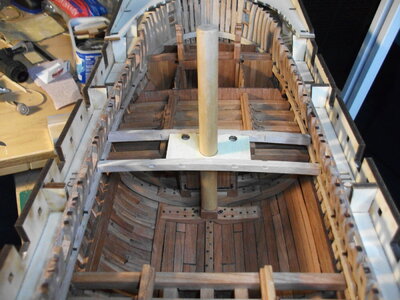
This photo shows the pump well dry fit.
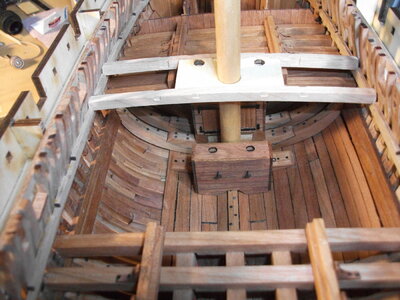
Finally, an overhead view of where I stand at this point.
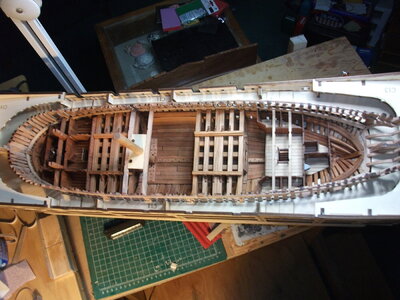
Have the mizzen mast, some additional athwartships beams and some deck support beams to install aft and that will about complete part 2. Pretty happy with how it is fitting together to this point, fingers crossed on the alignment issues.
Cheers
This photo shows the notches in the mortar support beams, can deepen those to adjust the height.

This photo shows the fit in the longitudinal "wale"

This photo shows the aft set of mortar support beams installed

Here is the mast step installed

This photo shows the template that is provided to set the mast properly, I had to modify this due to my alignment issues.

This photo shows the pump well dry fit.

Finally, an overhead view of where I stand at this point.

Have the mizzen mast, some additional athwartships beams and some deck support beams to install aft and that will about complete part 2. Pretty happy with how it is fitting together to this point, fingers crossed on the alignment issues.
Cheers
Last edited by a moderator:
Your build is inspiring to other members on this forum. I am still fairing my frames on my Granado.


