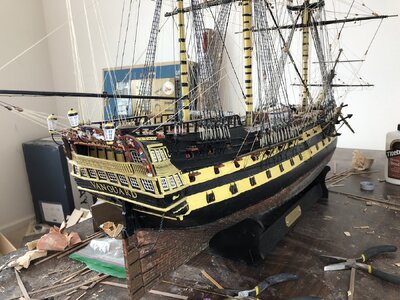
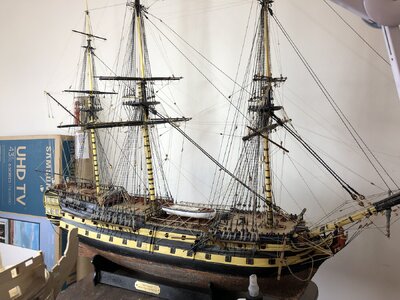
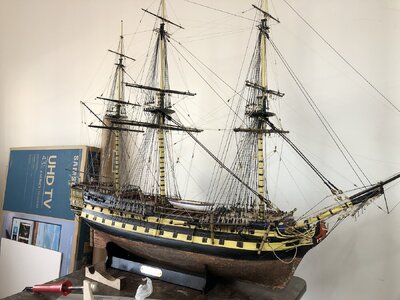
Hms Victory by Caldercraft - Build Log

Have you tried slightly damp towelette, like lens cleaners or those used with Windex for windows, not sure as most don't have much water but other chemicals.

Might try a test sample with scraps of copper left over to see effects. Easier than working on the ship and getting it messy again.
 
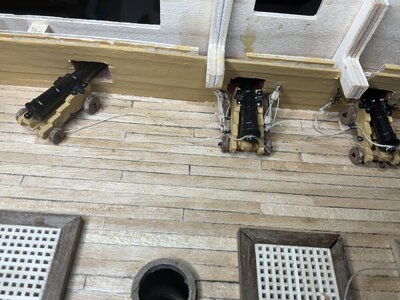
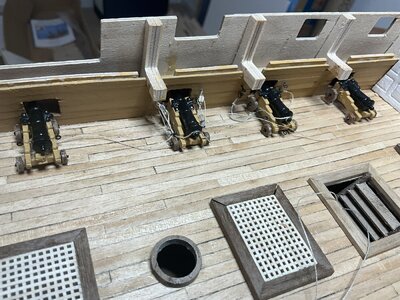
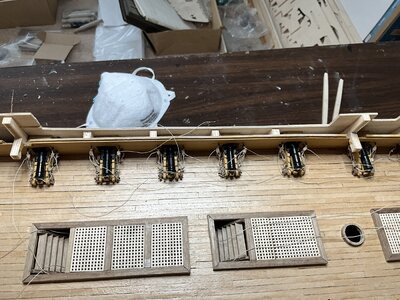
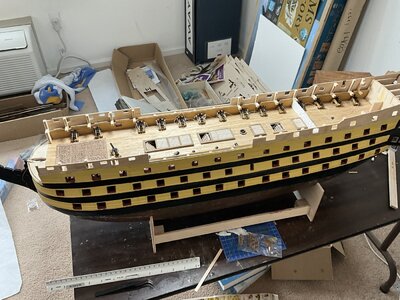
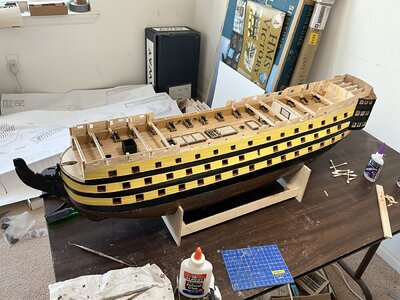
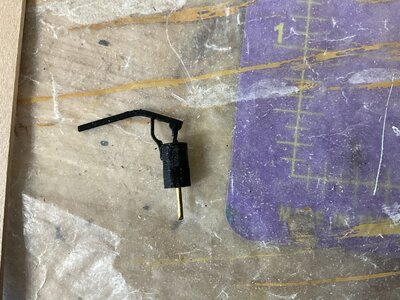
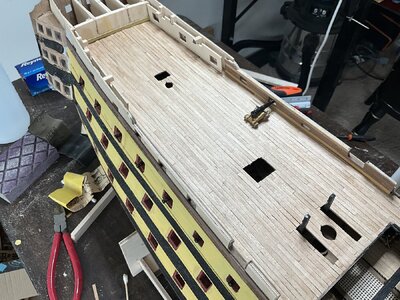
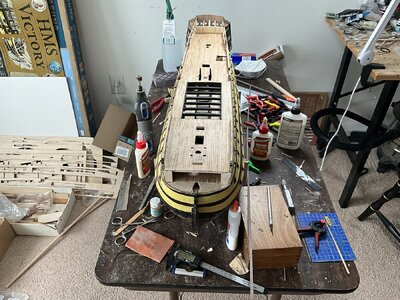
Well, I have moved on from the cooper sheets, I used the lemon juice/salt and got a semi good result. I decided it was going to have to be good enough, then put a coat of clear lacquer on it after thought drying it, but seems to have a few spots that have failed and are getting some green already. I think some of it has to do with living at the beach and the salt air that we have everyday. I am back to working on the upper gun deck, after a lot of screwups, finally have companionways done with stairs,, I always get frustrated working on the ladders, as the rungs are always bigger than the slots and have to be filed down to fit in the slats. I think they came out okay, fortunately they will be barely visible when things are done, I am going to have to up my game on the next deck for sure. The guns are made and I will begin mounting them next and put rigging on a few. I have a nice rigging diagram from a book, but there are no directions in the kit about rigging them, says you can rig them and tells you where to put the eyelets in the hull/guns for the rigging. I am trying to figure out if I can make coils of the end of the rigging lines as the picture shows or if am going to do something totally different, I will try a few in forward area where you will not be able to see them in the end. Overall much slower than I would like, but I am making progress, and continueing to learn as I go.

image.jpg

image.jpg

image.jpg

image.jpg
 
Well, I have moved on from the cooper sheets, I used the lemon juice/salt and got a semi good result. I decided it was going to have to be good enough, then put a coat of clear lacquer on it after thought drying it, but seems to have a few spots that have failed and are getting some green already. I think some of it has to do with living at the beach and the salt air that we have everyday. I am back to working on the upper gun deck, after a lot of screwups, finally have companionways done with stairs,, I always get frustrated working on the ladders, as the rungs are always bigger than the slots and have to be filed down to fit in the slats. I think they came out okay, fortunately they will be barely visible when things are done, I am going to have to up my game on the next deck for sure. The guns are made and I will begin mounting them next and put rigging on a few. I have a nice rigging diagram from a book, but there are no directions in the kit about rigging them, says you can rig them and tells you where to put the eyelets in the hull/guns for the rigging. I am trying to figure out if I can make coils of the end of the rigging lines as the picture shows or if am going to do something totally different, I will try a few in forward area where you will not be able to see them in the end. Overall much slower than I would like, but I am making progress, and continueing to learn as I go.

View attachment 393008

View attachment 393009

View attachment 393010

View attachment 393011
Good morning Doc. The advantage with the Victory is we get to practice on the middle deck first;). Re your copper tiles. I really like the weathered look you unintentionally achieve. I seen modellers spend hours attempting to get the look your Victory has so it certainly doesn’t detract from the look and feel of your build. Cheers Grant
 
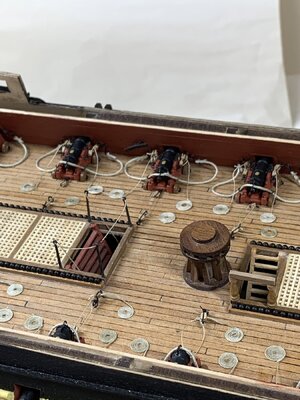
Little delays,, I took a two week vacation and am back,, struggling with getting the guns rigged, I have seen multiple ways to do it , and the directions just say “rig the guns” with very little info, so here is my first crack. It is going to be under the quarter deck and only partly visible through waist, but I figured it was a good spot to start. I would love to coil the ends of the lines but am afraid to pull to much on them as everything is so fragile it seems. This one is not perfect, but it is a start and I can only go up from here!!!

image.jpg

image.jpg
 
Doc, looking good. I had pretty good success by making a supply of rope coils and then trimming down the loose end of the line running through the blocks so that it touched the deck with about a half inch extra. Then glued the coil over the loose end laying on the deck. Have to keep a little pressure on the coil while the glue dries so the coil lays flat.
 
Doc, looking good. I had pretty good success by making a supply of rope coils and then trimming down the loose end of the line running through the blocks so that it touched the deck with about a half inch extra. Then glued the coil over the loose end laying on the deck. Have to keep a little pressure on the coil while the glue dries so the coil lays flat.
That is a great idea!!!! Thank you so much,, gonna try it,,,
 
Well, I have moved on from the cooper sheets, I used the lemon juice/salt and got a semi good result. I decided it was going to have to be good enough, then put a coat of clear lacquer on it after thought drying it, but seems to have a few spots that have failed and are getting some green already. I think some of it has to do with living at the beach and the salt air that we have everyday. I am back to working on the upper gun deck, after a lot of screwups, finally have companionways done with stairs,, I always get frustrated working on the ladders, as the rungs are always bigger than the slots and have to be filed down to fit in the slats. I think they came out okay, fortunately they will be barely visible when things are done, I am going to have to up my game on the next deck for sure. The guns are made and I will begin mounting them next and put rigging on a few. I have a nice rigging diagram from a book, but there are no directions in the kit about rigging them, says you can rig them and tells you where to put the eyelets in the hull/guns for the rigging. I am trying to figure out if I can make coils of the end of the rigging lines as the picture shows or if am going to do something totally different, I will try a few in forward area where you will not be able to see them in the end. Overall much slower than I would like, but I am making progress, and continueing to learn as I go.

View attachment 393008

View attachment 393009

View attachment 393010

View attachment 393011
Just a quick suggestion for you - look at stained glass shops/stores. They typically sell chems for changing the patina of copper and lead.
 
Little delays,, I took a two week vacation and am back,, struggling with getting the guns rigged, I have seen multiple ways to do it , and the directions just say “rig the guns” with very little info, so here is my first crack. It is going to be under the quarter deck and only partly visible through waist, but I figured it was a good spot to start. I would love to coil the ends of the lines but am afraid to pull to much on them as everything is so fragile it seems. This one is not perfect, but it is a start and I can only go up from here!!!

View attachment 398517

View attachment 398518
Take a look at my build log for HMS Sovereign of the Seas, and you will see a simple way to make coils of rope for the train tackles that by flat on the deck. It’s crazy to leave a long length of line off the train tackle in attempt to coil it and glue it down onto the deck. That’s like wrestling an angry wet cat. The coils are made separately, and glued down over the ends of the lines from the train tackles. The train tackle lines look like they are connected to the coils, but they are not.
 
Had to take two weeks off,, some personal stuff, finally think I have the starboard guns done,, I have to make the coils still, but it is coming along, I finally think I have a method so hopefully the port side will go faster,,, these took me 4 weeks when all was said and done, a lot of starting and stopping,,, and of course I see something else wrong and I have to “touch it up”. But overall making progress. I don’t think I am going to rig the cannons you can’t see. I know some do, but I want to get these done and move on…

image.jpg

image.jpg
 
Hi Doc. Your Victory is really looking great. I have just started the same kit, and am documenting it all. I just want to get a little more completed before I start posting my build log. Amazing kit! While waiting for my kit to arrive from the UK (paint held it up in customs for 3 weeks), I did tons of research which I think is a requirement for a kit of this magnitude (and expense). I see you have had questions regarding rigging the guns and coils. I found an absolutely amazing wooden model ship builder on YouTube (Olha Batchvarov) who shows in amazing detail gun rigging and coiling. (I hope it's OK to post a YouTube link) Take a look at the following (around the 17 minute mark) Model ship building - RAGUSIAN CARRACK XVIc - Full Build-Log. Instead of talking she uses captions, so be sure to turn on captions. Anyways, I look forward to following your build!
 
Last edited:
Hi Doc. Your Victory is really looking great. I have just started the same kit, and am documenting it all. I just want to get a little more completed before I start posting my build log. Amazing kit! While waiting for my kit to arrive from the UK (paint held it up in customs for 3 weeks), I did tons of research which I think is a requirement for a kit of this magnitude (and expense). I see you have had questions regarding rigging the guns and coils. I found an absolutely amazing wooden model ship builder on YouTube (Olha Batchvarov) who shows in amazing detail gun rigging and coiling. (I hope it's OK to post a YouTube link) Take a look at the following (around the 17 minute mark) Model ship building - RAGUSIAN CARRACK XVIc - Full Build-Log. Instead of talking she uses captions, so be sure to turn on captions. Anyways, I look forward to following your build!
I have been building this kit at roughly the same pace as Doc. He has done a better job on the model itself and a much better job at posting progress. As you are just getting started I wanted to make sure you were aware of a series of build log videos posted by Paul Vickers. Tremendously helpful for the bulk of the hull construction. It is posted on a variety of sites but probably easiest to find on YouTube. Search for HMS Victory Build Log and it pops right up. I think he has 7 chapters posted which take you a long way. I have been at my kit a year now and am just starting on rigging (never done that before) and they start you with building out the bowsprit. Anyway, Paul's videos were a big help for me, hope the same for you. Cheers
Andy
 
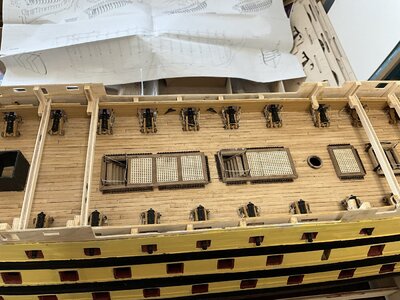
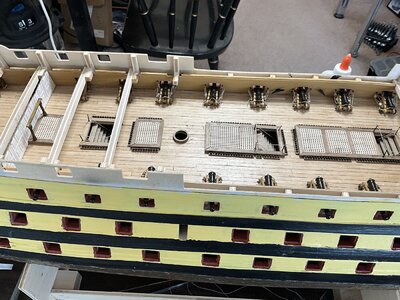
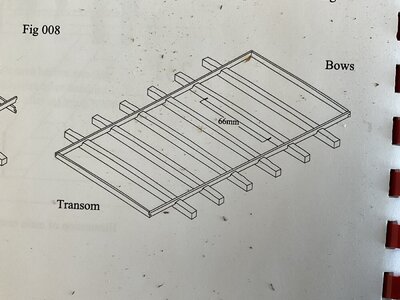
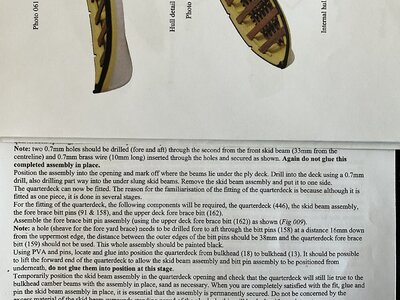
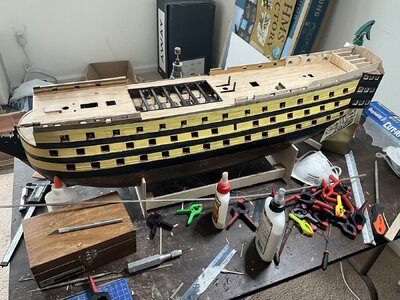
Time for an update and I have some questions if people have the answers I would appreciate it. the main gun deck is just about done, I have to add the elm pump but I will do once I have the quarterdeck on as I am afraid of damaging it while getting the false deck down. the guns in the waist I think came out okay, but not great. I am still learning a lot of the way here. I am not going to obsess over it as you are aren’t really going to be able to see them anyway once I have the skid row and launches on the. My questions are, The directions state that we need to put two 1cm rods in the second cross beam of the skid row, but I can’t find anywhere forward in the directions where we use them??? Also the directions say to bore partial depth holes on the edges of the crossbeams of the skid but again no mention of what to use them for or how to use them to secure the skid beam assembly in place????

image.jpg

image.jpg

image.jpg

image.jpg

image.jpg

image.jpg
 
I am enjoying looking at your build Doc. Don't worry about apologies for 'gaps' when taking time off - The process by it's nature is slow and if it takes 1 year or 10, it doesn't matter - Just enjoy the build and don't let it become a chore!!

I particularly like the detail you are getting on your gun deck. The stairs and the hatch details are excellent,

Regards

PeterG
 
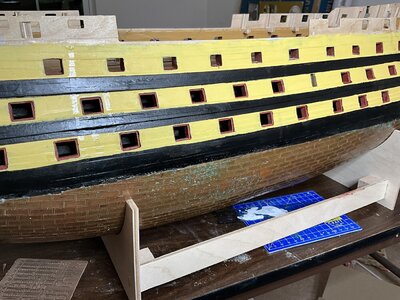
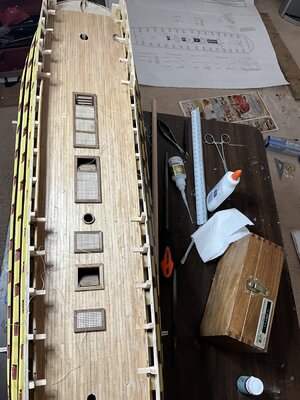
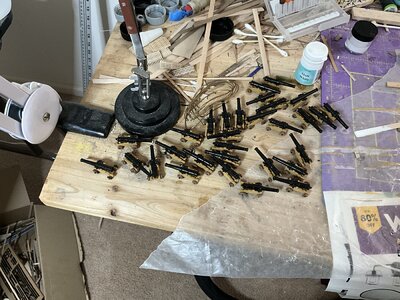
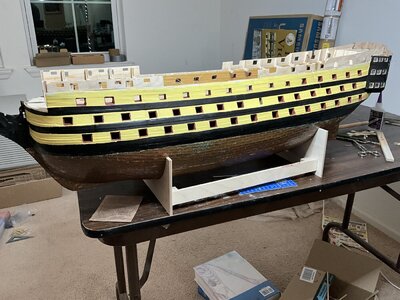
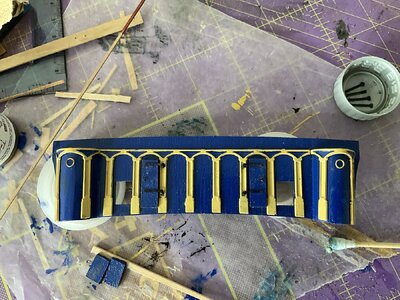
Well, we are making progress, I have the quarterdeck on and planked, I am done with the bulwarks and now working on the final hull plankings. I am a bit down, as again it seems the gun ports on the port side are a bit too low and the cannon won’t fit in it well. I was so carefull putting the templates on to follow the directions so I am still not sure what happened that they are low. I think maybe the deck wasn’t cambered enough down at the edges but not sure. Some times I just want to give up on this one and start all over again trying to not make the same mistakes. Some things are going very well, I am working on the beak head and it looks good. I will paint the bulwarks, gun ports and rest of hull when the final planks are on. I think I finally have the gun construction down and they seem to be coming out okay,,, I wanted to also thank the forum during the holidays, this is a great place for me and I appreciate all the likes/ advice, and views. As a surgeon this is the place I can “confess my sins” and move on building the boat. Almost like my M&M for those that know that is. HAPPY HOLIDAYS!!!

image.jpg

image.jpg

image.jpg

image.jpg
 
Well, we are making progress, I have the quarterdeck on and planked, I am done with the bulwarks and now working on the final hull plankings. I am a bit down, as again it seems the gun ports on the port side are a bit too low and the cannon won’t fit in it well. I was so carefull putting the templates on to follow the directions so I am still not sure what happened that they are low. I think maybe the deck wasn’t cambered enough down at the edges but not sure. Some times I just want to give up on this one and start all over again trying to not make the same mistakes. Some things are going very well, I am working on the beak head and it looks good. I will paint the bulwarks, gun ports and rest of hull when the final planks are on. I think I finally have the gun construction down and they seem to be coming out okay,,, I wanted to also thank the forum during the holidays, this is a great place for me and I appreciate all the likes/ advice, and views. As a surgeon this is the place I can “confess my sins” and move on building the boat. Almost like my M&M for those that know that is. HAPPY HOLIDAYS!!!

View attachment 416181

View attachment 416182

View attachment 416183

View attachment 416184
Do overs are common in ship building you know? And a Merry Christmas!
 
Well, we are making progress, I have the quarterdeck on and planked, I am done with the bulwarks and now working on the final hull plankings. I am a bit down, as again it seems the gun ports on the port side are a bit too low and the cannon won’t fit in it well. I was so carefull putting the templates on to follow the directions so I am still not sure what happened that they are low. I think maybe the deck wasn’t cambered enough down at the edges but not sure. Some times I just want to give up on this one and start all over again trying to not make the same mistakes. Some things are going very well, I am working on the beak head and it looks good. I will paint the bulwarks, gun ports and rest of hull when the final planks are on. I think I finally have the gun construction down and they seem to be coming out okay,,, I wanted to also thank the forum during the holidays, this is a great place for me and I appreciate all the likes/ advice, and views. As a surgeon this is the place I can “confess my sins” and move on building the boat. Almost like my M&M for those that know that is. HAPPY HOLIDAYS!!!

View attachment 416181

View attachment 416182

View attachment 416183

View attachment 416184
Dear Doc,
I know a thing or two about M&M and about ship building.
What I observe is you have great skills and a passion for this hobby, both of which are vital attributes.
In regard to canons being too high or ports too low, with the 4 deck Victory, it would only require mm inaccuracy in the lower levels to add up to the amount you are out on the quarter deck.
I too had a problem with canon port mismatch in my Vanguard, which is an easier build than the Victory. What you learn is how to adapt and rectify discrepancy. I tried a number of methods and in the end ground down the canon cart wheels. You have to look closely to see the flattened wheels. When finished, I hope not noticeable.
Now for the hard part. It appears to me your workspace is small for such a large ship and so it would be important to keep it tidy and free of clutter, like your operative field. No scrub nurse to help you here, I’m guessing.
Keep going with this ship, but if you want to start again don’t be discouraged, we all have skeletons in our closet and half finished hulls on our back shelf.

Happy holidays Doc.

IMG_3678.jpeg
 
Last edited:
Dear Doc,
I know a thing or two about M&M and about ship building.
What I observe is you have great skills and a passion for this hobby, both of which are vital attributes.
In regard to canons being too high or ports too low, with the 4 deck Victory, it would only require mm inaccuracy in the lower levels to add up to the amount you are out on the quarter deck.
I too had a problem with canon port mismatch in my Vanguard, which is an easier build than the Victory. What you learn is how to adapt and rectify discrepancy. I tried a number of methods and in the end ground down the canon cart wheels. You have to look closely to see the flattened wheels. When finished, I hope not noticeable.
Now for the hard part. It appears to me your workspace is small for such a large ship and so it would be important to keep it tidy and free of clutter, like your operative field. No scrub nurse to help you here, I’m guessing.
Keep going with this ship, but if you want to start again don’t be discouraged, we all have skeletons in our closet and half finished hulls on our back shelf.

Happy holidays Doc.

View attachment 416244
Your work if beautiful, I tried to make coils on my vanguard but they came out horrible and I just gave up. I will keep going and I need to learn how to put the rings on the back of the cannons for the rigging as they are in real life rather than just loop it around. I am enclosing a few pictures of my vanguard that I finished a year ago before starting my current Victory project. In terms of the high cannons, I am going to do what you said, file down the wheels a little bit but I am also boring out the carriage so the gun sits a little bit lower in the carriage. I am doing that with a router, between the two it seems to be working and doesn’t look horrible. Thanks for the comments and support, happy holidays,,see you at M&M,,,,,

70388406089__B28508B4-404D-4D8D-94E7-A2E64C5CDDE3.jpeg

70171473600__BDF54B0F-9F56-4F5B-932A-3D2F79C44C79.jpeg

69731319834__BB278C25-C986-49E3-822E-7B7546873A93.jpeg

69480529934__C60CEBA5-3ABD-4B63-84A7-7301E355E5E6.jpeg
 
TraumaDoc,

Great progress. As I follow behind (about to commence my first planking on my Victory), I am watching closely. Although you mention 'errors' you have made, these are incredibly helpful for someone like me, so thank you very much.

Regards,

PeterG
 
Back
Top