I can only agree with Heinrich an PT-2, what a beautiful work.The blend of wood tones and precision of your work set a very high standard to emulate. The cannons with their brass fittings and projection through the gun ports with the exterior brass is a good contrast high-lighting the hull exterior. Wonderful to look at over and over. Rich (PT-2)
-

Win a Free Custom Engraved Brass Coin!!!
As a way to introduce our brass coins to the community, we will raffle off a free coin during the month of August. Follow link ABOVE for instructions for entering.
-

PRE-ORDER SHIPS IN SCALE TODAY!
The beloved Ships in Scale Magazine is back and charting a new course for 2026!
Discover new skills, new techniques, and new inspirations in every issue.
NOTE THAT OUR FIRST ISSUE WILL BE JAN/FEB 2026
You are using an out of date browser. It may not display this or other websites correctly.
You should upgrade or use an alternative browser.
You should upgrade or use an alternative browser.
- Joined
- Aug 16, 2019
- Messages
- 870
- Points
- 343

Now I almost regret to have build the Corel model the OcCre look a lots better
Well I have been burning the midnight oil trying to get all these cannon carriages built and the cannon assemblies ready for installation soon. I still have to do some rigging and eyes to attach them to the ship. But I have 10 completed (half) and it’s been a lot of work! I counted 31 pieces to make 1 cannon assembly with my current design.
I test fit them and took a few pics...
I made and installed the Falconette bases. I also noticed there is two ports or holes in the stern where Falconettes could be added...hmmm...may have to order some. I already need to order more eye pins after adding two per cannon carriage...so I used 40 extra and they don’t give you spares.
Last edited:
You have an excellent balance of wood tones that make the care and precision of your work stand out. The red cannon carriages provide an excellent highlight contrast. I greatly enjoy watching your progress. Bluenose II will greatly appreciate your skill in that build. Rich (PT-2)Well I have been burning the midnight oil trying to get all these cannon carriages built and the cannon assemblies ready for installation soon. I still have to do some rigging and eyes to attach them to the ship. But I have 10 completed (half) and it’s been a lot of work! I counted 31 pieces to make 1 cannon assembly with my current design.
I test fit them and took a few pics...
I made and installed the Falconette bases. I also noticed there is two ports or holes in the stern where Falconettes could be added...hmmm...may have to order some. I already need to order more eye pins after adding two per cannon carriage...so I used 40 extra and they don’t give you spares.
View attachment 196917View attachment 196916View attachment 196915View attachment 196914View attachment 196918View attachment 196919
Thank you Rich. I’m trying not to rush to finish this ship, as I have a few in waiting. The Bluenose being one! I’m excited about doing my first POF build with that one.You have an excellent balance of wood tones that make the care and precision of your work stand out. The red cannon carriages provide an excellent highlight contrast. I greatly enjoy watching your progress. Bluenose II will greatly appreciate your skill in that build. Rich (PT-2)
I have to say the hardest part of these cannon assemblies is bending the trunnion caps with tiny needle nose pliers, with any consistency! Tiny piece of brass strip is hard to work with and thick enough to make the job much harder than it needs to be. Oh well, only 20 more to bend!
Thank you again for the compliment. I hope to maintain my quality. I think sometimes as you get close to finishing, you want to rush to complete it and can end up settling for less to get done faster. So I have to be careful not to get in a hurry.I can only agree with Heinrich an PT-2, what a beautiful work.
...I can only agree with Heinrich an PT-2, what a beautiful work.
- Joined
- Jan 9, 2020
- Messages
- 10,566
- Points
- 938

Beautiful work Dean that is a pleasure to the eye - harmonious with just the right touch of colour highlighting. I know I for one can't wait to see what you will bring to Bluenose, but for now, the Xebec deserves all attention.
Suddenly this gem of a ship is looking FIERCE! Nice work on the cannons. I wasn't a fan of the red carriages at first but they have grown on me. Good call Captain!Well I have been burning the midnight oil trying to get all these cannon carriages built and the cannon assemblies ready for installation soon. I still have to do some rigging and eyes to attach them to the ship. But I have 10 completed (half) and it’s been a lot of work! I counted 31 pieces to make 1 cannon assembly with my current design.
I test fit them and took a few pics...
I made and installed the Falconette bases. I also noticed there is two ports or holes in the stern where Falconettes could be added...hmmm...may have to order some. I already need to order more eye pins after adding two per cannon carriage...so I used 40 extra and they don’t give you spares.
View attachment 196917View attachment 196916View attachment 196915View attachment 196914View attachment 196918View attachment 196919
Depending on the material you are using, a simple jig may speed up the process and make parts uniform. Here is the one I made, so you can get an idea.Thank you Rich. I’m trying not to rush to finish this ship, as I have a few in waiting. The Bluenose being one! I’m excited about doing my first POF build with that one.
I have to say the hardest part of these cannon assemblies is bending the trunnion caps with tiny needle nose pliers, with any consistency! Tiny piece of brass strip is hard to work with and thick enough to make the job much harder than it needs to be. Oh well, only 20 more to bend!

Thank you Heinrich, looking forward to the Bluenose too. Will give San Felipe a back seat for now...lolBeautiful work Dean that is a pleasure to the eye - harmonious with just the right touch of colour highlighting. I know I for one can't wait to see what you will bring to Bluenose, but for now, the Xebec deserves all attention.
Very nice, I like it! It's a shame the kit manufacturer couldn't just stamp them for you!Depending on the material you are using, a simple jig may speed up the process and make parts uniform. Here is the one I made, so you can get an idea.
View attachment 196967
Agree, they can make a Photoetched or simply cast out of pewter...I guess, they wanted you to become a scratch build modeler.It's a shame the kit manufacturer couldn't just stamp them for you!
@dockattnerSuddenly this gem of a ship is looking FIERCE! Nice work on the cannons. I wasn't a fan of the red carriages at first but they have grown on me. Good call Captain!
Thank you Paul!
As you know I had originally stained the first cannon carriage, and when test fitting in the ship, I realized it just blended in with the deck! I thought it would be a shame to lose the attention of the cannon assembly details after all this work. Even with a dark stain...its still just another wood color on a what will become a very busy deck.
Then while looking at pictures of real cannons on the internet for reference, I saw the red painted cannon carriages of the USS Constitution. I found out that was actually a common color used. So I thought, why not the Cazador Xebec? Its plausible it could have had red carriages.
Then after painting the first one and putting it on the ship, I knew that was the perfect solution to bring attention to the armament. Now they really jump out there and demand your attention!
Last edited:
Thank you Rich. I’m trying not to rush to finish this ship, as I have a few in waiting. The Bluenose being one! I’m excited about doing my first POF build with that one.
I have to say the hardest part of these cannon assemblies is bending the trunnion caps with tiny needle nose pliers, with any consistency! Tiny piece of brass strip is hard to work with and thick enough to make the job much harder than it needs to be. Oh well, only 20 more to bend!
To bend my larger trunnion caps I place my metal over a drill bit and slowly hammered the legs down using a square edge to form the angle, clamp it and do the same on the other leg. A half radius jig holds the drill bit and piece for a matching geometry each time. I know that yours will be as close to perfect as is feasible. Rich(PT-2)@dockattner
Thank you Paul!
As you know I had originally stained the first cannon carriage, and when test fitting in the ship, I realized it just blended in with the deck! I thought it would be a shame to lose the attention of the cannon assembly details after all this work. Even with a dark stain...its still just another wood color on a what will become a very busy deck.
Then while looking at pictures of real cannons on the internet for reference, I saw the red painted cannon carriages of the USS Constitution. I found out that was actually a common color used. So I thought, why not the Cazador Xebec? Its plausible it could have had red carriages.
Then after painting the first one and putting it on the ship, I knew that was the perfect solution to bring attention to the armament. Now they really jump out there and demand your attention!
So they show building the landing and stairs to upper deck and then later building cannons and installing them. Two of the cannons are under the landing and behind the stairs! No way I’m attempting to install them after! So I installed two cannons on each side and then built the landing and stairs. They looked dangerous with no railings. To keep my men from falling overboard, i added some custom railings that I think tie in well.
Pics...
Pics...
Last edited:
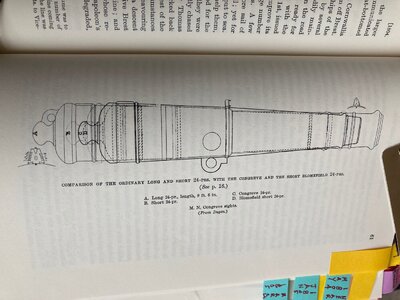
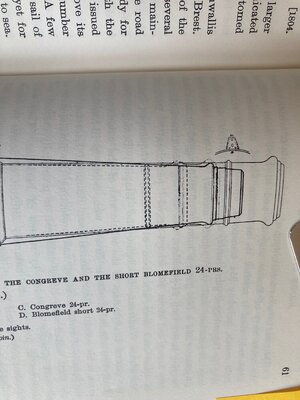
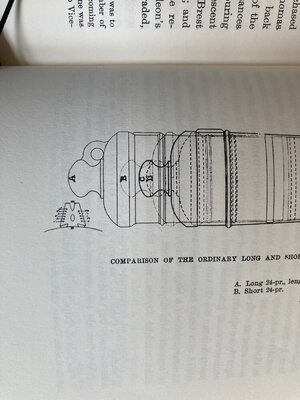
Those cannons look very nice and well done. I received some interesting barrel length and shortening for 24 pounders that include sights associated with the flintlock firing device that was being used on some of them.,Ok I’ve been busy this weekend. Not showing pics of every little thing, but I have:
Added fairleads to upper deck, drilled holes for all cannon eyes, drilled holes for mounting Falconettes, installed false barrels (look like Falconettes), drilled holes for mast eyes in decks, rigged some cannons, installed four cannons, installed landings and stairs that go to upper deck, built custom railings for landings to upper deck.
So they show building the landing and stairs to upper deck and then later building cannons and installing them. Two of the cannons are under the landing and behind the stairs! No way I’m attempting to install them after! So I installed two cannons on each side and then built the landing and stairs. They looked dangerous with no railings. To keep my men from falling overboard, i added some custom railings that I think tie in well.
Pics...
View attachment 197430View attachment 197431View attachment 197432View attachment 197434View attachment 197435View attachment 197436


Now we have some options to consider with our armament. Rich (PT-2_
I slipped my moorings prematurely and need to have the three images removed ASAP. thanks RichThose cannons look very nice and well done. I received some interesting barrel length and shortening for 24 pounders that include sights associated with the flintlock firing device that was being used on some of them.,View attachment 197438View attachment 197439View attachment 197443
Now we have some options to consider with our armament. Rich (PT-2_
That is the function of the large recoil hawser to limit the travel. The outhaul double and single side blocks do not perform that function. The inhaul a the carriage breach end is for that and needs only the travel to bring the muzzle in enough for swabbing and loading. At least as I understand things. Rich (PT-2)Looking good Dean! How the heck did they operate those cannons underneath the stairs? No recoil space!


