Charles W. Morgan by David Lester - Model Shipways - 1/64 scale [COMPLETED BUILD]

Joined
Apr 30, 2019
Messages
98
Points
133

Location
Cobourg, ON
Hello Everyone,
This is my first posting at SOS forum. I have joined as the result of the encouragement of a couple of my online friends and look forward to meeting new online acquaintances here.

I am well along in my build of the CWM, so I'll post a few pictures at this time to bring you up to date and then add new posts at regular intervals as I move forward from here.

If anyone is contemplating this kit, I can recommend it highly. It is challenging, but very satisfying and is an interesting change from warships. The kit is well designed. As per usual the instructions are minimal but the plans are very comprehensive.
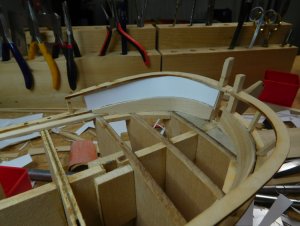
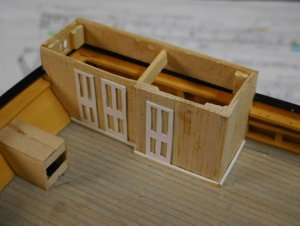
DSCN2202.JPG

DSCN2292 (Custom).JPG

DSCN2236.JPG

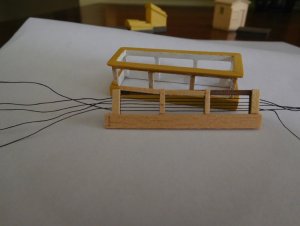
Using thread to represent the metal rods in the skylight.

DSCN2284 (Custom).JPG

DSCN2287 (Custom).JPG

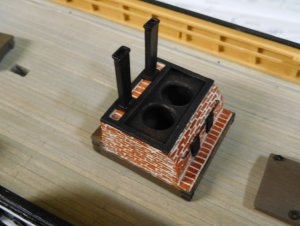
The tryworks made out of 1mm x 2mm x 4mm boxwood "bricks."

DSCN2255 (Custom).JPG

DSCN2370 (Custom).JPG

DSCN2351 (Custom).JPG

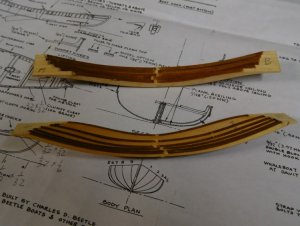
I cut the boats in half to make it easier to shape the interiors.

DSCN2363 (Custom).JPG

They glued back together seamlessly.

DSCN2440 (Custom).JPG

DSCN2474.JPG

DSCN2475.JPG

DSCN2478.JPG

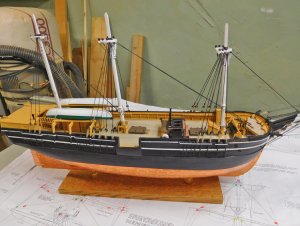
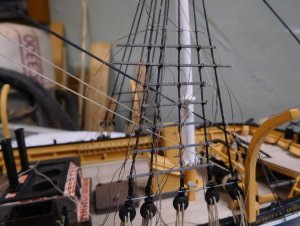
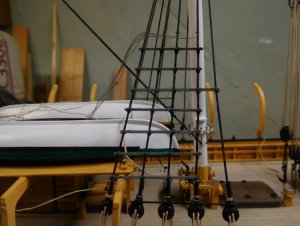
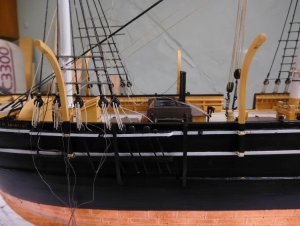
This is where I am at as of now, having just started the standing rigging. Lots more to do yet!

David
 
Hi Guys,
Yes, I did use boxwood strips to make the bricks. I used 1mm x 2mm strips cut into 4mm lengths. They're laid like actual bricks with thin card stock between the rows, recessed slightly from the front. Once it was finished, I painted the whole thing with orange/brick coloured paint and then filled in the gaps with joint filler. It gives a very realistic effect.

I must make it clear that I did not come up with the approach and cannot take credit for it. I found it had been previously used in two or three other CWM builds and I simply followed their lead.

Have you noticed that everything falls into one of two categories - either you think it's going to be hard to do and it turns out it isn't, or it looks like it's going to be easy to do, but it ends up biting you in the behind. This was one of those things that was easier to do than it looks.

Thanks again,
David
 
Great job David!! I also have this same kit of the Morgan and hope to some day build it. There are a lot of nice fixtures on this model that beg for scratch building and extra detail. I think it comes with 5 whale boats?? Boxwood is the best modeling wood ever imho. I am glad to see this one coming together!! Please keep going!!!
 
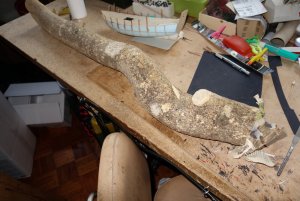
I happen to be a very lucky guy. Just look what a friend gave me a couple of years ago:


DSC05768.JPG


Yes, 7kg of boxwood. I let it to dry for a couple of years, it is ready to be cut now.
I estimate that the tree from where it was cut is more than 200 years old.
I have some more boxwood from the same origin and from a garden nearby where they riped out a whole hedge of boxwood.
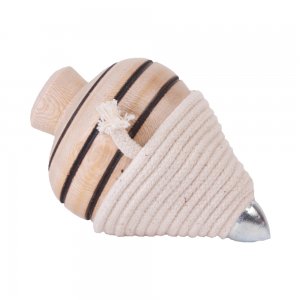
It used to be a very commom tree here in Portugal used in hedges in almost every garden, they used it to make children toys like this:


piao-1000x1000.jpg

No one gave any importance to the boxwood, it even was used in fireplaces. Now it is very hard to find,

Regards

JL
 

Attachments

  • DSC05770.JPG
    DSC05770.JPG
    238.4 KB · Views: 18
Hi Guys,
The fact that it was boxwood was not really the issue for me. In his build log (on MSW) Gerald Spargo gave instructions on building the tryworks. He used 1mm x 2mm strips to create the bricks. I didn't want to deviate from those dimensions as the small size of the tryworks didn't leave much room for error. I had a decent inventory of basswood, but it was all imperial measure. I had trouble finding basswood anywhere that was metric, so I ordered some boxwood because it was readily available in metric sizes.

It didn't break the bank to buy it. There were quite a few other things I needed for the build, so I put together an order and placed it with Model Expo. I only needed one pac of the strips and I think it only added about 4 or 5 dollars to the total order and of course, made no difference to the shipping charges.

I'm not sure what it's like for domestic shipping in the US or the UK, but in Canada shipping charges are the bane of this hobby. It's an ongoing battle to minimize them. Shipping within Canada is affordable but there are few suppliers. General hobby supplies like xacto blades, drill bits etc are readily available, but model parts or anything specialized is virtually nonexistent. So as a result, I'm always placing international orders from Bluejacket or ME or Cornwall Model Boats, who are all great to deal with but it means building up a decent list of things before placing an order to keep shipping costs at a reasonable level. Sometimes I feel ridiculous ordering things from the US or UK that I know I could get domestically, but I find myself adding them to the list of things that I can only get outside the country to get to a decent sized order.

What's it like for you guys in Australia? Do you have plenty of domestic options or do you have to rely on US and UK supplies too?

Thanks again, for checking in, comments and likes,
David
 
A little update. I've been working on this 'n' that.

I've finished the cutting in tackle.
DSCN2487 (Custom).JPG

DSCN2488 (Custom).JPG

Those Bluejacket cast metal blocks have great detail. They're a breeze to work with at this size (5/16") but a more difficult in smaller sizes.

DSCN2491 (Custom).JPG

The plans indicated that the two lines from the cutting in tackle tie off on the windlass head and the windlass barrel. So clearly this tackle was not in place at all times, only when it was in use. The plans don't indicate exactly how to terminate the lines after being wrapped around the windlass, so I ended one set with a coil on the deck and I imagined the other set being tied off on the wooden bar above the windlass.

I don't mind making rope coils for the deck, but I really don't like making the ones that hang down usually from belaying pins. I find them very hard to do. I have to admit to a bit of a cheat on these. I like using Amati rigging line generally; it seems to be very good quality without being expensive. I know that there is superior hand made rope available, but I find this one to be an excellent trade-off between quality and price. The problem with it is, it's a bit stiff and I can never get it to loop nicely for my vertical coils. I shouldn't tell anyone this, but I switch to a different rope here. I use crochet cotton for the vertical coils. It's much easier to get it to behave being very soft. The ecru is a nearly identical colour match and I always use a fine weight even if it's lighter than the actual rigging line. Again it's much easier to handle and the eye simply cannot pick up the slight difference.

DSCN2488 (Custom).JPG

Then I made a start at the ratboards. A feature that's a bit different for this ship and although it's early yet, it looks like they're going to be fun to do.
DSCN2484 (Custom).JPG

Still have to trim them to length of course. I find if they're trimmed to length first, it's very hard to tie them on the outermost shrouds.

In the background you can see some boat davits in place. More about them in the next post.

Many thanks for looking in, comments and all the likes.
David
 
Very good appearance and good looking rigging and metal parts - I really would like to see more often some details of your work and ship :cool:
 
Hello All,
I have a brief update. I've been working on two things simultaneously. The first is the ratboards:

Here are some more in place, the upper two waiting to be trimmed along with the thread ends -

DSCN2503 (Custom).JPG

Here are some after trimming and threads ready to accept the next one.
I'm using a set of nail clippers to trim the boards and for some strange reason it really does feel like I'm trimming its nails.:)

DSCN2502 (Custom).JPG

At the same time, I've been working on the five whaleboat stations. In my past builds it's just been a matter of sticking on a pair of davits and maybe a cleat or two and that's it. No so in this case. It's hard to believe but there are 30 individual parts in each of the five stations.

Here you can see the davits in place -
DSCN2505 (Custom).JPG

Here are the strips mounted to the side of the hull that serve as sliders. The thinnest wood I have is 1/32" and it looked a bit too heavy and I wasn't able to get the slight bow in them that's clear in pictures of the actual ship. So I laminated two pieces of styrene strip and that seemed to do the job. It was difficult to get the strip to adhere adequately to the top support piece that runs over to the hull, so I glued a piece of black construction paper to the top of the support piece and folded it up and glued it against the inside of the slider and that seems to secure it quite well.

DSCN2504 (Custom).JPG

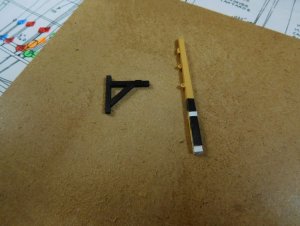
The remaining parts for each station are the boat bearers and cranes which are shown below, but not installed yet. The cranes attach to the bearers with a pair of eyebolts and pins. The challenge will be to install each pair of assemblies so that the two cranes are at the same height, in order for the boats to sit level.

I resorted to vinyl again for the two fairleads on the side of the bearer. I could not shape basswood without it crumbling. Instead I laminated two pieces of thin vinyl strip together and drilled a hole near the end of the strip. Then I cut off a small square containing the hole and glued it to the bearer. When the glue was well set, I filed the round shape into the vinyl square. It's a detail that probably doesn't need to be there as the plans say that it is unknown what the purpose of these fairleads was. But they're on the plans, so I added them nevertheless.

DSCN2506 (Custom).JPG

So that's where I'm at as of today. It's time to get back down to my shop as it's Wednesday and will soon be time for the Moth Radio Hour on NPR and I really hate to miss it.

Thanks for all the likes, comments etc.

David
 
Back
Top