-

Win a Free Custom Engraved Brass Coin!!!
As a way to introduce our brass coins to the community, we will raffle off a free coin during the month of August. Follow link ABOVE for instructions for entering.
-

PRE-ORDER SHIPS IN SCALE TODAY!
The beloved Ships in Scale Magazine is back and charting a new course for 2026!
Discover new skills, new techniques, and new inspirations in every issue.
NOTE THAT OUR FIRST ISSUE WILL BE JAN/FEB 2026
You are using an out of date browser. It may not display this or other websites correctly.
You should upgrade or use an alternative browser.
You should upgrade or use an alternative browser.
Constellation, the sloop of war c.1856 in 1:36 scale for R/C sailing
- Joined
- May 25, 2020
- Messages
- 1,131
- Points
- 443

Jerry!!! I'm late to the party as usual. I see you are up to your usual magical standards. Bravo! Thank you over and over for the marvelous mini masterpieces you made for my Harriet Lane build!
AND (belatedly) Happy Birthday!!!! I hope you got all of the presents you heart could wish for.
Blessings.
Chuck
AND (belatedly) Happy Birthday!!!! I hope you got all of the presents you heart could wish for.
Blessings.
Chuck
I always wanted to see this model of Savannah by by Mark Wilkins that's at the Ships of the Sea Maritime Museum in Savannah, Georgia, and this September (2024) finally got to go.
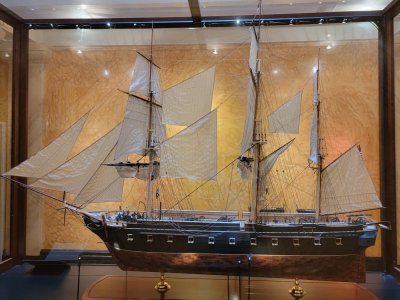
There's more of my pictures of this model, as well as others at the museum in the forum here:
Savannah was a contemporary of Constellation, originally built as a 44 gun frigate and razeed to a 24 gun sloop of war.
Relative to each other:
Constellation was launched: August 26, 1854, Displaced: 1,400 tons, 179 feet log with a beam of 41 feet, drawing 21 feet. My model is 1:36 scale.
Savannah was a Brandywine class frigate launched on May 5, 1842, converted to a sloop of war in 1857. She displaced 1726 tons, was 175 long with a 45 foot beam. I guess drew between 21 & 24 feet. The model is 1:32 scale.
The ships were very similar in size, armament, and arrangement, and Mr Wilkins model was something of an inspiration for me and my Constellation. In particular is crew figures. I always intended to crew Constellation, and this model displayed that was the right path.
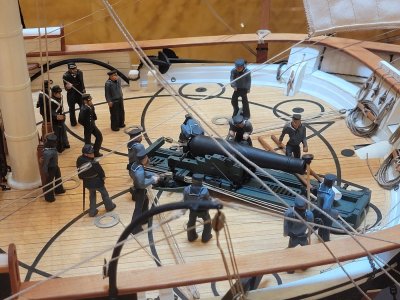
There are some minor details about the Savannah model I take issue with. She should be fitted with rigging-screws (turnbuckles) instead of deadeyes and lanyards, and her main tops'l yard braces should anchor to a ring that slides up and down the mizzen top-mast. Very minor details unless you've conditioned to look for them.

There's more of my pictures of this model, as well as others at the museum in the forum here:
Ship of the Sea Museum ~ Savannah Georgia USA, September 9 2024
Pictures from a visit to the Ships of the Sea maritime museum in Savannah GA on September 9 2024: I apologize for the reflections and glare, it was difficult to get good images through glass cases with all the windows, etc.
shipsofscale.com
Savannah was a contemporary of Constellation, originally built as a 44 gun frigate and razeed to a 24 gun sloop of war.
Relative to each other:
Constellation was launched: August 26, 1854, Displaced: 1,400 tons, 179 feet log with a beam of 41 feet, drawing 21 feet. My model is 1:36 scale.
Savannah was a Brandywine class frigate launched on May 5, 1842, converted to a sloop of war in 1857. She displaced 1726 tons, was 175 long with a 45 foot beam. I guess drew between 21 & 24 feet. The model is 1:32 scale.
The ships were very similar in size, armament, and arrangement, and Mr Wilkins model was something of an inspiration for me and my Constellation. In particular is crew figures. I always intended to crew Constellation, and this model displayed that was the right path.


There are some minor details about the Savannah model I take issue with. She should be fitted with rigging-screws (turnbuckles) instead of deadeyes and lanyards, and her main tops'l yard braces should anchor to a ring that slides up and down the mizzen top-mast. Very minor details unless you've conditioned to look for them.
Last edited:
It's gotten too cold to hang-out in the unheated shop for more than a few minutes, so I worked on the 3D models for an item that's kind-of holding up my starting on Constellation's rigging - the pin-rails.
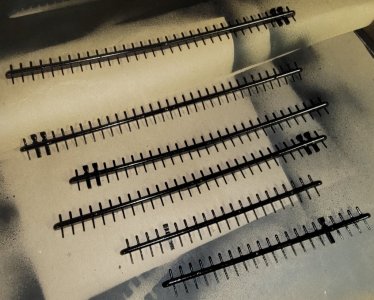
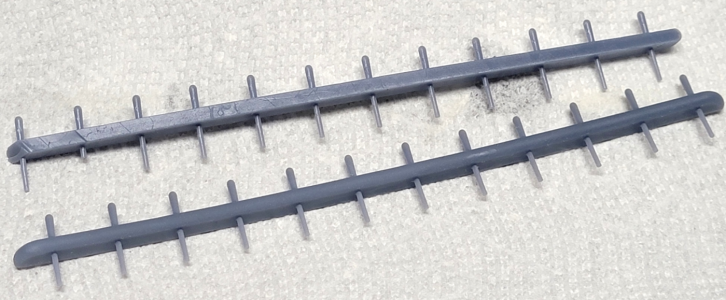
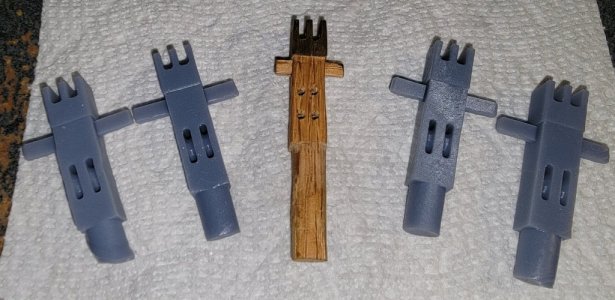
Here's the first attempt at the aft-most rails, which printed pretty fairly, though the left end of the upper one, and one of it's pins didn't do so well.
While that's repairable, when I modeled it, I forgot the bulwark it attaches to leans inboard a bit and forgot to model in that angle on the back surface. Sanding that angle in would make the rail too narrow, so I'm fixing the model and will reprint it.
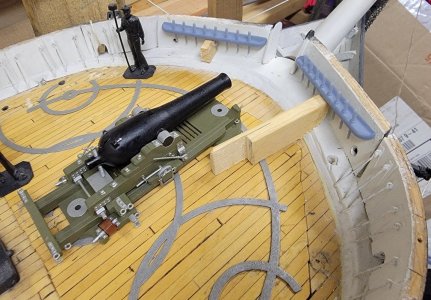
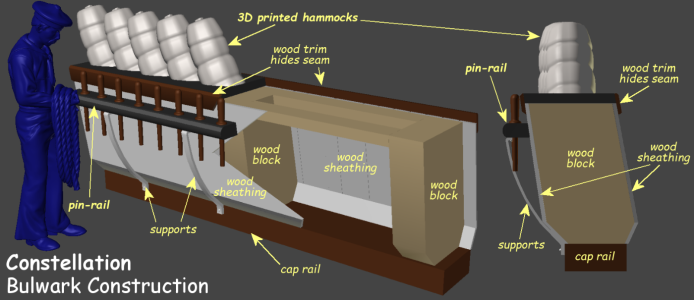
The rails will be pinned to the bulwark where the wood blocks are inside it.
This pic shows how the bulwarks are constructed, as well as that inboard lean I mentioned.
Here's the first attempt at the aft-most rails, which printed pretty fairly, though the left end of the upper one, and one of it's pins didn't do so well.
While that's repairable, when I modeled it, I forgot the bulwark it attaches to leans inboard a bit and forgot to model in that angle on the back surface. Sanding that angle in would make the rail too narrow, so I'm fixing the model and will reprint it.

The rails will be pinned to the bulwark where the wood blocks are inside it.
This pic shows how the bulwarks are constructed, as well as that inboard lean I mentioned.

Last edited:
Half-an-hour-ish, and I've Fixed the pin-rail model to have the proper angle back-side, and set it to printing.
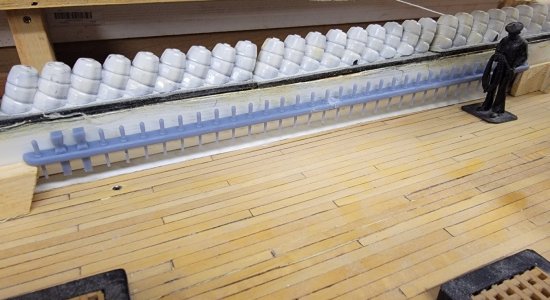
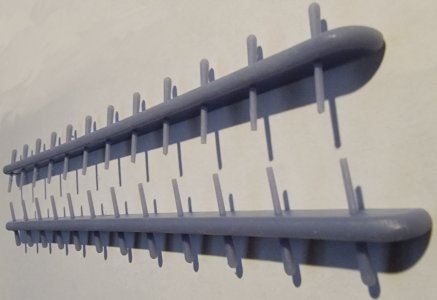
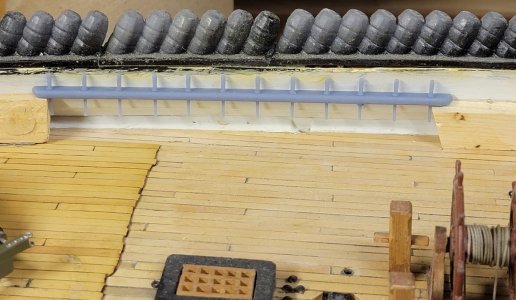
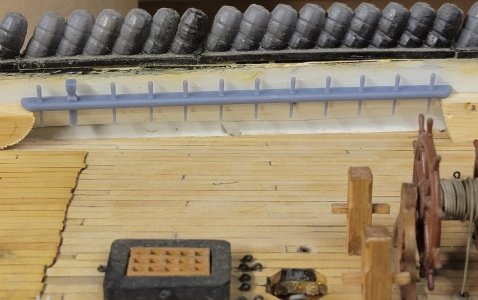
Five hours and some change later it came out perfectly. See the angle? Well there it is siting somewhere near where it will live.
While that was printing I started making the midships pin-rail; the one closest in this screen capture.

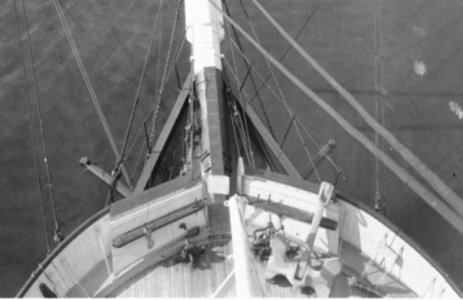
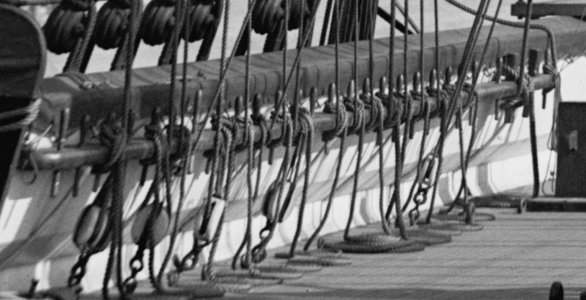
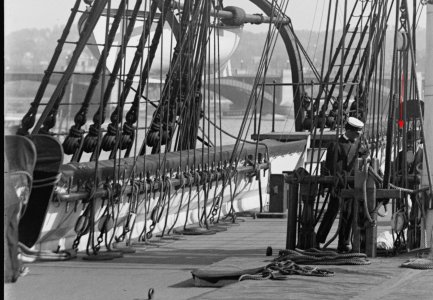
In this picture from the 1890's, I originally thought there was a caval at the aft end, but it actually appears to be a pair of meat tenderizers.
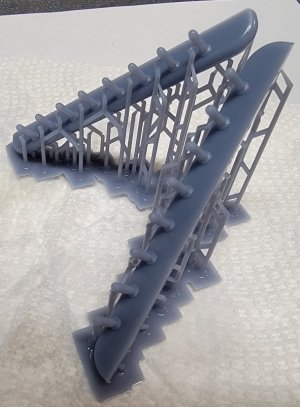
This wasn't going to fit in the printer, even at an angle, so I made each side in two parts, and angled them (not to fit, but make them more likely to print properly)
As I type here, this one is on the printer with about 4 hours to go

Keeping with that workflow I should be making the forward pin-rails while the others print, but it's almost 3am, so, later...
Five hours and some change later it came out perfectly. See the angle? Well there it is siting somewhere near where it will live.


While that was printing I started making the midships pin-rail; the one closest in this screen capture.

In this picture from the 1890's, I originally thought there was a caval at the aft end, but it actually appears to be a pair of meat tenderizers.

This wasn't going to fit in the printer, even at an angle, so I made each side in two parts, and angled them (not to fit, but make them more likely to print properly)
As I type here, this one is on the printer with about 4 hours to go

Keeping with that workflow I should be making the forward pin-rails while the others print, but it's almost 3am, so, later...
Last edited:
The midships pin-rails printed like I knew what I was doing.
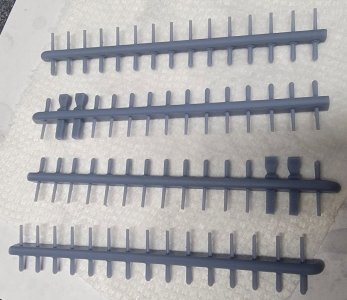
Here that are with supports removed, washed, and drying. The two halves were bonded together with resin and a quick zap of UV light, and cured - under the UV light for a few minutes to fully cure the resin part all the way through.
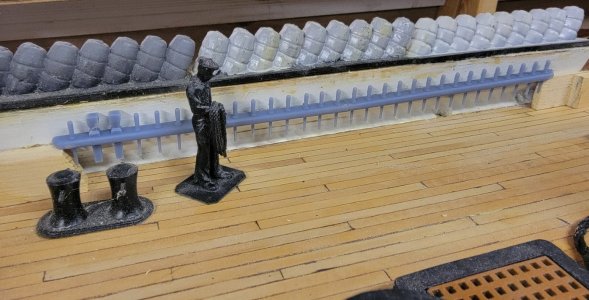
Here's one pin-rail sitting about where it'll get installed after they're primed, painted, and drilled for attaching pins
Here that are with supports removed, washed, and drying. The two halves were bonded together with resin and a quick zap of UV light, and cured - under the UV light for a few minutes to fully cure the resin part all the way through.

Here's one pin-rail sitting about where it'll get installed after they're primed, painted, and drilled for attaching pins

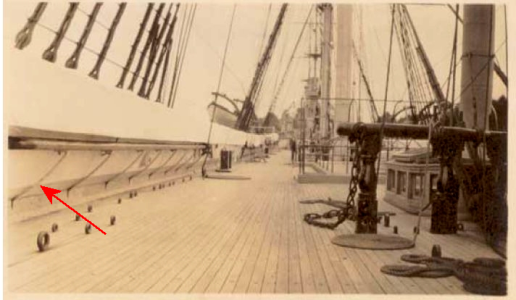
While looking through images to see if there were other pin-rails back aft, I noticed the little detail pointed out by the red arrow in an 1890's photo
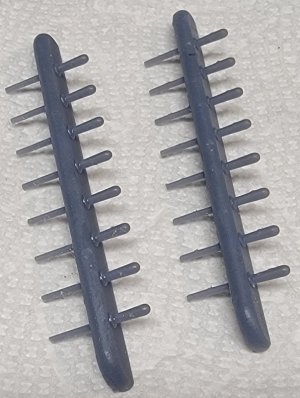
Seems the aft/mizzen rails had a meat-tenderizer as well, and also had more pins, closer together, like the other rails, so I fixed the model and printed a pair...
I couldn't find any more pin-rails, so I think I'm done with this stage. The weather says it'll get up to 61°f after a couple of rainy days, so I should have these all drilled, primed, painted, and coated then, maybe even installed.

Seems the aft/mizzen rails had a meat-tenderizer as well, and also had more pins, closer together, like the other rails, so I fixed the model and printed a pair...

I couldn't find any more pin-rails, so I think I'm done with this stage. The weather says it'll get up to 61°f after a couple of rainy days, so I should have these all drilled, primed, painted, and coated then, maybe even installed.
Haven't gotten back into the shop yet, but I fiddled with some related 3D models a bit
(click pic for full size)
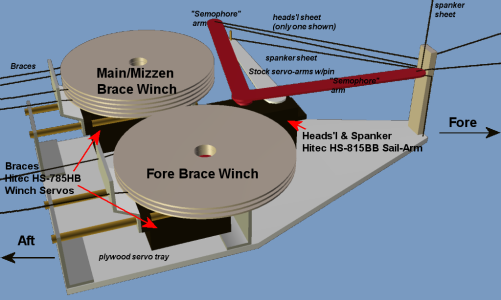
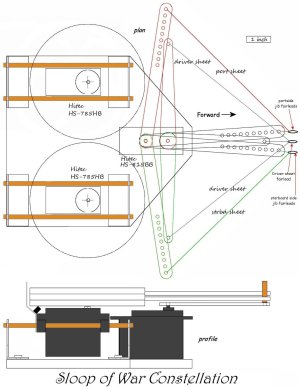
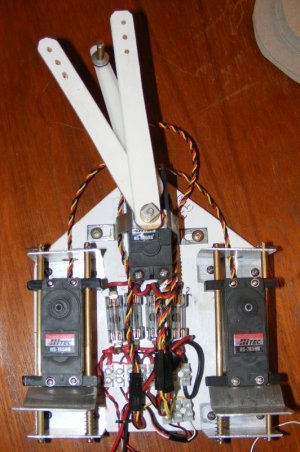
This one is a cleaned up, up-detailed, and smoother model of the Control Module for the model's braces and sheets and the measured drawing it came from. Before 3D printing, I used my modeling software to model parts like this to check for size and fit, clearances, etc. In this case it was another attempt to explain how Constellation's braces and sheets are handled, though there are still some folks that can't wrap their heads around it.
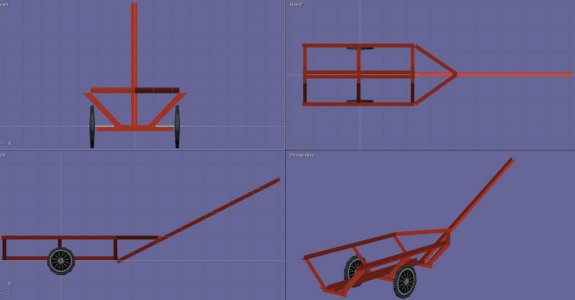
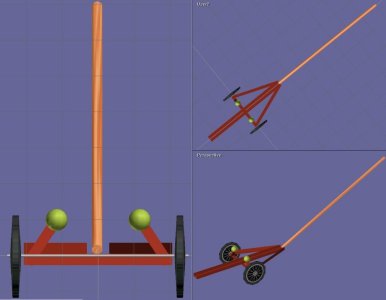
When I was figuring out a way to move, launch, and retrieve the model I played with ideas in the 3D modeling software. This led to about as simple a concept as probably be done, all without cutting any of the steel bed-frame rails that turned out to be really tough stuff to cut.
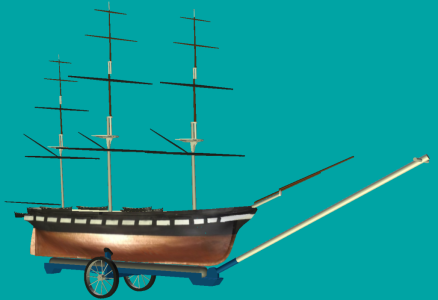
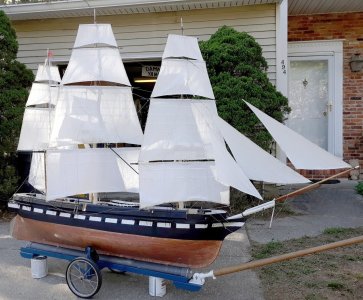
This is how the cart actually turned out, but I dressed up the model a bit with real spoked wheels and a basic rig in the ship.
I've been asked to bring the model to an event at Fort Howard Maryland May 28th, I'm told it's an instruction event for maritime reenactors that'll be open to the public. The model will be jury-rigged yet again, but she should appear a bit farther along than the last time she was out.
My focus now will be installing those pin-rails and having things done that will be hard to get at when rigging commences in earnest.
(click pic for full size)


This one is a cleaned up, up-detailed, and smoother model of the Control Module for the model's braces and sheets and the measured drawing it came from. Before 3D printing, I used my modeling software to model parts like this to check for size and fit, clearances, etc. In this case it was another attempt to explain how Constellation's braces and sheets are handled, though there are still some folks that can't wrap their heads around it.


When I was figuring out a way to move, launch, and retrieve the model I played with ideas in the 3D modeling software. This led to about as simple a concept as probably be done, all without cutting any of the steel bed-frame rails that turned out to be really tough stuff to cut.


This is how the cart actually turned out, but I dressed up the model a bit with real spoked wheels and a basic rig in the ship.
I've been asked to bring the model to an event at Fort Howard Maryland May 28th, I'm told it's an instruction event for maritime reenactors that'll be open to the public. The model will be jury-rigged yet again, but she should appear a bit farther along than the last time she was out.
My focus now will be installing those pin-rails and having things done that will be hard to get at when rigging commences in earnest.
Last edited:
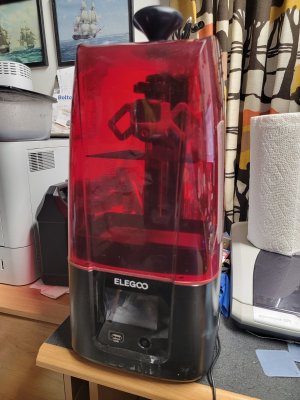
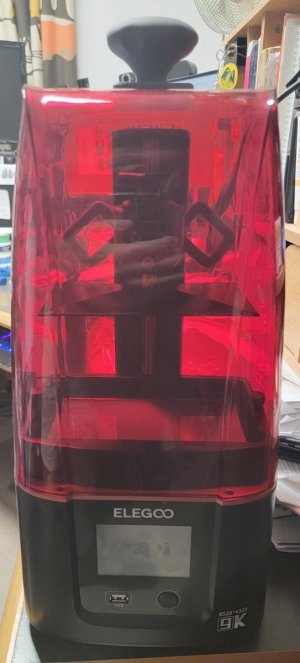
The 3D printer had a leak that, at first, I thought was irreparable, so I bought a replacement while they're still fairly cheap. Turns out repairing the 3 wasn't as involved as I had thought, and now I have two 3D printers; a Mars 3 and a Mars 4:
Working again, I printed blocks, some with fixed sheaves for things that won't be moving much, like halyards and bunt lines; and some meant to get 8mm brass sheaves for operational things, like the braces.
I also made boat chocks fitted to the boats they go with based on their lines drawings. I just eye-balled the design, since I haven't found any usable data on what the ship may have actually had. The boats also got a final coat of paint, inside and out, though some touch-up is needed still.
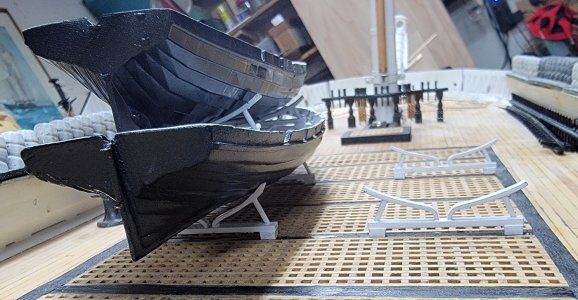
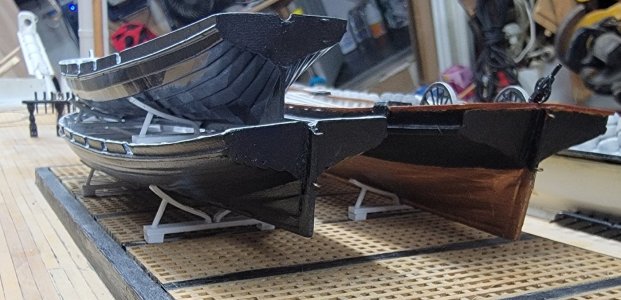
The next big thing is getting the inside of the bulwarks painted, and drilling the mounting pin holes in it for the pin-rails I printed a while back. Those got another coat of paint, while I was painting everything else. I have to do something about getting the hull lower so I can work over it. The remains of my brain isn't liking being up on a stool, bent over to work.


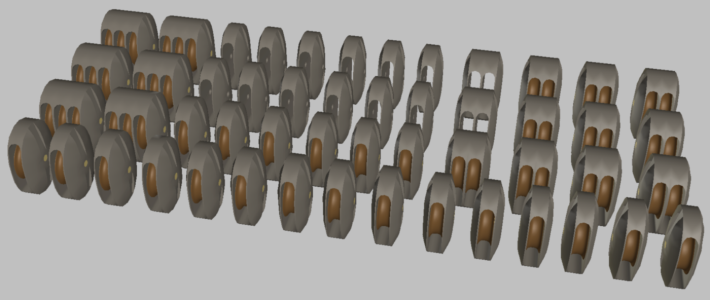
Working again, I printed blocks, some with fixed sheaves for things that won't be moving much, like halyards and bunt lines; and some meant to get 8mm brass sheaves for operational things, like the braces.

I also made boat chocks fitted to the boats they go with based on their lines drawings. I just eye-balled the design, since I haven't found any usable data on what the ship may have actually had. The boats also got a final coat of paint, inside and out, though some touch-up is needed still.


The next big thing is getting the inside of the bulwarks painted, and drilling the mounting pin holes in it for the pin-rails I printed a while back. Those got another coat of paint, while I was painting everything else. I have to do something about getting the hull lower so I can work over it. The remains of my brain isn't liking being up on a stool, bent over to work.
Last edited:
- Joined
- Mar 5, 2025
- Messages
- 24
- Points
- 58

Hey Jerry , what part of the states are you in? I remember seeing a local fella with a large model like yours.
Put your mouse over where my name is and it'll say "from Maryland USA"Hey Jerry , what part of the states are you in? I remember seeing a local fella with a large model like yours.
actually, at the bottom, under the Naval rank it says "Location: Maryland USA"
...more specifically, about 12 miles north of Annapolis
Last edited:
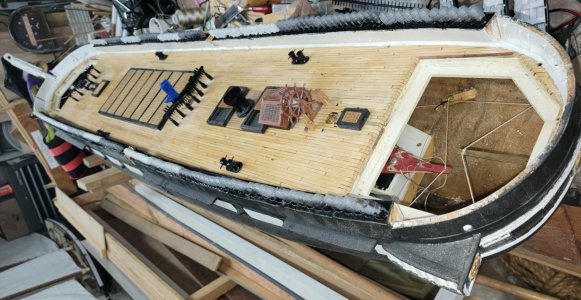
I ground the hammock trays on the starboard side flush with the bulwarks, painted the bulwarks, and painted the hammock trays. I have to mix a "canvas" color paint to paint the hammocks (which are the lighter colored ones in the pictures).
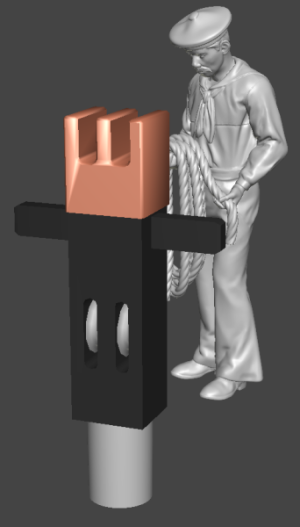
I printed new "crown-bitts" to replace the clumsy looking red oak ones I made years ago.
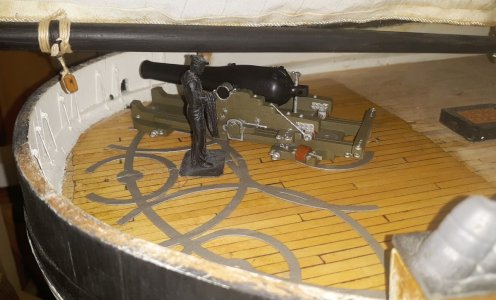
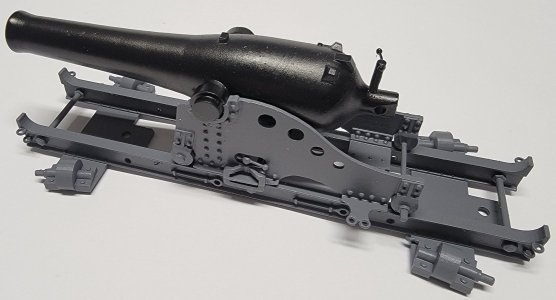
I printed the XI Dahlgren for my "Guns of Constellation" side project. Here it is with some primer and the tube painted black. I'm not sure what color the carriage should be, there's no pictures of the ship where they can be seen.

I printed new "crown-bitts" to replace the clumsy looking red oak ones I made years ago.


I printed the XI Dahlgren for my "Guns of Constellation" side project. Here it is with some primer and the tube painted black. I'm not sure what color the carriage should be, there's no pictures of the ship where they can be seen.

The covering-board is on, and the pins to hold the pin-rails are drilled. I made the pin rails to measurements I took from the actual ship, but that covering-board is actually too thick, so I'm going to pad the pin-rails out a little to give them some room, before gluing them on.
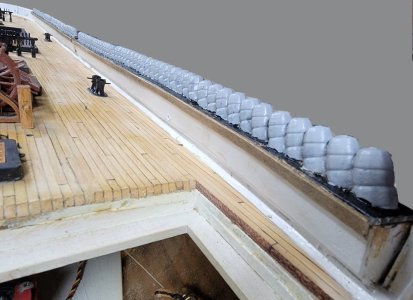
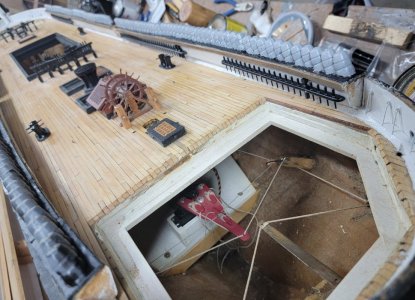
The next thing before moving on to the port side are the braces, or supports under the pin-rails. These I'll make of sheet brass, blackened, painted, and glued in. Notice they have a little curve to them, somewhat like a leaf-spring. I've looked at every photo I can find where you can see them, and it's not a distortion.
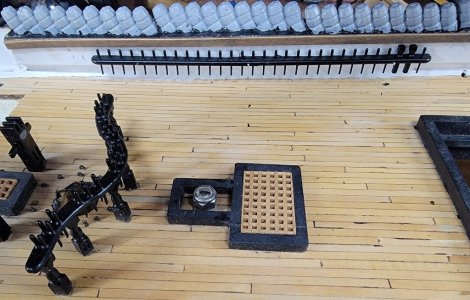
I padded the back-side of the pin-rails with basswood to bring out the belaying pins from the bulwark a 1/16", painted and clear-coated them. Tomorrow I'll touch up the bulwarks paint a little and epoxy the pin-rails in place.
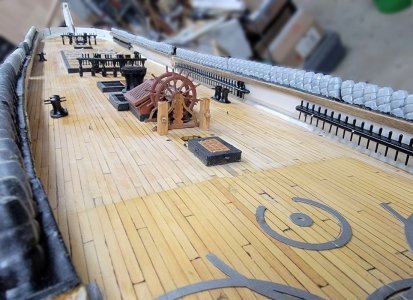
The boats got some clear-coat as well, and it occurred to me none of them had been in the water, so one of the quarter-boats went to the kitchen and took a dip in a plastic tub - it floats!
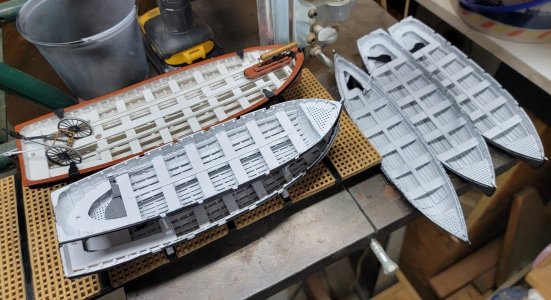
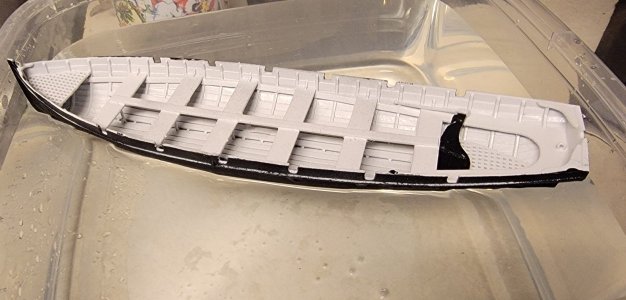


The boats got some clear-coat as well, and it occurred to me none of them had been in the water, so one of the quarter-boats went to the kitchen and took a dip in a plastic tub - it floats!


- Joined
- May 25, 2020
- Messages
- 1,131
- Points
- 443

Jerry! You're doing some outstanding work - and I'm not a bit surprised  Love the boats and the gun!!! So, those curved metal supports under the pin rails - can't wait to see that! I suppose you're looking forward to having her on the water soon - to the amazement and delight of all!
Blessings.
Chuck
Blessings.
Chuck
Thank you Chuck, and everyone that clicked like all these years.
The boat hasn't gotten wet since 2019 when working nights and weekends, COVID, the stroke, weather, and all of life seemed determined that I wasn't getting this thing done. I don't know that I'll have her sailing this year, but she will be noticeably more progressed. Pride, on-the-other-hand, I do hope will sail before the cold weather returns, though she won't be completed either.
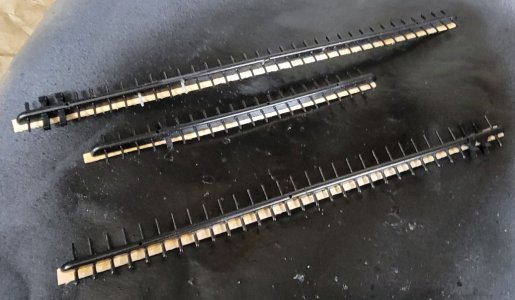
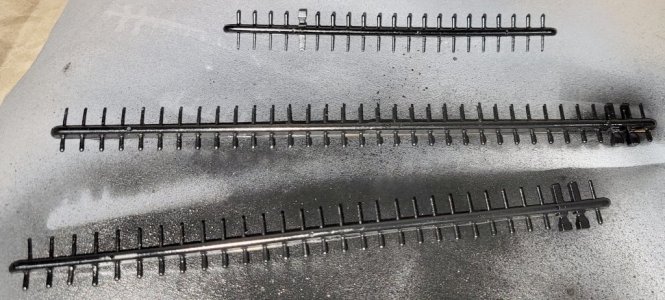
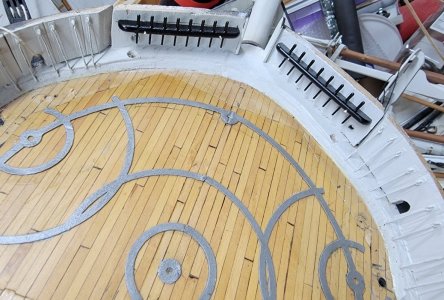
Before mixing up a batch of epoxy to not only glue on these pin-rails, but also finish up the ballast bulb for Pride, I padded the port-side pin-rails as I had the starboard ones, trimmed the wood, painted, and clear-coated them. The bow pin-rails got drilled and pinned also. Then my stomach was wondering if my throat had been cut, so I stopped to eat.


