Your doing a fine job Keith. I'm on my first ship, the La Candelaria by Occre, & will follow your build with interest.
-

Win a Free Custom Engraved Brass Coin!!!
As a way to introduce our brass coins to the community, we will raffle off a free coin during the month of August. Follow link ABOVE for instructions for entering.
-

PRE-ORDER SHIPS IN SCALE TODAY!
The beloved Ships in Scale Magazine is back and charting a new course for 2026!
Discover new skills, new techniques, and new inspirations in every issue.
NOTE THAT OUR FIRST ISSUE WILL BE JAN/FEB 2026
You are using an out of date browser. It may not display this or other websites correctly.
You should upgrade or use an alternative browser.
You should upgrade or use an alternative browser.
Endeavour by Occre 1:54 [COMPLETED BUILD]
- Thread starter KeithLyall
- Start date
- Watchers 31
- Joined
- Jun 13, 2022
- Messages
- 310
- Points
- 168

Thanks Alan, much appreciated … almost finished. All rigged up and just some finishing touches to add coils of rope and I can move into my next model. Only taken 33 months but there was no rush.
Looking great.
Will be interested to see how yours turns out. Thank is a bit keen removing the nails from the first layer
Hi Keith, I have started a topic on removing nails. Perhaps it is of interest to you?
Nails: To Remove or not to Remove
Looking for opinions and arguments. Is it wise to remove the nails from the first planking after the glue has dried? Or is it a no go? I have performed this action on two ships so far. The first ship, Shackleton's Endurance, is still in shipshape condition three months after completion. But...
shipsofscale.com
- Joined
- Jun 13, 2022
- Messages
- 310
- Points
- 168

Thanks for the heads up Mike. I am certainly in the group of modellers who pushed the pins flush with the first layer followed up with some sanding which smoothed the top of any pins slightly protruding. This is only my second model and the first using pins, hence not really thought of removing but interesting to read others comments. Just using push pins is a definitely a future consideration. Regarding the 2nd layer I actually used masking tape (Frog tape which does not leave any stickiness) to hold the plans to avoid holes although as you did see I used pins to add extra effect. Point taken from one post that pins are not in scale but I still like the effect. Complements on your first layer of planking, very neatly done.Hi Keith, I have started a topic on removing nails. Perhaps it is of interest to you?
Nails: To Remove or not to Remove
Looking for opinions and arguments. Is it wise to remove the nails from the first planking after the glue has dried? Or is it a no go? I have performed this action on two ships so far. The first ship, Shackleton's Endurance, is still in shipshape condition three months after completion. But...shipsofscale.com
- Joined
- Jun 13, 2022
- Messages
- 310
- Points
- 168

Can't believe where that year has gone and that I have been a bit tardy with my Occre Endeavour build log. This year has mainly been involved in the masts, spars and rigging.
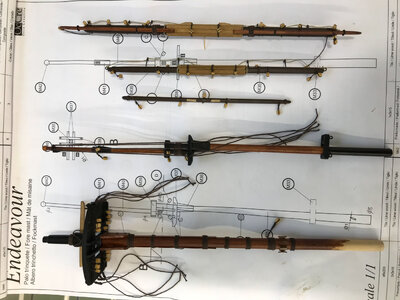
Masts
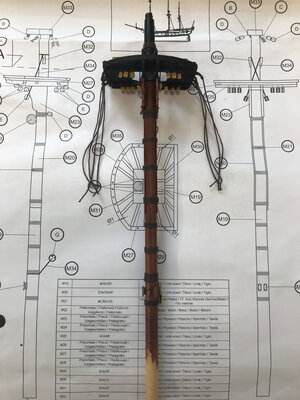
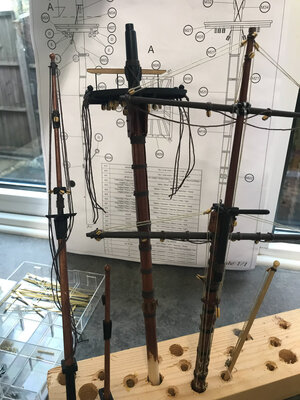
I constructed the masts and yards separately based on the Occre plans, although in a few cases there did appear to be pulleys that were not required which only became obvious later in the build, but not a big deal.
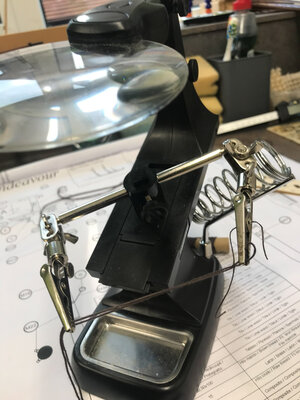
A very useful "pair of hands" to hold threads ...
What felt like a major milestone was gluing the masts onto the model. From reading a number of members posts, some appear to prefer to build the mast and yards as a unit before inserting the into the hull; I decided on just the masts initially and adding the yards later, hoping that would not come back to bite me later.
I did add the running rigging to the mizzen mask more as an experiment/learning process before attempting the more complex main and fore masts. At times rigging felt like a game of strategy to ensure you work from inside to out so that you don't block yourself from both threading and tying some rigging.
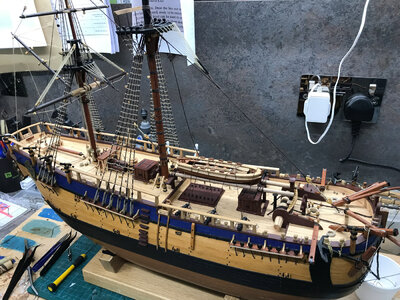
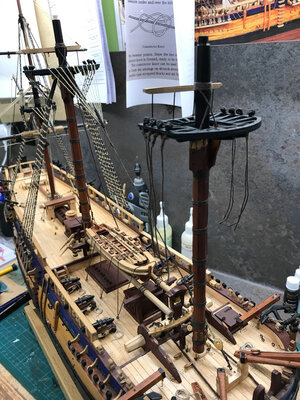
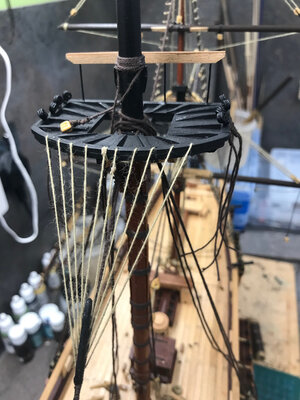
The crowfeet rigging does demonstrate the hairiness of Occre provided threads ... it does not look so bad on the actual model but the photograph seems to accentuate it. I can see why some folks either make their own or upgrade to better quality products.
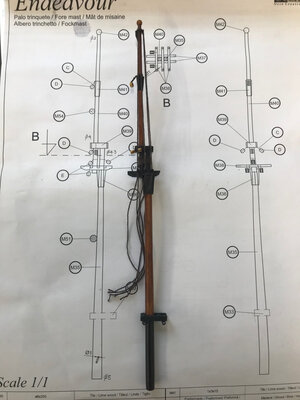
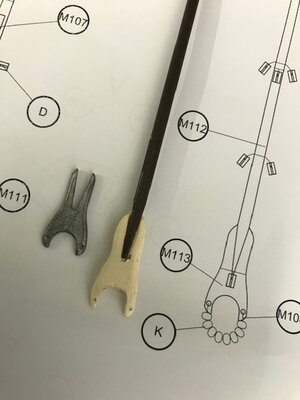
I did not like the Occre provided part for the mizzen spar. As such I traced the supplied part and carved a replacement, which once painted was a lot more pleasing.
Masts
I constructed the masts and yards separately based on the Occre plans, although in a few cases there did appear to be pulleys that were not required which only became obvious later in the build, but not a big deal.


A very useful "pair of hands" to hold threads ...

What felt like a major milestone was gluing the masts onto the model. From reading a number of members posts, some appear to prefer to build the mast and yards as a unit before inserting the into the hull; I decided on just the masts initially and adding the yards later, hoping that would not come back to bite me later.
I did add the running rigging to the mizzen mask more as an experiment/learning process before attempting the more complex main and fore masts. At times rigging felt like a game of strategy to ensure you work from inside to out so that you don't block yourself from both threading and tying some rigging.


The crowfeet rigging does demonstrate the hairiness of Occre provided threads ... it does not look so bad on the actual model but the photograph seems to accentuate it. I can see why some folks either make their own or upgrade to better quality products.


I did not like the Occre provided part for the mizzen spar. As such I traced the supplied part and carved a replacement, which once painted was a lot more pleasing.

Last edited:
- Joined
- Jun 13, 2022
- Messages
- 310
- Points
- 168

Sails and Running Rigging
The sails and rigging did seem to take an age, although real life did get in the way during the summer months and I see my ship building as essentially a winter project. I did raise some questions throughout the year as separate threads to help me clarifying the Occre build instructions, see links below for full details ...
In the end I decided to do furled sails using the silkspan/tissue sail as that would allow a more realistic scale of furling. That did make the running rigging more involved as based on responses to my sails questions, it was pointed out that all running rigging associated with the sails should be added.
While the Occre instructions for the hull build are in my opinion very detailed, the rigging diagrams are less so and I did spend considerable time trying to determine what went where, in particular associating the rigging diagram for the masts with the attachment end points on the deck plan. Copious use of highlighter pens helped considerably as I was going number blind trying to determine what I had already done ... this approach did help tremendously. Even then there appear to be missing annotations or times where multiple threads are attached to the same end point.
I had initially tied knots in the thread and threaded the knot through the top deadeye. However this meant that threading the lower deadeye required the needle threaded to come from the back of the deadeye. As such threading the shroud deadeyes ended up being in reverse as I could only get the needle threader through deadeyes from the front; the hull prevented access from the back for the deadeyes. After the thread was passed through all deadeye holes, I would pull an extra length of thread, tie a knot before pulling the thread back to tension the shroud thread.
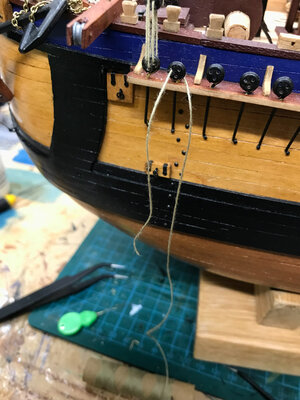
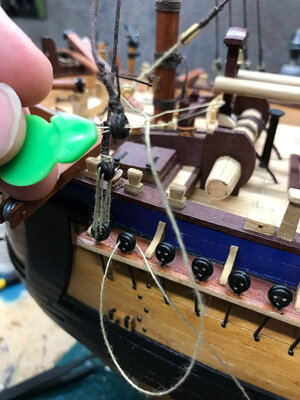
The following images show the steps in the sail and rigging construction. I basically progressed by adding:
1) the stays,
2) the shrouds
3) the ratlines
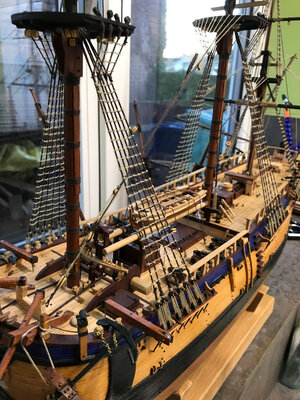
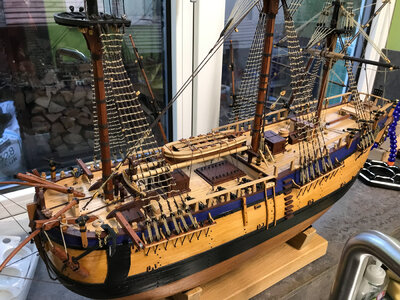
4) the yards
Tip: When attaching the yards, I drilled a hole through each yard and in the mast at the yard position, and then used a pin to hold the yard in place against the mast. This allowed me to tension running rigging without the yard moving.
5) the sails
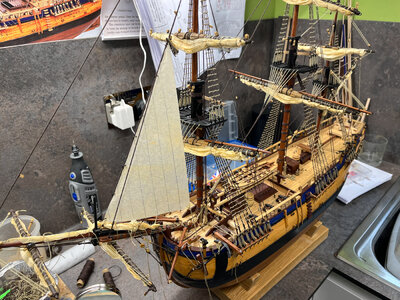
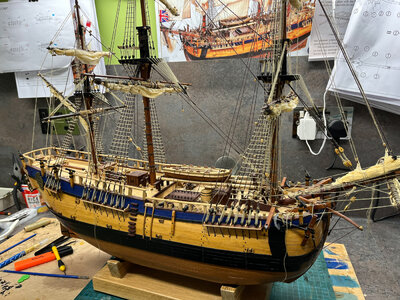
6) the running rigging
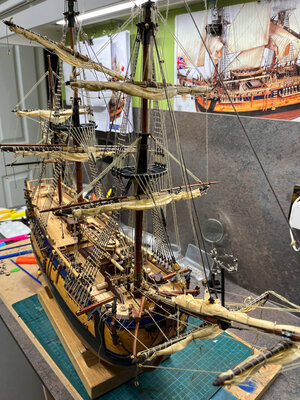
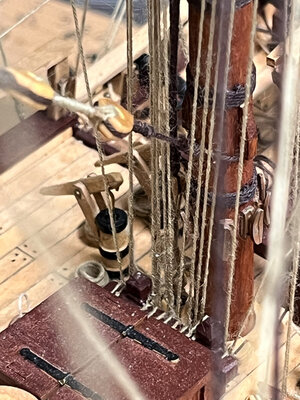
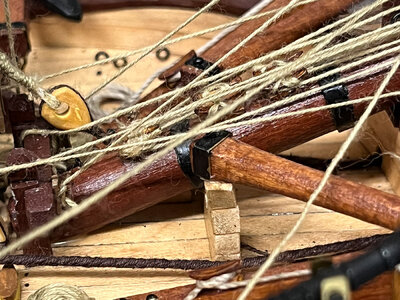
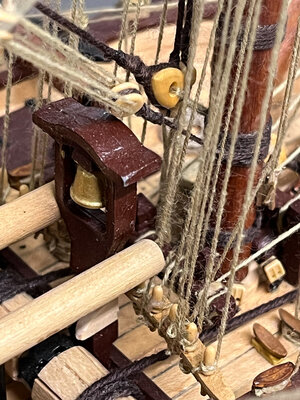
The ruling rigging attached to a number of points on the hull. In particular the rigging from the sails and for adjusting the yards went to a limited space which made tying challenging. Long tweezers and knot tying tools were essential to access these areas. The 3rd image shows the threading for the fore mast where in some cases 2 threads went to one belay pin. This was definitely a case of working from inside to out.
So after a few false starts all sails and running rigging has been applied. Final steps of my build to follow soon.
The sails and rigging did seem to take an age, although real life did get in the way during the summer months and I see my ship building as essentially a winter project. I did raise some questions throughout the year as separate threads to help me clarifying the Occre build instructions, see links below for full details ...
- Sails or No Sails? This contains details of my experiments with sails and their final construction.
- Rigging Question

In the end I decided to do furled sails using the silkspan/tissue sail as that would allow a more realistic scale of furling. That did make the running rigging more involved as based on responses to my sails questions, it was pointed out that all running rigging associated with the sails should be added.
While the Occre instructions for the hull build are in my opinion very detailed, the rigging diagrams are less so and I did spend considerable time trying to determine what went where, in particular associating the rigging diagram for the masts with the attachment end points on the deck plan. Copious use of highlighter pens helped considerably as I was going number blind trying to determine what I had already done ... this approach did help tremendously. Even then there appear to be missing annotations or times where multiple threads are attached to the same end point.

I had initially tied knots in the thread and threaded the knot through the top deadeye. However this meant that threading the lower deadeye required the needle threaded to come from the back of the deadeye. As such threading the shroud deadeyes ended up being in reverse as I could only get the needle threader through deadeyes from the front; the hull prevented access from the back for the deadeyes. After the thread was passed through all deadeye holes, I would pull an extra length of thread, tie a knot before pulling the thread back to tension the shroud thread.


The following images show the steps in the sail and rigging construction. I basically progressed by adding:
1) the stays,
2) the shrouds
3) the ratlines


4) the yards
Tip: When attaching the yards, I drilled a hole through each yard and in the mast at the yard position, and then used a pin to hold the yard in place against the mast. This allowed me to tension running rigging without the yard moving.
5) the sails


6) the running rigging

The ruling rigging attached to a number of points on the hull. In particular the rigging from the sails and for adjusting the yards went to a limited space which made tying challenging. Long tweezers and knot tying tools were essential to access these areas. The 3rd image shows the threading for the fore mast where in some cases 2 threads went to one belay pin. This was definitely a case of working from inside to out.


So after a few false starts all sails and running rigging has been applied. Final steps of my build to follow soon.
Great looking work.Sails and Running Rigging
The sails and rigging did seem to take an age, although real life did get in the way during the summer months and I see my ship building as essentially a winter project. I did raise some questions throughout the year as separate threads to help me clarifying the Occre build instructions, see links below for full details ...
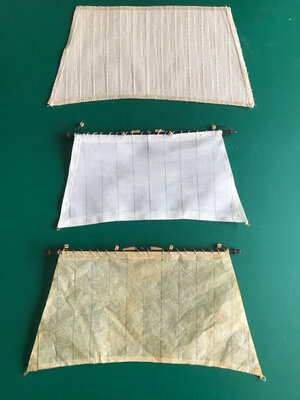
I experimented with the Occre provide sails (top), a home made material sail (middle) and silkspan/tissue sails (bottom).
- Sails or No Sails? This contains details of my experiments with sails and their final construction.
- Rigging Question
View attachment 405599
In the end I decided to do furled sails using the silkspan/tissue sail as that would allow a more realistic scale of furling. That did make the running rigging more involved as based on responses to my sails questions, it was pointed out that all running rigging associated with the sails should be added.
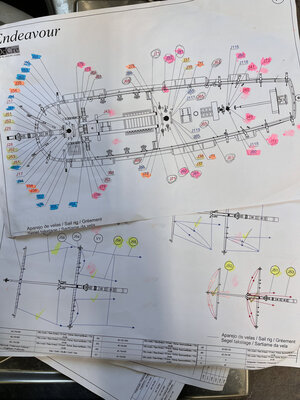
While the Occre instructions for the hull build are in my opinion very detailed, the rigging diagrams are less so and I did spend considerable time trying to determine what went where, in particular associating the rigging diagram for the masts with the attachment end points on the deck plan. Copious use of highlighter pens helped considerably as I was going number blind trying to determine what I had already done ... this approach did help tremendously. Even then there appear to be missing annotations or times where multiple threads are attached to the same end point.
View attachment 405595
I had initially tied knots in the thread and threaded the knot through the top deadeye. However this meant that threading the lower deadeye required the needle threaded to come from the back of the deadeye. As such threading the shroud deadeyes ended up being in reverse as I could only get the needle threader through deadeyes from the front; the hull prevented access from the back for the deadeyes. After the thread was passed through all deadeye holes, I would pull an extra length of thread, tie a knot before pulling the thread back to tension the shroud thread.
View attachment 405601View attachment 405602View attachment 405600
The following images show the steps in the sail and rigging construction. I basically progressed by adding:
1) the stays,
2) the shrouds
3) the ratlines
View attachment 405606View attachment 405607
4) the yards
Tip: When attaching the yards, I drilled a hole through each yard and in the mast at the yard position, and then used a pin to hold the yard in place against the mast. This allowed me to tension running rigging without the yard moving.
5) the sails
View attachment 405610
View attachment 405609
6) the running rigging
View attachment 405608
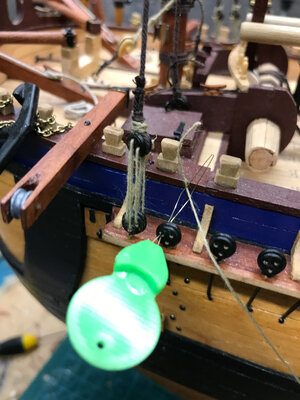
The ruling rigging attached to a number of points on the hull. In particular the rigging from the sails and for adjusting the yards went to a limited space which made tying challenging. Long tweezers and knot tying tools were essential to access these areas. The 3rd image shows the threading for the fore mast where in some cases 2 threads went to one belay pin. This was definitely a case of working from inside to out.
View attachment 405611View attachment 405612View attachment 405613
So after a few false starts all sails and running rigging has been applied. Final steps of my build to follow soon.
Good job. Those sails really look great. Much more realistic than could ever be accomplished with unfurled sails. I had never even heard of silkspan, but now I will do my research to see if this is a feasible option for me. One question would be: how to determine where running rigging should go when sails are furled?
Regarding the fuzziness of the thread. Have you considered waxing it, that is pulling it through a block of wax? It also makes threading more easy. I am seriously considering upgrading both running and standing rigging. By the way, how many of the 20 rolls of thread included with the kit did you end up using? This will give me an estimate of the cost of replacing them. On the other hand you are certainly right that randomly observed it is not that conspicuous. When working on it however, one is hyperfocussed and everything tends to be magnified.
Final question (for now): did you paint the deadeyes black or are they replacements of a different material, and what about the blocks, are they the original ones?
I will also take a good look at your two threads on rigging and sails/no sails.
- Joined
- Jun 5, 2021
- Messages
- 165
- Points
- 88

C'est très beau.
Pour parfaire les cordages, ce serait mieux de les cirer, pour éviter l"aspect pelucheux
Marco
It is very beautiful.
To perfect the ropes, it would be better to wax them, to avoid the fluffy appearance
Marco
Pour parfaire les cordages, ce serait mieux de les cirer, pour éviter l"aspect pelucheux
Marco
It is very beautiful.
To perfect the ropes, it would be better to wax them, to avoid the fluffy appearance
Marco
Good work on the model - and very good progress
You are coming close for finalization
You are coming close for finalization
- Joined
- Jun 13, 2022
- Messages
- 310
- Points
- 168

Thanks all for the comments on my last post. I am now on the final leg and putting some finishing touches to my build, essentially flags and loops and coils for rope.
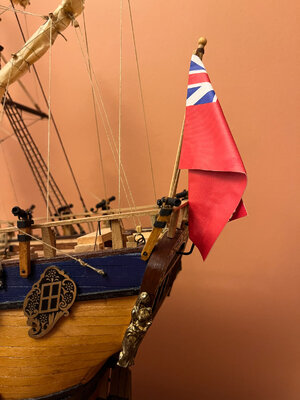
For the flags I wanted the effect of a flag drooping as it would were there little or no wind. Quite simply I made the flag and then folded in a manner that would suggest no wind and added some PVA glue between the furls before clamping while the glue dried.
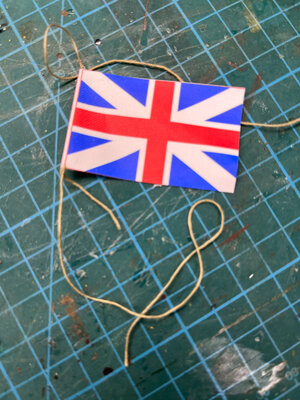
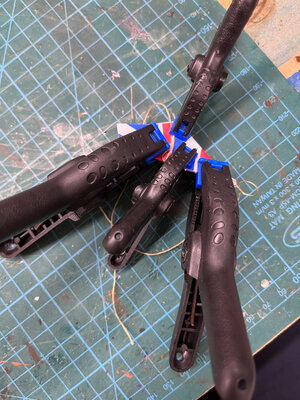
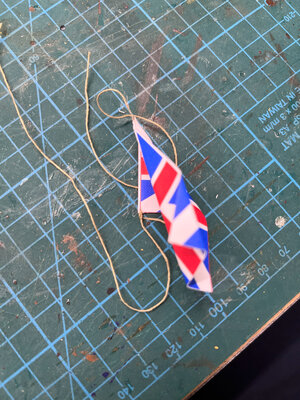
In the end I did not use the union flag on the bow as with all the rigging it did not sit correctly. However using the same approach for the stern flag I was pleased with the result.
On the Occre instruction videos which I was using largely to see if it gave any further hints on rigging), the running rigging just terminated on cleats while in reality there would have been loops of extra rope.
To create small coils of rope to place on the deck, I wrapped around a piece of dowel and painted a watered down mixture of glue. After leaving to dry I slid the coils off the dowel.
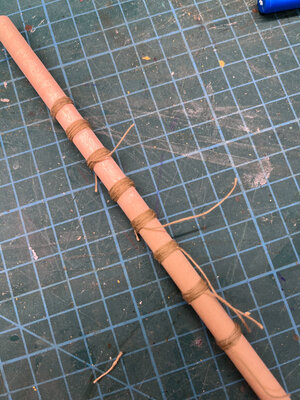
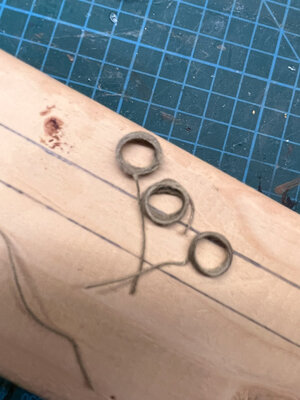
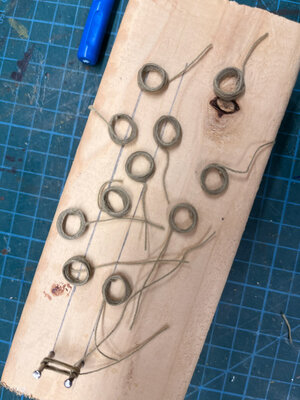
To create loops to hang from cleats, I created a jig using panel pins and wrapped the thread around a few times before painting with the dilute glue mixture. This was a good way to use the many left overs from the main rigging. I left a a few centimetres of thread on both the start and end which I then tied around one of the pins to create a loop to place over the cleats.
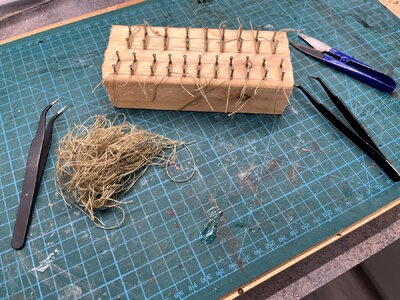
In some cases, attaching the loops was fiddly as some of the outer running rigging did get in the way. Note to self in future to add some of this detail earlier when access was not hindered by ropes on the outer edges of the model.
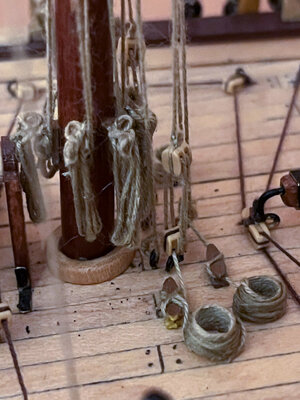
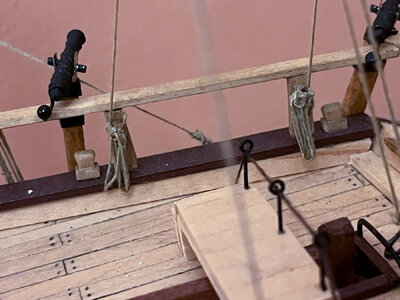
So after 35 months my build is complete. I will take some final images of the completed build in the next couple of weeks.
Wishing all my SOS colleagues a relaxing Christmas and best wishes for 2024.
For the flags I wanted the effect of a flag drooping as it would were there little or no wind. Quite simply I made the flag and then folded in a manner that would suggest no wind and added some PVA glue between the furls before clamping while the glue dried.


In the end I did not use the union flag on the bow as with all the rigging it did not sit correctly. However using the same approach for the stern flag I was pleased with the result.

On the Occre instruction videos which I was using largely to see if it gave any further hints on rigging), the running rigging just terminated on cleats while in reality there would have been loops of extra rope.
To create small coils of rope to place on the deck, I wrapped around a piece of dowel and painted a watered down mixture of glue. After leaving to dry I slid the coils off the dowel.


To create loops to hang from cleats, I created a jig using panel pins and wrapped the thread around a few times before painting with the dilute glue mixture. This was a good way to use the many left overs from the main rigging. I left a a few centimetres of thread on both the start and end which I then tied around one of the pins to create a loop to place over the cleats.

In some cases, attaching the loops was fiddly as some of the outer running rigging did get in the way. Note to self in future to add some of this detail earlier when access was not hindered by ropes on the outer edges of the model.


So after 35 months my build is complete. I will take some final images of the completed build in the next couple of weeks.
Wishing all my SOS colleagues a relaxing Christmas and best wishes for 2024.
Hi Keith,
very nice work indeed. I stopped work on my Endeavour a year ago, but intend recommencing after Christmas. I still have most of the rigging to do.
Wishing you and every one else at SOS a very merry Christmas and a happy and successful 2024.
Trevor.
very nice work indeed. I stopped work on my Endeavour a year ago, but intend recommencing after Christmas. I still have most of the rigging to do.
Wishing you and every one else at SOS a very merry Christmas and a happy and successful 2024.
Trevor.
- Joined
- Jun 13, 2022
- Messages
- 310
- Points
- 168

Thanks Trevor… look forward to seeing your completed model. Merry XmasHi Keith,
very nice work indeed. I stopped work on my Endeavour a year ago, but intend recommencing after Christmas. I still have most of the rigging to do.
Wishing you and every one else at SOS a very merry Christmas and a happy and successful 2024.
Trevor.
PS
I admire the method you employed to cretae a realistic hanging flag.
The flag supplied by Occre is incorrect. Occre's flag has the cross of St. Patrick, which didn't appear on the flag until 1800.
Details, details.
I admire the method you employed to cretae a realistic hanging flag.
The flag supplied by Occre is incorrect. Occre's flag has the cross of St. Patrick, which didn't appear on the flag until 1800.
Details, details.
What a great job your doing on this build. Thanks for showing her off
Congratulations for finishing this model - VERY good work
Please do not wait so long for the final photo session - I am looking forward


