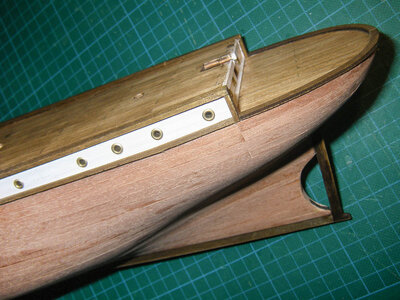
I had a similar problem using brass black (or as near as I could find in Spain) and found that the "brass" plates have some sort of coating that prevents it blacking. I sanded off the coating on the few stanchions that I used on the bow (I bought others for the rest of the ship). The other parts, like ladders and bow decoration I painted anyway.My first attempt at blueing...not too successful. I'm not sure what I was expecting it to look like, but this is very uneven. I want my Endurance to look quite weathered like in its last days, so I thought I'd try dulling the brass. Luckily I have another set of the brass from OcCre. Any thoughts on what I did wrong or if it's salvageable?
View attachment 348543View attachment 348544
-

Win a Free Custom Engraved Brass Coin!!!
As a way to introduce our brass coins to the community, we will raffle off a free coin during the month of August. Follow link ABOVE for instructions for entering.
-

PRE-ORDER SHIPS IN SCALE TODAY!
The beloved Ships in Scale Magazine is back and charting a new course for 2026!
Discover new skills, new techniques, and new inspirations in every issue.
NOTE THAT OUR FIRST ISSUE WILL BE JAN/FEB 2026
You are using an out of date browser. It may not display this or other websites correctly.
You should upgrade or use an alternative browser.
You should upgrade or use an alternative browser.
Good afternoon. That filler worked a treat. On the second layer. It is a pity you have “jumped” shipI tried this filler today and didn't have to thin it out. It worked fine. A bit thick but once I applied it and wiped it with a damp paper towel it smoothed out nicely. One more light sanding tomorrow and the hull is ready for the second planking.
View attachment 347516View attachment 347517
Yes, I have mixed feelings about breaking away from my Endurance! I’ll be back at it soon enough. In the meantime I’ll watch yours and learn from you. Happy modeling!Good afternoon. That filler worked a treat. On the second layer. It is a pity you have “jumped” ship. I was looking forward to your Endurance evolution. To be continued sometime….

I did the same thing for mine after getting poor coverage with Brass Black.I had a similar problem using brass black (or as near as I could find in Spain) and found that the "brass" plates have some sort of coating that prevents it blacking. I sanded off the coating on the few stanchions that I used on the bow (I bought others for the rest of the ship). The other parts, like ladders and bow decoration I painted anyway.
Back to the Endurance! After getting 2 ships under my belt and seeing how great the ships look on this forum when people customize their ships past what the kit offers, I'm going to take my time and add lots of fine detail. I like the results and enjoy the process. Here's my dog kennels, still need to put a coat of finish on them.
Attachments
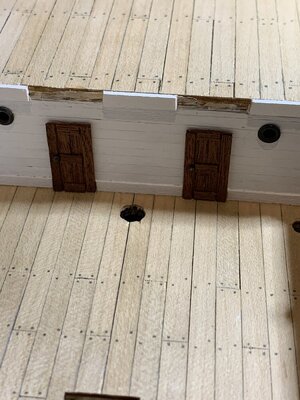
Also didn't like the brass doors so I'm making my own wooden ones.
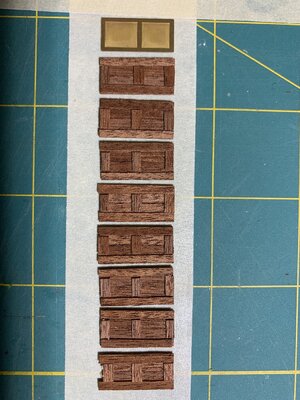
Here are the pics of the dog kennels...

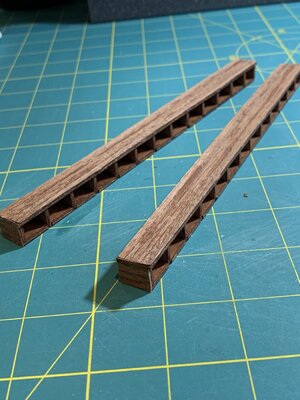
Also, I want to represent the last fateful days of the Endurance, so I'm trying to weather everything. I'm going to blacken all the brass provided by the kit. I have a couple of books on the Endurance and have seen a lot online so I'm going to try and replicate that as best as I can.
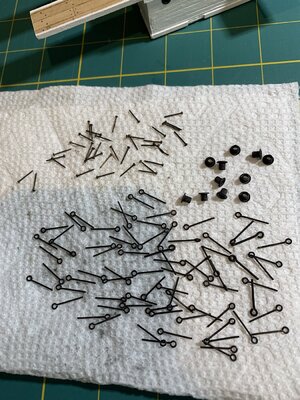

Here are the pics of the dog kennels...


Also, I want to represent the last fateful days of the Endurance, so I'm trying to weather everything. I'm going to blacken all the brass provided by the kit. I have a couple of books on the Endurance and have seen a lot online so I'm going to try and replicate that as best as I can.

After some detailing distractions (enjoyable distractions), I'm ready for the second planking. I sanded and filled in all the gaps with putty and sanded again. I feel I have a nice smooth hull. My last double plank kit I use CV to glue the second layer of planks on. Not crazy about that method. Any suggestions?
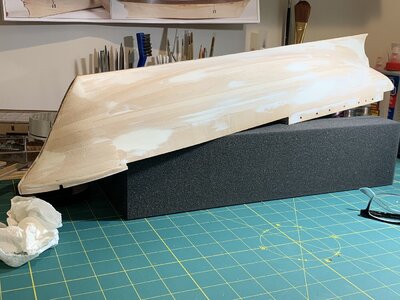

Kramer, your smooth hull looks great. Did you use any special grade of putty and which grades of sand paper do you feel worked the best for the great finish? Thanks, Magic Mike
Kramer, your smooth hull looks great. Did you use any special grade of putty and which grades of sand paper do you feel worked the best for the great finish? Thanks, Magic Mike
Hey Mike, I used Varathane water-based wood filler and thinned it out with a few drops of water. Went on smooth and filled all the gaps. I sanded it with a soft sanding block of 120 grit.
Thanks Kramer, running out to purchase the wood filler and already had piles of 120 grit paper. Appreciate your help, Magic Mike
After some detailing distractions (enjoyable distractions), I'm ready for the second planking. I sanded and filled in all the gaps with putty and sanded again. I feel I have a nice smooth hull. My last double plank kit I use CV to glue the second layer of planks on. Not crazy about that method. Any suggestions?
View attachment 393647
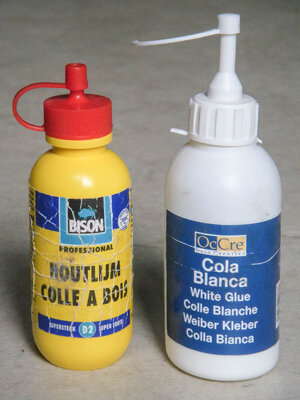
I simply used PVA glue on my Endurance (and my current Endeavour build), and used pins (and sometimes gaffer tape) to hold the strips in place. It is important to install the strips quickly after evenly (!) applying glue and subsequently applying pressure by rubbing them firmly. But...the opinions on this topic differ. I believe Occre even advises to use contact glue.
Last edited:
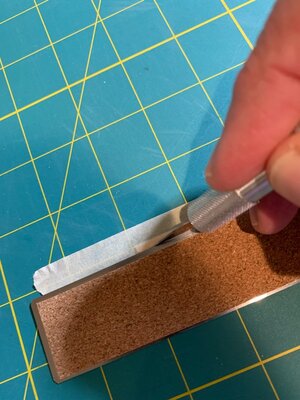
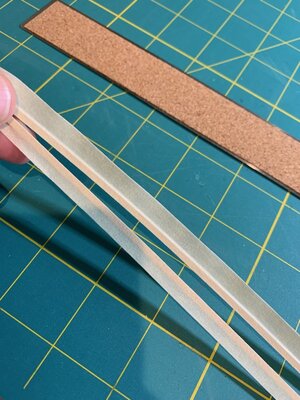
By the way, I like your custom built doors. But I do not understand how you got it done on that scale. Is that the sapelli supplied with the kit?
Yes, I ripped them.By the way, I like your custom built doors. But I do not understand how you got it done on that scale. Is that the sapelli supplied with the kit?
I get confused...is contact glue the same as CA? And you didn't have a problem with the edges of the planks, everything stayed down?I simply used PVA glue on my Endurance (and my current Endeavour build), and used pins (and sometimes gaffer tape) to hold the strips in place. It is important to install the strips quickly after evenly (!) applying glue and subsequently applying pressure by rubbing them firmly. But...the opinions on this topic differ. I believe Occre even advises to use contact glue.
View attachment 394197
View attachment 394198
View attachment 394214
So you used tape to avoid splitting! I did not know that trick.
But that is not sapelli wood. I guess it's sycamore.
I guess CA is sometimes designated as a contact glue. I also get confused by the nomenclature.I get confused...is contact glue the same as CA? And you didn't have a problem with the edges of the planks, everything stayed down?
Contact (or impact-) glue is basically a neoprene glue that has to be applied to both sides. Take a look at the Occre instruction video below.
Link: Second planking Endurance Occre instruction video
Now I am sure that the approach as shown in the video will work, but the execution is not as easy as is suggested in the video. That's why I chose to use PVA glue.
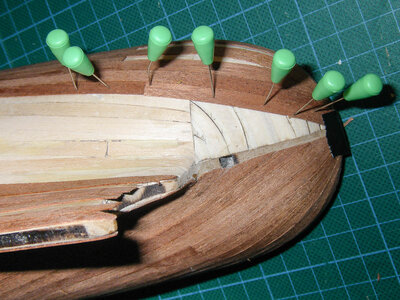
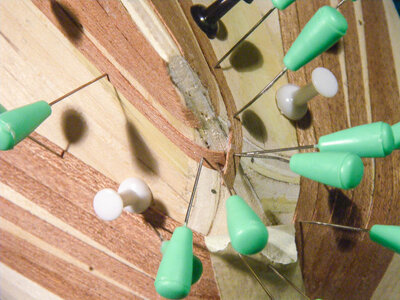
The problem indeed is that the planks tend to curl upwards at the sides. This is why it's important to make sure the entire surface is covered with glue, and to apply pressure not only right after placing the strip but also at regular intervals afterwards. Pins are put in those spots that are troublesome. Also it is advisable not to force the strips in any direction, but let them run their natural way.
As you can see in the picture below (not Endurance but Endeavour) I also use these thicker black and white pins, They make bigger holes, but it will not show because they are stuck in just the first layer of planking.
Kramer, I went to purchase the "Varathane" water based wood filler and all Home Depot had was "non-hardening" on the label. Is that what you used on the "Endurance? Thanks Magic Mike


