• LUCZORAMA SHIPWRECK SCAVENGER HUNT GIVEAWAY. 4 Weeks of Fun • 1 Legendary Prize ((OcCre’s Fram Ship)) • Global Crew Welcome!
    **VIEW THREAD HERE**

Fair American 1:48 by Model Expo

Namabiiru! Looking great!

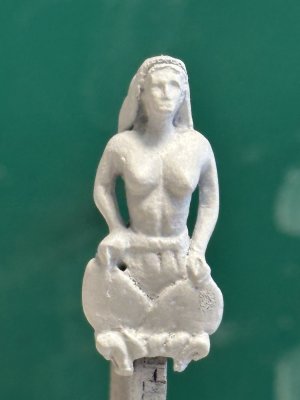
I see what you are saying about a saw blade. I think this is because of the contrast in metal colors and knowledge of the origin of the tiara. Perhaps if it were curved a bit? As to Lill herself, you did a great job getting her top off. Although her arms appear a little thick, I think you can cure the proportion problem by shading. Dark shadows where you want to reduce and highlight the line of the arms - this will keep the eye on the thin line of highlighting and make her arms appear slender and supple. You say you're not a figure painter. You have also claimed lack of skills. One of these things, IMHO, is not quite true :) So, I'm confident that Lill will be a stunner once you've painted her, either because you have the skill or will have the skill when the time comes.

Hey, framing complete! I see that the cabin space is nicely open. I look forward to seeing what you make there! As to the glass - I think it looks very convincing, nicely translucent. My question would be whether translucent is enough? Since you are going to the effort of building out the main cabin I'm thinking you're wanting to be able to see what's in there? Maybe transparent is the way to go? This means that you might have to abandon the idea of representing colonial era glass and cutting individual panes.

Just some thoughts! I'm really enjoying your work, my friend!

Blessings. Peace. Gratitude.
Chuck
Thanks for that input, Chuck, and the kind words. I do think you’re correct and a re-do is in order.

For the tiara, I did experiment with curving it, but my limited recollection of geometry was confirmed that by bending it, the hole gets too small. Enlarging the hole makes it too fiddly. Going to press on as is, and if it still doesn’t look right, it’ll Mr Surfacer to the rescue.
 
Is this a reasonable facsimile of colonial glass, or too rough?
I actually like the aesthetic, but I’ve seen my fair share of preserved 18th century windows. At a scale, or a distance, their imperfections and distortions are not noticeable.

If you like how it looks, leave it. But if you’re making an interior you’d like visible or are shooting for accuracy, you might want to clear them up a bit.
Have already pulled them out and working on replacements. I lost control of the amount of glue that went in, which is why it came out looking so heavy-handed. Second attempt should be much better. Will probably use floor polish this time to hold the windows in
 
After a coat of primer, I gave her another coat of matte white from a rattle can.
IMG_5884.jpeg
Since I’ll be working with mostly bright colors, the white undercoat will allow me to use thinner layers of color. I got a bit heavy with the primer below her waistline, but the acrylics should sort that out (I hope!)

Now that I’m not looking at bare shiny metal, I’d say the arms came out pretty decent, all things considered.
 
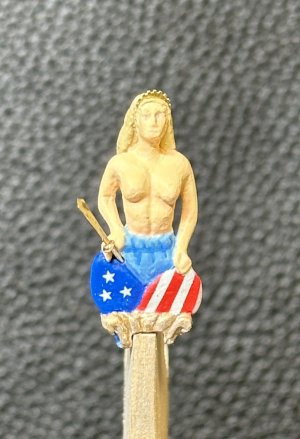
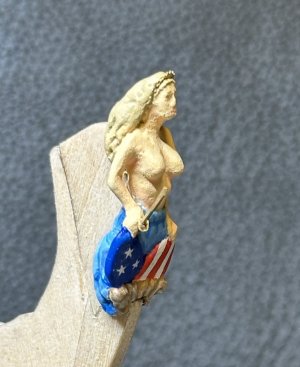
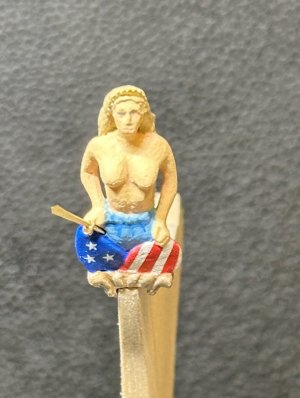
Got home from work a bit early today, so after a bit of a marathon painting session I think it’s time to put Nancy away safely until it’s time for her to go to her permanent home on the stem.
IMG_5887.jpeg
IMG_5888.jpeg
IMG_5889.jpeg
She is admittedly a bit of a Monet ;) but I think once she is integrated into the whole of the ship she’s going to be rather stunning.

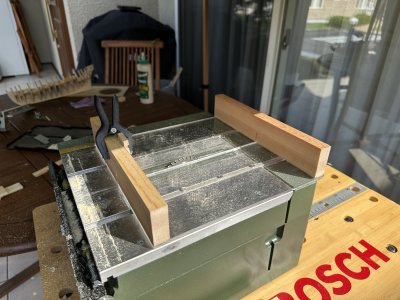
Probably not going to be much more progress until the weekend when I can complete the crosscut sled for my FET table saw. I need that to cut filler blocks for the stern.
 
Last edited:
Got home from work a bit early today, so after a bit of a marathon painting session I think it’s time to put Nancy away safely until it’s time for her to go to her permanent home on the stem.
View attachment 534424
View attachment 534425
View attachment 534426
She is admittedly a bit of a Monet ;) but I think once she is integrated into the whole of the ship she’s going to be rather stunning.

Probably not going to be much more progress until the weekend when I can complete the crosscut sled for my FET table saw. I need that to cut filler blocks for the stern.
Namabiiru! Excellent! I would have said Renoir ROTF Any way you slice it she's a stunner! The painting came out great! CONGRATULATIONS!

Blessings.
Chuck
 
I’m at the point where I need to take shipyard operations outside so I can start fairing the hull. Hopefully, weather on Sunday will be supportive after tomorrow’s typhoon has passed on.

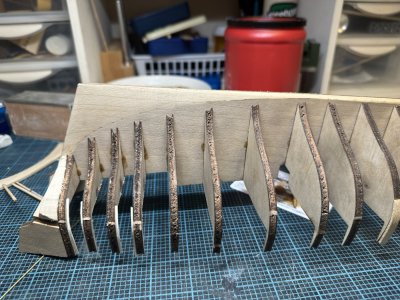
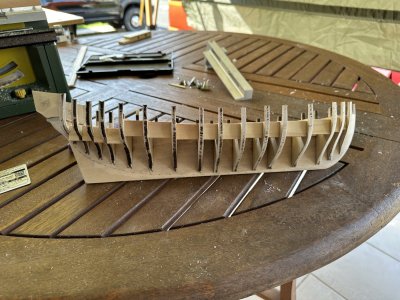
Would appreciate input from the Council of Master Craftsmen on an issue I noticed before I started gluing the bulkheads.

As you see in the photo, most bulkheads do not meet the bearding line
IMG_5918.jpeg
Although the photos in the @lauckstreet practicum appear to show that Bob had the same issue, there is no mention of the discrepancy or whether it needs to be addressed.

My assumption is that I need to fair the bevel for the rabbet into the bulkheads regardless of where the bearding line is drawn to ensure a smooth curve as the planking progresses down to the keel.

Anyone have enough experience to either validate or invalidate that assumption? @The Gavel Chuck, did you experience this with the Lovely Renee?
 
Last edited:
I’m at the point where I need to take shipyard operations outside so I can start fairing the hull. Hopefully, weather on Sunday will be supportive after tomorrow’s typhoon has passed on.

Would appreciate input from the Council of Master Craftsmen on an issue I noticed before I started gluing the bulkheads.

As you see in the photo, most bulkheads do not meet the bearding line
View attachment 535284
Although the photos in the @lauckstreet practicum appear to show that Bob had the same issue, there is no mention of the discrepancy or whether it needs to be addressed.

My assumption is that I need to fair the bevel for the rabbet into the bulkheads regardless of where the bearding line is drawn to ensure a smooth curve as the planking progresses down to the keel.

Anyone have enough experience to either validate or invalidate that assumption? @The Gavel Chuck, did you experience this withe Lovely Renee?
Namabiiru!

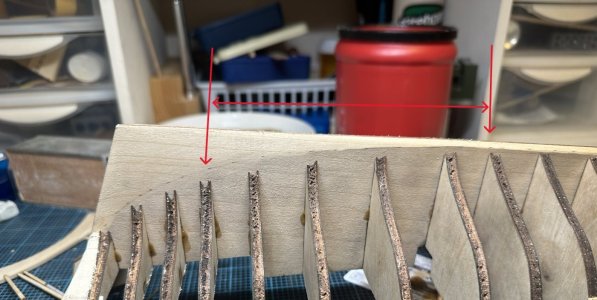
I'm sure I had the same thing happen - pics

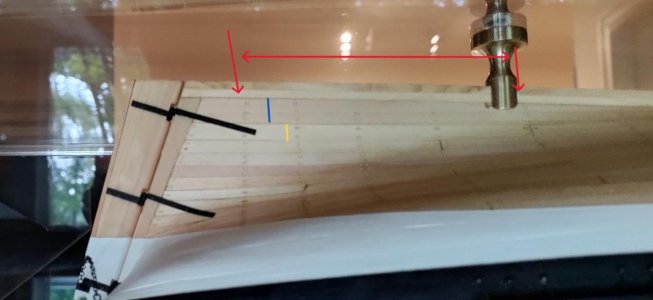
First a marked copy of yours. Second a marked copy of mine (inverted for easy comparison).

I'm not sure I gave it a lot of thought and my solution is probably technically/historically wrong. I used an extrawide plank for the garboard strake that I'm sure I feathered a bit where it met the deadwood. AND I beveled it pretty sharply where it needed to meet the bearding line. Second plank was a bit narrower. I don't think I did anything much to correct the fairing into the given bearding line - maybe just a bit more sanding. As you know the garboard and second planks lie flat against the deadwood as do the next four (the way I did it.) I got a good smooth transition mainly by sanding at the very lowest part. My advice - go for it!

Blessings.
Chuck

Namabiiru FA.jpegFA Plank Aft.jpg
 
Namabiiru!

I'm sure I had the same thing happen - pics

First a marked copy of yours. Second a marked copy of mine (inverted for easy comparison).

I'm not sure I gave it a lot of thought and my solution is probably technically/historically wrong. I used an extrawide plank for the garboard strake that I'm sure I feathered a bit where it met the deadwood. AND I beveled it pretty sharply where it needed to meet the bearding line. Second plank was a bit narrower. I don't think I did anything much to correct the fairing into the given bearding line - maybe just a bit more sanding. As you know the garboard and second planks lie flat against the deadwood as do the next four (the way I did it.) I got a good smooth transition mainly by sanding at the very lowest part. My advice - go for it!

Blessings.
Chuck

View attachment 535305View attachment 535304
Thanks, Chuck. That’s helpful!
 
Back
Top