• Win a Free Custom Engraved Brass Coin!!!
    As a way to introduce our brass coins to the community, we will raffle off a free coin during the month of August. Follow link ABOVE for instructions for entering.

Fair American 1:48 by Model Expo

Namabiiru!

You are doing amazing things with your Fair American build! I really wish I had your log to follow when I built Lovely Renee! First, NICE work on the stern. It is amazingly crisp and your solution to the decoration problem is inspired. I am stealing the idea of creating a stencil. As to making the scrollwork raised - if you still have the stencil and the will (I won't hold it against you if you don't) consider filling the stencil with wood filler or some sort of compound that you can press into the space and smooth. A wise man would probably leave that experiment for "the next one."

Your framing and planking look excellent. I particularly admire the parquet floor! In reality, and here I am relying on Patrck O'Brien's Master and Commander and other books in the Aubrey/Maturin series, perhaps a checkered deck cloth is more accurate? As to the stern block - you can't go wrong, but you took a lot of trouble to frame the stern to show the cabin. So, go ahead and show the cabin ;) . How far to carve the stern block? Well, how much can you see as things are? Based on Gunther's pictures and how I imagined the cabin of the Sophie, I had the impression that the floor to ceiling height would cause a man of average height to have to duck his head to get in and he would not be comfortable until seated. I also imgined that there were lockers immediately below the windows that served as a bench/sofa. In any event, the captain's quarters on a brig-of-war would not have been too handsom. On the other hand, you are the captain and how opulently you choose to furnish your cabin is mearly a matter of your heart's desire!

I can't wait to see what you conjure up next!

Blessings. Peace. Gratitude.
Chuck
Chuck,
Thank you, as always, for your wonderful comments. I’m not sure my log would have been all that useful for your Lovely Renee build, considering how much I’ve been relying on your log!

I had considered the idea of using the stencil to try to make some appliqués, as you suggested, but the stencil is very fragile (already broken twice!). If I destroy it, I’m SOL in the event the transom has to be re-done. I’ll have to give that some more thought.

Agree with you on the layout of the cabin. In fact, I’ve already got it in mind to make the counter ceiling into a sort of tiered bookshelf.

Thank you again for the input and feedback. Valued beyond measure!
 
Last edited:
Namabiiru!

Well, as you know, Lovely Renee was my second build of the ship - maybe I do her again and incorprate the new things I've learned from you!

As to the "raised" decoration - first - if you could cut the stencil once I'll bet a sack of dabloons you could do it again ;) - second - the effect you achieved is beautiful please don't take my two cents for more than they're worth.

I love your book shelf solution - reminds me of the voyage Jack and Stephen took on La Fleche - their host as captain had fitted his cabin out with book storage. It was, however, the start of the War of 1812 and Jack and Stephen end of prisoners of war in Boston.

Blessings.
Chuck
 
I suppose it was only a matter of time. The shipyard owner, having received certain reports of mismanagement, ineptitude, malingering and other “shenanigans”, was forced to curtail a tour of his other business interests and oversee construction personally.
IMG_6067.jpeg
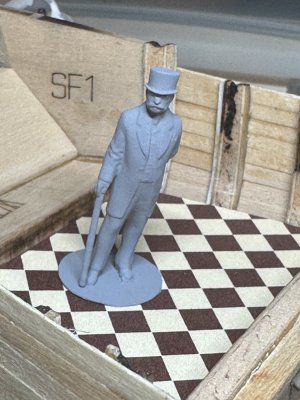
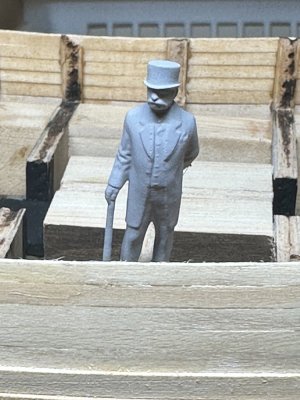
I have the honor to introduce Mr. Harold Basswood, esq., or, as he is better known by the other members of the Newport Sport Club, “Fuzzy” Basswood.

In truth, I needed something to help me visualize scale as I thought through designs for the great cabin and other issues. In fact, he’s already helped me confirm that the addition of another run of bulwark planking (if needed) would not look horribly over-sized.
IMG_6068.jpeg
 
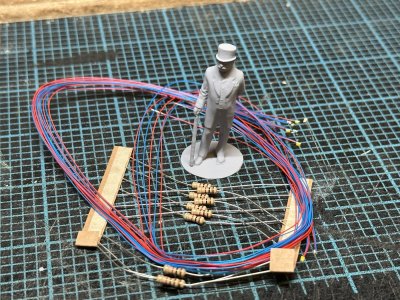
Things are getting serious now. It felt like a shame with all the windows not to have appropriate lighting in the great cabin (and stern lantern, of course), so I ordered a batch of micro-LEDs, which arrived today. That means I really need to get the base sorted out, a plan for wiring, and of course a layout for the lights themselves.

Have I over-reached? Quite possibly. Have gone overboard? Most certainly. Mr. Basswood, however, is somewhat non-plussed.
IMG_6070.jpeg
“Hrrmph. Don’t see a need for new-fangled lighting. Tallow candles and oil lamps have worked just fine for centuries. Never be able to justify such outrageousness to the commissioners.”
 
Hey Mamibiiru,

never mind, you are the master builder and you decide how to proceed. Don't listen to the rich toff who is too stingy for the art and culture of his master builder..... I am curious and can learn from you how to do it or not ... :D ROTF
 
Thanks, Günther! No master builder here! Simply an old fool who sometimes doesn’t know when he’s getting himself in trouble. But I have no choice to see this through for the sake of all those who have offered encouragement and advice. They are legion!
 
Good friend,

It's okay to be daft in old age. We both know very well that we're not. But the trick is to make others think that you are ... ROTF
I can't wait to see what happens next with you ... I'll keep my eye on the ball, says the footballer with his eye on the goal .....
 
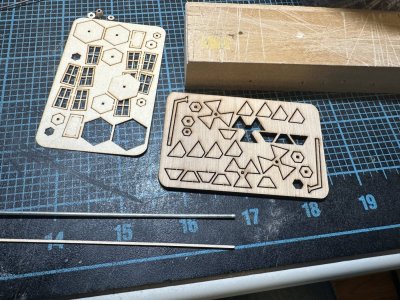
To my earlier point about being in over my head, it occurred to me that I have quite an engineering challenge ahead of me to figure out how to run the wiring for the stern lantern that doesn’t require me to mount the stern lantern itself too early in the build (lest it get broken during all the handling yet to come.)
IMG_6074.jpeg
You can see in this photo the cranks that come with the lantern kit—the L-shaped piece on the fret. I will replace that with the aluminum tube you see in the photo. The ID for that is just big enough for the pre-soldered leads of the led to fit through. No room to add any sort of connector so the LED will need to be hard-wired in. But I can’t simply leave a bunch of slack to push through because the wires will have to be hidden or disguised before I close up the great cabin.

Currently leaning toward installing the crank with LED on the transom and leaving the lantern off to be slid onto the crank at the very end. I’ll just have to be as careful of the naked crank as my ten thumbs will allow.
 
Last edited:
Ahoy Namabiiru, :D

I'm keeping my fingers crossed for you and am very curious to see how you will manage it ...

Best regards
 
View attachment 543278
“Hrrmph. Don’t see a need for new-fangled lighting. Tallow candles and oil lamps have worked just fine for centuries. Never be able to justify such outrageousness to the commissioners.”
This reminds me of the language used in the audio book series in listening to while I go through my current build. The second three books in the mistborn series by brandon sanderson. Love the character adding commentary to your build. Thanks for always being entertaining!
 
Hey Namabiiru,

looks great!!! I've sent you a few pictures so you can see how best to link the plinth to the room. I've also attached a picture of the toilet ...ROTF

I hope these pictures can inspire you.

Best regards
GüntherShip-1

The rooms are from the HMS Victory. Captain Hardy ...
View attachment 541185 View attachment 541186

View attachment 541188View attachment 541187
The Victory is a very different ship, but still cool pictures for refereces. I don't know why, but I feel like it must have been awesome to look out at the vast ocean while dropping anchor, if you catch my meaning.
 
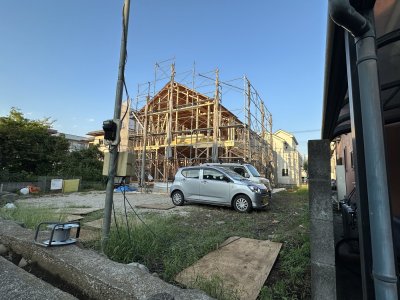
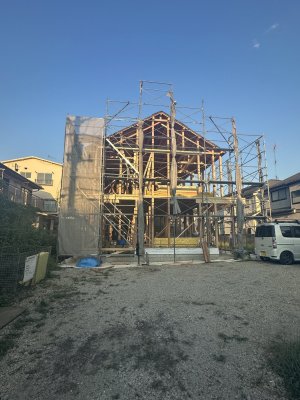
An update not directly related to my Fair American build (until it’s time to move to the new shop), but it has to do with wood and construction so I’ll share it anyway.

I’ve no direct experience with building a home in the US, but I haven’t met many people who had much good to say about the experience. Contractor delays, etc., etc.

In contrast, the Japanese carpenters started on our house yesterday, starting with a naked foundation and a few piles of materials.
IMG_6080.jpeg
IMG_6079.jpeg
This is where things stood just before they knocked off from their second day of work. I was fairly gobsmacked to see how much they accomplished.

Now if I could just make that kind of progress on Fair AmericanROTF
 
Last edited:
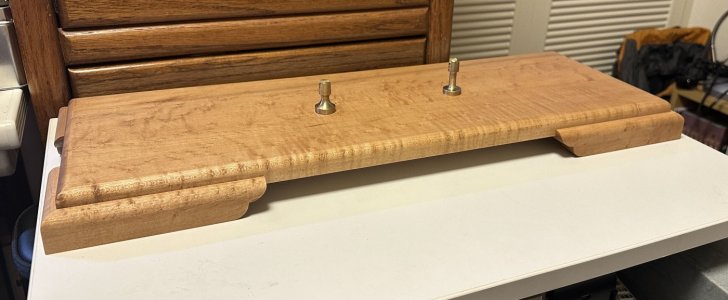
In addition to assorted bits and bobs of progress, I made good progress on the base.
IMG_6082.jpeg
The pedestals and feet aren’t attached yet. I’ll do that after I’ve drilled holes for screws and a switch and routed channels for wiring underneath.

The base itself is made from a slab of what I think is Birdseye Maple my Dad let me scrounge from his basement many years ago.
 
Last edited:
Wow that house is shaping up beautiful -- two days? Dang -- I guess you said the foundation was already down so you didn't have to wait for that to dry. Did they have premade sides? I'm surprised the scaffold goes all the way around the building

Also that wood used for the base is gorgeous - what did you use to finish it to get such a nice shine to bring out the colors?
 
An update not directly related to my Fair American build (until it’s time to move to the new shop), but it has to do with wood and construction so I’ll share it anyway.

I’ve no direct experience with building a home in the US, but I haven’t met many people who had much good to say about the experience. Contractor delays, etc., etc.

In contrast, the Japanese carpenters started on our house yesterday, starting with a naked foundation and a few piles of materials.
View attachment 544551
View attachment 544552
This where things stood just before they knocked off from their second day of work. I was fairly gobsmacked to see how much they accomplished.

Now if I could just make that kind of progress on Fair AmericanROTF
From the looks of the framework, you're going to have one beautiful new home Namabiiru.
 
Wow that house is shaping up beautiful -- two days? Dang -- I guess you said the foundation was already down so you didn't have to wait for that to dry. Did they have premade sides? I'm surprised the scaffold goes all the way around the building

Also that wood used for the base is gorgeous - what did you use to finish it to get such a nice shine to bring out the colors?
As for the house, all the timbers for contemporary wood structures in Japan are CNC milled based on the computer generated design. It kind of shows up as a kit—a very advanced kit—which is so much faster and less labor-intensive than some other construction methods. It’s still amazing.

To finish the base, I used something I found at the local DIY store that is simply labeled “oil finish”. It is pre-tinted, and I just wiped on two coats and I was done. So much easier than the combination of Minwax stain and polyurethane spray I have traditionally used (and can’t seem to get here). It felt a bit pricey too, but I guess with the exchange rate what it is right now, maybe not so much. If I ever get good enough at planking a hull that I can stain it rather than paint it, this is the stuff I plan to use.
 
Back
Top