Thanks guy's. No pun intended but it's a pain in the A**. For me it's worse when I lie down so sleeping is a real issue. I recently went to the dentist and almost canceled because I knew I would be in a reclining position for an hour. As it turned out I had no pain whatsoever in their chair. They declined my offer to come back and spend the night there however.I can really relate to your situation. About 2 years ago I couldn't sit for 5 minutes. Walking was the only thing that brought relief. Even during meals.
Hopefully there will be improvement soon.
Regards, Peter
-

Win a Free Custom Engraved Brass Coin!!!
As a way to introduce our brass coins to the community, we will raffle off a free coin during the month of August. Follow link ABOVE for instructions for entering.
-

PRE-ORDER SHIPS IN SCALE TODAY!
The beloved Ships in Scale Magazine is back and charting a new course for 2026!
Discover new skills, new techniques, and new inspirations in every issue.
NOTE THAT OUR FIRST ISSUE WILL BE JAN/FEB 2026
You are using an out of date browser. It may not display this or other websites correctly.
You should upgrade or use an alternative browser.
You should upgrade or use an alternative browser.
Fife-Scottish Fishing Vessel, Amati_Victory Models 1:32
used dental chairs on ebay...but that's not a very satisfying solution...Thanks guy's. No pun intended but it's a pain in the A**. For me it's worse when I lie down so sleeping is a real issue. I recently went to the dentist and almost canceled because I knew I would be in a reclining position for an hour. As it turned out I had no pain whatsoever in their chair. They declined my offer to come back and spend the night there however.
Installing the 2x4x600mm bulwark inner rails turned out to be time consuming. The rails were to be glued and nailed to the timberheads and the included stock wasn't quite long enough so a splice was required.
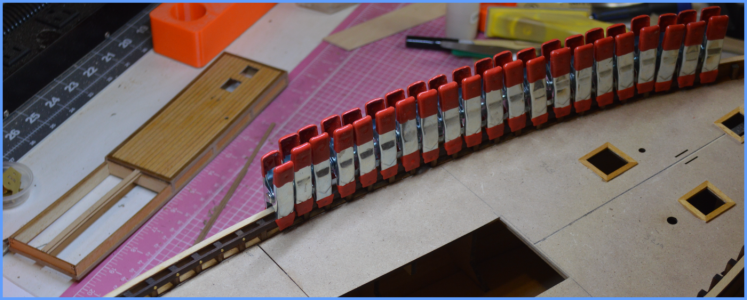
I predrilled a pilot hole at the leading edge of the rail and the first timberhead then temporarily pinned the rail in position. Then after clamping the rail to all the timberheads I trusted my old eyes that I could accurately mark the center of each timberhead onto the rail for drilling. The reason for all the clamps is because of the extreme bow of the hull and I wanted to be as accurate as possible marking the C/L's.
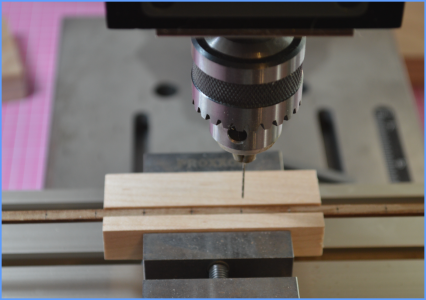
After all the C/L's were marked I unclamped the rail and took them to my drill press where I had made a fixture which would allow me to slide the rail along and drill all 90 holes along the center of the rail at each marked nailing position. Now the anxious part. I again pinned the rail to my first pilot hole and clamped the rail at each timber head and to my amazement all the holes aligned with the timberheads.
Removed all the clamps and put a small spot of glue on the timbereheads the re-clamped the rail and let the glue set up in preparation for drilling the nail holes. I only did about a third of the rail at a time so all the glue wouldn't set up before I finished aligning clamping the rail in place.
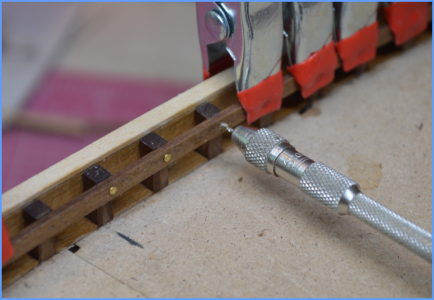
Drilling the pilot holes into the timberheads was tedious as I had to drill the holes using a drill bit installed in my smallest pin vise and drilling by hand as none of my drills were small enough to fit. The holes are about 3/8 inch above the deck. Foredom has advertised a right angle handset for their rotary tool which would allow me to use a powered drill unfortunately it is for their flexible shaft units not their MicroMeter unit that I have. Oh well, another tool didn't 'have' to purchase.
After the glue set up I stared drilling and nailing the rails. As the holes were only 'pilot holes' I had to push the nails in. I used a pair of small long nosed vice grip pliers with a small block of maple attached to one side of the jaws to protect and spread the load against the outside of the hull while 'pressing the nail in place.
Can never have enough clamps
My drill setup
Hand drilling. Not showing the callus on my thumb when finished
I predrilled a pilot hole at the leading edge of the rail and the first timberhead then temporarily pinned the rail in position. Then after clamping the rail to all the timberheads I trusted my old eyes that I could accurately mark the center of each timberhead onto the rail for drilling. The reason for all the clamps is because of the extreme bow of the hull and I wanted to be as accurate as possible marking the C/L's.
After all the C/L's were marked I unclamped the rail and took them to my drill press where I had made a fixture which would allow me to slide the rail along and drill all 90 holes along the center of the rail at each marked nailing position. Now the anxious part. I again pinned the rail to my first pilot hole and clamped the rail at each timber head and to my amazement all the holes aligned with the timberheads.
Removed all the clamps and put a small spot of glue on the timbereheads the re-clamped the rail and let the glue set up in preparation for drilling the nail holes. I only did about a third of the rail at a time so all the glue wouldn't set up before I finished aligning clamping the rail in place.
Drilling the pilot holes into the timberheads was tedious as I had to drill the holes using a drill bit installed in my smallest pin vise and drilling by hand as none of my drills were small enough to fit. The holes are about 3/8 inch above the deck. Foredom has advertised a right angle handset for their rotary tool which would allow me to use a powered drill unfortunately it is for their flexible shaft units not their MicroMeter unit that I have. Oh well, another tool didn't 'have' to purchase.
After the glue set up I stared drilling and nailing the rails. As the holes were only 'pilot holes' I had to push the nails in. I used a pair of small long nosed vice grip pliers with a small block of maple attached to one side of the jaws to protect and spread the load against the outside of the hull while 'pressing the nail in place.
Can never have enough clamps

My drill setup

Hand drilling. Not showing the callus on my thumb when finished

Clamps on parade... 

Love it PaulClamps on parade...
Didn't have a choice given the stiffness of the rail and the extreme bow of the hull. Then the other reason I did't do the whole rail at once.....Did not have enough clamps
Guess I could have pre-bent the rail.....
Also had to go back and touch up the bottoms of the timber heads with danish oil. otherwise I don't think the glue would adhere to the oil.
But it looks GREAT!
Thanks Paul,But it looks GREAT!
If I want to be completely honest I probably spent too much time watching Big 10 football. Really need to remove the TV from my work area.
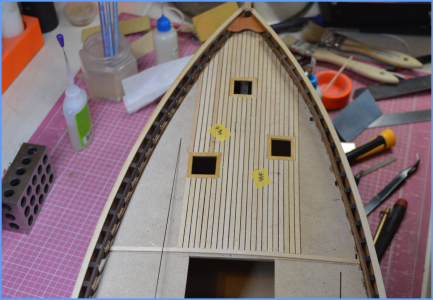
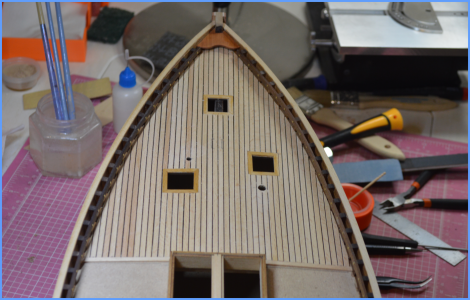
A whole day seriously worth it Ron.Yikes,I realize it's Labor Day weekend however, I never dreamed it would take me the whole day to do this.
View attachment 468632
You found a nice width for the caulking, Ron. Your day-time is spend well.Yikes,I realize it's Labor Day weekend however, I never dreamed it would take me the whole day to do this.
View attachment 468632
Regards, Peter
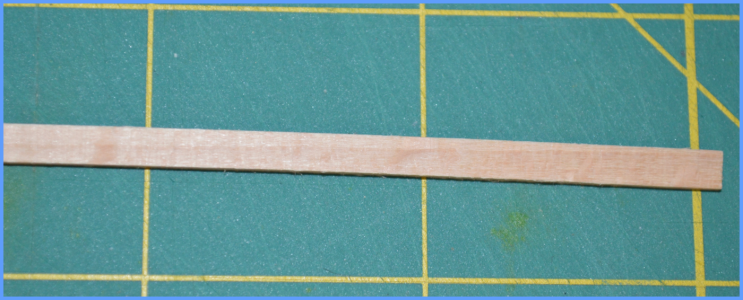
Don't know if this has been tried before but I'm using .020" carbon fiber rod for 'caulking'.You found a nice width for the caulking, Ron. Your day-time is spend well.
Regards, Peter
Well, at least your deck won't rust...Don't know if this has been tried before but I'm using .020" carbon fiber rod for 'caulking'.
... it is worth every minute of spending! Looks very good.I never dreamed it would take me the whole day to do this.
Oh wow, late to the parade. Just pulled up a chair. This looks like a fascinating build.
Jan
Jan
Thanks Jan. You're always welcome. I thought it was about time to start building something new to get me going again. I love this 1:32 scale.Oh wow, late to the parade. Just pulled up a chair. This looks like a fascinating build.
Jan
I'll just let the unfinished ones on the shelf stare at me....
That’s a great plan. I’m ignoring the shelf lurkers and trying to divide my time between the four I have in progress..I'll just let the unfinished ones on the shelf stare at me....
Jan
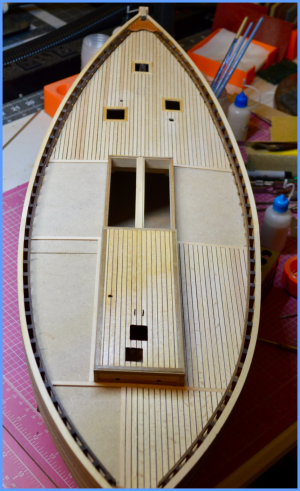
Good morning Ron. You are owning this deck. Marvellous. Cheers GrantOh crap. Just when I was on a roll to finish the decking I ran out of 'caulking' Just placed an order for more. $35.00 for material and $65.00 Fedex.
OBTW, the deck isn't really those different shades just poor lighting
View attachment 469054


